> For the complete documentation index, see [llms.txt](https://docs.digit.org/llms.txt). Markdown versions of documentation pages are available by appending `.md` to page URLs; this page is available as [Markdown](https://docs.digit.org/health/v2.0/deploy/configuration/hcm-console-configuration/console-ui-configuration/hcm-console-web-ui/campaign-setup.md).
# Campaign Setup
## Overview
Use **Campaign Setup** to create and configure a campaign in the HCM Console. This flow covers campaign basics, target boundaries, delivery rules, and app setup.
You can:
* Create a **new campaign** (import is not available in this version).
* Define **campaign details** like type, name, and dates.
* Select **target boundaries** for rollout.
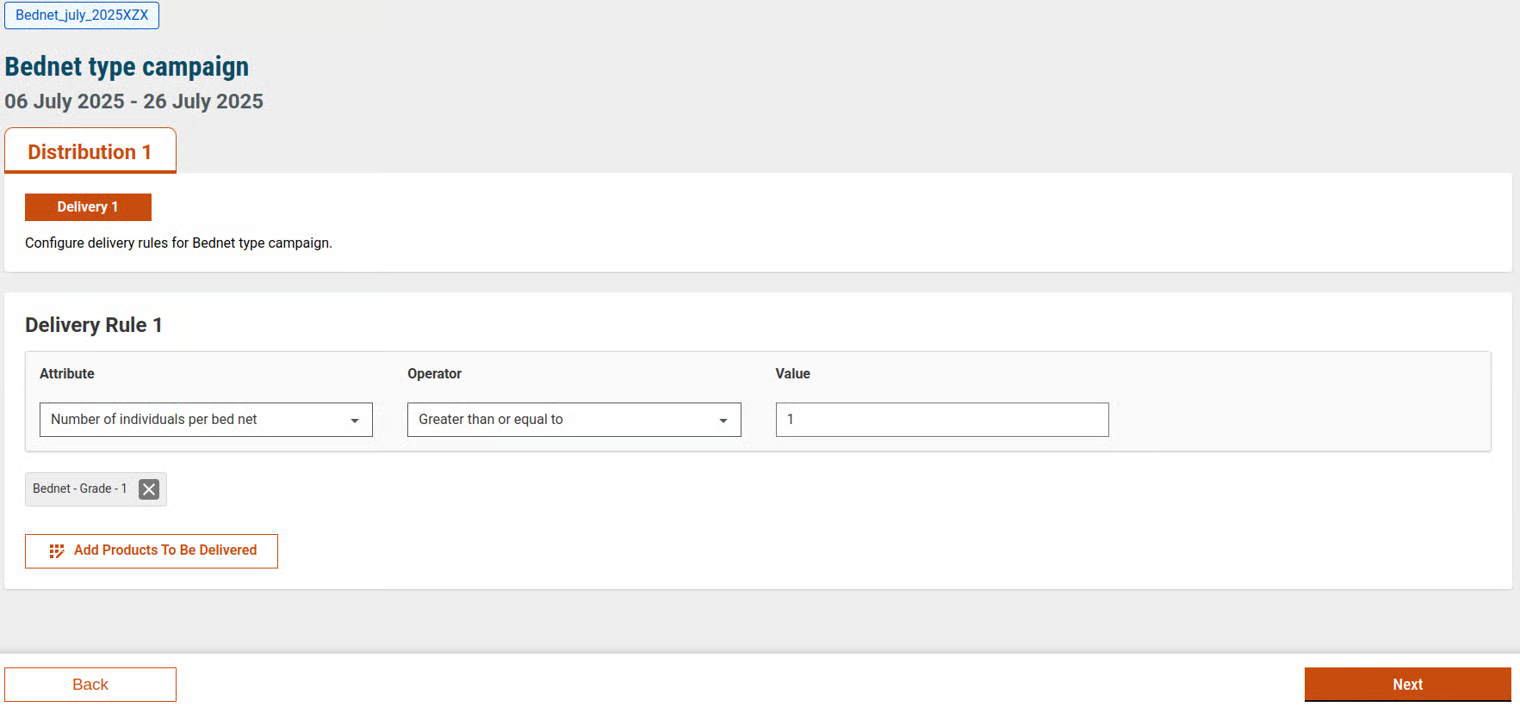
* Configure **delivery cycles** and delivery rules.
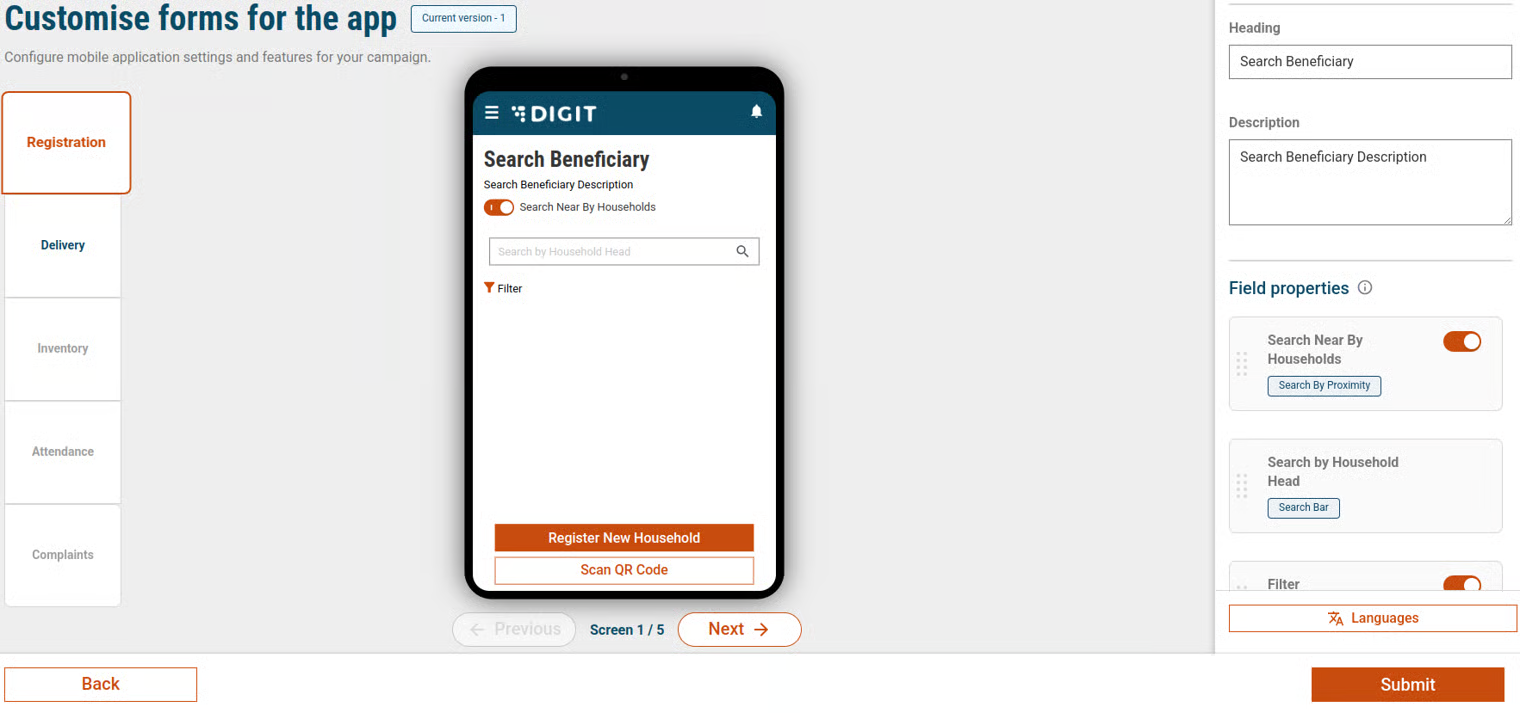
* Configure the **mobile app experience** for field teams.
* Upload **facilities, users, and targets**.
* Optionally set up **checklists**.
## Steps
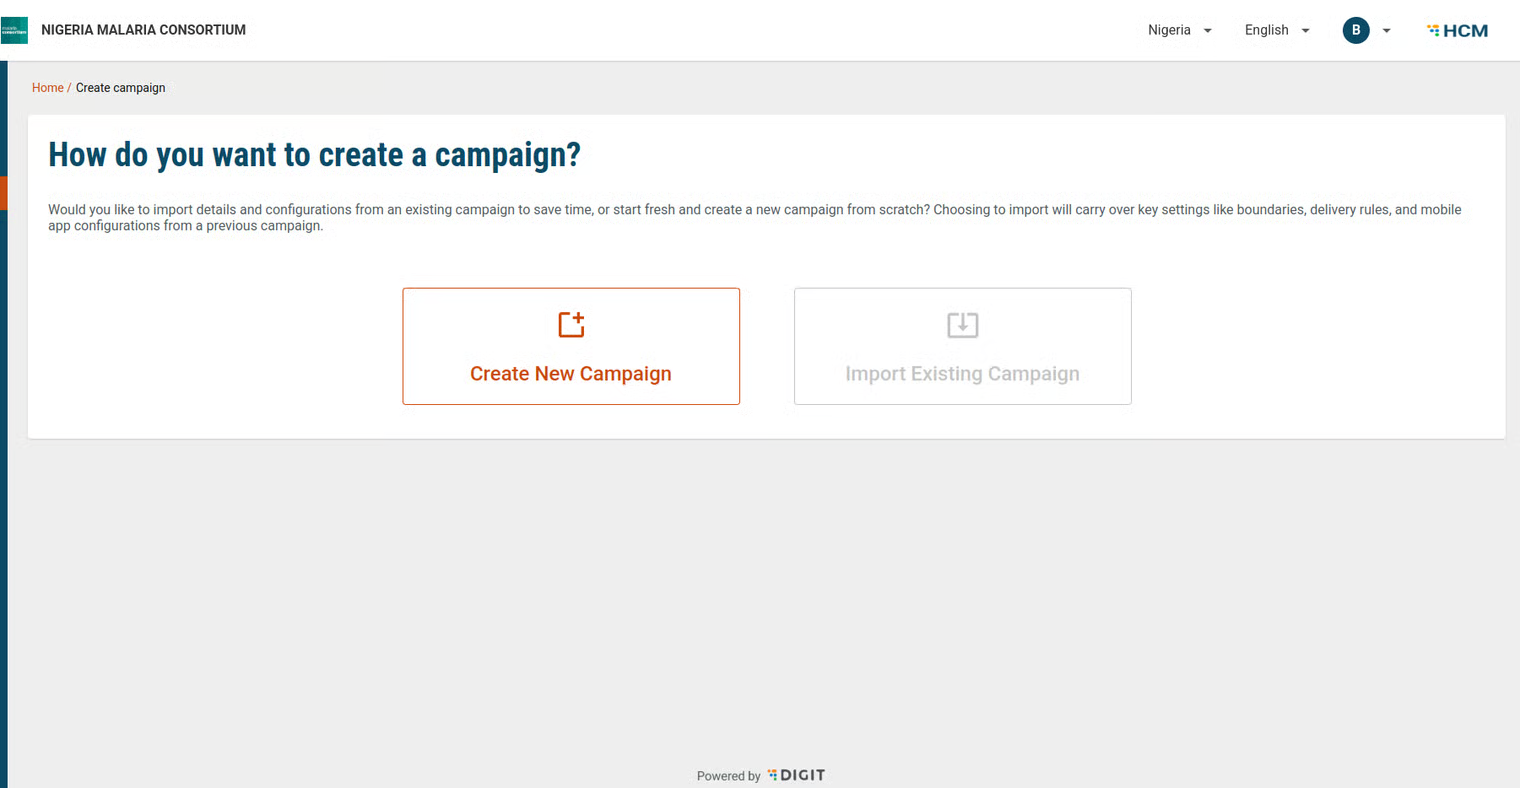
Click on **Create Campaign.** The campaign home screen contains two options:
1. **Create New Campaign**
2. **Import Existing Campaign** (not available in this version).
***
### Create New Campaign
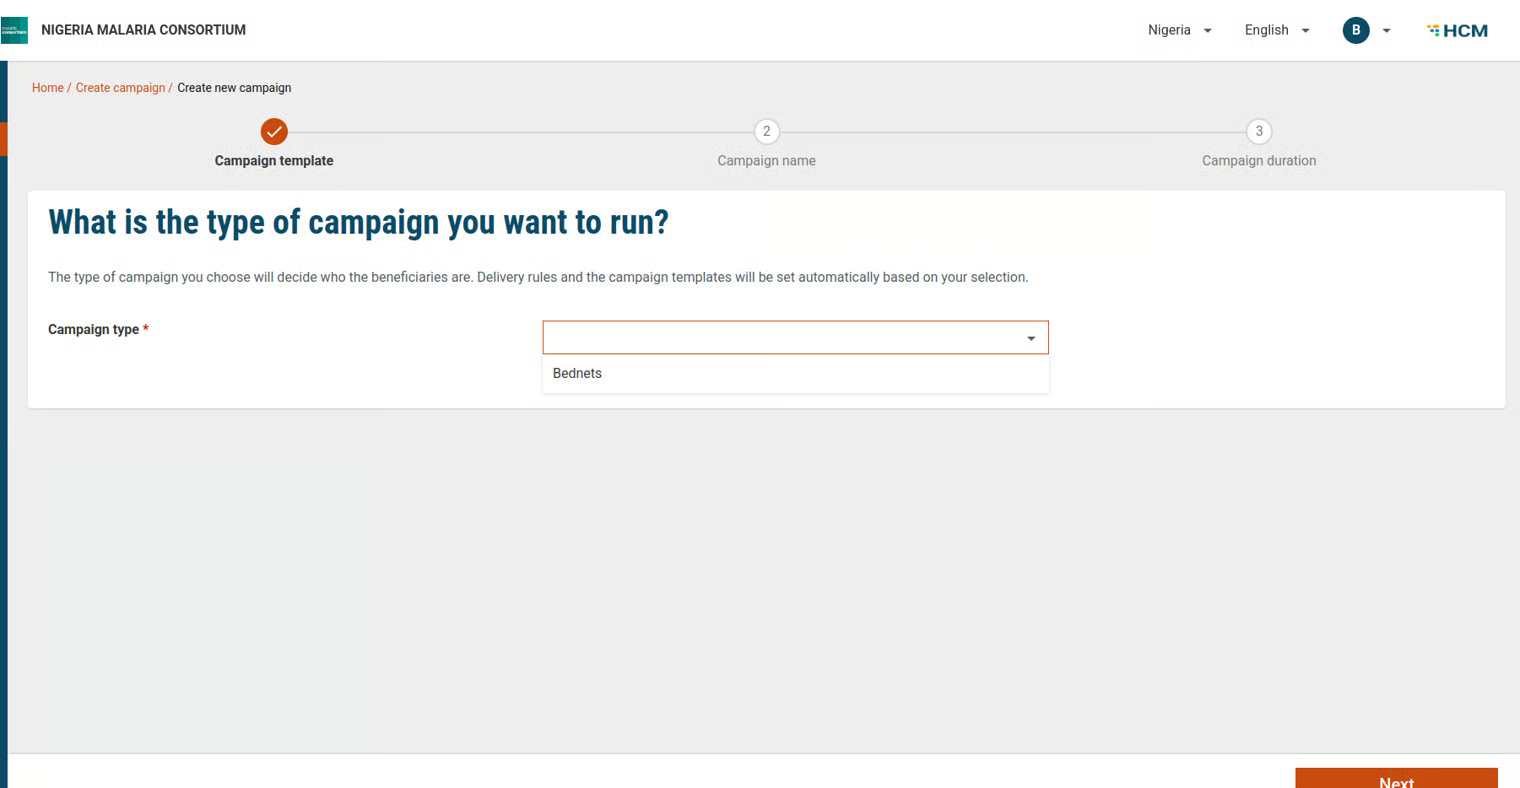
#### Step 1: Select Campaign Type
* Click **Create New Campaign**.
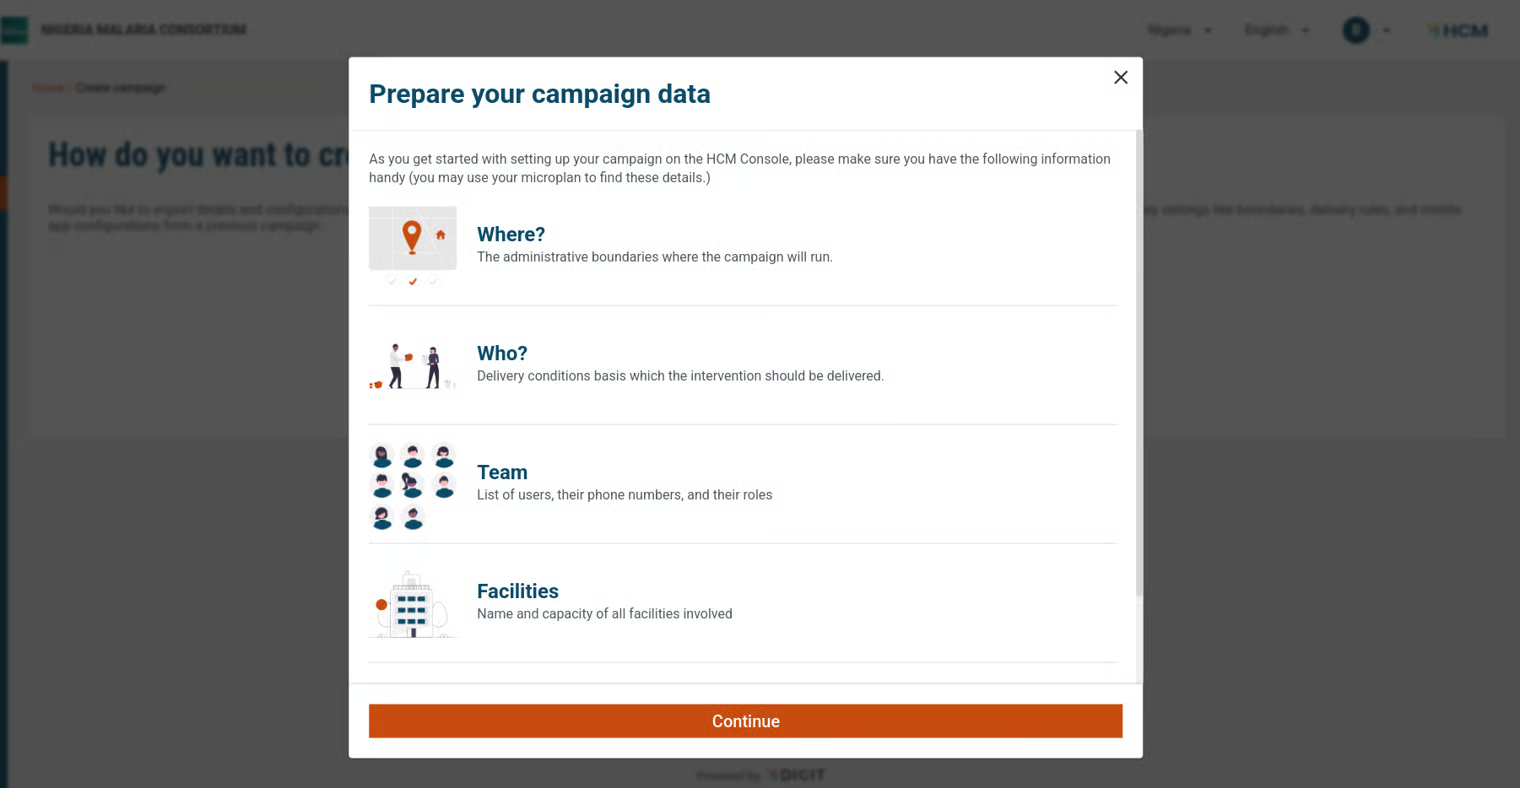
* A pop-up will show the items needed to create a campaign. Click **Continue**.
* Choose the **campaign type** from a dropdown (options come from MDMS: `HCM-PROJECT-TYPES.projectTypes`).
* This is a mandatory step.
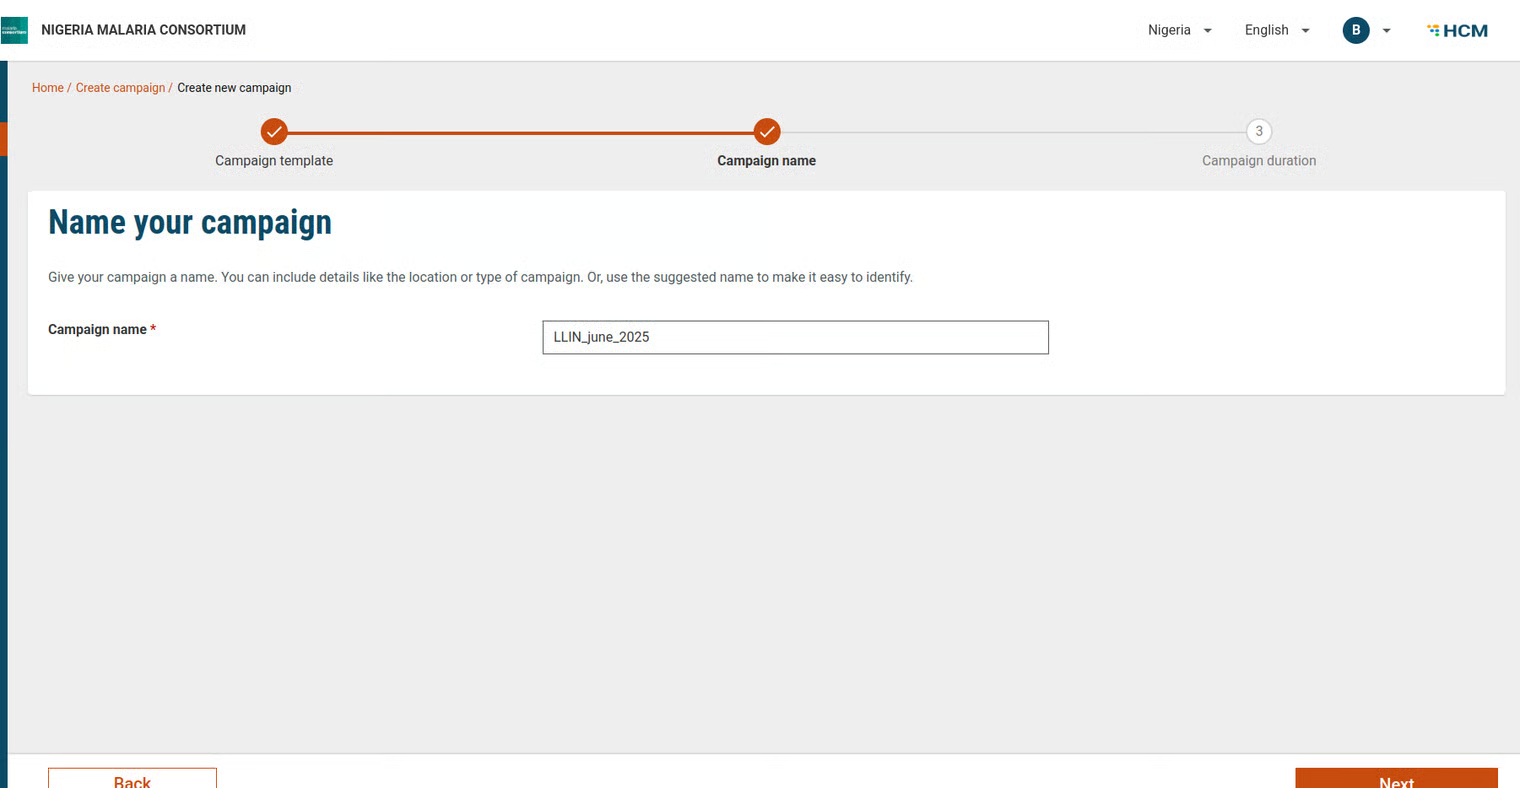
#### Step 2: Enter Campaign Name
* Enter a **name** for the campaign.
* A default name will be suggested based on the campaign type, current month, and year. You can edit this if needed.
* **Validation:** The campaign name must be unique.
* **Validation API:** `/project-factory/v1/project-type/search`
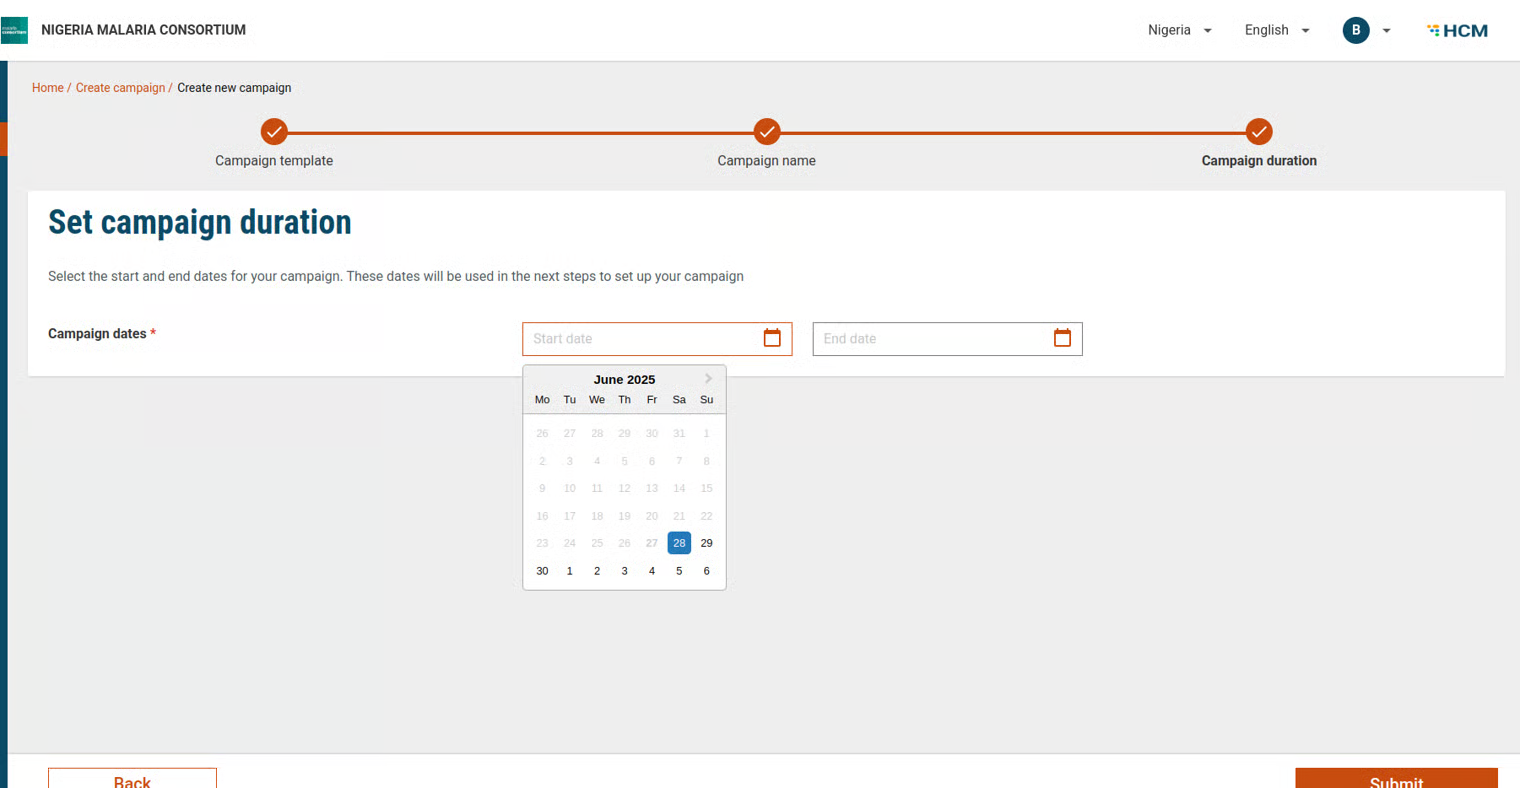
#### Step 3: Set Campaign Dates
* Enter **start and end dates** for the campaign.
* **Validation:**
* Dates cannot be earlier than today.
* End date must be later than start date.
* **API Used:** `/project-factory/v1/project-type/create`
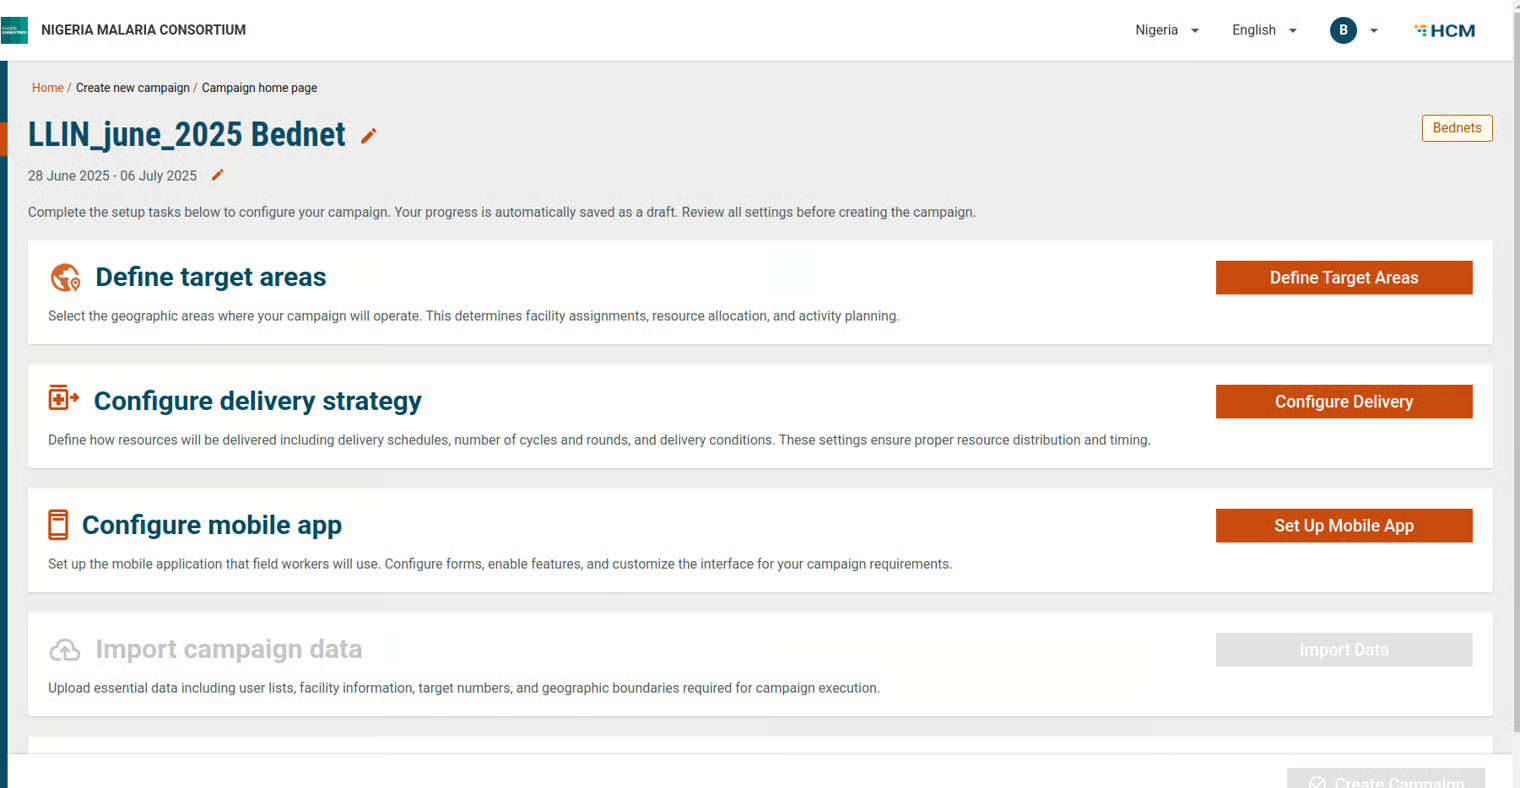
After submitting, you will be redirected to the **campaign details screen**. You can continue creating the campaign or save it as a draft under **My Campaigns** and resume later.
* You can edit the campaign name and dates anytime using the edit icons.
***
### Tasks to Complete Campaign Setup
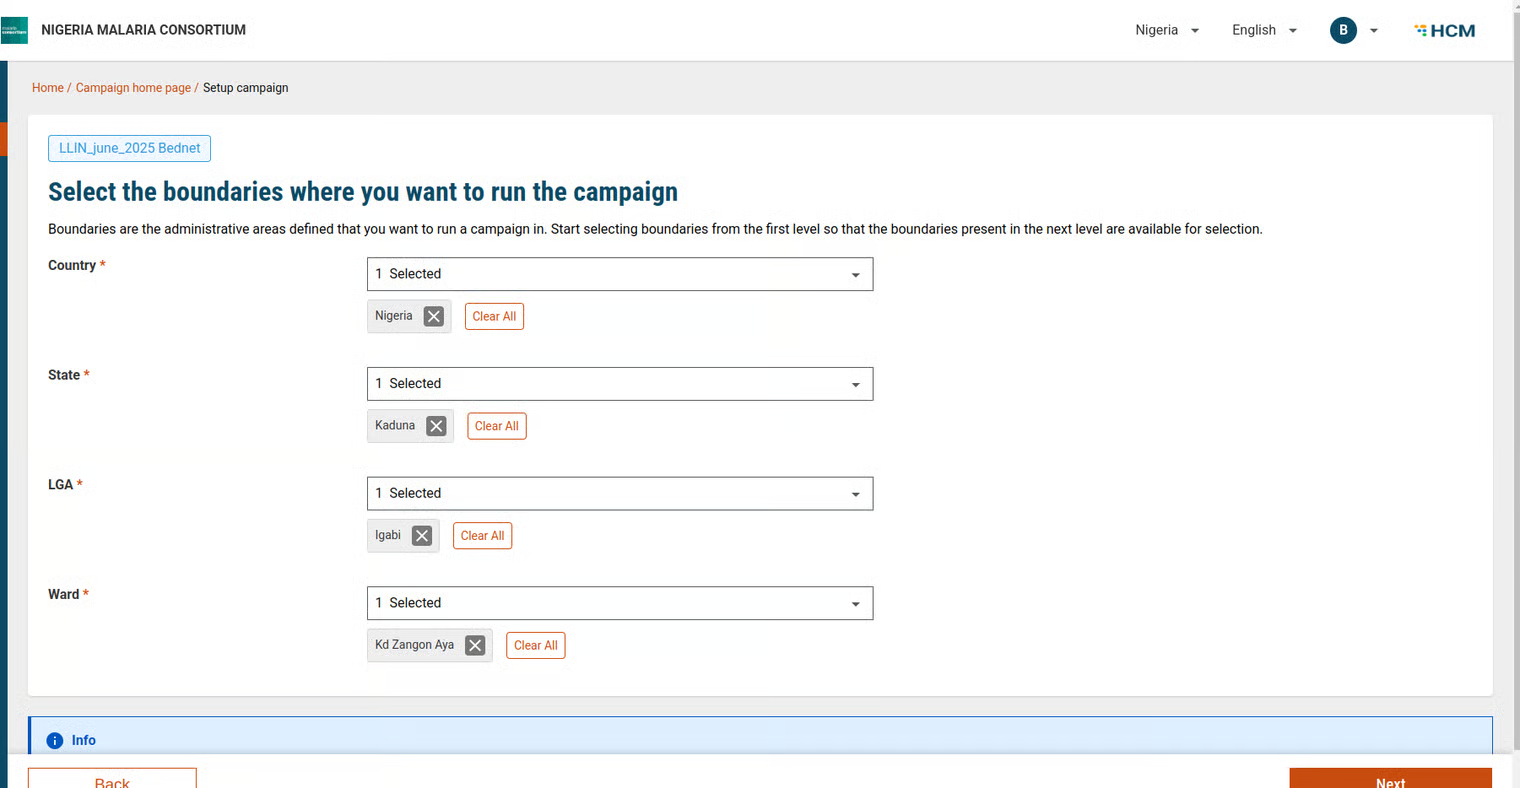
1. **Define Target Areas**
* Select the boundaries where the campaign will run.
* **Validation:** Must select down to the lowest level boundary. If a parent boundary is chosen, at least one child must also be selected.
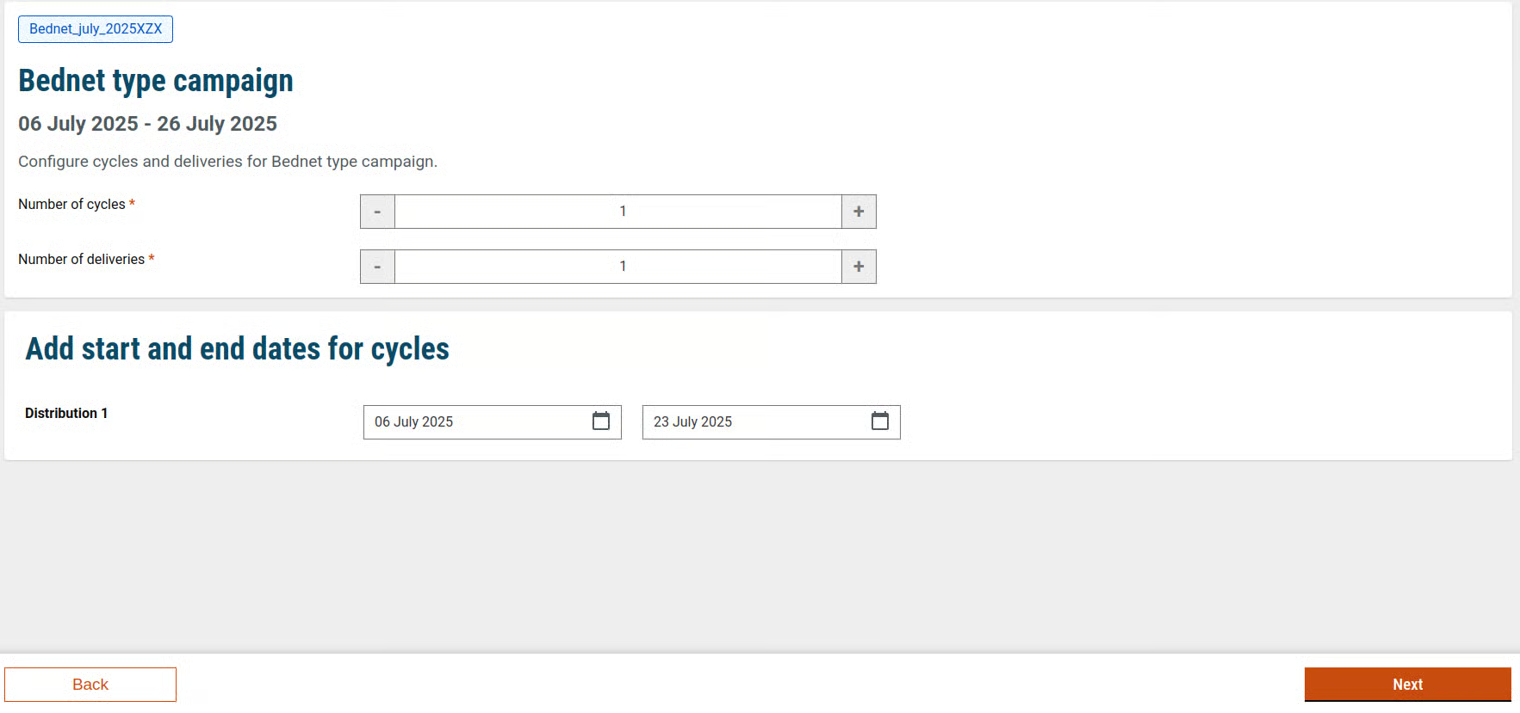
2. **Configure Delivery**
* Define campaign cycles, number of deliveries, and their dates.
* Set delivery conditions and allocate resources for each cycle.
3. **Configure Mobile App**\
This sets up the app that field workers will use.
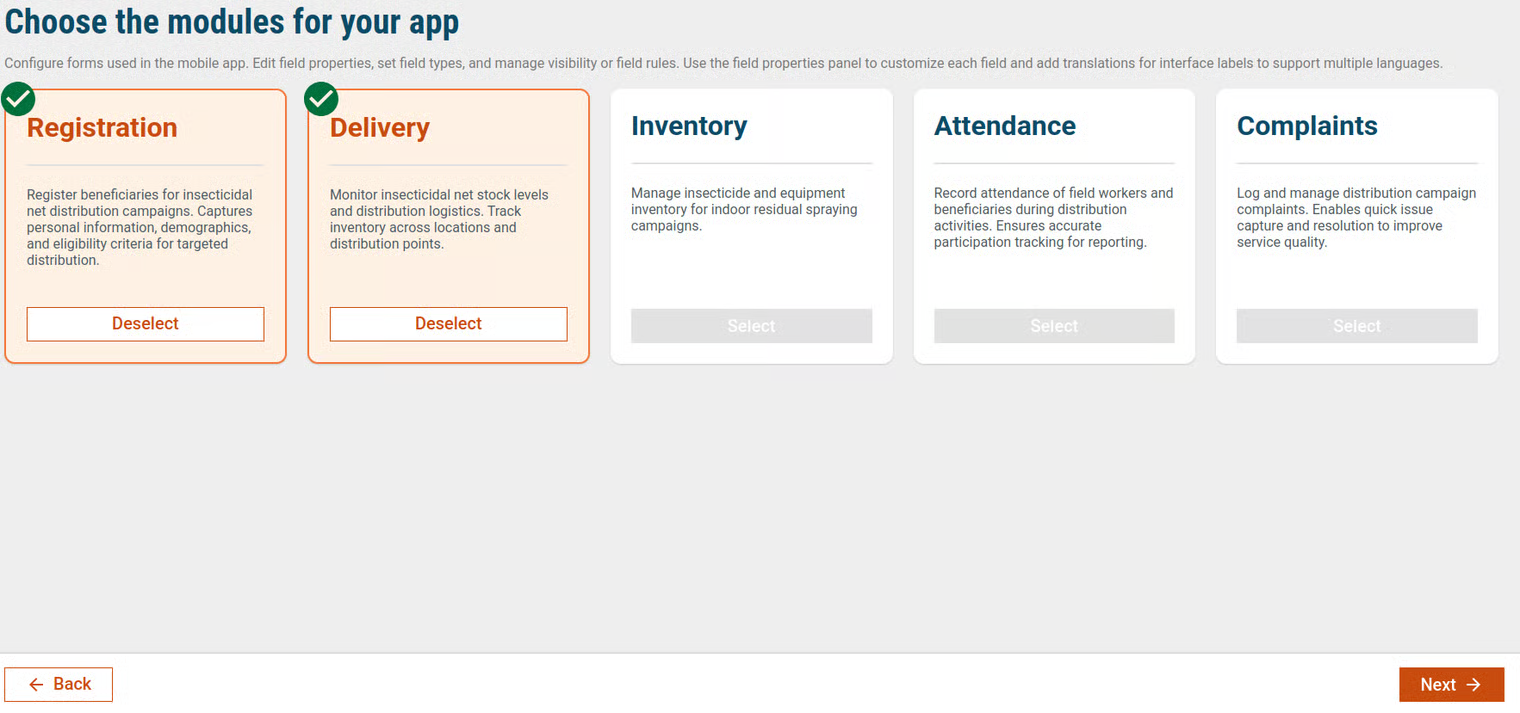
* **Module Selection**
* Choose modules to include in the app (from MDMS: `HCM-ADMIN-CONSOLE.FormConfigTemplate`).
* Selected modules are saved under `HCM-ADMIN-CONSOLE.AppConfigSchema`.
* Localisation modules are auto-created for the campaign.
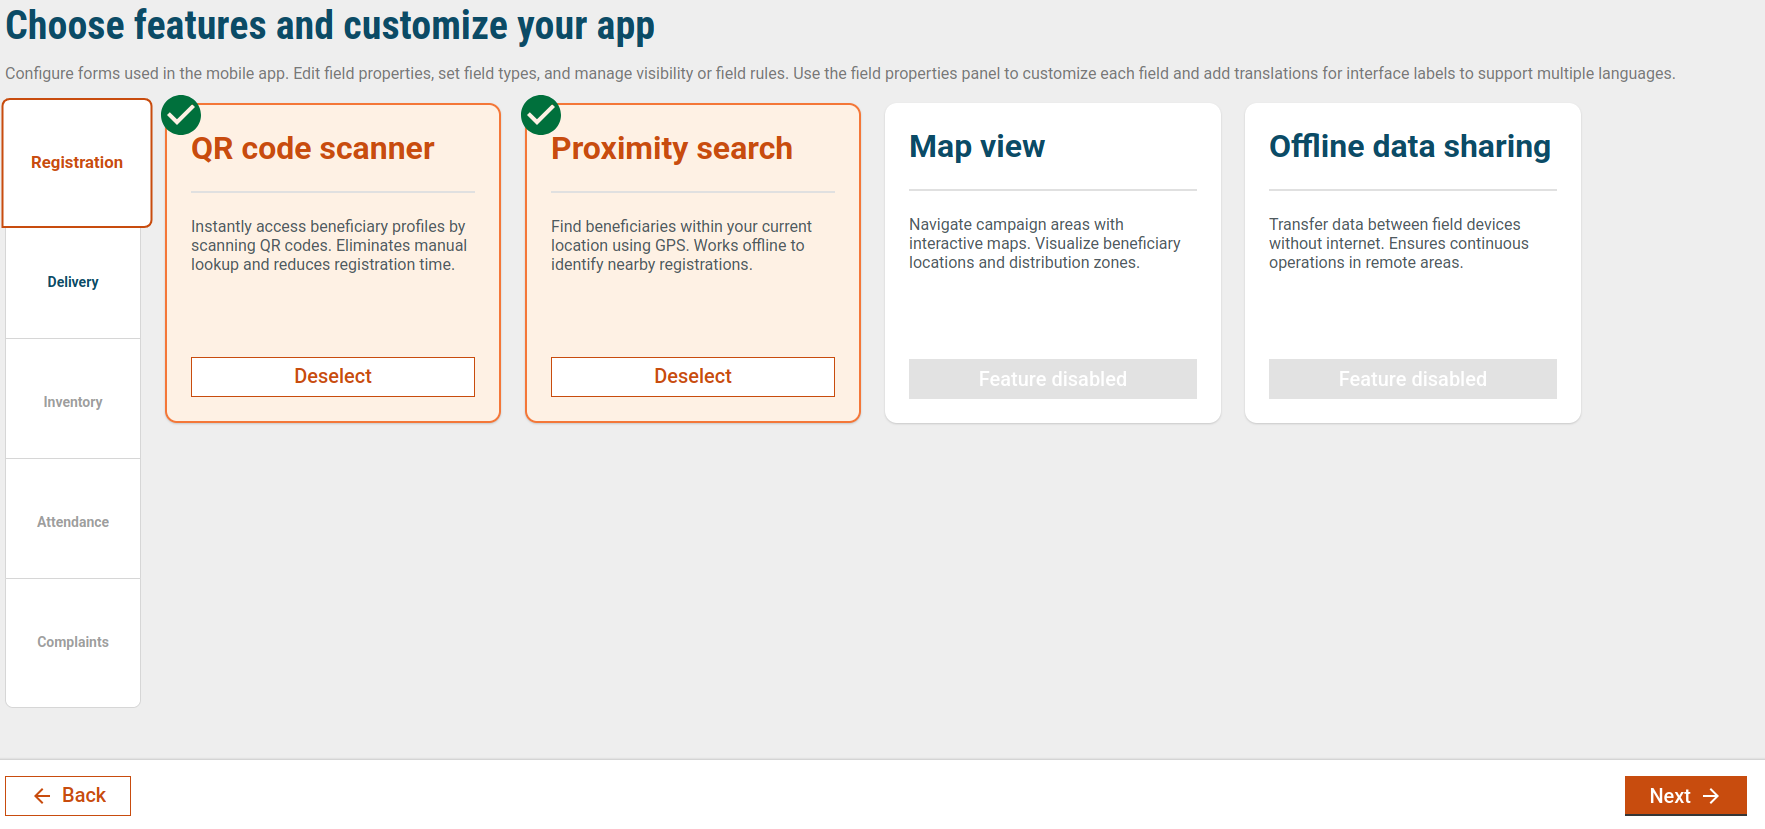
* **Feature Selection**
* Select features for each module.
* Features are fetched from `HCM-ADMIN-CONSOLE.AppModuleSchema`.
* Display depends on what’s marked as selected in the AppConfigSchema.
* **App Configuration**
* Configure how features will appear in the app.
4. **Upload Data**
* Upload sheets for facilities, users, and targets.
5. **Checklist (Optional)**
* Create checklists if needed.
Once all tasks are done, click **Create Campaign**. The campaign will appear under **Upcoming Campaigns** in **My Campaigns**.
***
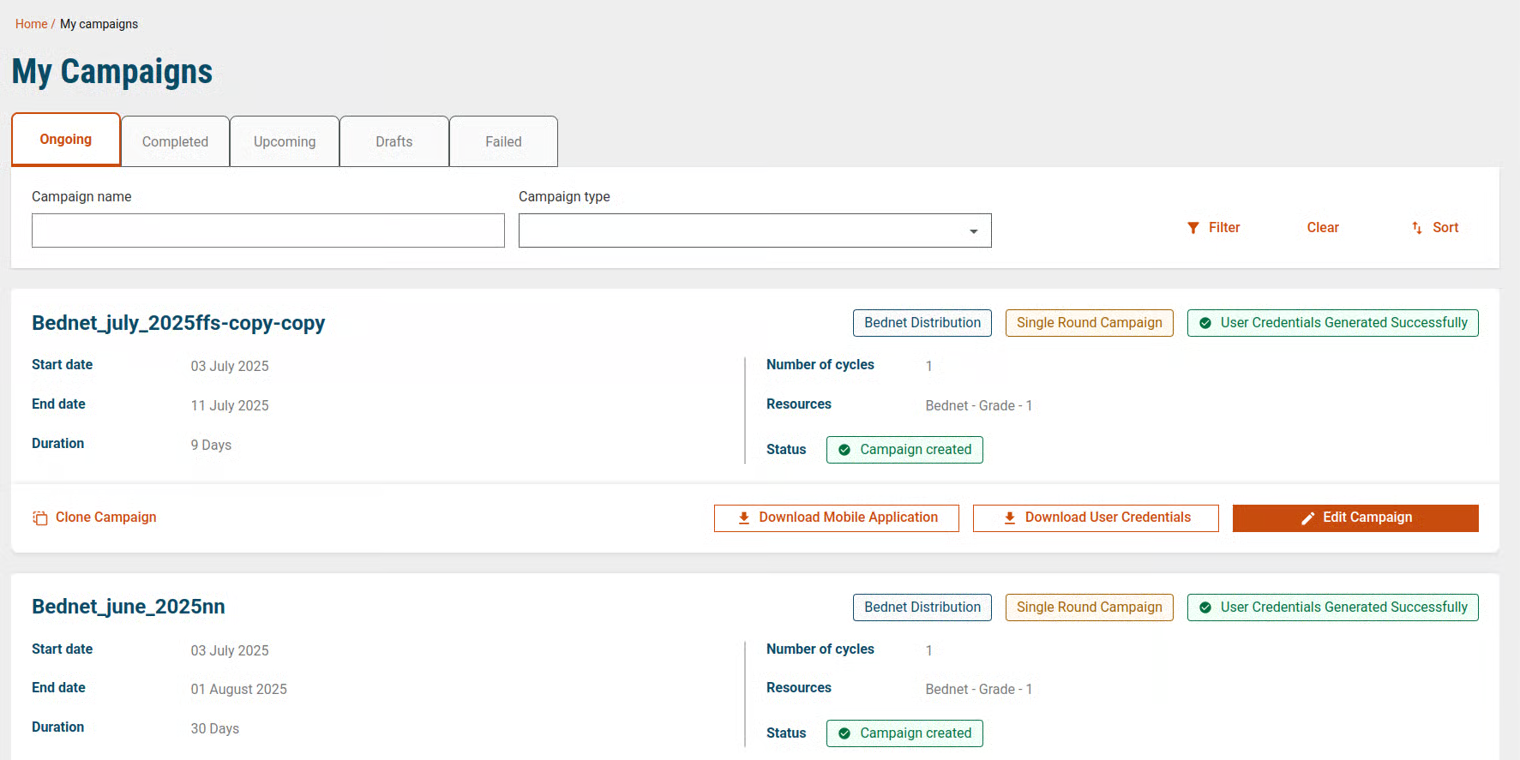
### My Campaign Page
Accessible from the home screen. Shows the status of your campaigns.
Each campaign card provides actions:
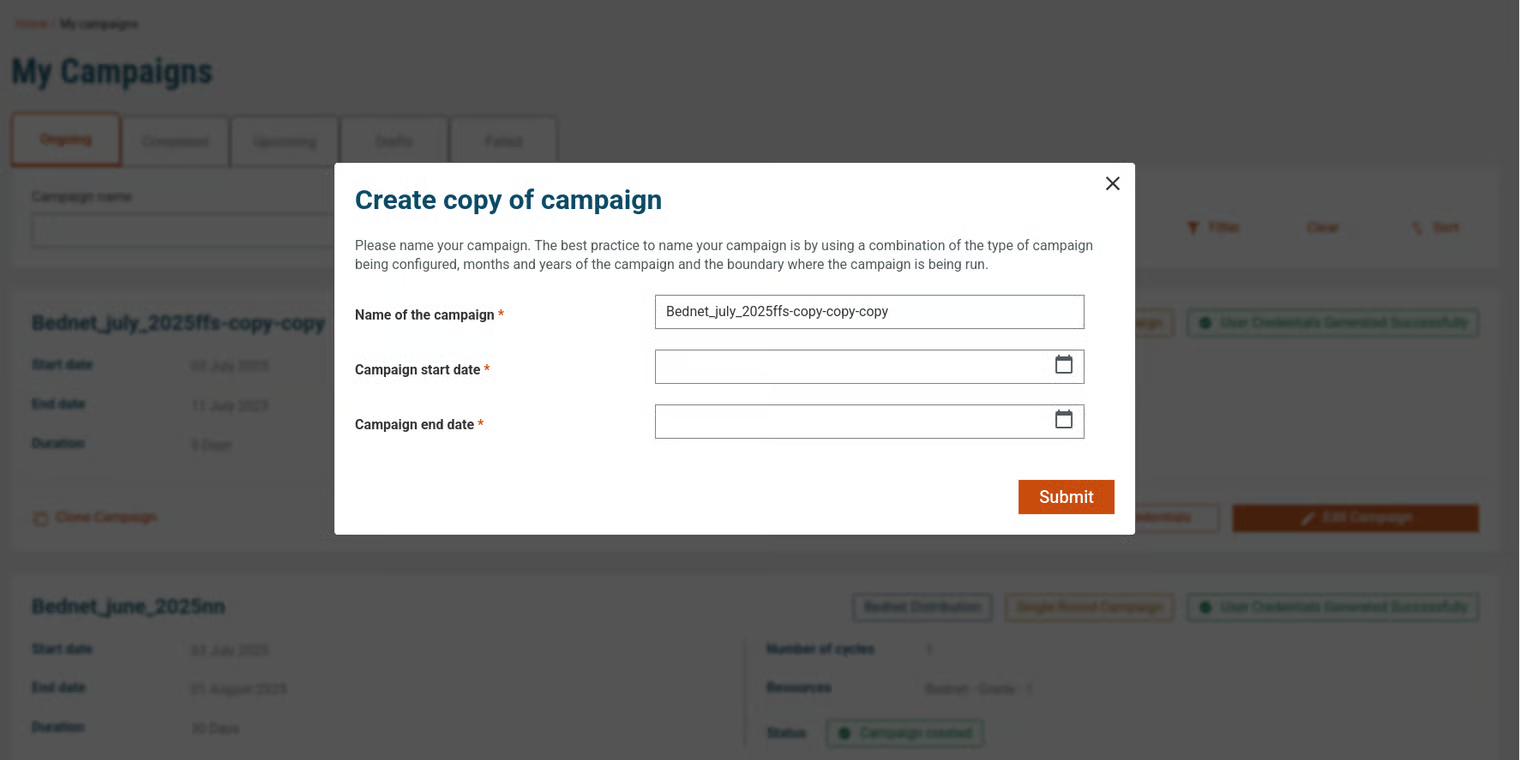
* **Clone Campaign** – Create a copy of an existing campaign. You just need to enter a new name and start/end dates.
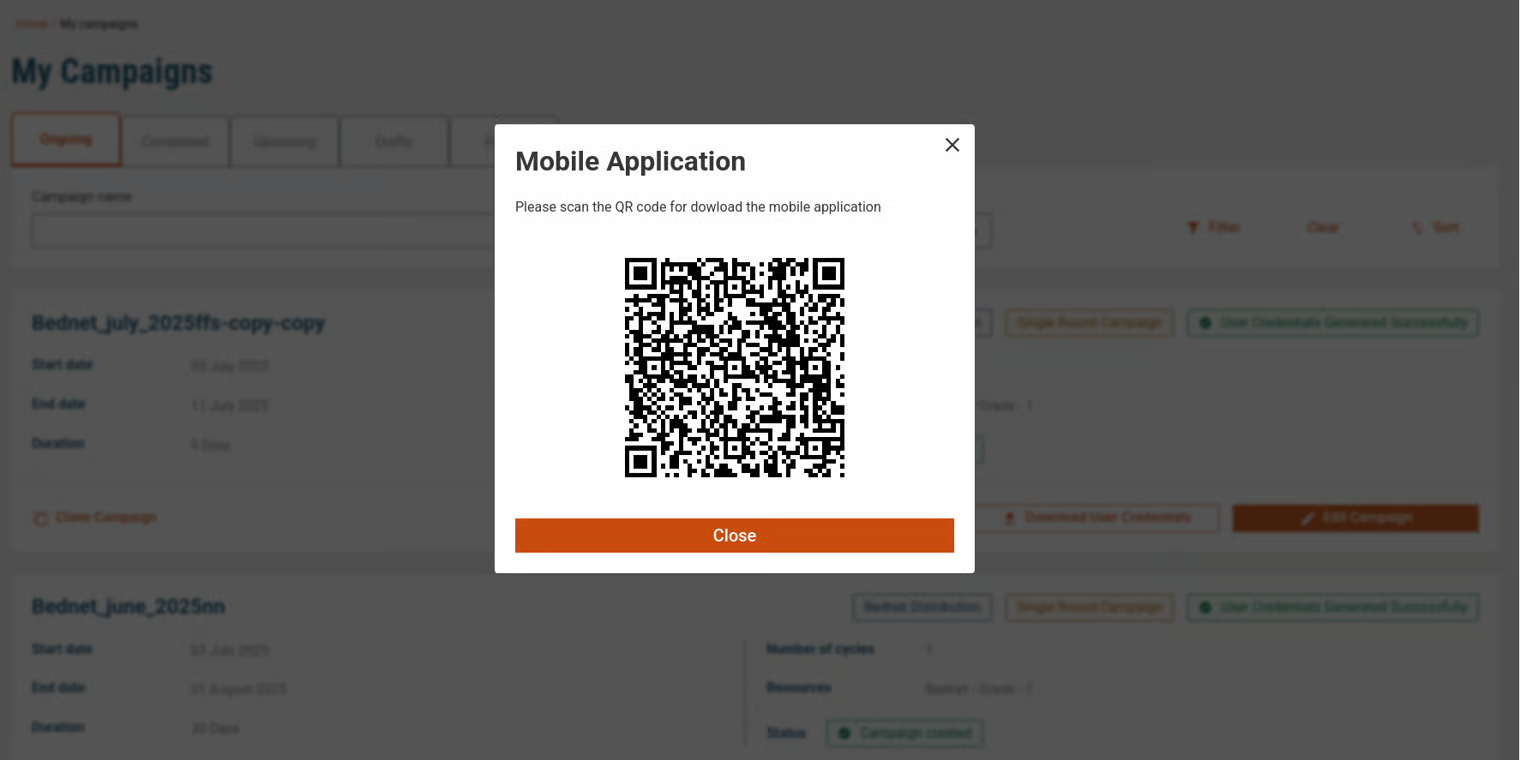
* **Download Mobile App** – Opens a QR code pop-up to download the app.
* **Download User Credentials** – Downloads an Excel with user credentials and passwords.
* **Edit Campaign** – Update boundaries or delivery dates.
---
# Agent Instructions
This documentation is published with GitBook. GitBook is the documentation platform designed so that both humans and AI agents can read, navigate, and reason over technical content effectively. Learn more at gitbook.com.
## Querying This Documentation
If you need additional information that is not directly available in this page, you can query the documentation dynamically by asking a question.
Perform an HTTP GET request on the current page URL with the `ask` query parameter, and the optional `goal` query parameter:
```
GET https://docs.digit.org/health/v2.0/deploy/configuration/hcm-console-configuration/console-ui-configuration/hcm-console-web-ui/campaign-setup.md?ask=&goal=
```
`ask` is the immediate question: it should be specific, self-contained, and written in natural language.
`goal` is optional and describes the broader end goal you are ultimately trying to accomplish on behalf of the user. GitBook uses it to tailor the answer towards what is most useful for that goal.
The response will contain a direct answer to the question and relevant excerpts and sources from the documentation.
Use this mechanism when the answer is not explicitly present in the current page, you need clarification or additional context, or you want to retrieve related documentation sections.