
Loading...
Loading...
Loading...
Loading...
Loading...
Loading...
Loading...
Loading...
Loading...
Loading...
Loading...
Loading...
Loading...
Loading...
Loading...
Loading...
Loading...
Loading...
Loading...
Loading...
Loading...
Loading...
Loading...
Loading...
Loading...
Loading...
Loading...
Loading...
Loading...
Loading...
Loading...
Loading...
Loading...
Loading...
Loading...
Loading...
Loading...
Loading...
Loading...
Loading...
Loading...
Loading...
Loading...
Loading...
Loading...
Loading...
Loading...
Loading...
Loading...
Loading...
Loading...
Loading...
Loading...
Loading...
Loading...
Loading...
Loading...
Loading...
Loading...
Loading...
Loading...
Loading...
Loading...
Loading...
Loading...
Loading...
Loading...
Loading...
Loading...
Loading...
Loading...
Loading...
Loading...
Loading...
Loading...
Loading...
Loading...
Loading...
Loading...
Loading...
Loading...
Loading...
Loading...
Loading...
Loading...
Loading...
Loading...
Loading...
Loading...
Loading...
Loading...
Loading...
Loading...
Loading...
Loading...
Loading...
Loading...
Loading...
The digital local governance solution
The DIGIT-powered local governance solution catalyses digital transformation across towns and cities - changing how citizens interact with government bodies. As a digital public good, the DIGIT Local Governance stack fosters an open digital ecosystem, enabling co-creation and deployment of locally relevant solutions that enhance business operations and improve overall quality of life. By transforming local governance, this initiative not only elevates citizen well-being but also accelerates the nation's economic growth.
Trade license applications pass through various stages where details are scanned, verified, and inspected before the final approval. The workflows are defined at the State or ULB level and adjusted to meet individual department requirements.
The prescribed stages through which trade license applications are routed include -
Document Verification
Field Inspection
Approval
UI configuration docs for the local business license issuing module
Citizen Feedback Rating
Citizen Consent Form
This feature is to get a consent from the citizen during the citizen login
Citizen Feedback Rating
This feature is focused to get a citizen rating when a service is completed.
NDSS KPIs
This includes
Citizen Feedback Score
Citizen Service Delivery Index
Aggregated SLA
Central Instance
This feature includes changes related to central instance for modules - Property Tax, Trade License, PGR, OBPS, Water and Sewerage, Firenoc, Birth and Death, mCollect, Reports, Inbox
PT bugs
While creating a new property the Institution name allowing special characters,institution-type options updated,in PDF, showing the proper name of the usage type.
Frontend
TL
Create New Application from CE end and TL Renewal billing slab issues.
Frontend
Finance
New Docs
New Docs
DIGIT 2.9 release changes.
Citizen Feedback & Citizen consent form
, , , , , ,
DIGIT 2.9 release changes.
Citizen Feedback & Citizen consent form
DSS
DIGIT 2.9 release changes.
DSS
, , , , , , , , ,
2.9 release master migration document
This page contains the changes related to core and municipal services along with the MDMS, DevOps and configuration setups required to accommodate multi-tenancy. Browse through the details below to learn more about the Central Instance.
Refer to SAAS Guidelines for Central Instance to find additional information.
The service-request module is required for the surveys to work. Follow the steps given below:
Add the
Add the new persister file:
Add the
Configure the build
Make the role action-mapping changes in the MDMS
Click on the Job-builder once the above steps are complete.
Restart the following services: egov-accesscontrol, egov-mdms-service, egov-persister
Deploy the service-request module build
For further details on how to use Citizen-feedback APIs refer to the .
Refer to and make changes as per the document.
Restart dashboard analytics with Cluster-configs.
Central Instance:
Find the details for prepping the UI build for a new instance.
Citizen Consent Form:
This feature allows citizen users to give their consent at the time of logging in.
Add this MDMS
Documentation: a. Refer to b. Restart MDMS and deploy the latest front-end builds.
Citizen Feedback:
A functionality that allows users to provide the user facility to submit feedback/ratings at the end of the service.
Add the MDMS file available here:
In the provided configuration, the parameter headerByRating is utilized to specify the value for the star condition, along with the corresponding message to be displayed on the UI screen. The enabledScreensList parameter is used to indicate the specific flows where the Citizen feedback screen will be presented, allowing citizens to provide reviews.
The rating component is utilized for displaying star ratings on the citizen feedback screen. You can locate this component within the micro-ui-internals folder on the following GitHub link: .
Documentation
a. Refer to for more details.
b. Restart MDMS and deploy the latest front-end builds.
Click on Inbox to view the list of applications submitted.
Click on the relevant Application Number hyperlink to open and view the application details.
Scroll down the application and click on the Take Action button. Click on Pay.
Enter the Payment and Payer Details. Click on Collect Payment to process the payment.
The system generates a unique payment Receipt Number. Click on the Print Receipt button to print the receipt. Click on the Go Back to Home Page button to navigate back to the home page.
Click on the Renew Trade Licence option on the home page.
Click on the relevant Trade Licence Number to renew. Edit the trade license details in the application form as required.
Click on the Take Action button. Click on the Renew Trade Licence option.
The user can renew it without modifying the trade details or it can be modified. If it is modified, it goes into application processing similar to a new TL application. If it is not edited then renewal happens in real time after making payment.
Log in with Document Verifier credentials.
The employee landing page displays the list of applications waiting for processing. Use the search filters on the page to find specific applications from the list.
Click on the Application Number hyperlink to open the application.
Scroll through the application details and review the uploaded documents.
Click on the Take Action button and click on Verify and Forward option if all documents are found complete and satisfactory.
Select the Assignee Name. The application will be forwarded to the selected assignee for field inspection.
In case, the documents are found incomplete or missing, click on Send Back to Citizen option. This will send back the application to the citizen for necessary action.
Click on the Reject option if the application details are found inaccurate. This will reject the application.
Log in with Field Inspector credentials.
The employee landing page displays the list of applications waiting for processing. Use the search filters on the page to find specific applications from the list.
Click on the Application Number hyperlink to open the application.
Scroll through the application details and review the details.
Click on the Take Action button and click on the Verify and Forward option if all details are found complete and satisfactory.
Select the Assignee Name. The application will be forwarded to the selected assignee for approval.
In case, the documents and details are found incomplete or missing, click on Send Back to Citizen option. This will send back the application to the citizen for necessary action.
Click on the Reject option if the application details are found inaccurate. This will reject the application.
Click on Send Back option to send the application back to the previous employee (document verifier in this case) for further action.
Log in with Approver credentials.
The employee landing page displays the list of applications waiting for processing. Use the search filters on the page to find specific applications from the list.
Click on the Application Number hyperlink to open the application.
Scroll through the application details and review the details.
Click on the Take Action button and click on the Approve option if all documents and details are found complete and satisfactory. The trade license is approved and a Trade License certificate is issued to the applicant.
Click on the Reject option if the application details are found inaccurate. This will reject the application.
Click on Send Back option to send the application back to the previous employee (field inspector in this case) for further action.
The TL application is approved and the TL Certificate is issued to the applicant. Click on the Download or Print button to download or print the TL Certificate.
Local governance approach
The Local Governance stack is a set of open APIs, services, and reference implementations, set up as a public good, to allow government entities, businesses, startups, and civil society to use a unique digital infrastructure and build solutions for urban India at a large scale. It provides a set of open standards, specifications and documentation to create a level playing field and enable ecosystem players to innovate on the stack. As a public good, the solutions are available to all members of society without profits or restrictions.
Citizens can renew their existing trade applications on the DIGIT portal. CE can also apply for TL renewal on behalf of the citizens.
My Applications option allows applicants to view their applications and track their status.
This section illustrates the steps for different employee user roles at the local governance level
Employees can -
Learn how to apply for new trade licence, renew and pay trade licence fee
Citizens represent individuals, communities, or business entities who are the system end-users. The TL module allows business owners to apply for a trade license online or even apply for the renewal of an existing license.
The citizen can also approach the Counter Employee (CE) to submit new TL applications or raise renewal requests for existing licences.
The Citizen or CE role can -
Follow the same steps as outlined in the workflow to update the application.
View and track user application status
Log in to the employee portal using your credentials.
Click on the New Application option in the top left corner of the landing page.
An employee can create the application on behalf of citizens over the counter.
Select the applicable Financial Year for which the trade license is to be issued.
Fill in the application details (same as given in the citizen application process).
Click on the Submit button once all details are found complete and accurate.
A unique application reference number is generated. This number is used to access the application and for further processing. The citizen receives a notification along with this application number in the registered mobile number.
Download payment receipts
Total bill amount not showing proper
Frontend
Common
Fetch bill api issue, Localisations issue in release kit.
Frontend
mCollect
UI alignment issue, Payer's Name is not visible while scanning the QR code, The footer is overlapping the drop down.
Backend
Create the Citizen Feedback Service definitions (as mentioned in the above Citizen Feedback Service document) for modules and flows as per requirement before using it on the UI.
- name: "builds/digit-dev/core-services/service-request"
build:
- work-dir: "core-services/service-request"
image-name: "service-request"
dockerfile: "build/maven/Dockerfile"
- work-dir: "core-services/service-request/src/main/resources/db"
image-name: "service-request-db"{
"tenantId": "pb",
"moduleName": "common-masters",
"RatingAndFeedback": [
{
"type": "isCitizenRatingEnabled",
"value": true
},
{
"type": "headerByRating",
"value": [
{
"minvalue": 1,
"maxvalue": 3,
"code": "CS_WHAT_WENT_WRONG"
},
{
"minvalue": 4,
"maxvalue": 5,
"code": "CS_WHAT_WENT_GOOD"
}
]
},
{
"type": "enabledScreensList",
"value": [
{
"module": "PT",
"bussinessService": "PT_CREATE",
"screenfrom": "pt/property/new-application/acknowledgement",
"cardHeader": "PT_RATE_HELP_TEXT_CREATE",
"cardText": "PT_RATE_CARD_TEXT_CREATE"
},
{
"module": "PT",
"bussinessService": "PT_MUTATION",
"screenfrom": "pt/property/property-mutation/acknowledgement",
"cardHeader": "PT_RATE_HELP_TEXT_MUTATE",
"cardText": "PT_RATE_CARD_TEXT_MUTATE"
},
{
"module": "PT",
"bussinessService": "PT_UPDATE",
"screenfrom": "pt/property/edit-application/acknowledgement",
"cardHeader": "PT_RATE_HELP_TEXT_UPDATE",
"cardText": "PT_RATE_CARD_TEXT_UPDATE"
},
{
"module": "PT",
"bussinessService": "PT",
"screenfrom": "digit-ui/citizen/payment/success",
"cardHeader": "PT_RATE_HELP_TEXT_PAY",
"cardText": "PT_RATE_CARD_TEXT_PAY"
}
]
}
]
}Application status report
Trade license registry
Trade license renewal pending report
Trade license daily collection report
Trade license application status report
Trade license registry
Trade license renewal pending report
None
Death count report
Birth and death certificate payment records
Birth count report
Death count report
Birth and death certificate payment report
None
And 3 new KPIs were added for administrative purposes.
About page
FAQ
3 KPIS - Non-tax revenue collected, Non-tax revenue contribution % and Average PT collected.
The urban mission offers digital governance solutions that encapsulate the core platform principles. The apps provide
Secure & reliable governance tools
Simple reusable modules for effective integration
Scalable & standardized solutions
Open APIs to promote interoperability
Multiple channel support
Configurable building blocks that support customization at each stage
The local governance focuses on inclusion and is designed to enhance both platform openness and choice for citizens. The platform uses open APIs and standards, creating a powerful framework to drive convergence across the multiple systems currently in use and to lower the barrier to entry for locally developed solutions.
Keeping in mind that most Indians use the internet through their phones, we follow and advocate a “mobile-first” approach, while supporting multi-channel access to accommodate diverse needs and preferences.
Open Source - The local governance stack is open source and has been built using the best-in-class open-source technology stacks powering the most advanced companies in the world. The solution can provide the lowest total cost of ownership and helps ensure that governments retain strategic control of their systems and data.
Mobile-Enabled - The local governance solution design follows a mobile-first approach, with robust mobile applications enabling citizens to access government services through their phones easily. Government officials and field workers are also empowered with mobile applications that enable them to deliver 24×7 governance with ease.
Real-time Dashboards - The real-time dashboards provide governments with actionable insights on demand. Administrators and department heads are empowered with verified data that enables them to manage their work and budgets better. Field-level employee reports enable effective performance management and ensure efficient usage of government resources.
Click on My Applications.
The screen displays all the applications tagged to the registered mobile number. Click on the View Details button to view the application details.
The Application Timeline displays the selected application's current status and completed actions. For applications pending payment, click on the Make Payment button to make the payment.
Select the applicable Payment Method and click on the Pay button.
Click on the Receipt or Certificate button to download the receipt or the processed trade license certificate. Else, click on the Go Back To Home button to go back to the home page.
mCollect Pdf - QR Code Bug Fix
Internal Gateway Config
DIGIT 2.9 release changes.
To renew TL navigate to the home page and click the Trade License option. Click on My Applications. Click on the Renew Trade License option to view the license details for renewal.
The system will display the license details. Click on the Renew button to apply for renewal.
If there are any changes in the trade details, click on the Change button adjacent to the fields before submitting for renewal. Click on the Submit Application button once all changes are done and reviewed.
The Trade License is submitted for renewal.
Click on the My Properties option on the home page. This displays the properties owned by the logged-in citizen.
Click on the View Details button to see the details of the selected property currently available in the municipal records. Click on the Update Property button to initiate an application to update the property details.
Click on the My Applications option on the home page. This lists all the applications submitted so far for property tax services. Click the Track button to view the application details and current status.
To view payment history and access details, click on the My Payments option on the home page. This displays the entire list of payments made by the logged-in user.
Each payment card provides the following details:
Amount Paid
Property ID
Owner's Name
Receipt Date
Receipt Number
Click on the Download Receipt button to download and print the receipt.
OBPS Release notes for Urban DIGIT 2.8 release.
This release offers the UI/UX revamp of the Residential Construction Permit System, workflow timeline changes and reports.
The functionality in OBPS remains the same - only the UI/UX has changed.
Two reports were added for administrative purposes.
Changes made to the workflow timeline for clear representation of application status to the users.
Notification based on channels.
Stakeholder registration and employee approval flow
Architect flow (permit application creation) and employee approval flow
Architect occupancy certificate creation and employee approval flow
Fire NOC employee approval flow
Residential construction permit application status report
Workflow timeline changes in application flow - The image below the one illustration on the right displays the old status view. Here the application status shows pending even if the task is completed. As per the current release, the application displays only the current state where the action is marked as pending. The remaining status is marked as done or completed or in a submitted state.
Notification based on channels - The residential construction permit application allows the user to configure different messages for different channels (In-app, mobile messages, email) for the same event in the application process flow.
None
This module allows employees to create surveys for citizens and let them fill out surveys. Later survey results can also be seen on the Survey results dashboard.
The Survey module consists of the following
For Employees
Surveys section on Home Page
Surveys inbox
Create survey
Meta Data - Title, Description, Survey start & end date/time
For Citizens
Notification on Survey creation.
Survey Filling
Expansion to other types of questions
More notifications to citizens prior to survey start, and survey end.
Making surveys open. (Right now citizens need to be logged in to fill out the survey. This needs to be made open)
This module gives citizens more information on a service delivery module than just links to access the service.
Product Specific Pages Module consists of the following:
For Citizen
For a module and tenant that is configured.
FAQs
List of FAQs for each module
How it works
An illustrative guide to using the business license issuing module
The module offers citizens and governance bodies a convenient and transparent means of processing trade licenses. A trade licence is permission the local governing bodies issue to carry on a specified business or trading activity within the authorized area. It is a mandatory document required to run a business or commercial activity.
Click on the relevant role below to learn more about how to use the trade license solution.
This page provides configuration details for TL master data templates
The Local Business License Issuing application makes the process of obtaining a business license easy, smooth, and transparent. The module removes the need for manual processing and streamlines the key business license management functions to provide a better user experience.
The module enables citizens to -
Apply for a new trade license or renew an existing trade license.
Upload all the relevant documents required for the license.
Make payment for the Trade License (New/Renewal) fee using the online payment gateway.
Receive notifications and alerts by email or SMS for new application status updates and pending renewals.
The module enables employees to -
Create flexible role-based workflows.
Configure license fee calculation logic.
View custom dashboards for module statistics.
Filter search results using advanced configurable search parameters.
Receipt Register
Application Status
Cancelled Receipt Register
ULBwise Collection Report
Learn how to add new property, assess or transfer property and pay property tax
Citizens represent individuals, communities, or business entities who are the system end-users. The PT module allows property owners to register their property details online. These details are then used for various property-related transactions.
The citizen can also approach the Counter Employee (CE) to register new property, assess property or pay property tax.
The citizen can -
The search application facility enables users to search for an application.
Click on the Search Application option available in the employee inbox.
Enter at least one or multiple search parameters to find the application. The parameters are Application No., Owner Mobile No., Unique Property ID., Application Type, Application Status, From Date and To Date.
Search results show 10 records at a time on a page with the option to navigate to the next page.
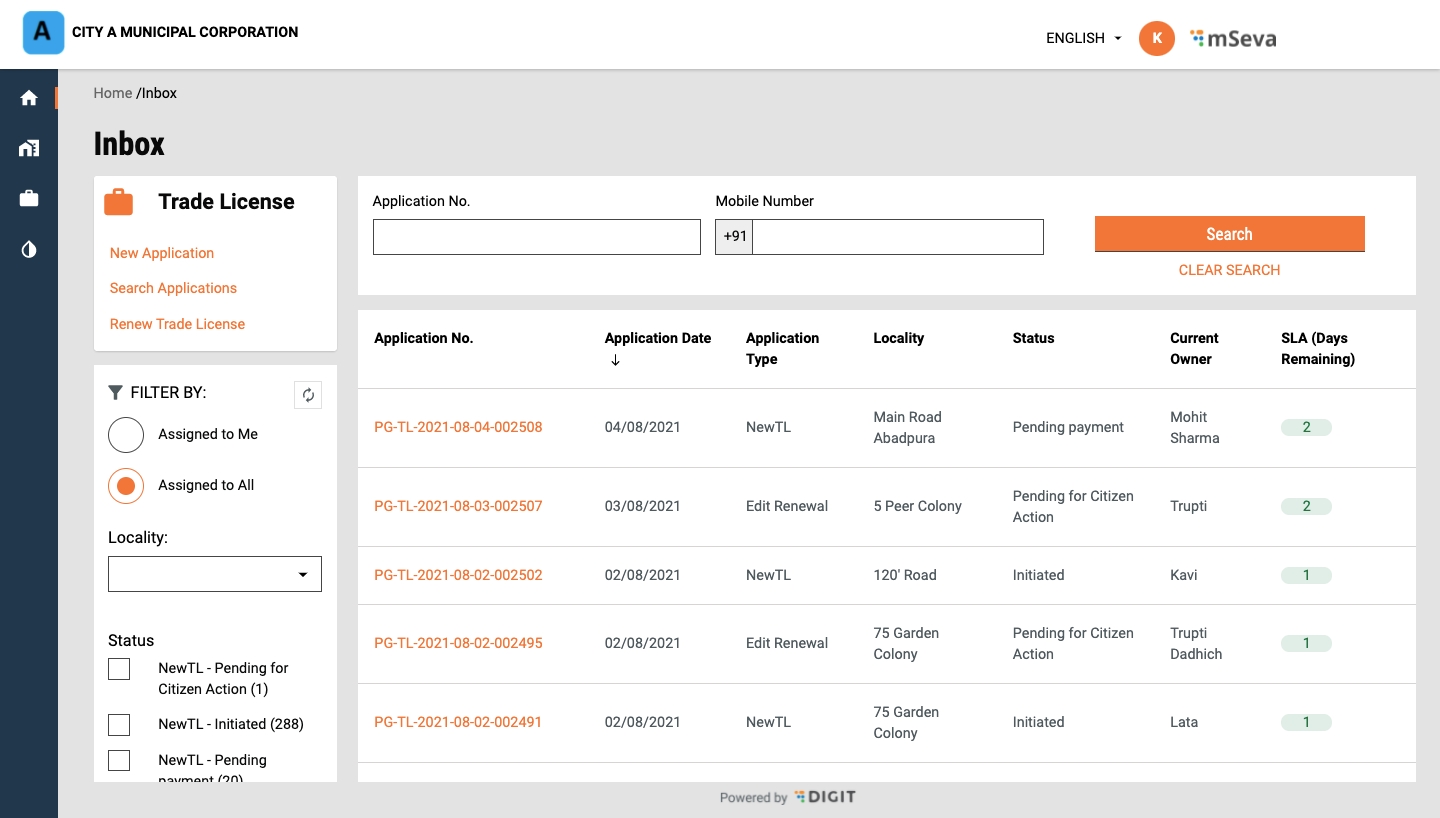
Employee Inbox provides the option to search for applications in different states or workflow. Employees get a view of applications assigned to them for further processing.
Enter at least one or multiple parameters to refine the search for property applications. The parameters include Application No., Mobile No., and the Unique Property ID.
Click on the Search button to view the search results. The search results show the filtered list of property applications along with their status.
Other filters available to refine the view of applications are -
Assigned to Me
Assigned to All
Locality
Application Type
Click on the Unique Property ID hyperlink in the search list screen to access the details. Click on the Clear Search button to renew the search parameters.
View property details
Click on the My Properties option on the home page to view the registered properties for the logged-in user. It will display all the properties owned by logged-in citizens.
Click on the View Details button to view the complete details of the property. It will display the property details.
Click on the Update Property button to make any changes.
Edit property allows users to make changes to the property details. The system allows users to make partial edits too.
To make changes search and view the property details. Click on the Edit Property option in the Action column for the corresponding property. The following details can be edited for the property:
Only Street Name and Door No. can be edited in the Location Details.
All information can be edited in the Assessment Details.
None of the information allowed for edits in the Ownership Details.
Documents can be re-attached.
Follow the same flow as in to submit the changes.
Log in to the system to land on the home page and click on My Bills. All bills pending payment are displayed.
Click on View Details to see the tax details for the selected bill.
Click on the Proceed to Pay button to make the payment (refer to the page for details on how to make the payment).
Find the relevant property and click on the Unique Property ID to view the property details.
Click on the Payment History option available right below the Total Dues detail on the Property Information page. All payments made to date for the given property are displayed on the screen.
Click on the Download Receipt link available for individual cards to download the receipt in PDF format.
To edit applications, navigate to the Inbox page. Search for the application you want to verify by entering any of the search parameters.
Scroll down the application page and click on the Take Action button. Click on the Edit option.
Update the application details and attached documents as required. Submit the application for subsequent processing.
To reopen the application find and open the desired application. Scroll down the application page and click on the Take Action button. Click on the Reopen option.
Select the Doc Verifier name who will be responsible for verifying the application. Enter any Comments if required. Click on the Choose File button to upload any file or images in context. Click on the Reopen button.
The application is forwarded to the selected doc verifier for verification of documents.
Apply for trade license, ensure compliance with trade safety guidelines, and lots more
The Local Business License Issuing System enables local government bodies to regulate trading establishments. It also serves to protect the interest of the public at large against possible health hazards and inconveniences that any business operation can cause. With the Business License Issuing application traders can obtain the trade certificate in a simplified manner and ensure compliance with rules and safety guidelines issued by the government. The module offers the citizens and governance bodies a convenient and transparent means of processing trade licenses.
The application makes obtaining a trade licence easy, smooth, and transparent. Hence, the module removes the need for manual processing and streamlines the key trade licence management functions to provide a better user experience.
An illustrative guide to using the property tax module
The Property Tax (PT) module offers the citizens and governance bodies a convenient and transparent means of processing property taxes. Local governing bodies identify the applicable tax slabs for different types of properties. The PT module assesses properties, calculates tax amounts, processes tax payments and generates tax collection reports.
Online automated management of property tax revenues and collections
The Property Tax System is a self-serve web and mobile-based, easy-to-use and configurable application that addresses the objectives of municipal corporations and local government to automate all property tax operations, thus providing property tax assessment and payment services to citizens in real-time.
Search Application and Search License pages are used for searching any application/ license that may or may not be relevant to the workflow action of the logged-in users.
Search Application has 2 components.
A search field component is a form which takes inputs and passes them into tl-search API params. It utilizes SearchForm and SearchField components to create and arrange the form.
Property applications are rejected if the supporting documents uploaded by the applicant fail to comply with the property regulatory requirements or the details provided in the form are incorrect.
To reject applications navigate to the Home page. Search for the application you want to verify by entering any of the search parameters. Click on Application No. to open the application. Scroll down the form to review the filled-in details.
Click on the Take Action button available at the bottom of the page. Click on Reject.
Enter your Comments to state the reason for rejection. Click on the Upload Files button to upload any supporting documents to validate the rejection. Click on the Reject button.
The applicant will receive a rejection notification on his mobile number or email address.
DV sends back the applications to the citizens if some vital information is missing in the application or there is a mistake in the information provided.
To send back applications to the counter employee, navigate to the Inbox page. Search for the application you want to verify by entering any of the search parameters. Click on the Take Action button available at the bottom of the page. Click on the Send Back To Citizen option.
Select the Assignee Name who will be responsible for verifying the application. Enter any Comments stating why the application is sent back. Click on the Choose File button to upload any files or images in context and then click on the Send Back To Citizen button.
The application is assigned back to the selected assignee for verification of documents and at the same time, the citizen is allowed to edit the application to update the missing details.
To view property details, follow the steps outlined in the to find the property. The search results display the Unique Property ID, Owner, Locality, Application Status, Tax Due and Action details.
Click on the Unique Property ID hyperlink to view the corresponding property details.
The DV verifies and forwards the property applications to the Field Inspector if the DV finds all information and documents provided by the applicant correct.
To verify and forward the application navigate to the Home page. Search for the application you want to verify by entering any of the search parameters. Click on Application No. to open the application. Scroll down the form to review the filled-in details.
Click on the Take Action button available at the bottom of the page. Click on the Verify and Forward button. Select the relevant Assignee Name from the list of available employees for subsequent processing.
Enter any additional information in the Comments field in context to the application for the assignee’s knowledge. Click on Upload Files to upload any supporting documents for the application. Click on the Verify and Forward button.
The property application is assigned to the selected assignee for subsequent processing.
To search for submitted applications or track the status of submitted applications
Navigate to the Property Tax home page. Click on the Search Property link.
Select the Locality. The system displays the registered localities based on the ULB selected at the time of logging in.
Enter any of the following search parameters or combinations to refine the property search - the Owner Mobile No. or the Unique Property ID allotted by the system or the Existing Property ID if there is any legacy ID linked to the property.
Click on the Search button to view the results. Click on the Clear Search button to renew the search with different parameters.
Inbox
UI/UX revamp of employee inbox and service wise separate inboxes.
View Application
UI/ UX revamp of the application details view.
Doc Links
Search Bill
UI/UX revamps of searching a bill and then downloading the bill PDF. Bill amounts can also be collected.
Cancel Bill
UI/UX revamp of cancelling an active bill.
Group Bill
UI/ UX revamp of the grouping and merging of the multiple bills into single PDF.
Group W&S Bills
UI/ UX revamp of grouping and merging of related water and sewerage bill into single PDF.
Download Bill PDF
UI/ UX revamp of download PDF.
Doc Links
Questions
Short Answer
Paragraph
Single Answer
Multiple choice questions
Date
Time
Survey Results
Aggregated view of all survey results in specific charts for each question type
Download the excel report with the survey results
Modify surveys
Survey questions
Extend the Survey date and time.
Link to access service via WhatsApp
Helpline Numbers
Address of Service Centres
Link to navigate to google maps
Static data
Ex. Days to process applications/ Amount to pay while applying etc
Dynamic Data
Number of citizens applied for service in last n months/ Amount collected etc
Download Trade License, Payment & Acknowledgement Receipts online.
ULBwise Application Status


Open link for stakeholder registration flow
Daily collection report
This section contains all docs and information required to understand the Business Licensing module, its key features, functional scope, and configuration details. Click on the links below to learn more about deploying, configuring, customising, and using the business license issuing module.
Navigation Tips
Click on the embedded links within the content to browse topic details
Use the Contents links available on the right side of the screen to move to a specific heading
Find the list of Related Docs links at the bottom of each page to browse through additional product details
The Search Application component is a form-based component, that controls the Table component and the search param for Inbox API, it uses FormComposer HOC to render fields.
Validation of these fields is achieved by using controlled component rules
Any number of search fields can be added but by convention, only mobile numbers and application numbers are provided.
Filters contain input fields to filter the result of API, by sending search params to inbox API.
It contains 3 sections
Assigned to Me/ All - It is a radio component to send the assignedToMe param as true or false.
Locality - Filter result according to the selected locality by sending locality code in module search params in inbox API.
Status - Status filters are achieved by sending the id received from the inbox API response and mapping the name of businessService, status name and count
The table is a react component which uses the React-Table plugin, used in multiple modules
However, in Mobile view are using cards to list all the applications without pagination support.
On Inbox page {env}/inbox/v1/_search?_=1627374959930 is the only API that is called.
API CURL -
This section guides you through the details of using the PT module for each role. Click on the relevant role below to learn more about how to use the PT system.
This section contains all docs and information required to understand the property tax module, its key features, functional scope, and configuration details. Click on the links below to learn more about deploying, configuring, customizing, and using the PT module.
Navigation Tips
Click on the embedded links within the content to browse topic details
Use the Contents links available on the right side of the screen to move to a specific heading
Find the list of Related Docs links at the bottom of each page to browse through additional product details
Result Table uses the Table react component and the result from API is adapted to the table config using a custom hook inside the common parent wrapper and passing the response to individual components.
Search License has a fixed param where the status of the application is “APPROVED”, other than differences in table config
The API end point for searching trade licenses is {env}/tl-services/v1/_search
API CURL -
curl 'https://qa.digit.org/tl-services/v1/_search?tenantId=pb.amritsar&fromDate=1625077800000&toDate=1627410599000&limit=10&sortBy=commencementDate&sortOrder=DESC&status=APPROVED&_=1627375567840' \
-H 'authority: qa.digit.org' \
-H 'sec-ch-ua: " Not;A Brand";v="99", "Google Chrome";v="91", "Chromium";v="91"' \
-H 'accept: application/json, text/plain, */*' \
-H 'dnt: 1' \
-H 'sec-ch-ua-mobile: ?0' \
-H 'user-agent: Mozilla/5.0 (X11; Linux x86_64) AppleWebKit/537.36 (KHTML, like Gecko) Chrome/91.0.4472.114 Safari/537.36' \
-H 'content-type: application/json;charset=UTF-8' \
-H 'origin: https://qa.digit.org' \
-H 'sec-fetch-site: same-origin' \
-H 'sec-fetch-mode: cors' \
-H 'sec-fetch-dest: empty' \
-H 'referer: https://qa.digit.org/digit-ui/employee/tl/search/license' \
-H 'accept-language: en-US,en;q=0.9,hi;q=0.8' \
--data-raw '{"RequestInfo":{"apiId":"Rainmaker","authToken":"18158d2b-0a50-4a60-baa3-a83c157e7aad"}}' \
--compressed


This feature allows the user to renew any trade license applications, which either has been expired or had to be renewed for current financial year (Approved and Paid), it also had integration with the payment component, in order to complete the flow all together for renewal.
Renewal can be two types:
DIRECT RENEWAL
EDIT RENEWAL
Once the user clicks on Renew Trade License button on the home page, it will redirect to the renewal list page which will display all the applications eligible for renewal corresponding to the mobile number on which the user has logged in. It will show the Trade name, License Number, Owner Name and status whether active or expired.
Once the user clicks on Renew Button, it redirects the user to the summary page just like in edit Trade license, with all the values pre-populated from the search API. The info card will be declared so that the user will understand how to proceed with either direct renewal or edit renewal.
If the user just wants to renew the same application without updating any data, it will cross-verify all the values in the summary page and then click on submit button directly at the end of the page, this will lead the application to the next status as pending for payment and user can go through payment flow from the acknowledgement screen also, by clicking on the Make Payment button.
If the user before renewal needs to update the application, they can do so by clicking on the change button on the summary screen, this will tell that the flow has been changed from direct to edit renewal, and the user will need to follow the same apply flow in order to complete the editing part of it. the values from the application will be pre-populated in the respective screens, to get the details about the edit flow, one can refer to this link. .
Once the user clicks on submit button it will change the current action of the application to pending for document verification as the data has been updated.
Renewal Trade main index can be found in the below-given link:
in this, we are calling the trade license search API, In order to get all the applications, through which the sorting is happened to classify which applications are eligible for renewal for the current financial year.
the hook which has been used for the API is:
The data from here then are sorted into the application which doesn’t have any open renewal application for the current financial year or which has a status of approved or expired. the significant method to get the renewal list of applications is mentioned below:
From here the Trade License List Component has been called which displays the list of the renewal application.
The main functionality of converting the License Object received from the API to the object structure for formdata for apply flow, following is done in a similar way as the edit trade, and the same method is being used to convert the response object, to know more details please refer to
Once the user has completed the flow as required or clicked the submit button directly, the method convertToEditTrade is being called, which re-arranges the data for the request body for the updated API /tl-services/v1/_update.
If it is a direct renewal only one update API is being called which updates the financial year only.
but if it is an edit renewal, two updated API is called after the first API successful call the application status gets changed to Initiated but after the second API call it is changed to applied. with the next action pending for document verification.
the code for these can be found in the utils folder index please refer to the below link for the same:
MDMS data which is being used here is the same as the Apply flow only, as the flow structure used for edit renew trade is the same as the Apply for Trade License. Please refer to the link for detailed MDMS information.
For Renew Trade also, the Localization keys are being added in the ‘rainmaker-tl’ locale module. Change, update or add any new localization key will be done in the same locale module only.
Provide employee purpose workflow actions.
The same screen is used for both application details and trade details.
Based on the conditions, we are showing the details here
Example: If the application is not in an approved state and the business Service New TL, then we are showing application details otherwise we are showing trade details.
For workflow action details, please refer to the file below.
File Path:
It is common for all modules, find the path here:
The workflow is the same as Old UI only, please refer to the documentation link below.
This feature allows the user to edit the application already created under their mobile number. After verifying employee can send the application back to the citizen with remarks on any changes that needed to be done, which can be edited by the user using this flow.
On the Application details page, on the employee side, if the application is marked with “Send Back to Citizen”, the edit option will appear dynamically at the end of the application details page, which the user can navigate through my applications.
After this, On clicking the button, the user can edit the trade license details by going through the Create Flow again. First, it will land on the Summary page, where for each section “change” button is there. Clicking on the Change button, the user will be redirected to the particular content, the only exception here will be the values will be pre-populated from the License object received from Trade License Search API, on completing the flow, Update API will be called and License application will get successfully updated.
Edit Trade License main index can be found in the link given below:
Here the main code consists of the function which results in transforming the License object received in Search API to the object structure which is suitable for citizen Apply flow (owner details, units, accessories etc), as the user needs to go through Apply flow again with pre-populated details and update the value of any accordingly. it also consists of the routing for the pages in the Apply flow.
getTradeEditDetails() function is being used so that the License object which is received from the Trade Search API, is converted to the Apply flow relevant structure so that the values can be pre-populated for the user convenience, on completing the flow, the application is updated. The link for the same can be found below:
User can delete and add as many accessory or units as it needs but there should be at least one unit to complete the application, to add a new unit or accessory “Add” button is used which is located at the end of the page. A new array is formed with all the updated details or with the old unit/accessory, when the flow is completed, this new array is then compared with the old array of accessories and units, and a new resulting array object is formed for the request body, you can find the respective code in the following method : gettradeupdateaccessories & gettradeupdateunits. this can be found in the below link
Similarly, for owners the method which is used to form the new request param array is gettradeownerarray
It is similar to Accessories and Units - the only difference is in UI. Users can’t select multiple owners and only add one owner, it needs to either add more than one owner or select a single owner in the ownership category and proceed. After the successful update, the application's next action will be “Pending for document verification” as there is an update in the data.
On completing the flow, the same object structure which was being used earlier in the flow gets changed into the request body structure for the update API: /tl-services/v1/_update, for this, the method which gets used is declared inside the Utils folder. Method name: convertToResubmitTrade and it can be found in the below link:
MDMS data that is being used here is the same as the Apply flow only, as the flow structure used for edit trade is the same as the Apply for Trade License. Please refer to the link for detailed MDMS information.
For Edit Trade also, the localisation keys are added to the ‘rainmaker-tl’ locale module. Change, update or add any new localization key is done in the same locale module only.
The amalgamation process is a service requiring the owner(s) to apply. A single application should include the details of all the properties and the necessary supporting documents. No application or processing fee is required for the amalgamation of properties.
Note: Users can search and pay the property taxes without even logging in to the application.
Citizens access the citizen portal via the ULB portal and land on the home page displayed below. Click on the Search and Pay option on the property tax panel to search for a property and pay the property tax dues.
Select one of the options on the screen to find the relevant property details -
I know my property ID - Select the City (mandatory) and input at least one of the 3 given parameters listed below -
Owner’s Mobile Number
Unique Property ID
I want to search using property details - Select the City (mandatory) and the Locality (mandatory). Enter at least one of the 2 given parameters listed below -
Door No.
Owner Name
Click on the Search button to fetch the list of the filtered properties. Click on the View Details & Pay button to see the tax details of the selected property and proceed with payment.
Verify the tax details displayed on the screen. Select Full Amount (the default option) to pay the full tax amount. Otherwise, select the Custom Amount option to make a partial payment. Enter the Amount you are going to pay. Click on Proceed To Pay.
To collect the property tax, follow the steps outlined in Search Property to find the property. The search results display the property's Unique Property ID, Owner, Locality, Application Status, and Tax Due details.
Click on the Collect Tax hyperlink in the Action column for the specified property.
Verify the bill details. Click on Collect Payment to process the payment.
Citizens or CE can register new property details through the DIGIT web portal or the DIGIT mobile app.
To register a new property click on the Property Tax panel on the home page.
Click on the New Property Registration option on the panel. The new property application form page contains various sections that include Location Details Property Assessment Details, and Ownership Details Document Required.
On the Location Details page enter the Pincode, City, Locality/Mohalla, Street Name, and Door/House No.
On the Property Assessment Details form enter the Property Usage Type, Property Type, and Plot Size details.
Enter the Floor/Unit details based on the selected Property Type. Select Floor, Usage Type, Occupancy, and Built-Up Area (sq ft) details. Click on the Add One More Unit option to add more unit details.
In the Ownership Details section, enter the owner's Name, Gender, Mobile Number, Guardian Name, Relationship, Special Category, Email, Correspondence Address, and Firm/Business Name.
In the Documents Required section upload the relevant documents for Usage Proof, Construction Proof, Occupancy Proof, Address Proof, Identity Proof, and Registration Proof.
Click on the Submit button once all the details are entered and documents uploaded. The application is submitted and the New Property Successfully Added acknowledgement message appears on the screen along with the Application Number and the Property ID details.
Click on the Download or the Print button on top of the page to download or print the application.
The update mobile number feature allows citizens and ULBs to change the existing mobile numbers to current numbers. The details are updated accordingly in the property owner records. Citizens can update their mobile numbers in the property details through an OTP validation.
Click on the My Properties option on the homepage.
Search for the relevant property using search filters. Click on the View Details button for the applicable property.
Click on the Edit icon next to the mobile number on the Property Ownership Details page.
Enter the New Mobile Number on the screen. Click on the Send OTP button.
Enter the OTP received on the given mobile number and then click on the Verify & Update Mobile Number button. In case of a wrong OTP entry, click on the Resend OTP button.
Refresh the Property Details page. The mobile number is updated.
FI sends back the applications to the citizens if some vital information is missing in the application or there is a mistake in the information provided.
To send applications back to the citizen navigate to the Home page. Search for the application you want to verify by entering any of the search parameters. Click on Application No. to open the application. Scroll down the form to review the filled in details.
Click on the Take Action button available at the bottom of the page. Click on the Send Back to Citizen button. Enter any Comments stating why the application is sent back.
Click on the Choose Files button to upload any files or images in context to the application. Click on the Send Back to Citizen button.
The system displays a success acknowledgement message stating that the application is sent back to the initiator.
DIGIT Urban 2.9 release has a new following features:
DIGIT Urban 2.9 Beta Features
DIGIT as a Service
Bug Fixes
The trade license 'apply' is the major feature in TL Module. It allows Citizens or Counter Employees to create TL Applications for the current financial year.
Every application is a part of the workflow. Once the user login with TL_CEMP role, then the User will get the option for creating a New TL Application in the TL card as well as in the inbox.
The PT module allows users to transfer the ownership of property.
To transfer the ownership of a property, search and open the property details page. Scroll down the page and click on the Take Action button. Click on the Transfer Property option.
Note the required documents for ownership transfer listed in the Required Documents - Transfer of Ownership screen.
Click on the Transfer Ownership button to proceed.
The Transferor Details page in the Transfer of Ownership form displays the current owner details.
Enter the following details in the Transferee Details
Users can review the list of applications and their status registered under their mobile numbers in the My Applications tab. Each Application for the initial view displays the Application No, Service Category, Owner Name (Multiple with a comma), status, SLA, and Trade Name with the View Details option. If the status is pending for payment the View Details & Pay button is available that enables the users to look up more details about the application.
Once the user clicks on the View Details or View Details & Pay button, the Application Details Page is displayed with all the necessary information about the application.
A property can be transferred from person to person or from organization to organization or from organization to person or vice versa. The transfer can be due to the property sale, gift, will, succession etc. Whenever such transfers happen the transferee is required to get the ownership change done in the municipal records.
Listed properties are assessed based on the changes to calculate the property tax amount.
To assess properties, find the property for assessment. Open the property details page and scroll down to click on the Take Action button. Click on the Assess Property option.
Select the relevant Financial Year in the pop-up window and then click on the Assess Property button.
The property tax assessment estimate details are displayed on the page. Click on the Assess Property button after reviewing the details.
The assessment is completed successfully. Click on the Proceed to Payment button to pay the property tax.
The Approver signs off the PT application once the information and documents provided by the applicant are found correct.
To approve the application navigate to the Home page. Search for the application you want to verify by entering any of the search parameters. Click on Application No. to open the application. Scroll down the form to review the filled-in details.
Click on the Take Action button available at the bottom of the page. Click on the Approve button.
Enter any additional information in the Comments field in context to the application for the assignee’s knowledge. Click on Choose Files to upload any supporting documents for the application. Click on the Approve button.
The property application is approved.
curl 'https://qa.digit.org/inbox/v1/_search?_=1627374959930' \
-H 'authority: qa.digit.org' \
-H 'sec-ch-ua: " Not;A Brand";v="99", "Google Chrome";v="91", "Chromium";v="91"' \
-H 'accept: application/json, text/plain, */*' \
-H 'dnt: 1' \
-H 'sec-ch-ua-mobile: ?0' \
-H 'user-agent: Mozilla/5.0 (X11; Linux x86_64) AppleWebKit/537.36 (KHTML, like Gecko) Chrome/91.0.4472.114 Safari/537.36' \
-H 'content-type: application/json;charset=UTF-8' \
-H 'origin: https://qa.digit.org' \
-H 'sec-fetch-site: same-origin' \
-H 'sec-fetch-mode: cors' \
-H 'sec-fetch-dest: empty' \
-H 'referer: https://qa.digit.org/digit-ui/employee/tl/inbox' \
-H 'accept-language: en-US,en;q=0.9,hi;q=0.8' \
--data-raw '{"inbox":{"tenantId":"pb.amritsar","processSearchCriteria":{"moduleName":"tl-services","businessService":["NewTL","DIRECTRENEWAL","EDITRENEWAL"]},"moduleSearchCriteria":{"sortBy":"applicationDate","sortOrder":"ASC"},"limit":10,"offset":0},"RequestInfo":{"apiId":"Rainmaker","authToken":"18158d2b-0a50-4a60-baa3-a83c157e7aad","userInfo":{"id":12032,"uuid":"4dc1010d-4b31-4b31-a596-cec2986ac04c","userName":"QATLA","name":"Sham","mobileNumber":"9999999934","emailId":null,"locale":null,"type":"EMPLOYEE","roles":[{"name":"TL Approver","code":"TL_APPROVER","tenantId":"pb.amritsar"}],"active":true,"tenantId":"pb.amritsar","permanentCity":null}}}' \
--compressedProperty Tax
Manage property database
Register property
Transfer property ownership
Amalgamate properties
Assess and pay property tax


Citizen Users
Apply for a new trade licence or renew an existing trade licence
Upload all the relevant documents required for the licence
Make payment for the Trade Licence (New/Renewal) fee using the online payment gateway
Receive notifications and alerts by email or SMS for new application status updates and pending renewals
Download Trade Licence, Payment & Acknowledgement Receipts online
Employee Users
Create flexible role-based workflows
Configure license fee calculation logic
View custom dashboards for module statistics
Filter search results using advanced configurable search parameters


EMPLOYEE
1730
4
/tl-services/v1/_search
EMPLOYEE, TL_APPROVER, TL_CEMP
1687
5
/egov-hrms/employees/_search
TL_APPROVER, TL_CEMP, EMPLOYEE, TL_DOC_VERIFIER, TL_FIELD_INSPECTOR
1752
1
egov-mdms-service/v1/_search
CR_PT
954
2
/tl-services/v1/_update
TL_APPROVER, TL_CEMP, EMPLOYEE, TL_DOC_VERIFIER, TL_FIELD_INSPECTOR
2029
3
/egov-workflow-v2/egov-wf/process/_search
Step 7: Upload the required documents to process the merge application.
Step 8: Review the application details before clicking on the Submit Application button.
Step 9: The application is submitted successfully. Note the acknowledgement reference number. You can also Download Acknowledgement Form.
Step 1: Select the Amalgamate Property option.
Step 2: Select a property to merge.
Step 3: Check the property registration documents list.
Step 4: The retaining property address and ownership details are displayed on the application.
Step 5: Select the property to be merged.
Step 6: Review the two selected property details
Existing Property ID
Select the applicable option on the Payer's Details page.
In case the payment is being made on behalf of the owner/consumer of the service, enter the Payer's Mobile Number and Payer's Name. Click on the Next button to proceed with the payment.
Select Payment Method as appropriate and then click on Pay.
According to the response received from the payment gateway the success/failure message is displayed. Click on the Download/View Receipt button to download the payment receipt.
Click on the Go back to home page link to navigate to the home page.
Upgrade of UPYOG with Beta features
15/05/2023
Pradeep Kumar
Session with NUDM team on Central Instance
31/07/2023
Ajay Rawat
Getting approval from partners for UPYOG upgrade with DIGIT as a Service
In Progress
Ajay Rawat
Effort Estimate for Upgrade created
Done
Vinoth
Gate 2
In Progress
The NUDM Team has shared the following requirements for upgrading UPYOG with the Central Instance:
*Conditions for Upgrading UPYOG with Central Instance
Role & Access Management at Cluster Level so that each State SI can do its scope of work
Role & Access Management at Logs Level so that each State SI can do its scope of work
Role & Access Management at Elastic Search & Kibana Level so that each State SI can do its scope of work
Enhancement & verification of Product default Kafka with more nodes, partitions, etc so that it sustains and performs for National Level traffic
Enhancement & verification of Product default ElasticSearch with more nodes, shards, etc so that it sustains and performs for National Level traffic
Availability of all States data in its DB schemas and the same should apply with ElasticSearch
Other enhancements so that the State Infra & DevOps team can manage their resources independently.
Citizen Feedback
No. of states adopting feature and sharing data with National Dashboard
At least 2 states to implement the feature under NUDM in next 6 months
Consent form
Compliance to NUIS Assessment
Compliance report already shared post release of feature
Dashboard KPIs
No. of states sharing data on new KPIs
Citizen Feedback feature to be implemented in states, for KPIs to start reflecting data. 2+ states to implement the feature and share data on the KPIs
Citizen Feedback
Improvement in Citizen Satisfaction
Improvement in Metrics by 20% in first 3 years in state using the feature
Consent form
Compliance to NUIS Assessment
Compliance report already shared post release of feature
Dashboard KPIs
Improvement in Citizen Satisfaction
Improvement in Metrics by 20% in first 3 years in state using the KPIs
1
TC1
Goods
सामग्री
2
TC2
Services
सर्विस
The table above contains sample Trade Category data.
1
Trade Category Code
Alphameric
64
Yes
The Code assigned to the Trade Category. Eg: TC1 For Goods, TC2 for Services
2
Download the data template attached to this page.
Refer to the ‘Data Definition’ section of this document to learn more about the template sheet, data type, size, and definitions.
Enter a unique Trade Category Code for each trade head.
Enter the Trade Category Name. Some trade categories are already defined in the master. Add new categories as required.
Enter the Trade Category Name (Local Language).
The checklist contains a set of activities to be performed once the data is filled into a template to ensure data entry requirements are met. These activities have been divided into 2 groups as given below.
This checklist covers all the activities which are common across the entities.
1
Make sure that each and every point in this reference list has been taken care of
This checklist covers the activities which are specific to the entity.
1
The format of the Trade Category Code defined should be alphanumeric and unique
TC1: Goods
TC2: Services
2
Trade Category Name (In either Language) should not contain any special characters
Goods: [Allowed]
#Goods! : [Not allowed]
1
IMMOVABLE
Immovable
अचल
2
MOVABLE
Movable
चल
The table above contains sample data.
1
Code
Alphanumeric
64
Yes
Unique code to identify the records uniquely
2
Download the data template attached to this page.
Refer to the ‘Data Definition’ section of this document for more details on data type, size, and definitions.
Contact the person who shared this template with you to discuss and clear your doubts.
Enter the relevant structure types.
Verify the data once again by going through the checklist and making sure that each and every point mentioned in the checklist is covered.
The checklist is a set of activities to be performed once the data is filled into a template to ensure data type, size, and format of data is as per specifications. These activities have been divided into 2 groups as given below.
This checklist covers all the activities which are common across the entities.
1
Make sure that each and every point in this reference list has been taken care of
A separate entity-specific checklist is not needed for this entity data template.
Clicking on New Application navigates to the New Trade License Application screen.
Route: mSeva
Initial MDMS call is being made on page load like old UI.
Structure Type and Sub Structure Type field data is fetched from egov-mdms-data/StructureType.json at master · egovernments/egov-mdms-data
Trade Category, Trade Type, Trade Sub Type field data is fetched from egov-mdms-data/TradeType.json at master · egovernments/egov-mdms-data
Mohalla Data - egov-mdms-data/boundary-data.json at master · egovernments/egov-mdms-data (For Amritsar)
Type of Ownership and Type of Sub ownership - egov-mdms-data/OwnerShipCategory.json at master · egovernments/egov-mdms-data egov-mdms-data/OwnerType.json at master · egovernments/egov-mdms-data
Data fetch, load and render
Clicking on Submit button, tl-services/v1/_create api is called and create the application, after getting success response, we are calling update API tl-services/v1/_update.
On loading the page, /tl-calculator/billingslab/_search api is called for showing the licence type (File Path: digit-ui-internals/TLTradeDetailsEmployee.js at main · egovernments/digit-ui-internals ) and accessories options (File Path: digit-ui-internals/TLAccessoriesEmployee.js at main · egovernments/digit-ui-internals ).
Acknowledgement Screen
After the success of creating and updating calls will route to the acknowledgement screen.
1
/egov-mdms-service/v1/_search
TL_CEMP
954
2
/tl-services/v1/_create
TL_CEMP
1685
3
Provide Ownership Details - select the ownership type
Enter owner Name - the name of the transferee
Select the Gender of the transferee
Enter the Mobile No. of the transferee
Enter the Guardian’s Name of the transferee
Enter a Relationship with Guardian of the transferee
Enter the Email address of the transferee
Select the applicable Special Applicant Category
Enter the Correspondence Address of the transferee
Select the Yes or No option to answer the question Is Mutation Pending in Court? If yes, enter the Details of Court Case.
Select the Yes or No option to answer the question Is Property or part of property under state/central government acquisition? If yes, enter the Detail of government acquisition.
On the Registration Details page provide the following questions:
Reason for Property Transfer
Property Market Value
Registration Document Value
Registration Document Issue Date
Remarks
Click on the Next Step button to proceed to the Document Upload section.
Select the type of document that will be uploaded for Address Proof, Identity Proof, and Registration Proof.
Click on the Next Step button to move to the Summary section. Click on the Submit button once all details are reviewed. The system displays the application success message. Click on the Download Acknowledgement button to download a PDF version of the acknowledgement.
Click on the Go back to home page button to navigate back to the home page.
If the status is Pending for Payment for the application or Action required by a citizen (discussed elaborately here), a button will be visible to pay or edit at the end of the page respectively. On clicking on the Make Payment button it will redirect to the common pay screen through which the user can make the payment.
Timeline Component - timeline component is present at the end of the application details which tells about the current status and history of the application being initiated, Applied, Pending for Document Verification, Pending for Field Inspection, Pending approval, Pending payment, Approved etc.
The link for the Applications and Application Details main code is given below, it can be used to understand the working of the code, Below is the folder link.
The template for My Application List is present under https://github.com/egovernments/digit-ui-internals/blob/main/packages/modules/tl/src/pages/citizen/Applications/Application.js and Application Details page is present inside - https://github.com/egovernments/digit-ui-internals/blob/main/packages/modules/tl/src/pages/citizen/Applications/ApplicationDetails.js .
All the Application lists are retrieved by calling the search API "/tl-services/v1/_search". If the view is set as “bills”, all the application is loaded using the hook useFetchBill which calls the /billing-service/bill/v2/_fetchbill API. SLA value in the Application List Screen is calculated from the data received from workflow API : /egov-workflow-v2/egov-wf/process/_search
Following is the hook used for the trade search API.
To get the Application details in key-value format, in order to make it more compatible, the following hook is being used, which is a common service to be used across modules.
No MDMS data is being used here, all the data is being loaded from Search API/Fetch Bill API.
For My Applications also the localization keys are added in the ‘rainmaker-tl’ locale module same as other parts of the TL module. Change, update or add any new localization key is done in the same locale module only.
Enter Transferee Details. For the Provide Ownership Details section, select the applicable option to indicate the type of ownership.
In the Owner Details screen enter the owner's Name, Gender, Mobile Number, Guardian and Relationship (relationship with the guardian) information.
Select the applicable option in the Special Owner Category screen.
Enter the correspondence address of the transferee in the Owner’s Address screen. Checkmark the Same As Property Address box if both addresses are the same.
Select the applicable Document Type in the Proof Of Identity screen. Click on Choose File button to attach the scanned copy of the document chosen above.
Select Yes or No to answer the question Is Mutation Pending In Court? If yes, enter the Details of Court Case.
Select the applicable Reason for Property Transfer.
Enter the Property Market Value.
Enter the Registration Document No., the Registration Document Value, and the Registration Document Issue Date in the Registration Document Details screen.
Enter any additional Remarks (if required).
In the Registration Document Details screen, select the applicable Document Type. Click on the Choose File button to attach and upload the scanned copy of the selected document. Click on Next. The application is submitted and a success message is displayed.
Click on the Download Acknowledgement Form button to download the acknowledgement form.
To apply for a transfer of property ownership, click on the Transfer Property Ownership/Mutation option on the home page.
This redirects users to the Search Property screen. Enter the required parameters to search for the property.
Click on the Transfer Ownership button.
The Required Documents - Transfer of Ownership provides the list of documents required for the application. Make sure these documents are scanned before proceeding with the application.
The Transferor Details show the current ownership details. Click on the Next button to proceed.


01 - Accelerated Reforms
The Local Governance transforms the way governments deliver public services.
By establishing a digital public infrastructure (DPI), multiple states have built capacity, removed administrative burdens, and improved governance, enabling faster, better, and cheaper delivery of public services.
Governments face multiple challenges in transformation initiatives, including capacity issues, emergent needs and behaviours, and variance in context and requirements at different scales.
DIGIT was designed from the ground up to address such challenges and has evolved over multiple years of implementation to solve for accelerated reforms.
02 - Trustworthy Data For Effective Decision Making
Timely and trustworthy data for effective decision-making at different administrative levels and to fix accountability. DIGIT Local Governance comes ready with data dashboards to enable decision-making at all levels of government, right from administrators to frontline workers.
DIGIT makes possible:
interoperability
Easy sharing of data
Single source of truth
03 - Improved Productivity & Faster Adoption
Reduce overheads for technology teams and learning curve for the final product users.
Single login for multiple applications and a standardised user interface make adoption quicker and easier. Role-based access takes away the overheads of multiple environments for different systems and multiple user accounts for each system.
For employees, it removes having to do tedious, repetitive tasks by automating processes, improving productivity, and allowing them to focus on more meaningful aspects of their jobs.
04 - Sustainable Impact At Scale & Speed
Scalability is at the core of the DIGIT platform. It has been deployed as a digital public infrastructure serving large-scale sub-national and national populations.
What makes it possible? A technologically robust platform with open and freely available specifications and standardised APIs that have proven its performance at massive deployments at the population scale.
DIGIT's source code is open source, data is stored in shared registries and data stores are owned by the government, mitigating the risks associated with vendor lock-ins, and allowing digital transformation initiatives to move ahead with speed at scale.
05 - Enhanced Citizen Access To Public Services
Local Governance solutions built on DIGIT can be accessed by multiple channels. So that, services can be delivered to citizens via mobile, web, WhatsApp, chatbots, through intermediaries or over the counter in physical offices. All are seamlessly connected.
It comes ready with a well-defined design system with a standardised user interface that has been created considering the realities of population-scale digital products. The user interface is straightforward and minimal. It follows a guided approach for citizens using these digital products.
06 - Quick Development, Easy Deployment
All products on DIGIT are designed to be configured, customised, and extended to suit the needs of the local context. These changes can be made at different levels of government.
A federated architecture supports the different realities of each unit of governance.
A set of reusable building blocks can be leveraged by market players to build products and services rapidly. Well-defined specifications, documentation, guides, and training materials make deployment quick and easy for teams. Thus, making it possible to build products for different programs and services, urgent needs and take them to the ground as fast as possible.
07 - Strong Network Of Trusted System Integrators
The DIGIT team works actively with partners and has created a robust ecosystem of application developers and system integrators who are trained and certified in DIGIT.
Open training sessions on design, development, deployment and implementation are held regularly. In addition to that, DIGIT provides certifications to trained personnel.
08 - Continued Platform Support
For governments using DIGIT as their technology platform, the DIGIT team offers:
Advisory support in vendor selection
Product design review, architecture design review
Enablement of system integrators selected by the government
9 - Designed For Global Challenges, Recognised Globally
DIGIT has the capabilities needed to rapidly develop digital applications to address global development challenges. From its origin in solving for urban governance, the platform has rapidly evolved to address challenges in areas of sanitation, public health welfare, public finance, rural governance and legal case management among others.
DIGIT is certified as a Digital Public Good (DPG) by the Digital Public Goods Alliance (DPGA). The DIGIT team sits on the technical advisory committee of the Govstack that works to identify and support the advancement of digital public goods with relevance to the whole of the government transformation approach.
The page assumes that the deployment of the central instance will happen in a Kubernetes-based environment independent of whether it’s a cloud-based or a bare metal deployment with a Kubernetes-based orchestrator. This page lists all types of services available in a DIGIT SAAS package and the steps to deploy, implement, and add a new service.
Namespace/deployment-space - refers to the Kubernetes namespace or the equivalent by establishing access restrictions.
State/Tenant - A state is a separate entity whose applications and data are separated from the rest by namespaces and schemas in the database.
Backbone Services - The backbone services include Kafka, Redis, and Elastic stack. The number of deployments and the namespace where the services will be deployed are taken care of by the deployment manager itself.
State Deployment space - Namespace - In DIGIT SAAS, the private application/deployment space (namespace in K8s & schema in DB) is provided for different tenants (states) when they onboard, the steps to create and provide the same are mentioned in the following document.
Central/Shared Services - In DIGIT SAAS, each new tenant is given a separate namespace, but most use some unmodified out-of-box services provided by DIGIT deployed in a shared space known as the central namespace. These sets of services include some of DIGIT’s core services and registries. Among the services mentioned some can never be modified by the state (tenant) actors and some can be modified. In case of any modification, the services should be deployed in their own space.
The above-mentioned services cannot be modified by the state actors and should only be deployed in the central/shared namespace.
The services that are by default deployed and run in the state namespaces whether there are modifications or not. Since they have functionalities that are directly related to the specific requirement of the state.
These services can be divided into multiple categories -
The DIGIT applications require different types of config setup, they are as follows the MDMS data, persister, indexer, pdf, report, searcher and internal gateway.
The MDMS data is required for the Master data management service to supply the data required by other modules to perform their basic validation and verify the validity of the data. The prescribed format of the same can be found in the application setup. Since the application is deployed in all the namespaces central and state. Each deployment will need its own GitHub repo.
Central MDMS - central MDMS repo
State 1 MDMS - state1 MDMS repo
The persister and indexer configuration for all states should be added in a single GitHub repo in the same branch. Since both applications run in a single place. Each state deployment will have to modify their KAFKA topic names with a prefix of their state schema name.
The pdf configs have to be added in a separate repository since the format of pdfs printed will change with each different tenant.
The configs of report and searcher have to be added in the same GIT repo and same branches as the persister and indexer. The additional change that needs to be done here is that their URL should be appended with state schema names like the topic names with persister config.
The internal gateway config should be added to the since the app is deployed in the central namespace.
The development of any service in DIGIT should be based on this development guide.
The following library versions are a minimum requirement before any service can be made central instance compatible.
Changes to pom.xml
Add Tracer 2.1.1 and above
Services-common 1.1.0 and above
MDMS-Client 0.0.4 and above
ENC-Client 2.04 and above
The following document helps to make multi-environment applications (Services which will run in the DIGIT namespace but store their data in state-specific namespaces of DB based on tenant-id) central instance compatible. These services include the likes of -
Billing-service
Collection-service
workflow-service
egov-apportion-service
Any service that needs to share its data among multiple DB schemas can be added to the above category.
Certain services in the Central-instance will only be deployed in the central (DIGIT) namespace but their data needs to be stored in different schema belonging to different state namespaces. The migrations of foretold services need to be run in all Required schemas (for instance: namespaces that want to make use of the centrally deployed services). To enable the above functionality the following changes are required.
Migrate.sh
This file is needed for building migration docker image is located in the DB folder of resources. eg: . Update the file with the following contents:
values.yml
The DB configuration is by default provided in the common file in the helm chart and need not be edited in normal scenarios. Since we are injecting the multiple schema list for app-specific purposes all the DB-migration ENV variables should be overridden in the app-specific values.yml file.
#Values.yml of the specific service before multiple schema changes
#Values.yml of the specific service after multiple schema changes.
- the full updated sample file can be found here
Only the - name: SCHEMA_NAME variable needs to be added and other fields can be copied from the common as it is without any changes. The above file contains an if-else condition with two new variables
The "property-ismultischema-enabled" Boolean value to check if the feature is enabled and "property-schemas" to derive the value from respective environments YAML. This example of two variables should be named differently based on service-name to avoid conflicts.
Environments.yml
In the respective environment’s file add the two new variables, one for the if condition and the other field for actual values under the respective service names. Lines 6 and 7 are the sample values provided here.
eg :
Any services that could potentially be commonly used by all environments in the central instance (refer to for details).
Application.properties variables to be added.
state.level.tenantid.length=2 State-level tenant value will be picked from the full tenant-id separated by the '.' dot. once the tenant-id is separated by a dot the resulting array of sizes given above will be considered state level.
is.environment.central.instance=true
Declares whether the environment in which the service is deployed belongs to a central-instance kind of setup.
The both above said variable has to be overridden in the values YAML file of the respective service to pick up the values from the environment.
The host of the state-specific services referred by this service should be changed to the internal gateway host for tenant-based(namespace) redirection.
file to refer to the above-said changes
If this service allows the search of data without tenant-id then the following validation should be added to all the search APIs belonging to the service. searches without state-level tenant-id (as described by this variable - state.level.tenantid.length) will render the application useless, so the following is mandatory
Update the Kafka producer in the service with the following code to enable the service to post to a tenant (namespace) specific topic based on the tenant-id.
Replace all the table names in the queries present with the {schema} placeholder
Add the following Schema replacer utility method and use the same to replace all queries with the respective schema.
Change the persister config to alter the Kafka topic names for the configs belonging to your respective multi-schema service. The Kafka topic name should be appended with the schema name of the respective state schema.
Whether a service is going to be deployed in a central instance or not, it should follow and integrate with the central instance util library of common services.
Refer to the common update document .
Make use of centralInstanceUtil class to perform any tenantId manipulations. Manual manipulation of tenantId is to be avoided for common purposes like getting state-level tenantId, and state-specific Kafka topics. Read the following methods from MultiStateInstanceUtil class found in the common-services package and make use of them as mentioned in the document.
New environment variables are to be added mandatorily for environments.
The environment should be set to false when the current server is not for multi-state(non-central-instance), disabling and enabling this make the methods in the multiStateUtil class behave as required.
The state-level tenant length describes what part of the whole tenantId represents the state part. for eg: in tenantId “in.statea.tenantx”. in.statea represents the state part so the value will be 2.
The schema index position points to the substring of the tenantId whose value represents the schema name of the database for the given state.
Citizens or CEs can apply for a new trade licence through the DIGIT web portal or the DIGIT mobile app. To apply for a new trade licence click on the Trade Licence card available in the Citizen Services section of the DIGIT home page.
Click on Apply for Trade License.
The initial application screen displays the list of documents that have to be submitted for trade license registration. Scroll through the list and make sure the required documents are scanned and ready for submission online.
Enter the Trade Name. Click on the Next button.
Click on the Yes or No option to indicate the Structure Type of the trading premises. Yes to indicate the trade will run on an immovable structure. And, No to indicate the trade will run on a movable structure.
This section illustrates the steps for different employee user roles at the ULB level
The citizen can approach the Counter Employee (CE) to register new properties, update property details, apply for title transfer or pay property tax.
The CE can
DV is responsible for verifying the supporting documents uploaded by the property applicants or the counter-employee on behalf of the applicants.
The DV can
FI is responsible for inspecting and verifying the field details of the property in the application.
The FI can
The Approver is responsible for the final approval of the PT application.
The Approver can
This page provides configuration details for PT master data templates
DIGIT Property Tax facilitates ULBs and citizens to automate the assessment/ re-assessment of property tax for a property and its demand billing and collection. It also enables the ULBs and citizens to process the transfer of title of a property in case of a sale, gift or will and captures the ownership history.
The main features of the product are given below.
Completely automated assessment and re-assessment of property tax against a property.
Online self-assessment process
Integrated workflow for ULB staff to perform the check and approve.
Receipt Register
Cancelled Receipt Register
Demand Register
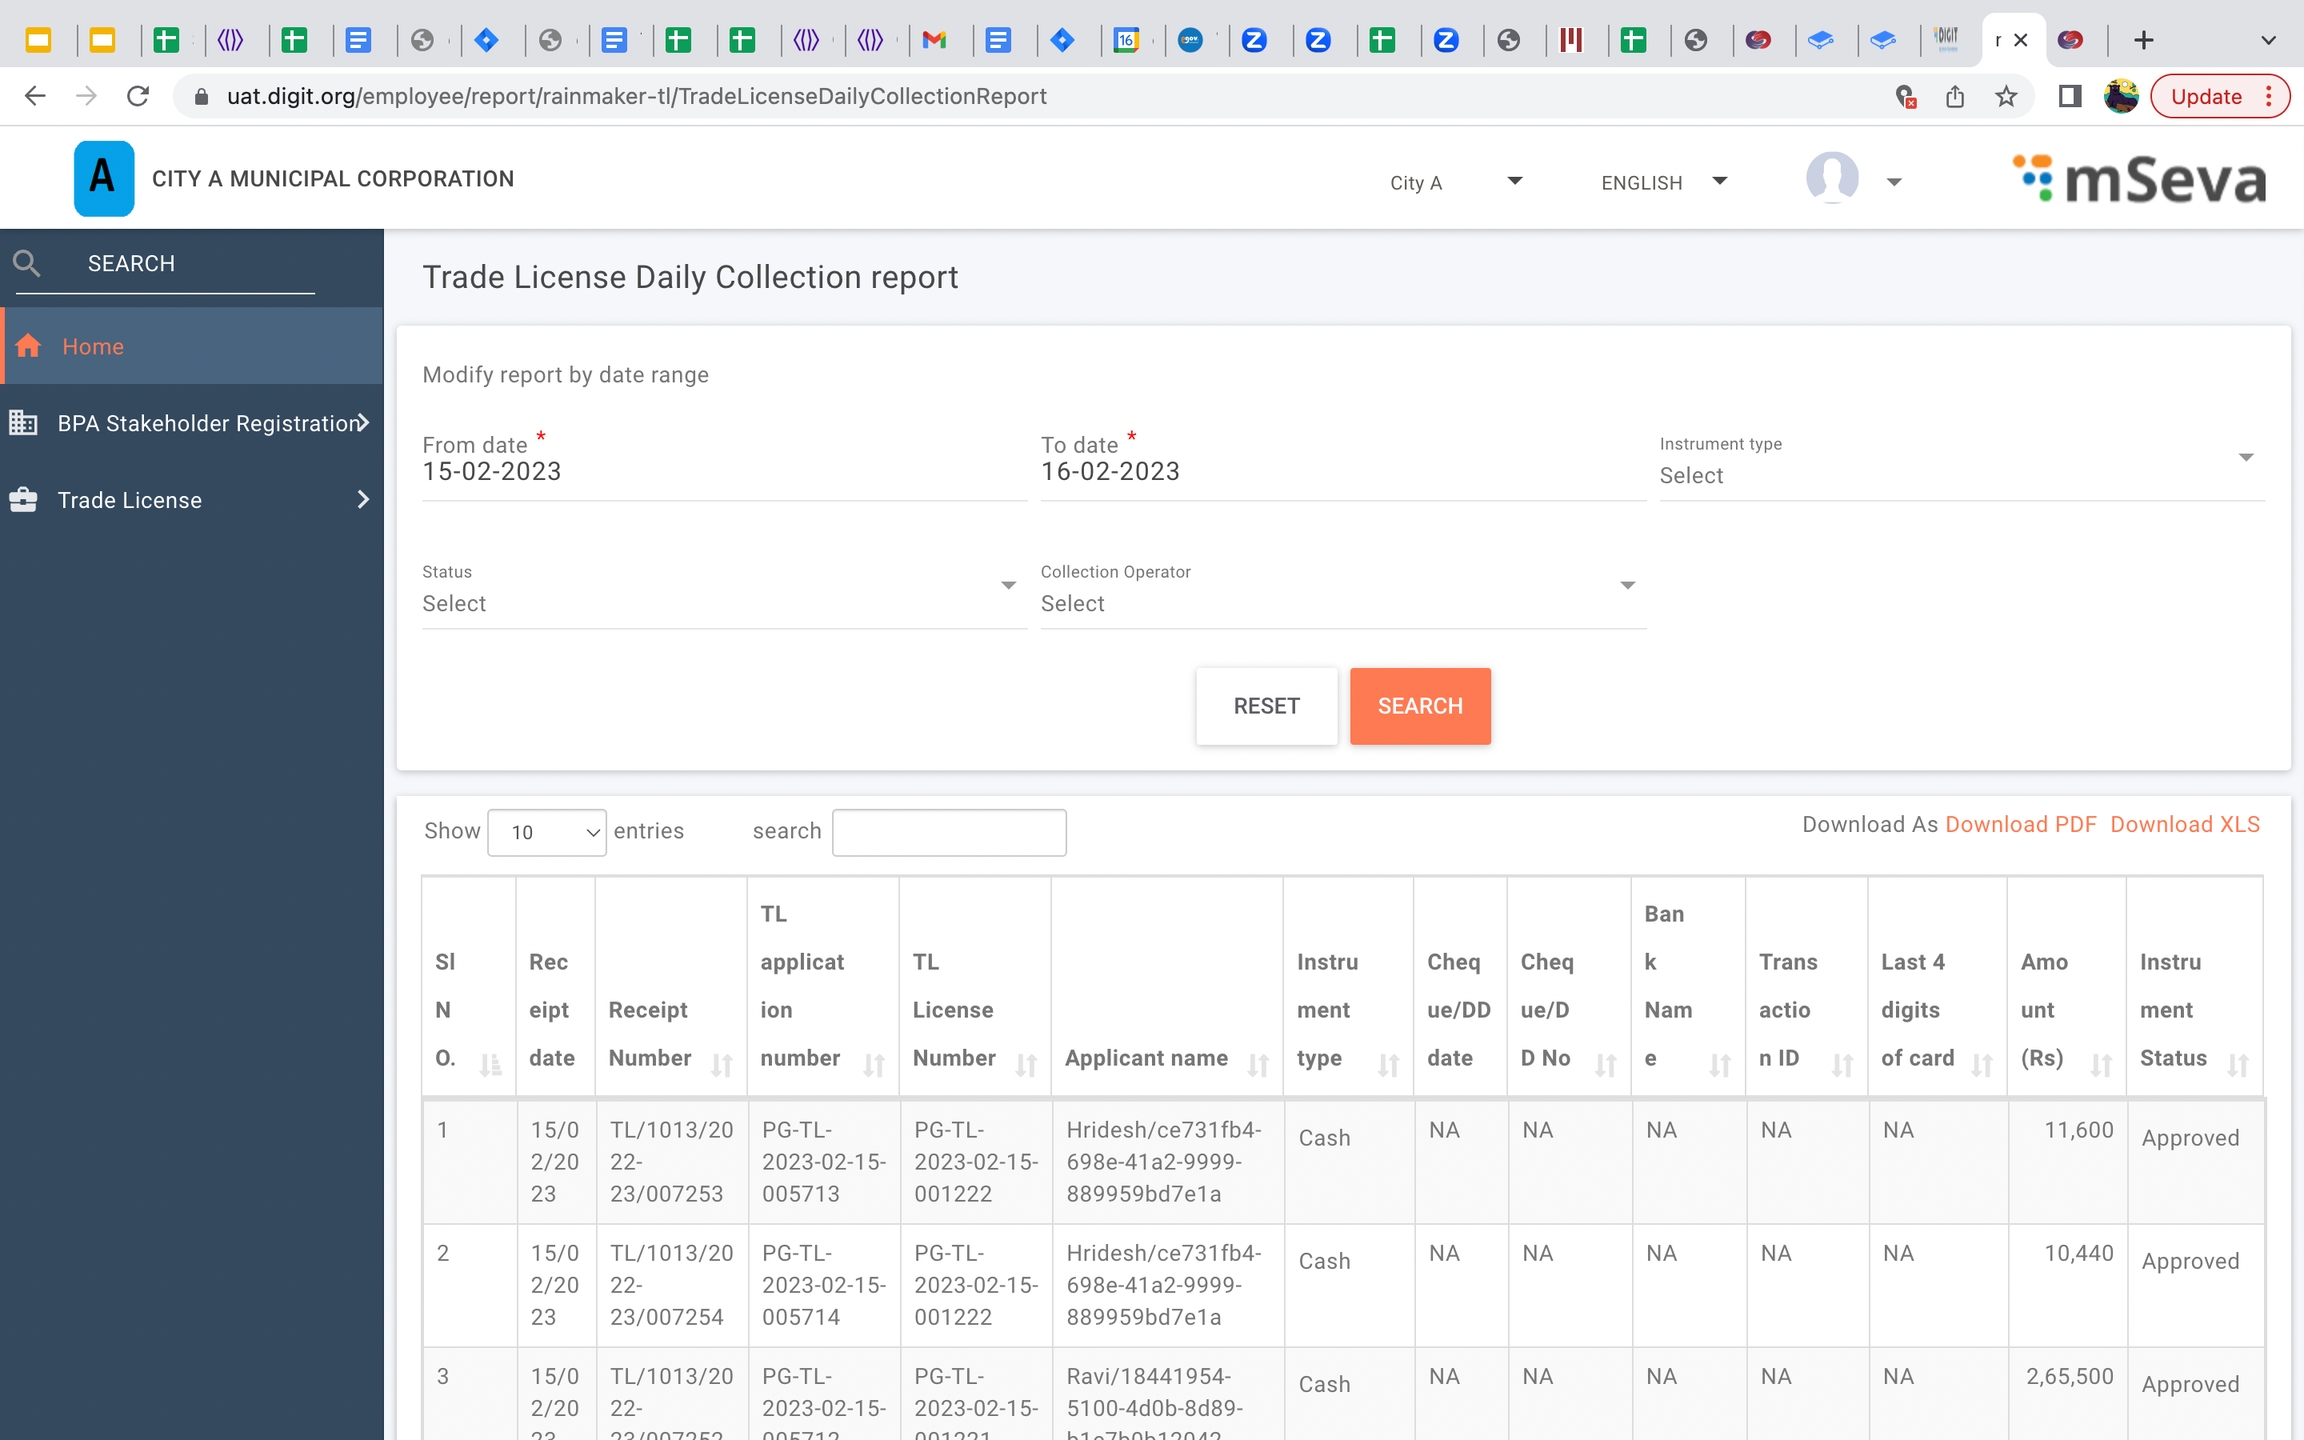
const { isLoading, isError, data, error, ...rest } = view === "bills" ? Digit.Hooks.tl.useFetchBill(
{
params: { businessService: "TL", tenantId, mobileNumber },
config: { enabled: view === "bills" }
}
) : Digit.Hooks.tl.useTLSearchApplication({}, {
enabled: view !== "bills"
}); const { isLoading, isError, error, data: application, error: errorApplication } = Digit.Hooks.tl.useTLApplicationDetails({
tenantId: tenantId,
applicationNumber: id,
});const { isLoading, isError, error, data } = Digit.Hooks.tl.useTradeLicenseSearch({ filters: filter1 }, {});
if (isLoading) {
return <Loader />;
}applicationsList.filter((response)=>response.licenseNumber).map((ob)=>{
if(applications[ob.licenseNumber]){
if(applications[ob.licenseNumber].applicationDate<ob.applicationDate)
applications[ob.licenseNumber]=ob
}
else
applications[ob.licenseNumber]=ob;
})Ajay Rawat
Release Communication Shared with Partners
To Do
Ajay Rawat
DIGIT as a Service
No. of accounts/projects using feature in all missions
At least 2 accounts use DIGIT as a Service in next 6 months
DIGIT as a Service
Optimizing resources for saving in infra costs
Saving to be estimated
Online application
Integrated workflow for ULB staff to perform the check and approve.
Generating the demand
Collection of property tax through various modes (Cash, Cheque, POS (Credit/ Debit Card), NEFT/RTGS, Online - Through Payment Gateway)
Auto calculation of rebate, interest and penalty.
Trade Category Name (In English)
Text
256
Yes
Name of the Trade Category in English. Eg: Goods, Services etc.
3
Trade Category Name (In Local Language)
Text
256
Yes
Name of the Trade Category in Local Language (as decided). Eg: Service is described as “सर्विस” in Hindi
Structure Type* (In English)
Text
256
Yes
Structure type in English
3
Structure Type* (In Local Language)
Text
256
Yes
Structure type in local language e.g. Hindi, Telugu etc.
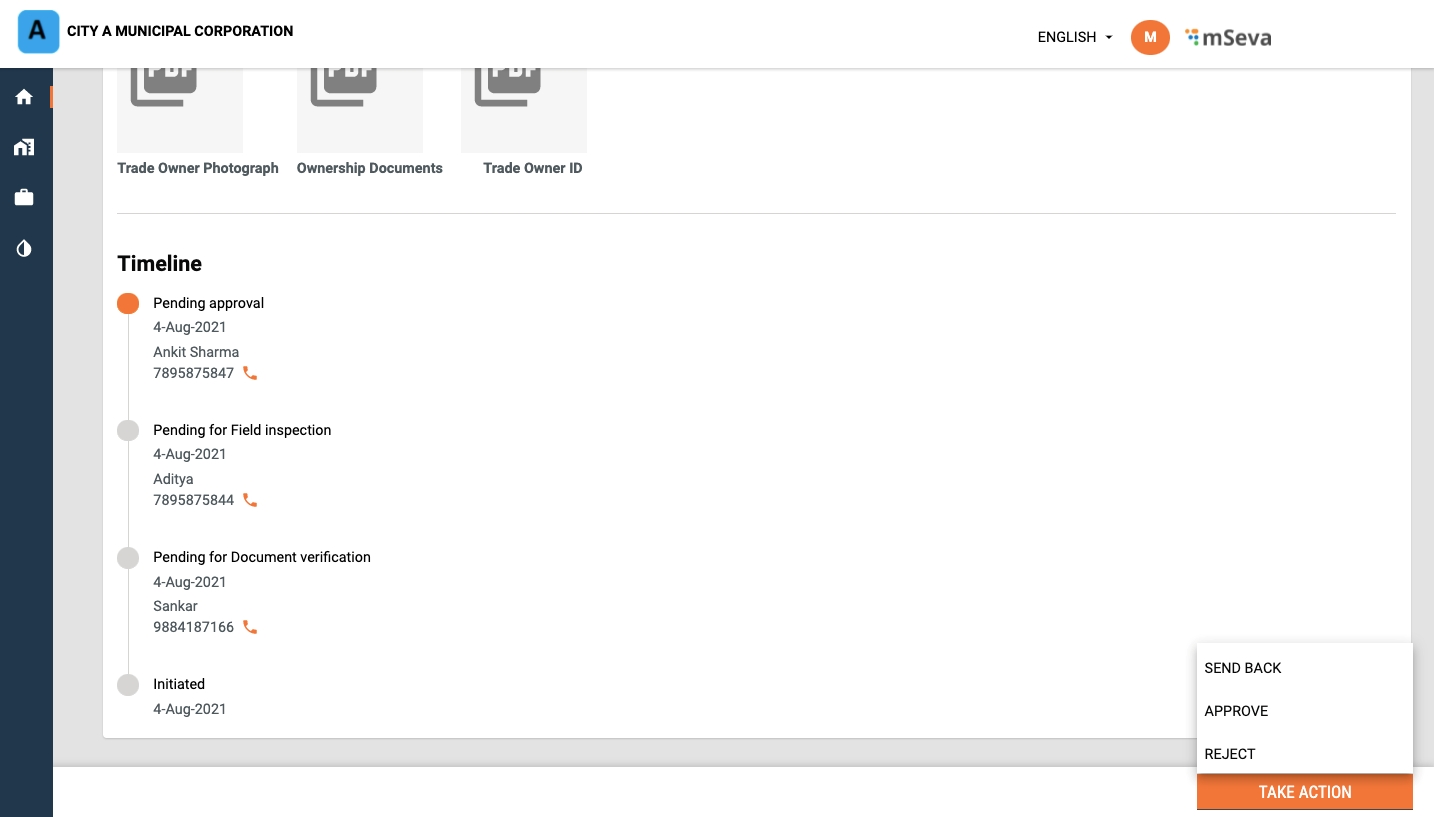


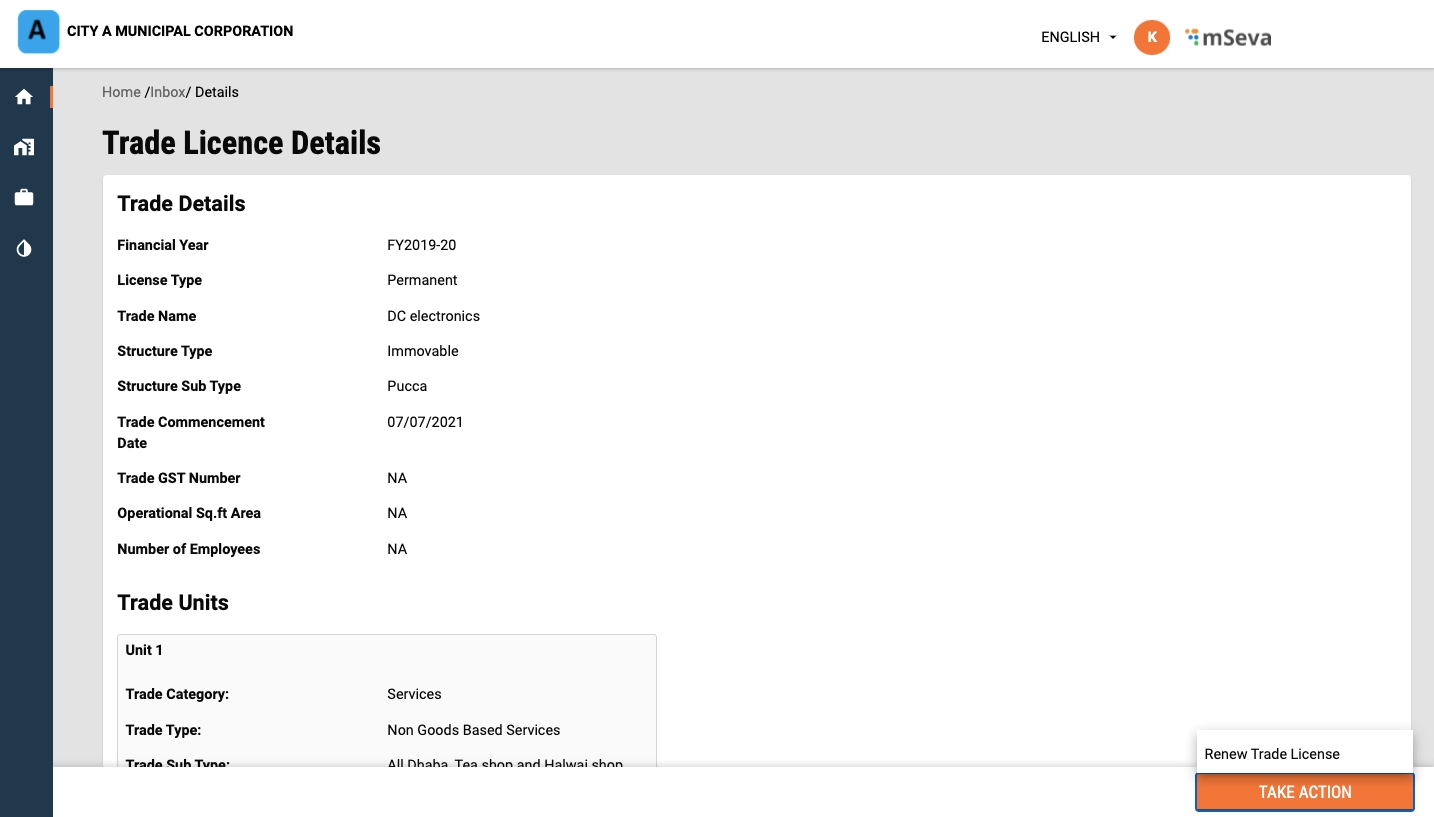
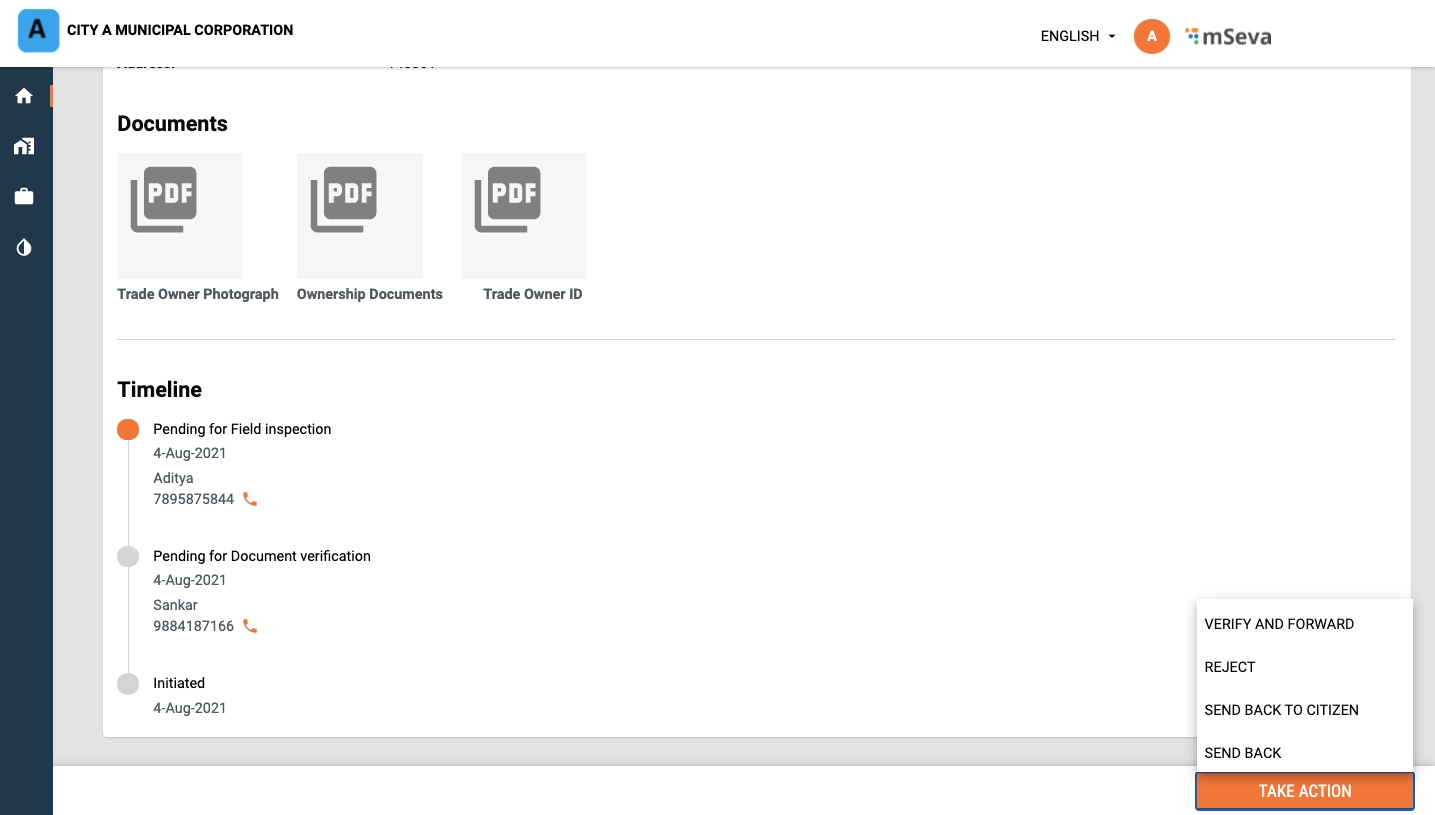
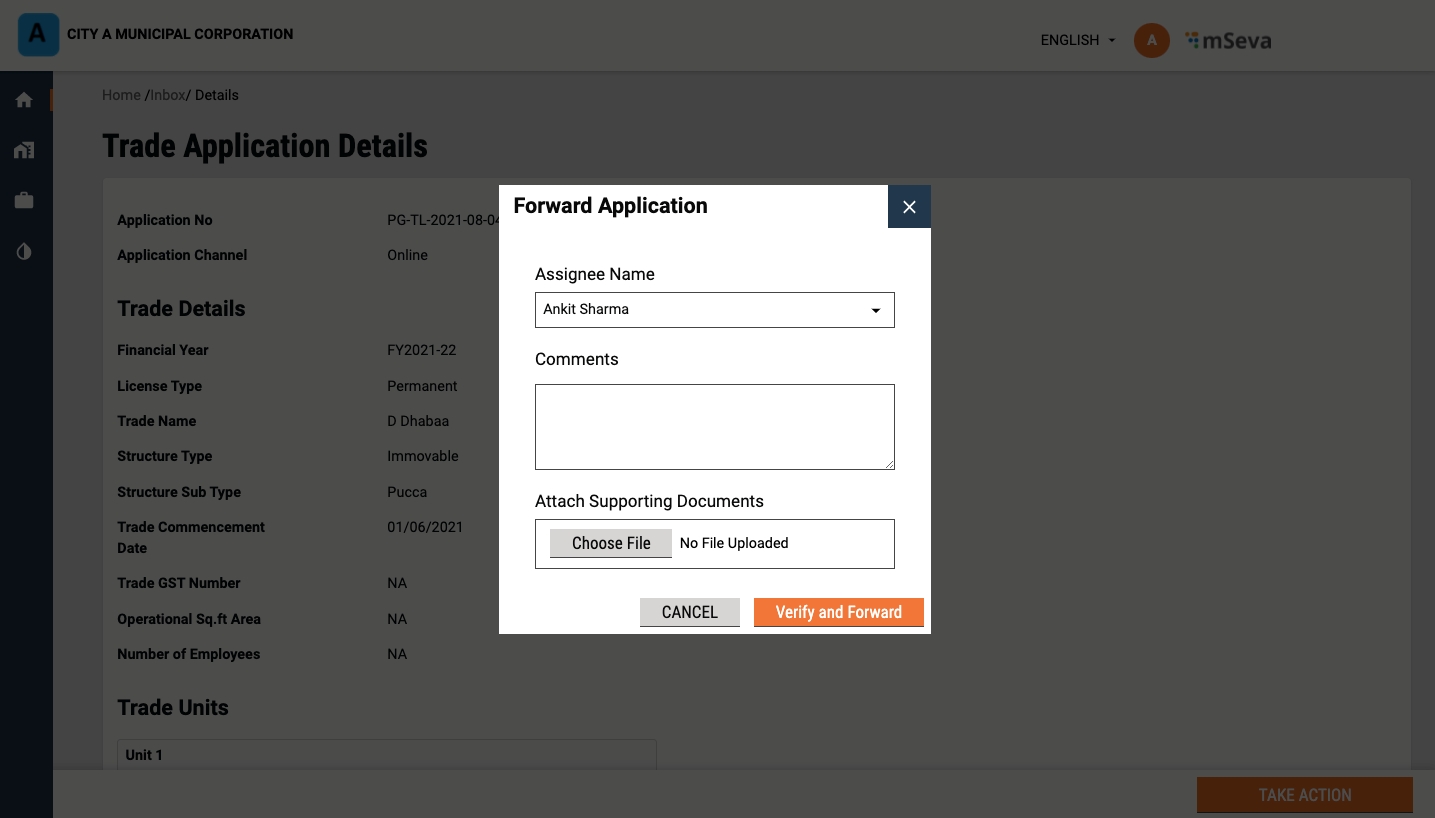
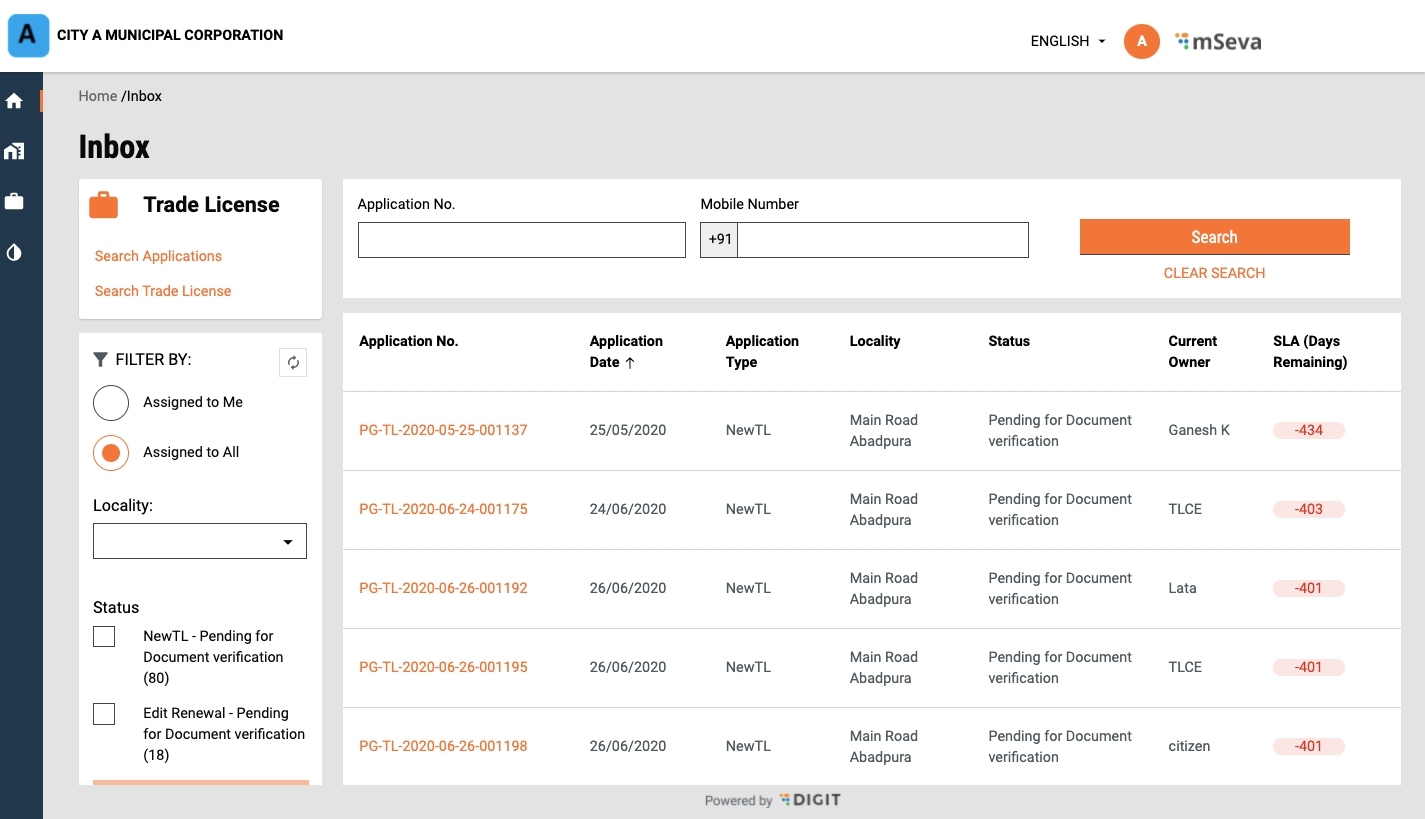
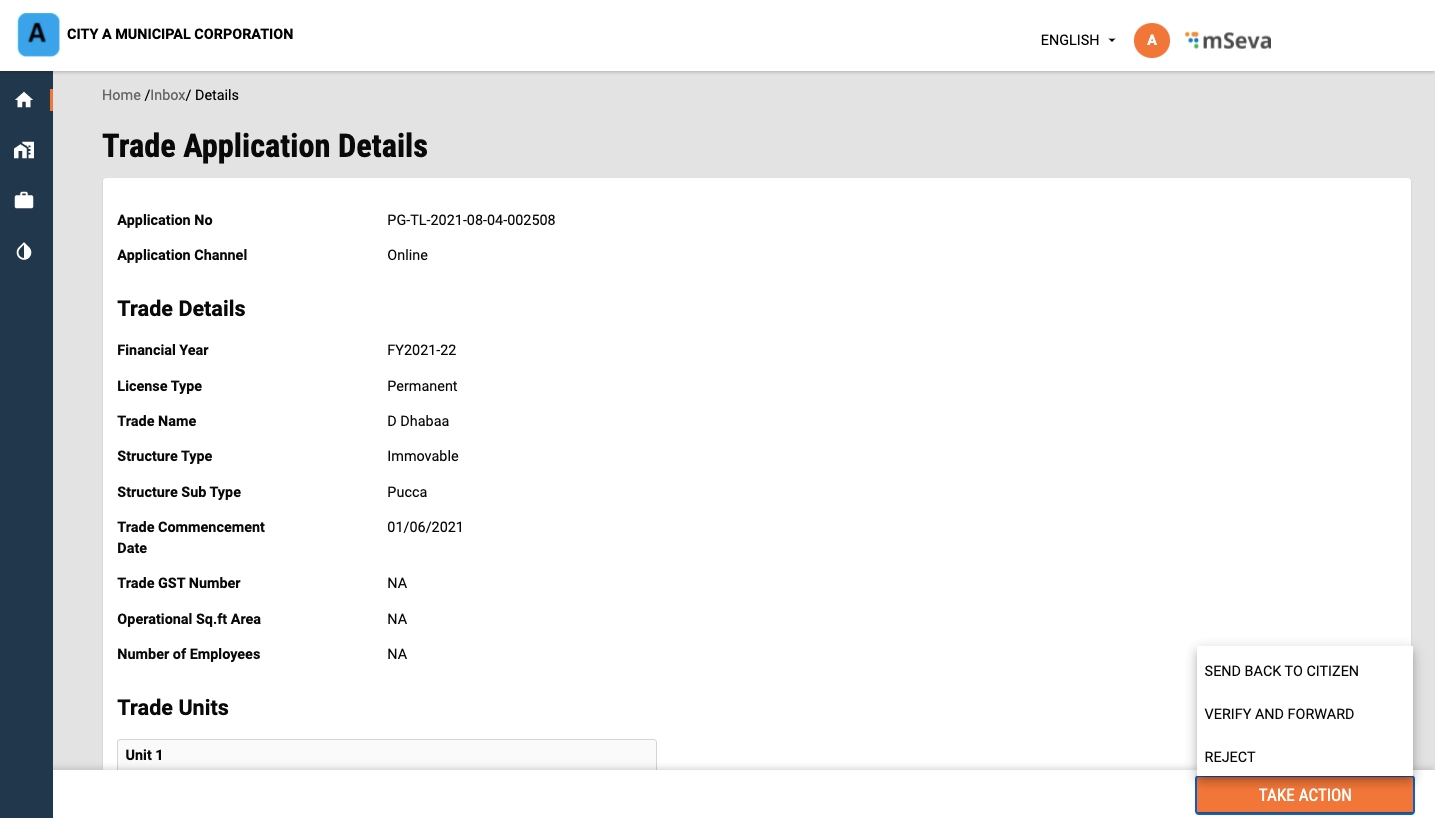
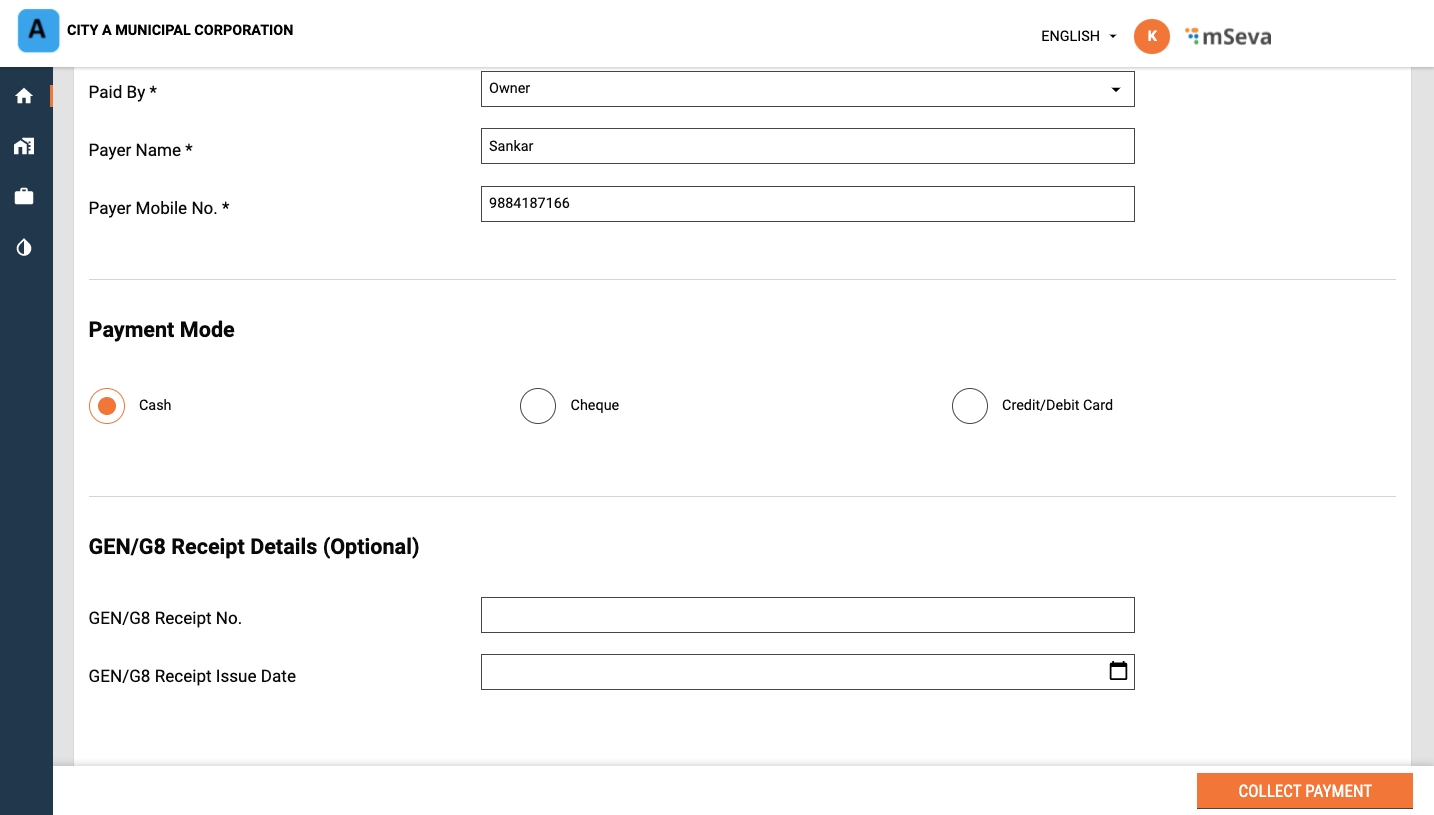
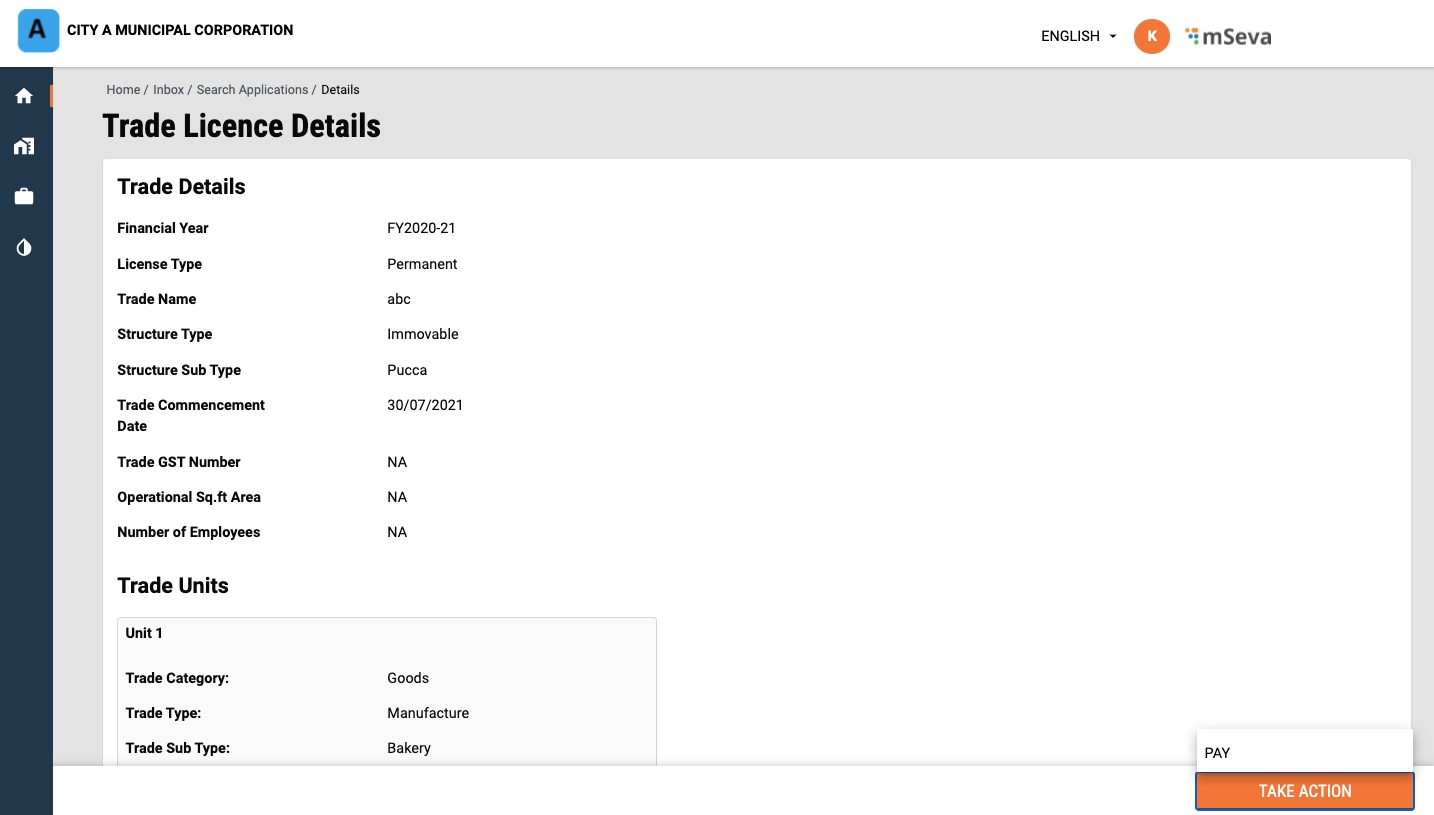
Notification SMS
Notification email
User event
IDgen
Payment gateway service
egov-hrms
All the municipal registries
Property-services
TL-services
PGR-services
bpa-services
echallan-services
firenoc-services
land-services
noc-services
sw-services
ws-services
save-property
state1-save-property
state2-save-property
update-property
state1-update-property
state2-update-property
reportName: AssetImmovableRegister
state1_AssetImmovableRegister
state2_AssetImmovableRegister
- name: billswithaddranduser
state1_billswithaddranduser
state2_billswithaddranduser
Open training sessions | Certifications | Implementation guidance | Platform performance review
DIGIT promises long-term support of the platform for all its core components and also underwrites the performance of the core platform.
Map Trade Types to corresponding Trade Sub Types
1
TRADE_SUBTYPE_CLINIC
Clinic
क्लिनिक
TRADE_TYPE_MEDICAL
2
TRADE_SUBTYPE_DHABA
The table above contains sample data.
1
Trade Sub Type Code
Alphanumeric
64
Yes
The Code assigned to the Trade Sub Type. Eg: TRADE_TYPE_Dhaba is assigned to Hotels
2
Download the data template attached to this page.
Refer to the ‘Data Definition’ section of this document to learn more about the template sheet, data type, size, and definitions.
Select the relevant Trade Type Code from the Trade Type master data. This will map the listed Trade Sub Type to the selected Trade Type.
Enter a unique value for Trade Sub Type Code.
Enter the English name for Trade Sub Type Name (English).
Enter the local name for the Trade Sub Type Name (Local Language).
The checklist contains a set of activities to be performed once the data is filled into a template to ensure data entry requirements are met. These activities have been divided into 2 groups as given below.
This checklist covers all the activities which are common across the entities.
1
Make sure that each and every point in this reference list has been taken care of
This checklist covers the activities which are specific to the entity.
1
The format of the Trade Sub Type Code defined should be text and unique
TRADE_SUBTYPE_CLINIC
2
Trade Type Name (in either language) should not contain any special characters
Clinic: [Allowed]
#Clinic! : [Not allowed]
/tl-services/v1/_update
TL_CEMP
1686
4
/tl-calculator/billingslab/_search
TL_CEMP
1684
Select Pucca or Kutcha option to indicate the Building Type. The Building Type option appears if the selected Structure Type in the previous screen is Immovable.
In the case of Movable structures, the system displays the Structure Sub Type as Vehicle Type. Select Hand Driven Vehicle or Motor-Driven Vehicle option depending on the trading plans.
Enter the Trade Commencement Date. This date indicates the inception or starting date of the trade.
Select the Trade Category as either Goods or Services in the Trade Units screen. Next, select the appropriate Trade Type and Trade Sub Type from the available drop-down list. Click on Add More Trade Units button to append multiple trading units.
Select Yes or No to indicate if you have any trade accessories.
If Yes, select the applicable Accessory from the drop-down list. Enter the Count for the selected Accessory to provide details on the number of accessories required. The system auto-populates the applicable UOM, if any, for the selected accessory. Enter the UOM value. Click on Add More Trade Accessories button to append multiple accessories.
Enable the Location Finder to allow GPS to track the current location. Or, move the pin to the location manually. Alternatively, you can also enter the location in the Search bar.
The Pincode field gets auto-populated if the location is selected on the map. Else, enter the Pincode of the location details manually. Click on Skip and Continue in case you are unable to provide the Pincode details.
City and Locality/Mohalla fields are auto-populated once the Pincode is entered. Else, select the City and applicable Locality/Mohalla from the drop-down list.
Enter the Street Name and Door No. details.
Provide a Landmark to locate the trading premise.
Select either the Single Owner or Multiple Owners option to indicate the type of ownership in the Ownership Details screen.
Enter the Owner Name. Select the applicable Gender and enter the owner’s Mobile Number.
Enter the Owner’s Address. Check the Same as Trade Address box if the owner’s address and trading address are the same. This will auto-populate the trading address provided earlier.
Select Choose File and upload the relevant identity proof document.
Upload the Ownership Document. The supported file formats are jpg, PNG or PDF
Upload the Owner's Photograph.
Validate the information entered in the application summary screen. Click on Change to modify the information if required. Click on the Submit button once the filled-in details are found correct and complete.
The system generates a unique application reference number. Click on the Download Acknowledgement Form to download and print the acknowledgement.


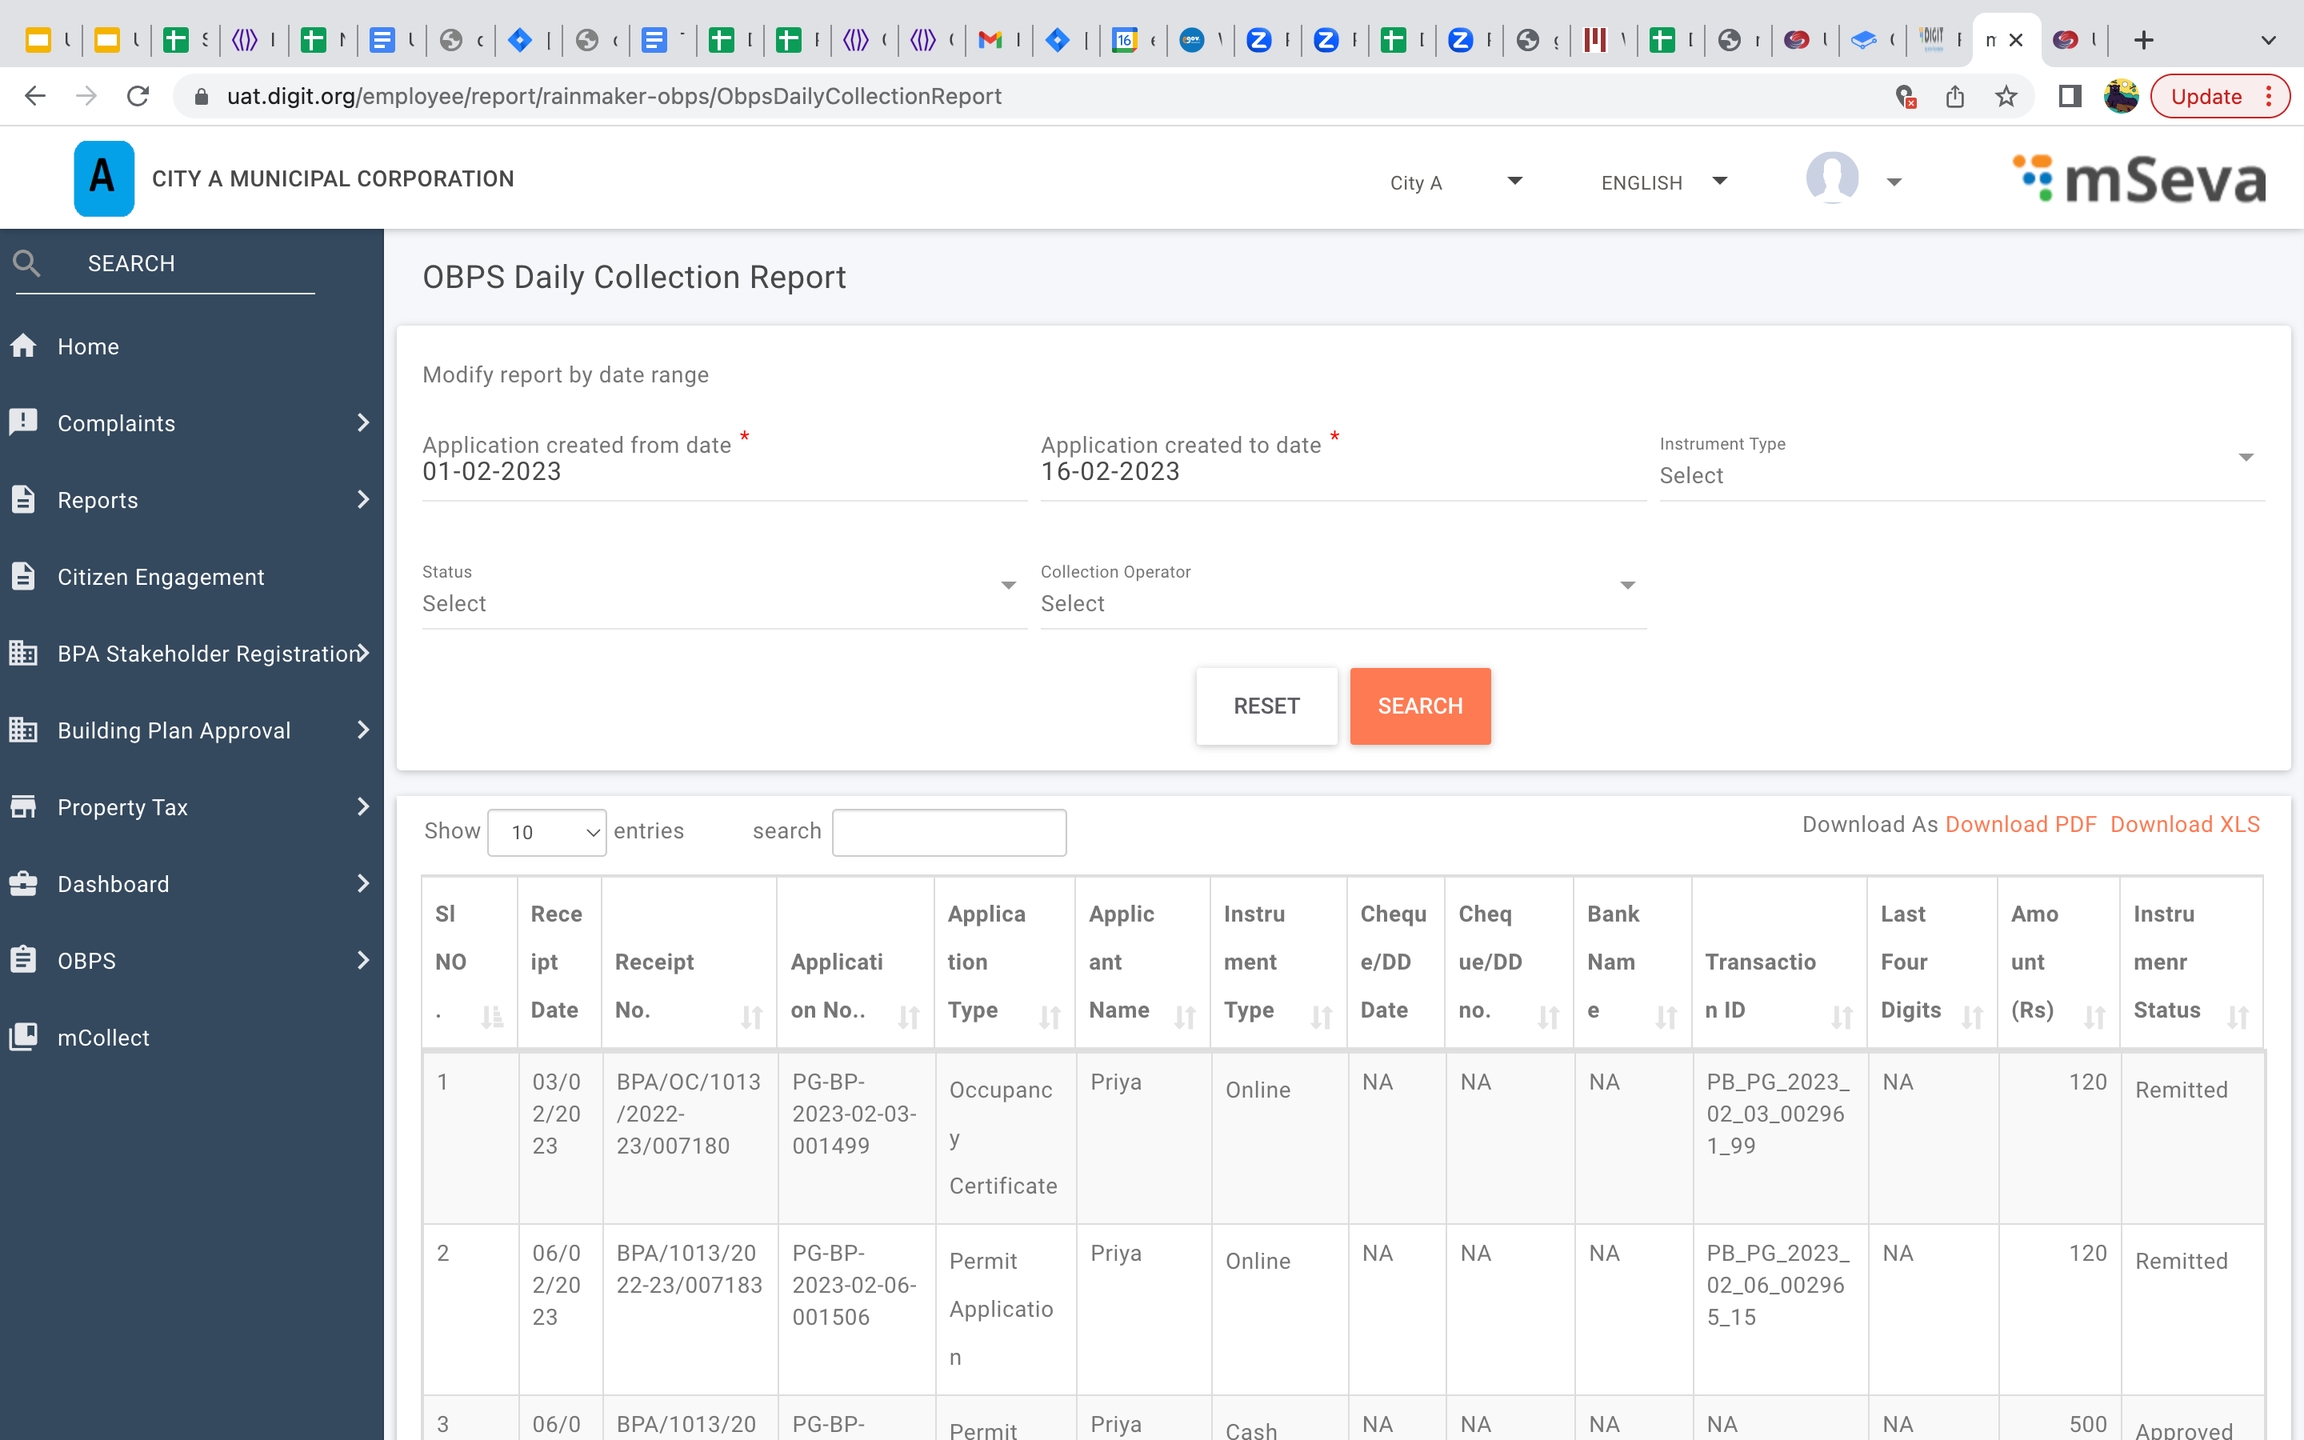
Once the Trade Categories are defined, the next task is to -
Define Trade Types
Map Trade Category to listed Trade Types
The Trade Type can be defined as the next (2nd) level classification of Trade. There can be multiple trade types and the list may vary from one State/ULB to another.
The table above contains sample Trade Type data.
Download the data template attached to this page.
Refer to the ‘Data Definition’ section of this document to learn more about the template sheet, data type, size, and definitions.
Select the relevant Trade Category Code from the available drop-down list of Trade Category. This will map the listed Trade Type to the corresponding Trade Category.
Enter a unique Trade Type Code to identify the type of trade.
The checklist contains a set of activities to be performed once the data is filled into a template to ensure data entry requirements are met. These activities have been divided into 2 groups as given below.
This checklist covers all the activities which are common across the entities.
This checklist covers the activities which are specific to the entity.
Log in to the system.
Click on the Register Property option on the home page.
The screen displays the Required Documents list. Note the list of documents valid for address, identity, registration, usage, special category, and occupancy proofs.
Click on Next to move on to the next screen. Answer Yes or No to the question Is this a Residential Property? Click on the Next button.
Select the relevant option on the screen to indicate the Type of Property.
Enter the Plot Size in square feet.
Select the correct option to indicate the Number Of Floors.

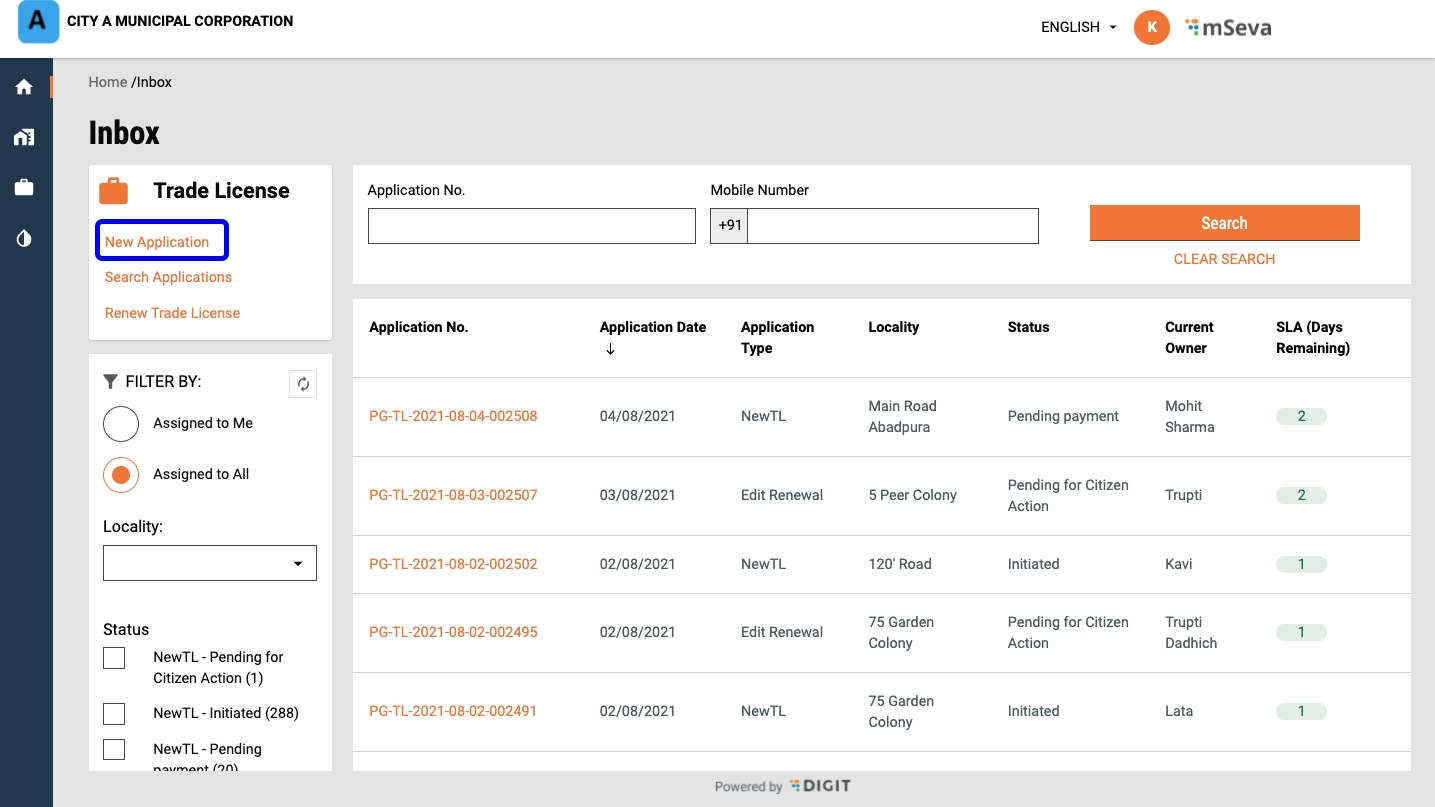

Once the Trade Ontology is defined, the next step is to allocate the license fee associated with the Trades.
Dependent on the Trade Classification Level (/ ), the fee allocated might be the same across the Sate or could vary from ULB to ULB. There could be a distinct fee(s) for two different types of applications (new and renewal).
Following are the key tasks to be executed :
This service is used to issue a license to the user after verification. The service is designed in such a way that it can be used to serve different type of licenses. Currently used to issue trade licenses, perform stakeholder registration and issue lockdown pass. The service is integrated with workflow where we can define the steps for approval of the application. Once the application is approved the license is generated.
All the fields in this flow are the same as the New TL Application. The difference here is that max fields are having pre-populated data (On Loading the page, search is made for that particular application).
Will get the Renew Trade License option, when the application is in an approved state and the same financial year application is not present in the workflow.
File path:
When we click on the Renew Trade License application, it will route to Renew screen
File Path:
File Path:
Direct Renewal: There is no change in any fields and directly clicks on submitting an application, an update API call is made for the respective application with respective to Direct Renewal (
<dependency>
<groupId>org.egov.services</groupId>
<artifactId>tracer</artifactId>
<version>2.1.1-SNAPSHOT</version>
</dependency><dependency>
<groupId>org.egov.services</groupId>
<artifactId>services-common</artifactId>
<version>1.1.0-SNAPSHOT</version>
</dependency><dependency>
<groupId>org.egov</groupId>
<artifactId>mdms-client</artifactId>
<version>0.0.4-SNAPSHOT</version>
</dependency><dependency>
<groupId>org.egov</groupId>
<artifactId>enc-client</artifactId>
<version>2.0.4-SNAPSHOT</version>
<exclusions>
<exclusion>
<groupId>org.springframework.kafka</groupId>
<artifactId>spring-kafka</artifactId>
</exclusion>
<exclusion>
<groupId>org.apache.kafka</groupId>
<artifactId>kafka-clients</artifactId>
</exclusion>
</exclusions>
</dependency>#!/bin/sh
baseurl=$DB_URL
echo "the baseurl : $DB_URL"
schemasetter="?currentSchema="
schemas=$SCHEMA_NAME
echo "the schemas : $schemas"
for schemaname in ${schemas//,/ }
do
echo "the schema name : ${baseurl}${schemasetter}${schemaname}"
flyway -url=${baseurl}${schemasetter}${schemaname} -table=$SCHEMA_TABLE -user=$FLYWAY_USER -password=$FLYWAY_PASSWORD -locations=$FLYWAY_LOCATIONS -baselineOnMigrate=true -outOfOrder=true -ignoreMissingMigrations=true migrate
done# Init Containers Configs
initContainers:
dbMigration:
enabled: true
schemaTable: "property_services_schema"
image:
repository: "property-services-db"# Init Containers Configs
initContainers:
dbMigration:
enabled: true
schemaTable: "property_services_schema"
image:
repository: "property-services-db"
env: |
{{- if index .Values "property-ismultischema-enabled" }}
- name: SCHEMA_NAME
value: {{ index .Values "property-schemas" | quote }}
{{- end }}
- name: "DB_URL"
valueFrom:
configMapKeyRef:
name: egov-config
key: db-url
- name: "SCHEMA_TABLE"
value: {{ .Values.initContainers.dbMigration.schemaTable | quote }}
- name: "FLYWAY_USER"
valueFrom:
secretKeyRef:
name: db
key: flyway-username
- name: "FLYWAY_PASSWORD"
valueFrom:
secretKeyRef:
name: db
key: flyway-password
- name: "FLYWAY_LOCATIONS"
valueFrom:
configMapKeyRef:
name: egov-config
key: flyway-location{{- if index .Values "property-ismultischema-enabled" }}
- name: SCHEMA_NAME
value: {{ index .Values "property-schemas" | quote }}
{{- end }}property-services:
property-schemas: 'public,statea,stateb'
property-ismultischema-enabled: 'true' {{- if index .Values "global" "is-environment-central-instance" }}
- name: IS_ENVIRONMENT_CENTRAL_INSTANCE
valueFrom:
configMapKeyRef:
name: egov-config
key: is-environment-central-instance
{{- end }}
{{- if index .Values "global" "is-environment-central-instance" }}
- name: STATE_LEVEL_TENANTID_LENGTH
valueFrom:
configMapKeyRef:
name: egov-config
key: state-level-tenantid-length
{{- end }} - name: EGOV_MDMS_HOST
valueFrom:
configMapKeyRef:
name: egov-service-host
key: internal-gatewayif(configs.getIsEnvironmentCentralInstance() && criteria.getTenantId() == null)
throw new CustomException("EG_PT_INVALID_SEARCH",
" TenantId is mandatory for search ");
else if(configs.getIsEnvironmentCentralInstance()
&& criteria.getTenantId().split("\\.").length < configs.getStateLevelTenantIdLength())
throw new CustomException("EG_PT_INVALID_SEARCH",
" TenantId should be mandatorily " + configs.getStateLevelTenantIdLength() + " levels for search");@Service
@Slf4j
public class Producer {
@Autowired
private CustomKafkaTemplate<String, Object> kafkaTemplate;
@Autowired
private PropertyConfiguration configs;
public void push(String tenantId, String topic, Object value) {
String updatedTopic = topic;
if (configs.getIsEnvironmentCentralInstance()) {
String[] tenants = tenantId.split("\\.");
if (tenants.length > 1)
updatedTopic = tenants[1].concat("-").concat(topic);
}
log.info("The Kafka topic for the tenantId : " + tenantId + " is : " + updatedTopic);
kafkaTemplate.send(updatedTopic, value);
}
} private static String PROEPRTY_AUDIT_QUERY = "select property from {schema}.eg_pt_property_audit where propertyid=?";/* * add this variable to your constant class */
public static String SCHEMA_REPLACE_STRING = "{schema}"; /** * Method to fetch the state name from the tenantId * * @param query * @param tenantId * @return */
public String replaceSchemaPlaceholder(String query, String tenantId) {
String finalQuery = null;
if (tenantId.contains(".")) {
String schemaName = tenantId.split("\\.")[1];
finalQuery = query.replace(Constants.SCHEMA_REPLACE_STRING, schemaName);
} else {
finalQuery = query.replace(Constants.SCHEMA_REPLACE_STRING.concat("."), "");
}
return finalQuery;
}
/* * Sample method example to replace query with schema */
public List < String > getPropertyIds(Set < String > ownerIds, String tenantId) {
List < Object > preparedStmtList = new ArrayList < > ();
String query = queryBuilder.getQuery(ownerIds, tenantId, preparedStmtList);
query = util.replaceSchemaPlaceholder(query, tenantId);
return jdbcTemplate.queryForList(query, preparedStmtList.toArray(), String.class);
}is.environment.central.instance=false
state.level.tenantid.length=2
state.schema.index.position.tenantid=1Dhaba
ढाबा
TRADE_TYPE_HOTEL
Trade Sub Type Name (In English)
Text
256
Yes
Name of the Trade Sub Type in English. Eg: Clinic
3
Trade Sub Type Name (In Local Language)
Text
256
Yes
Name of the Trade Sub Type in Local Language (as decided). Eg: Dhaba is described as “ढाबा” in Hindi
4
Trade Type Code
Reference
64
Yes
The Code assigned to the Trade Type. Eg: TRADE_TYPE_MEDICAL is assigned to Hospitals
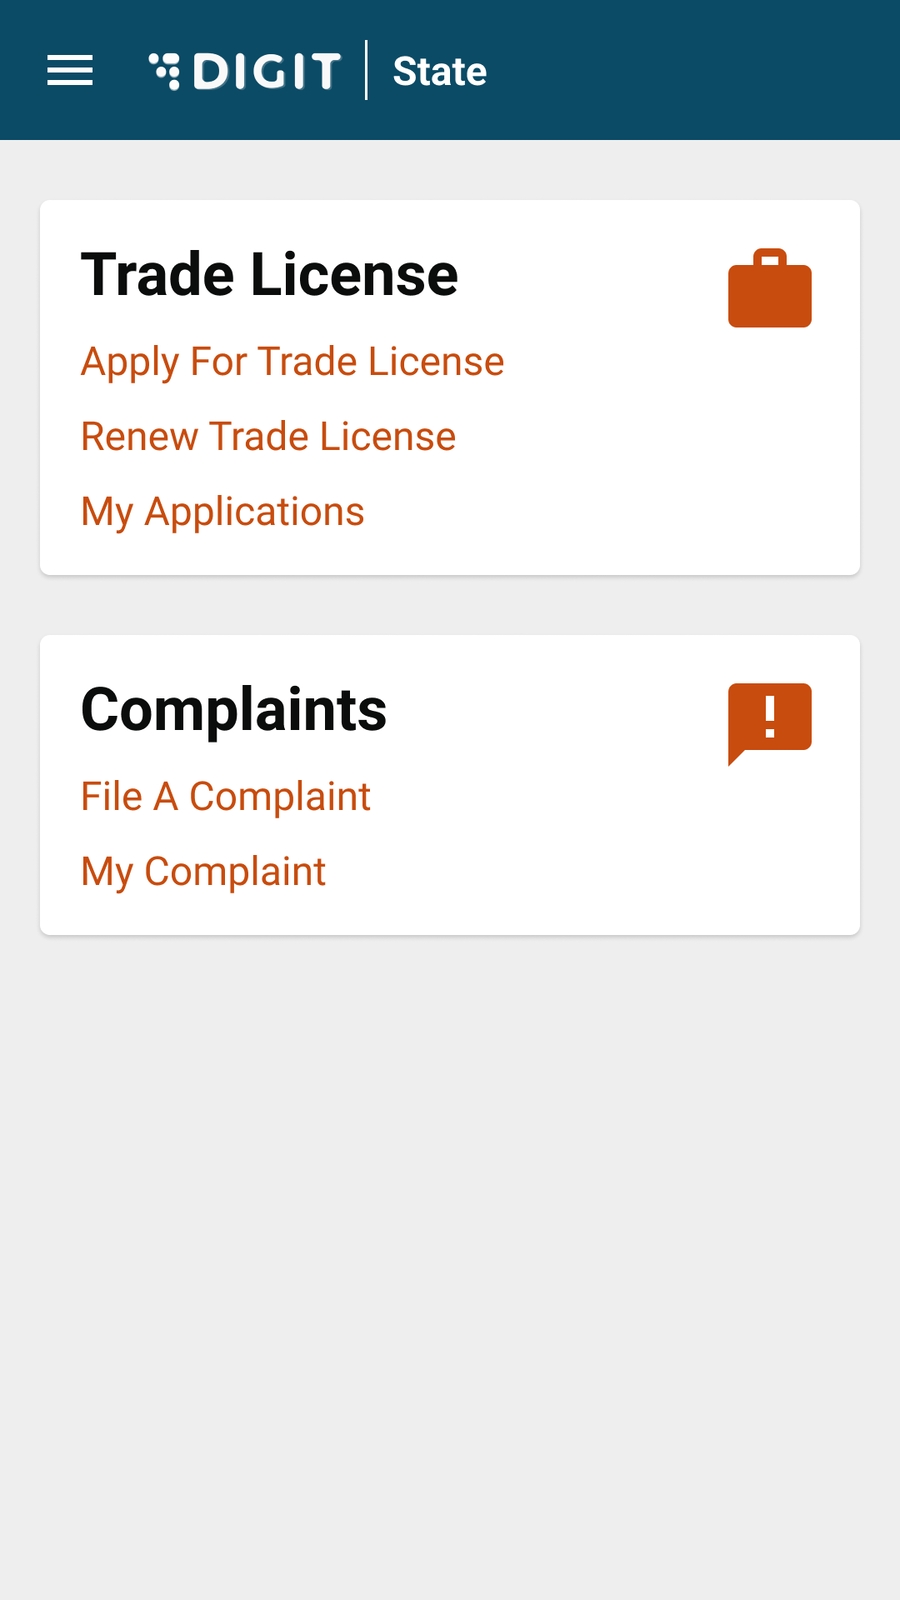


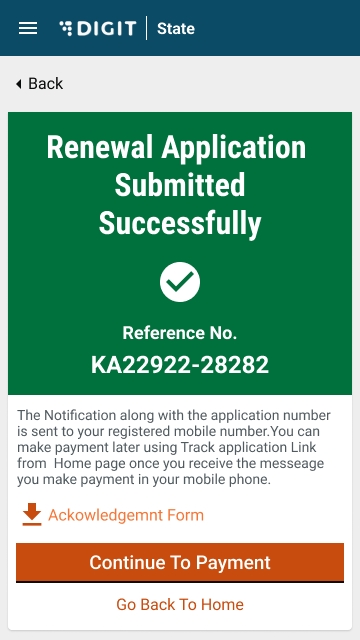
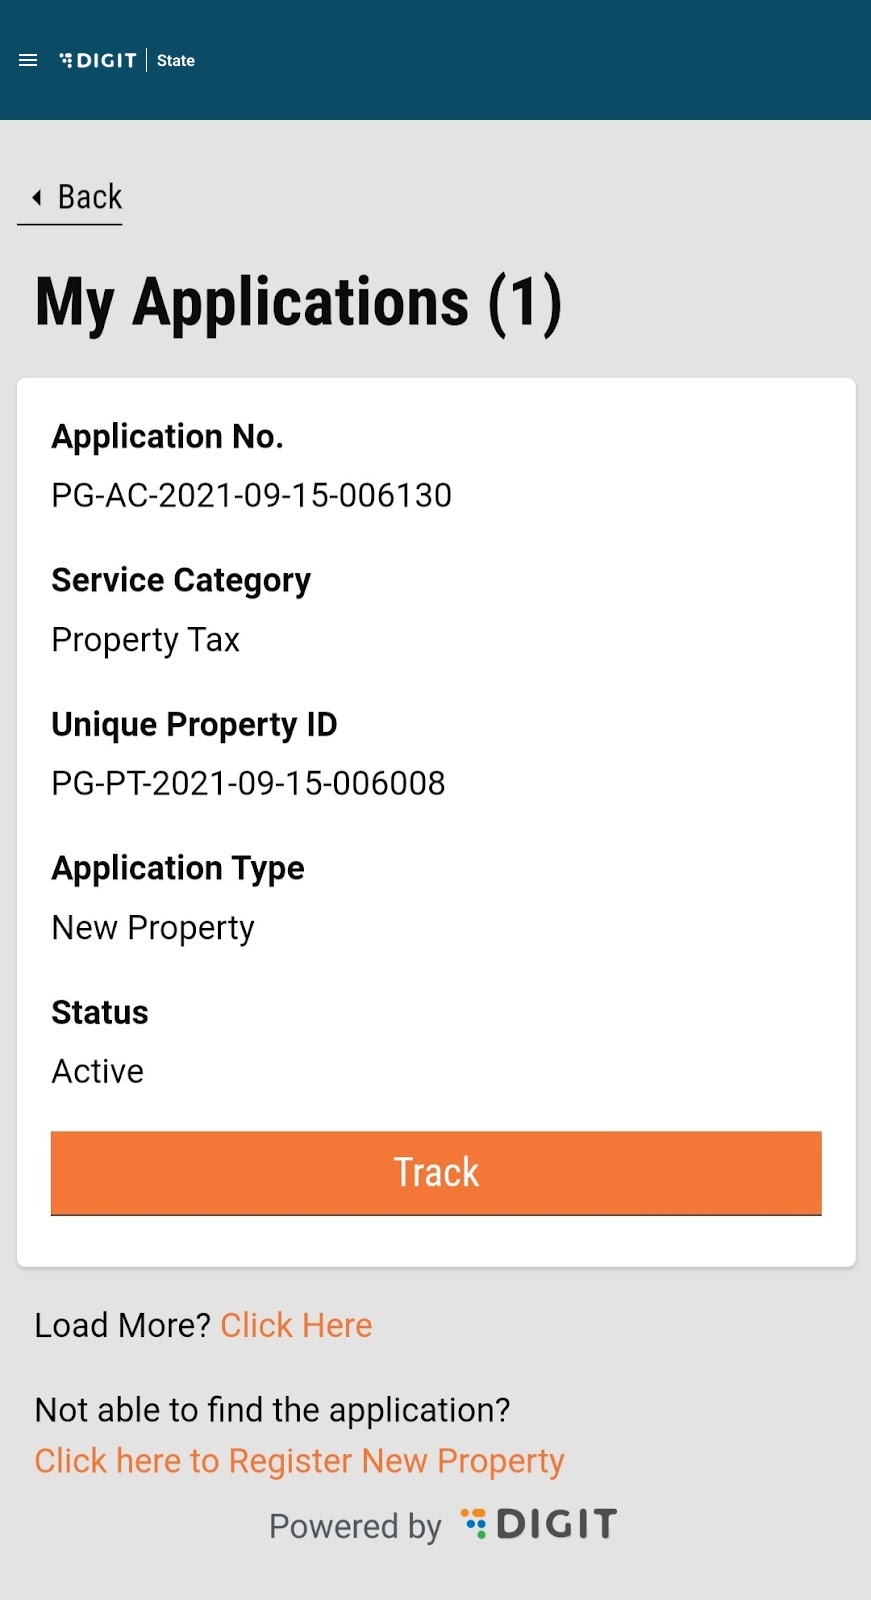

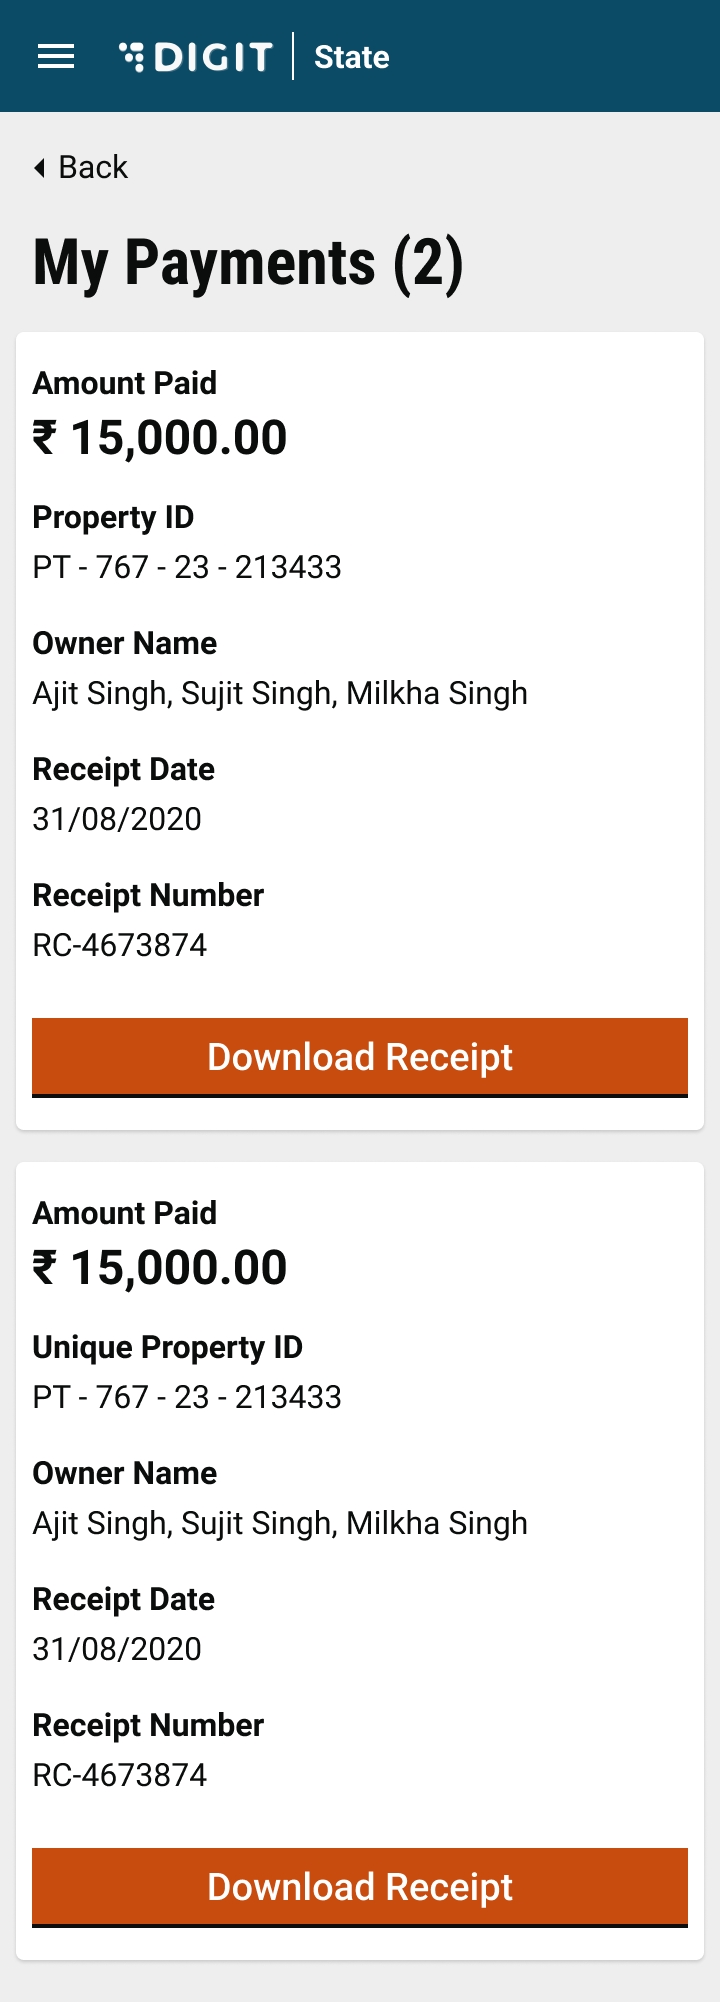
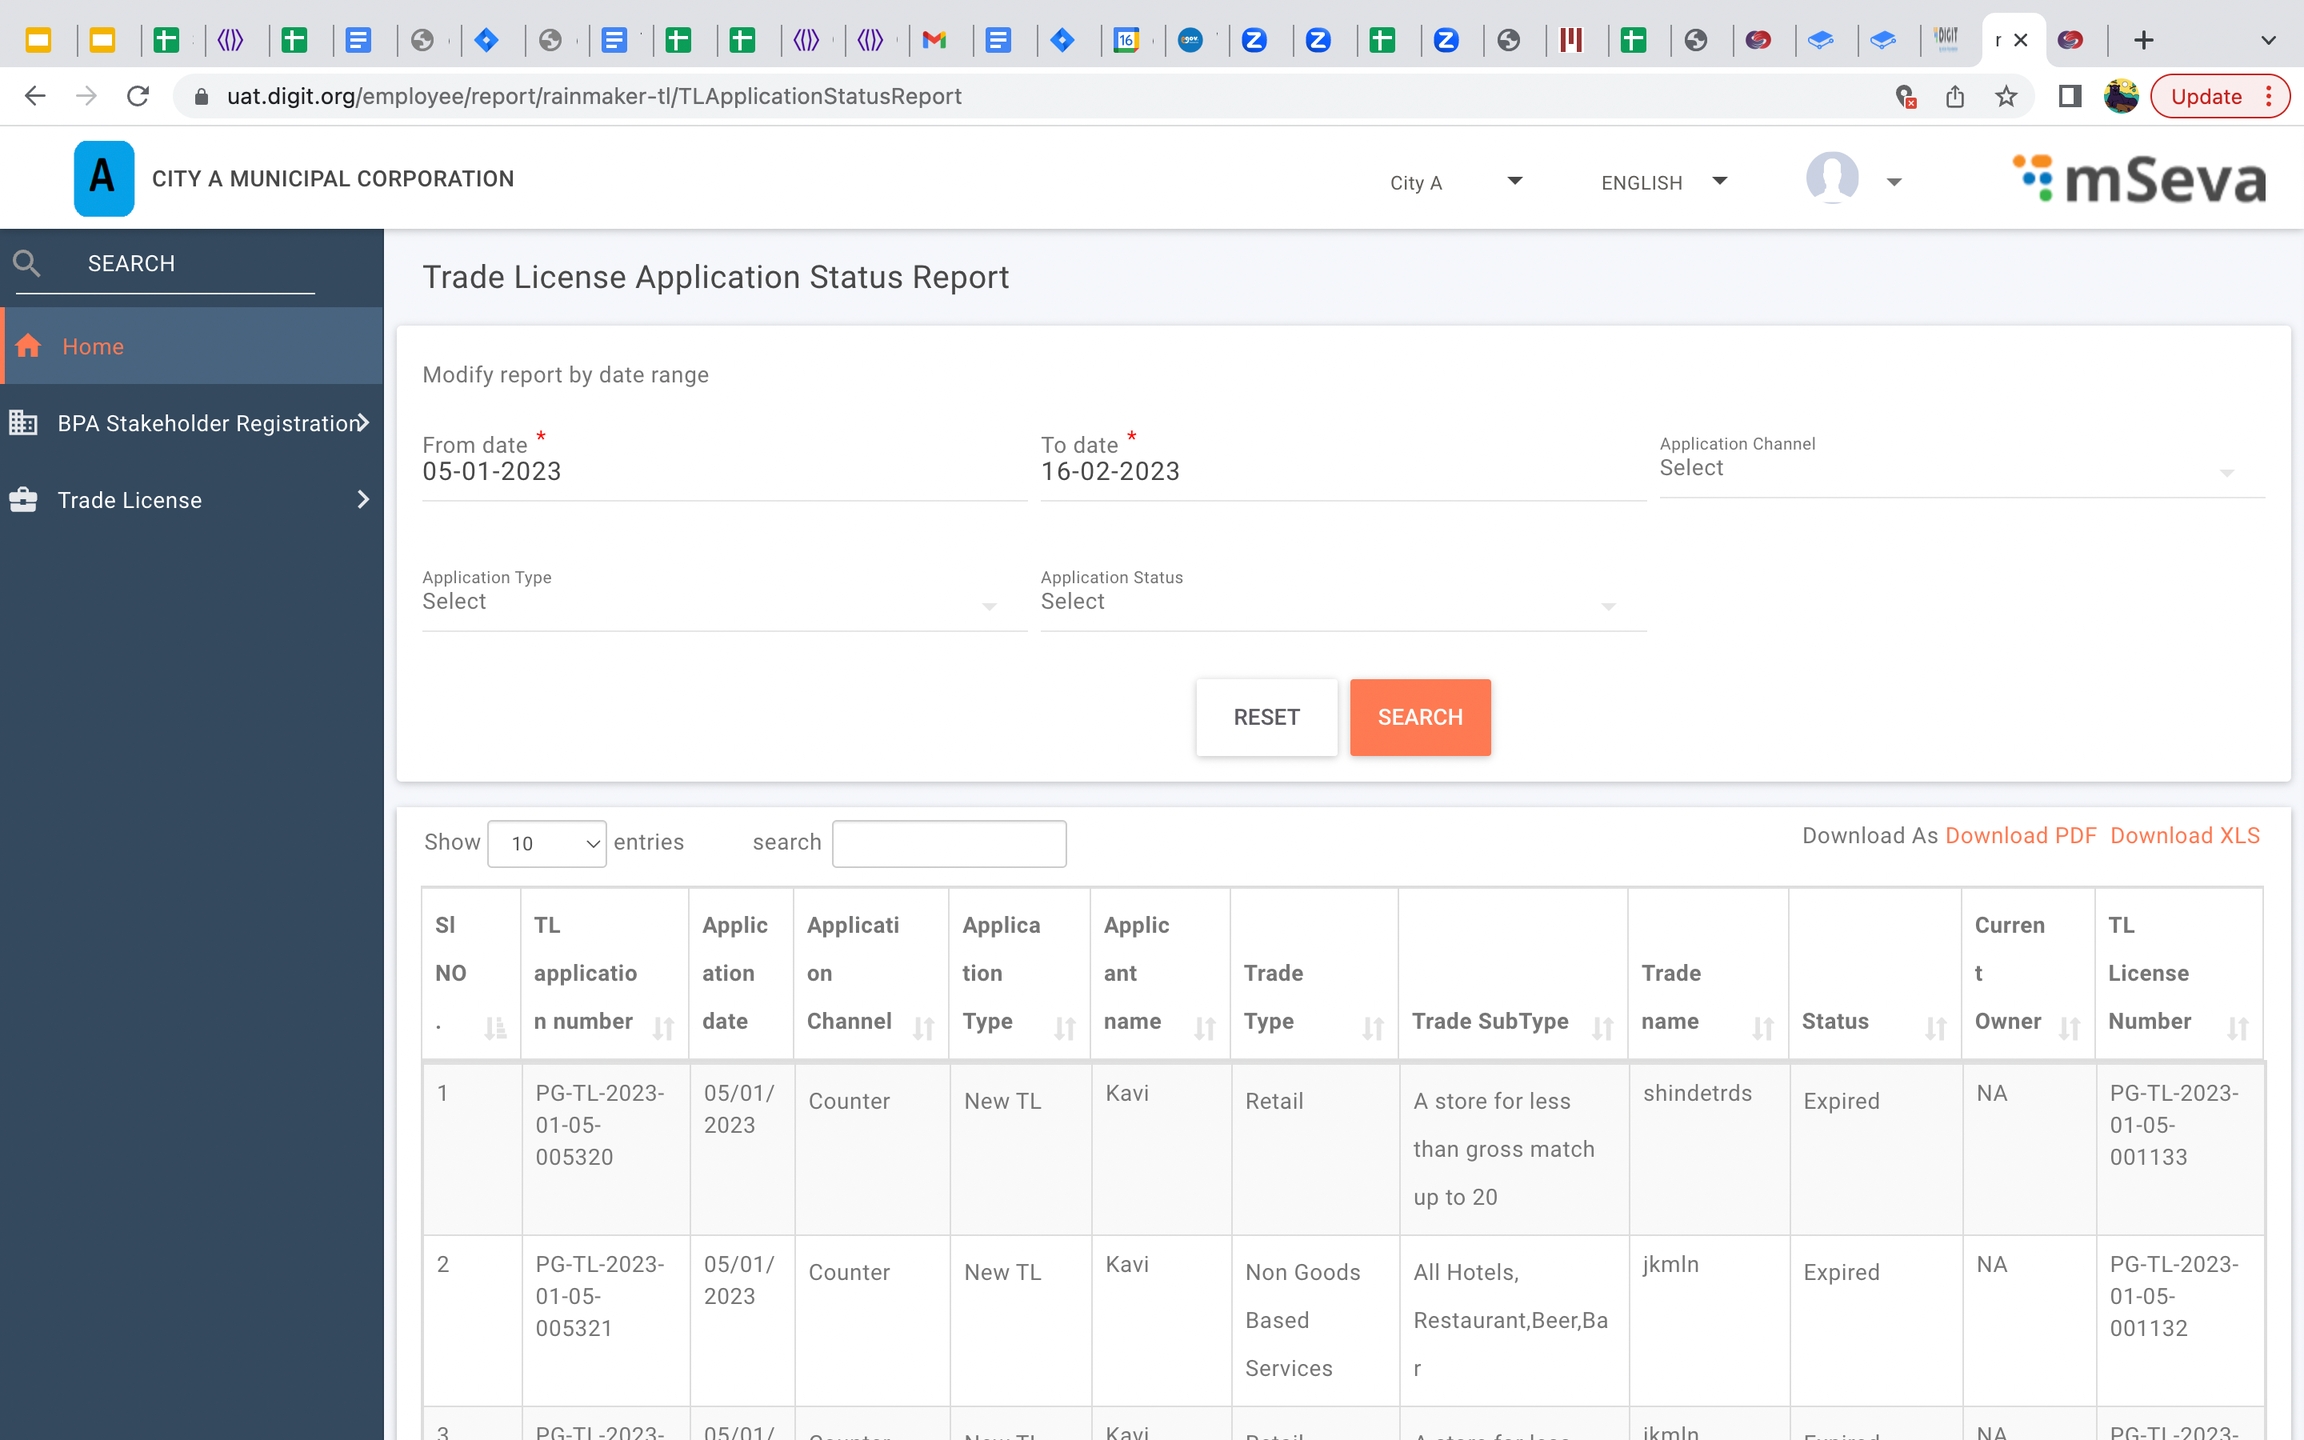

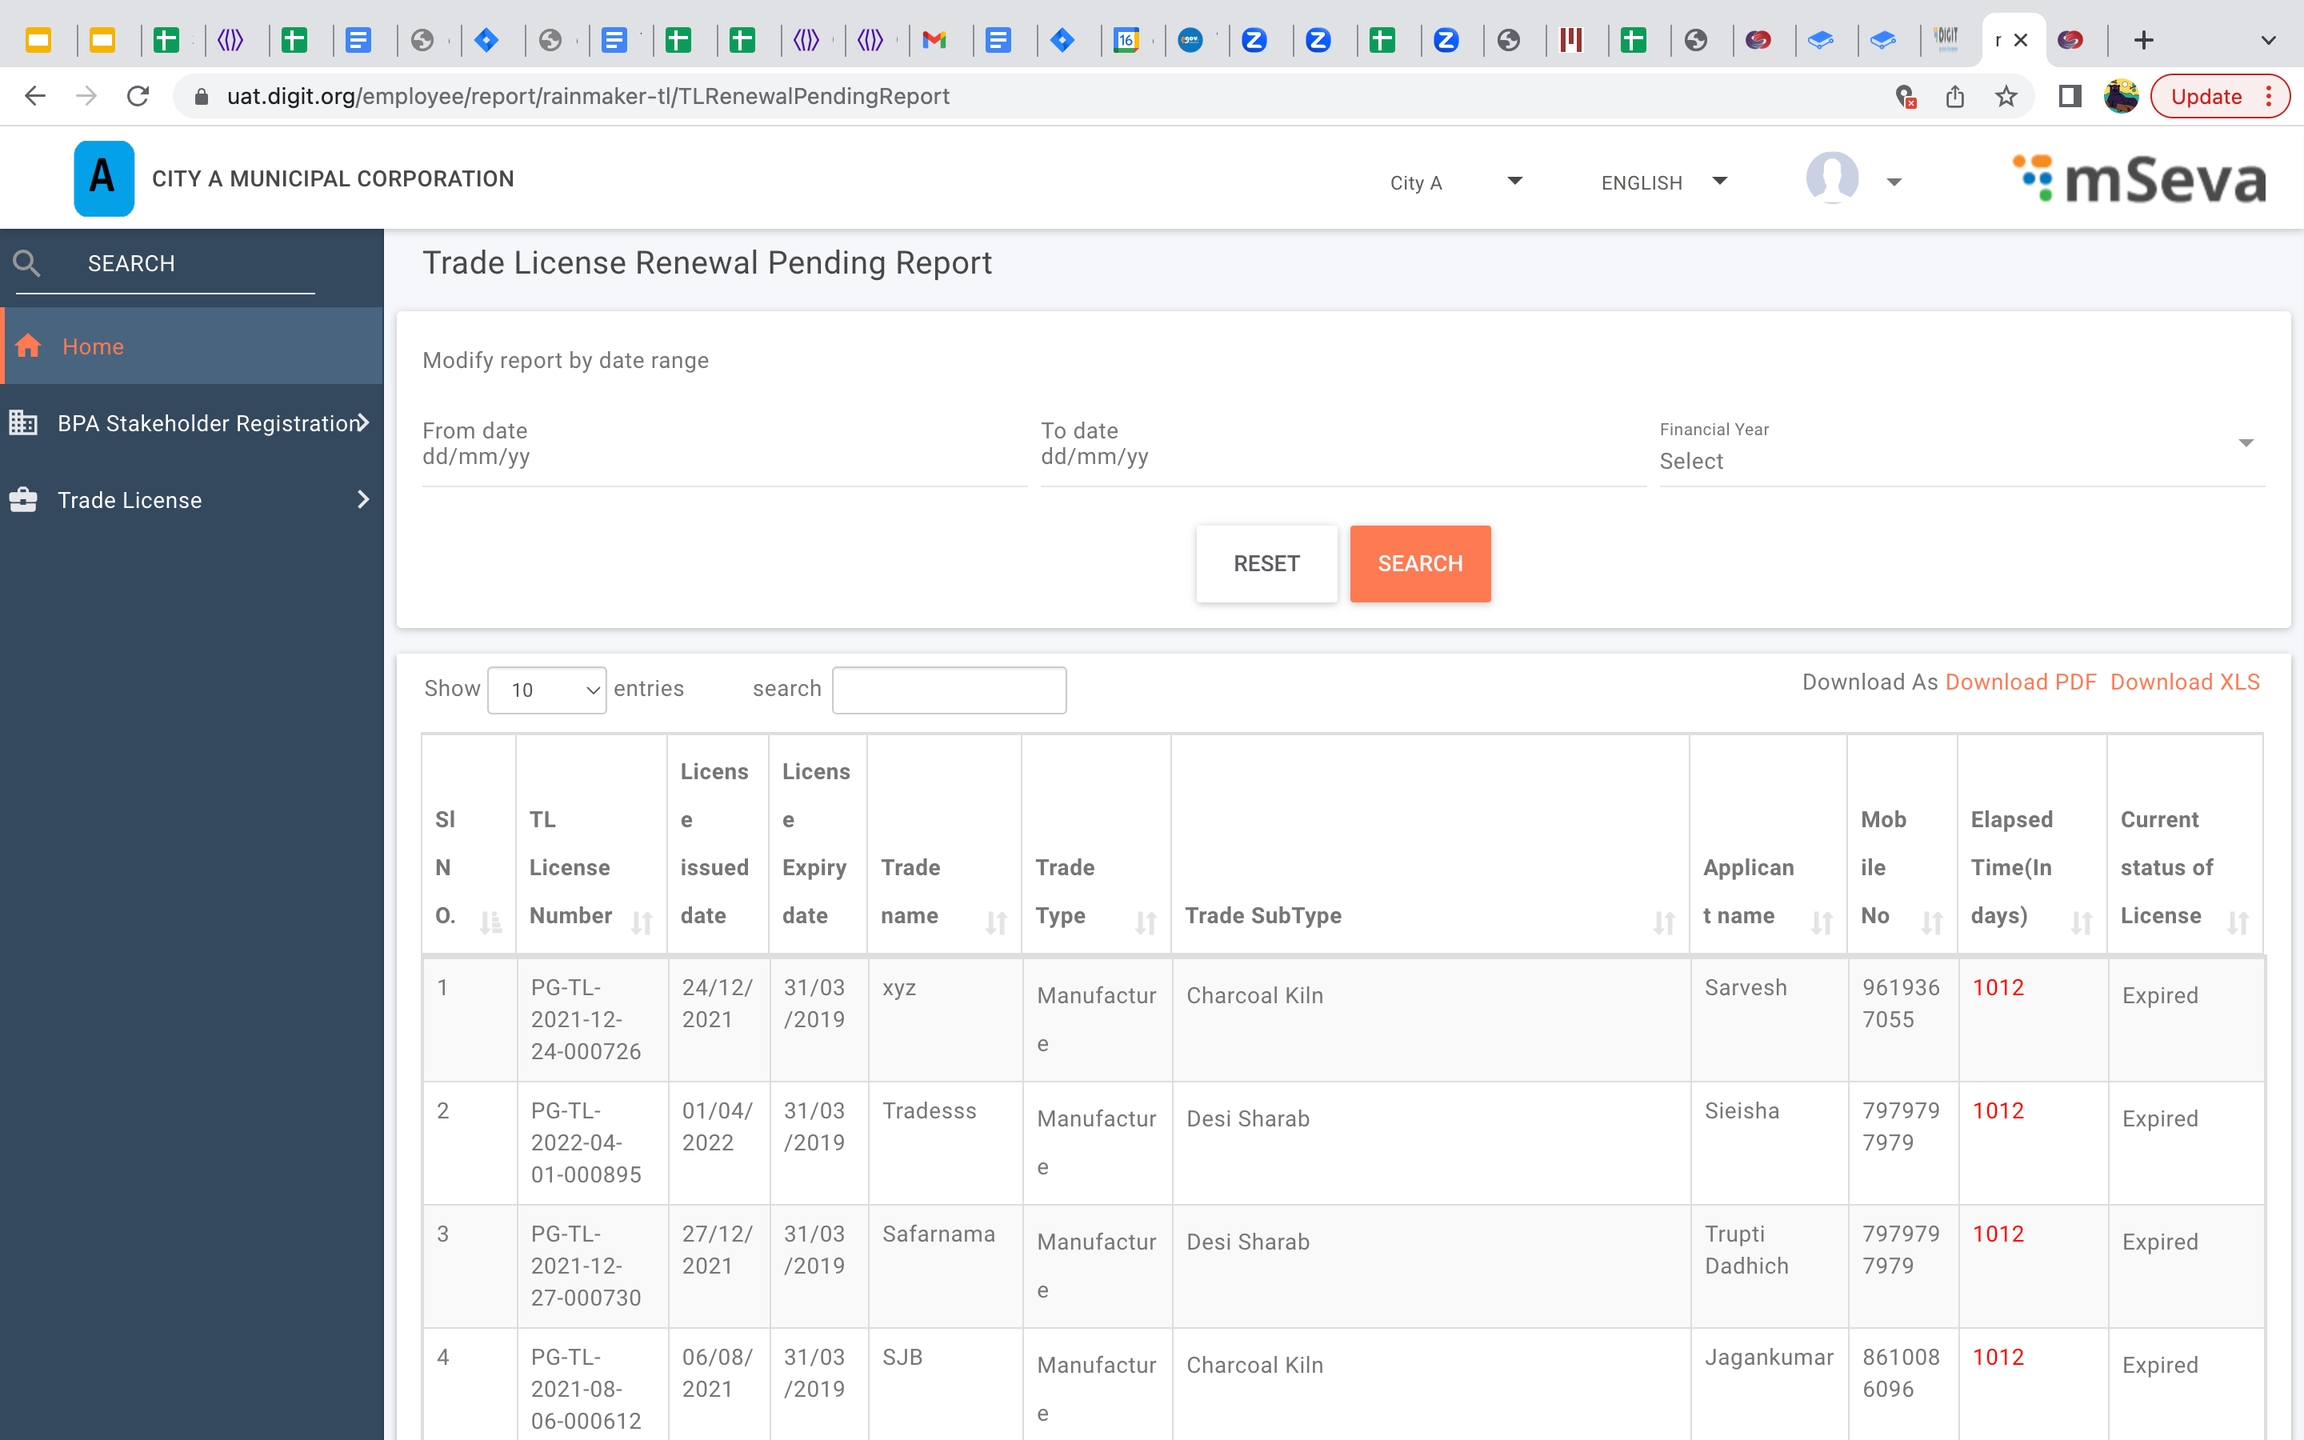
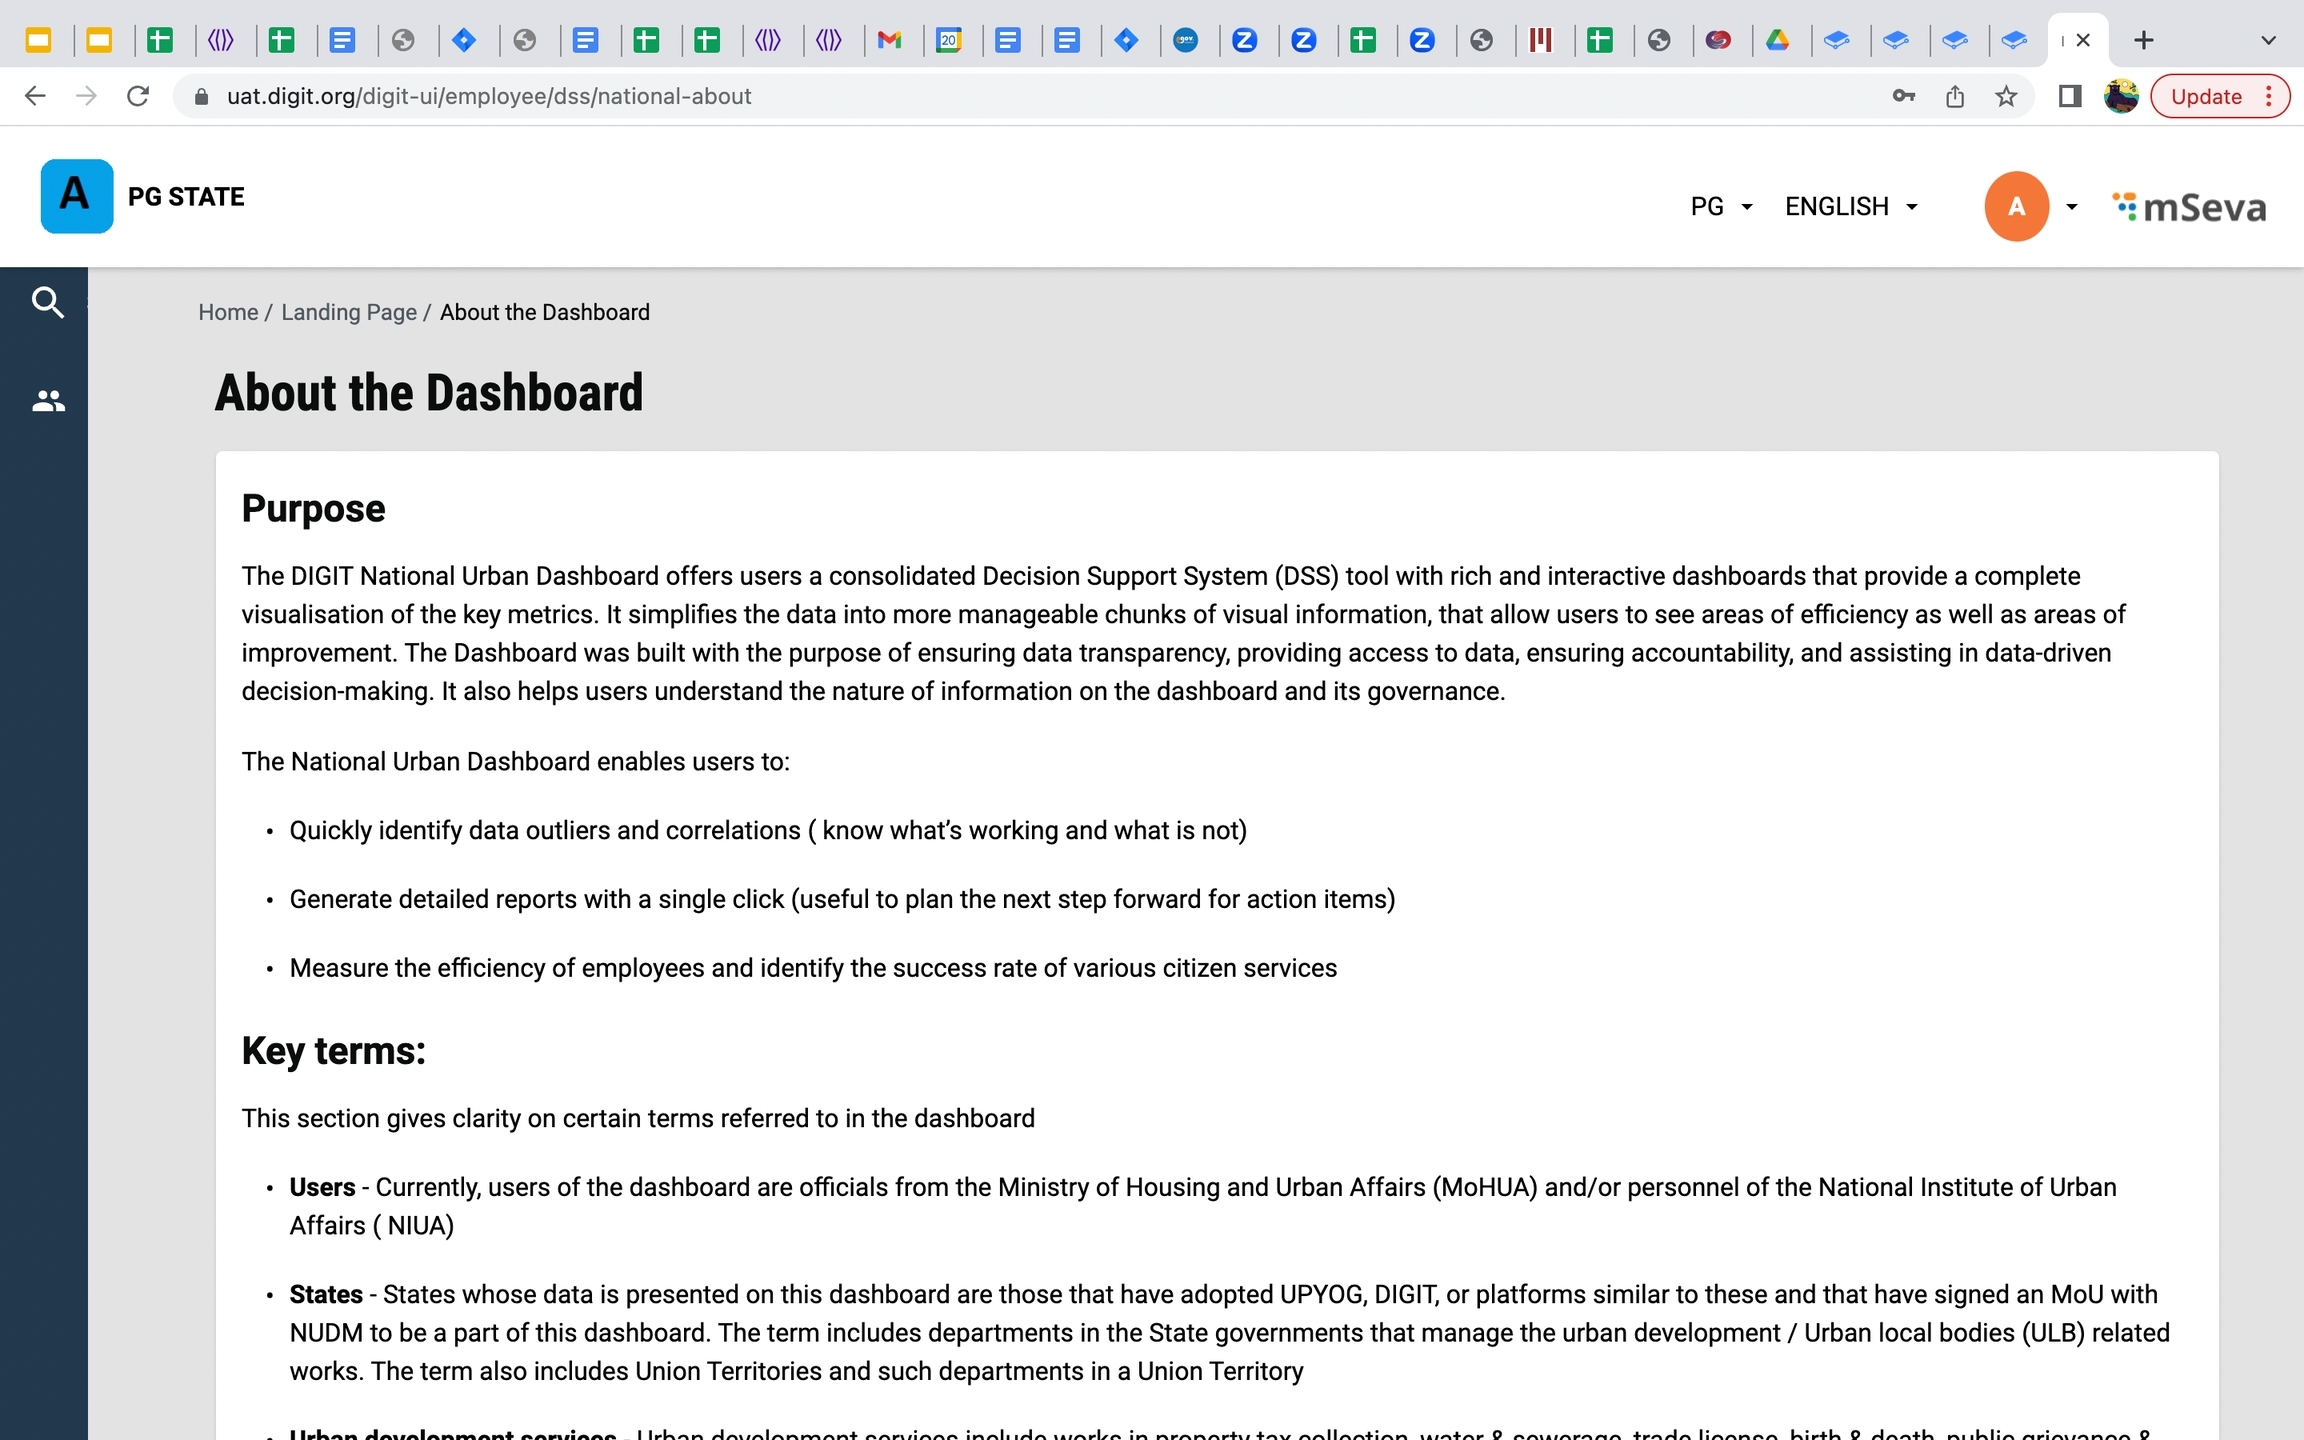
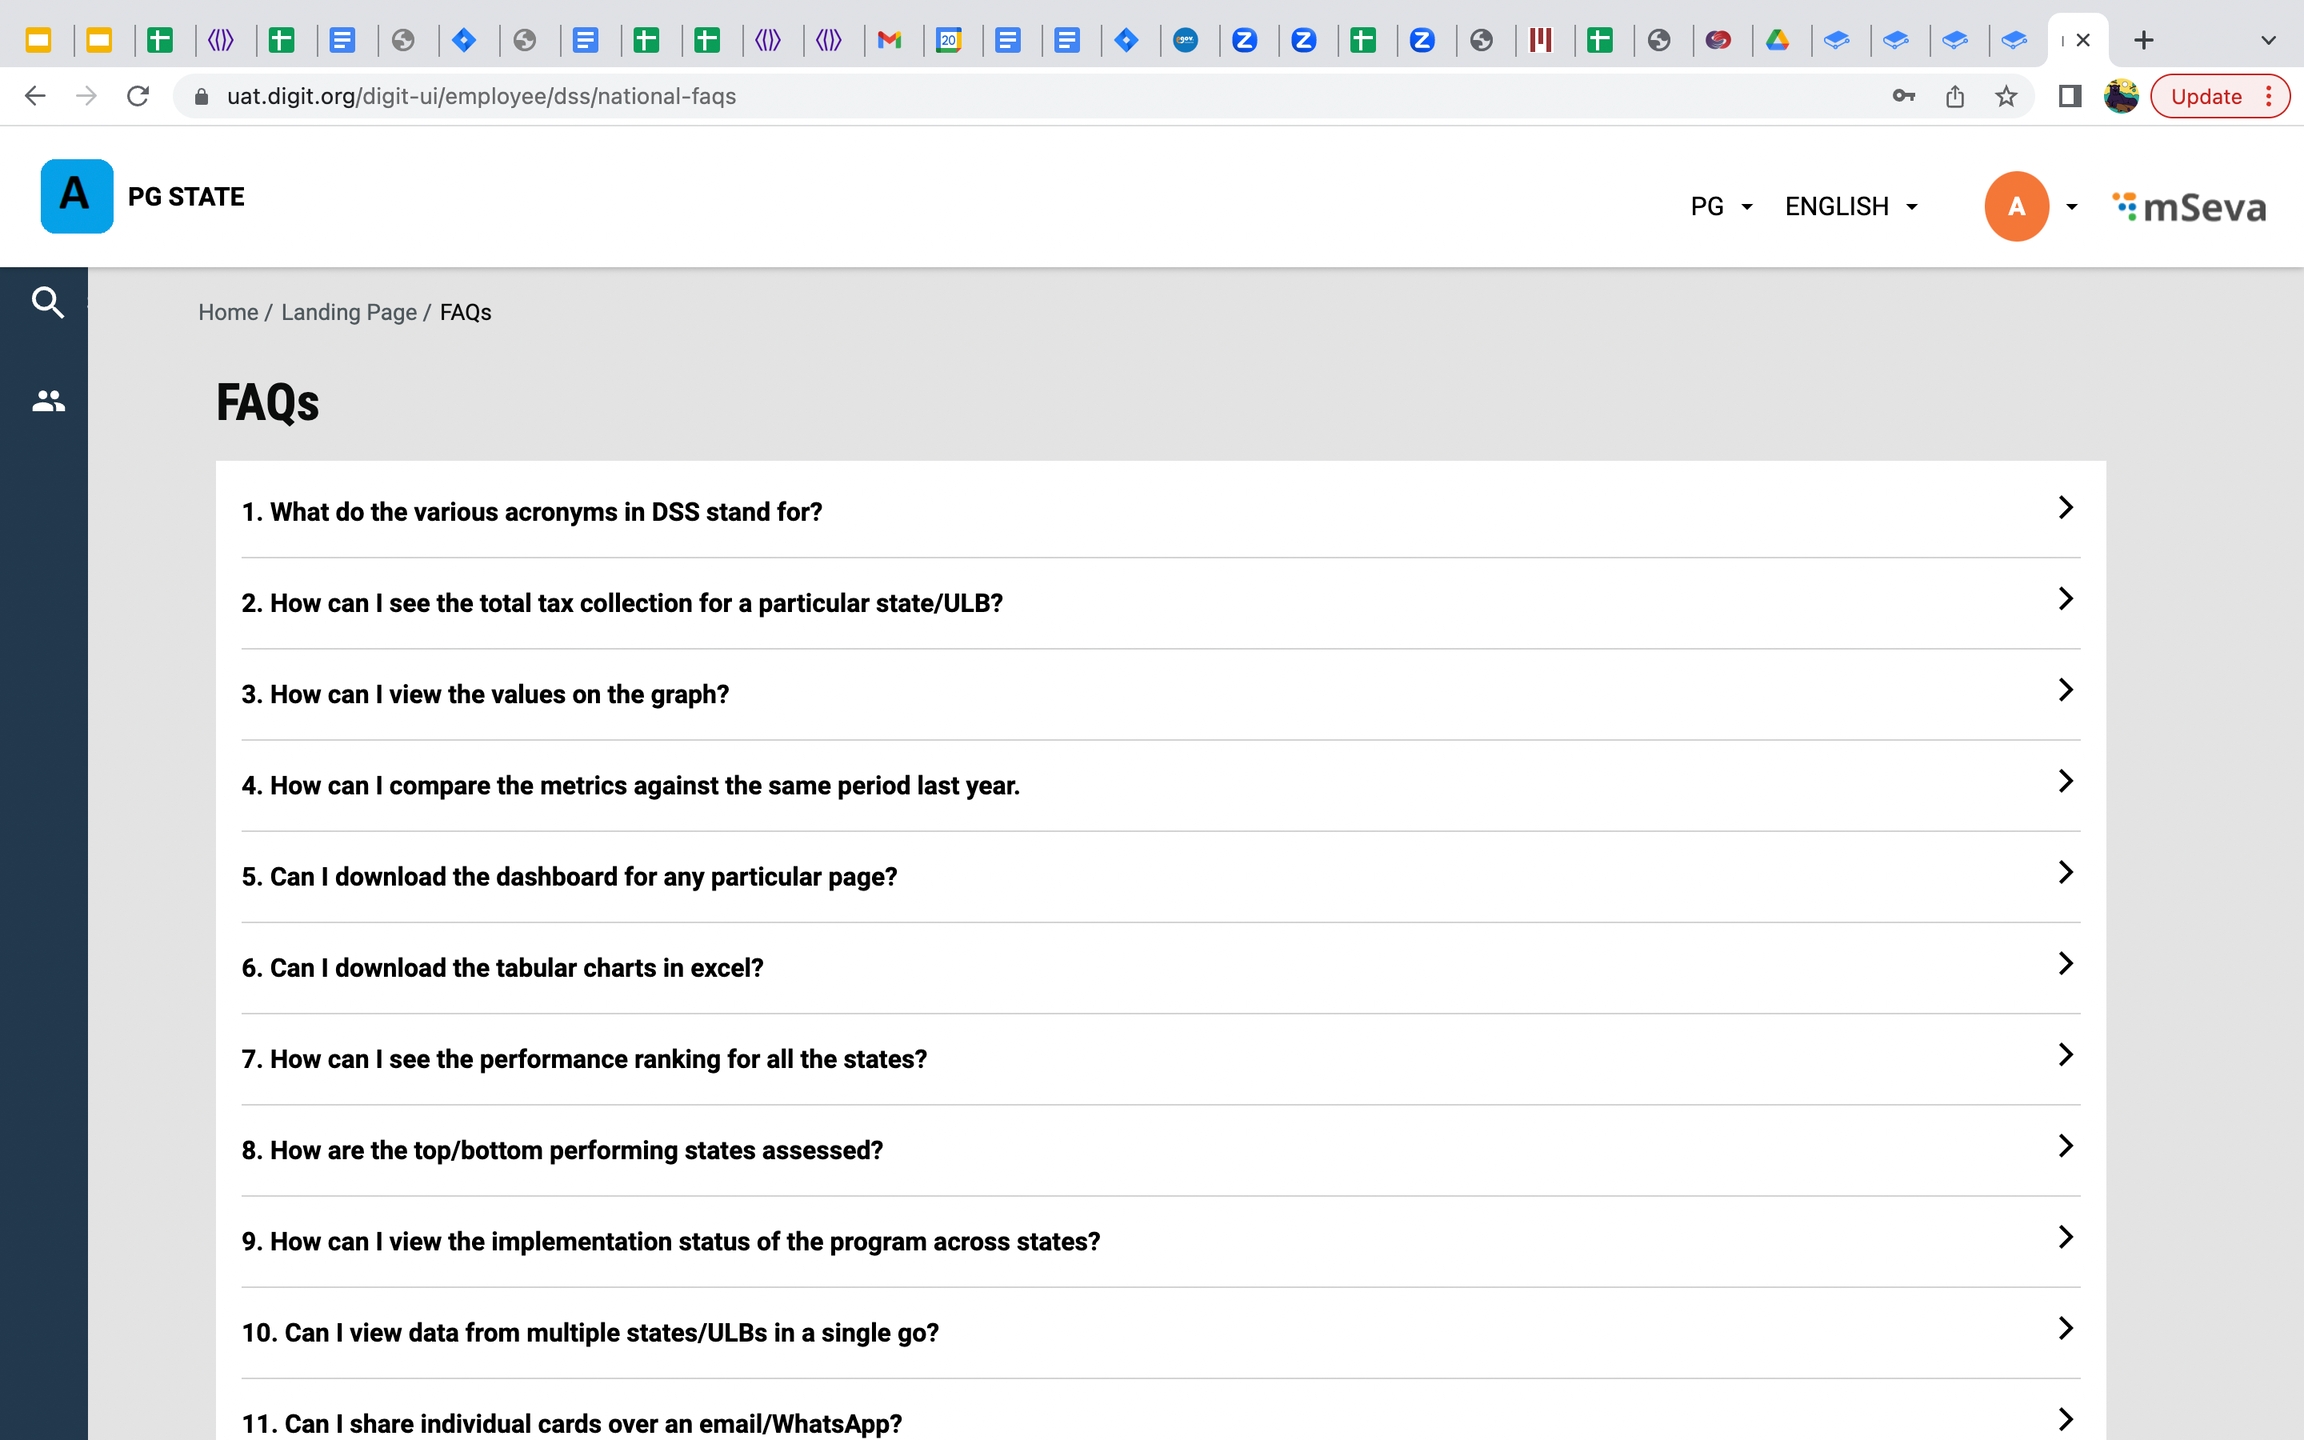
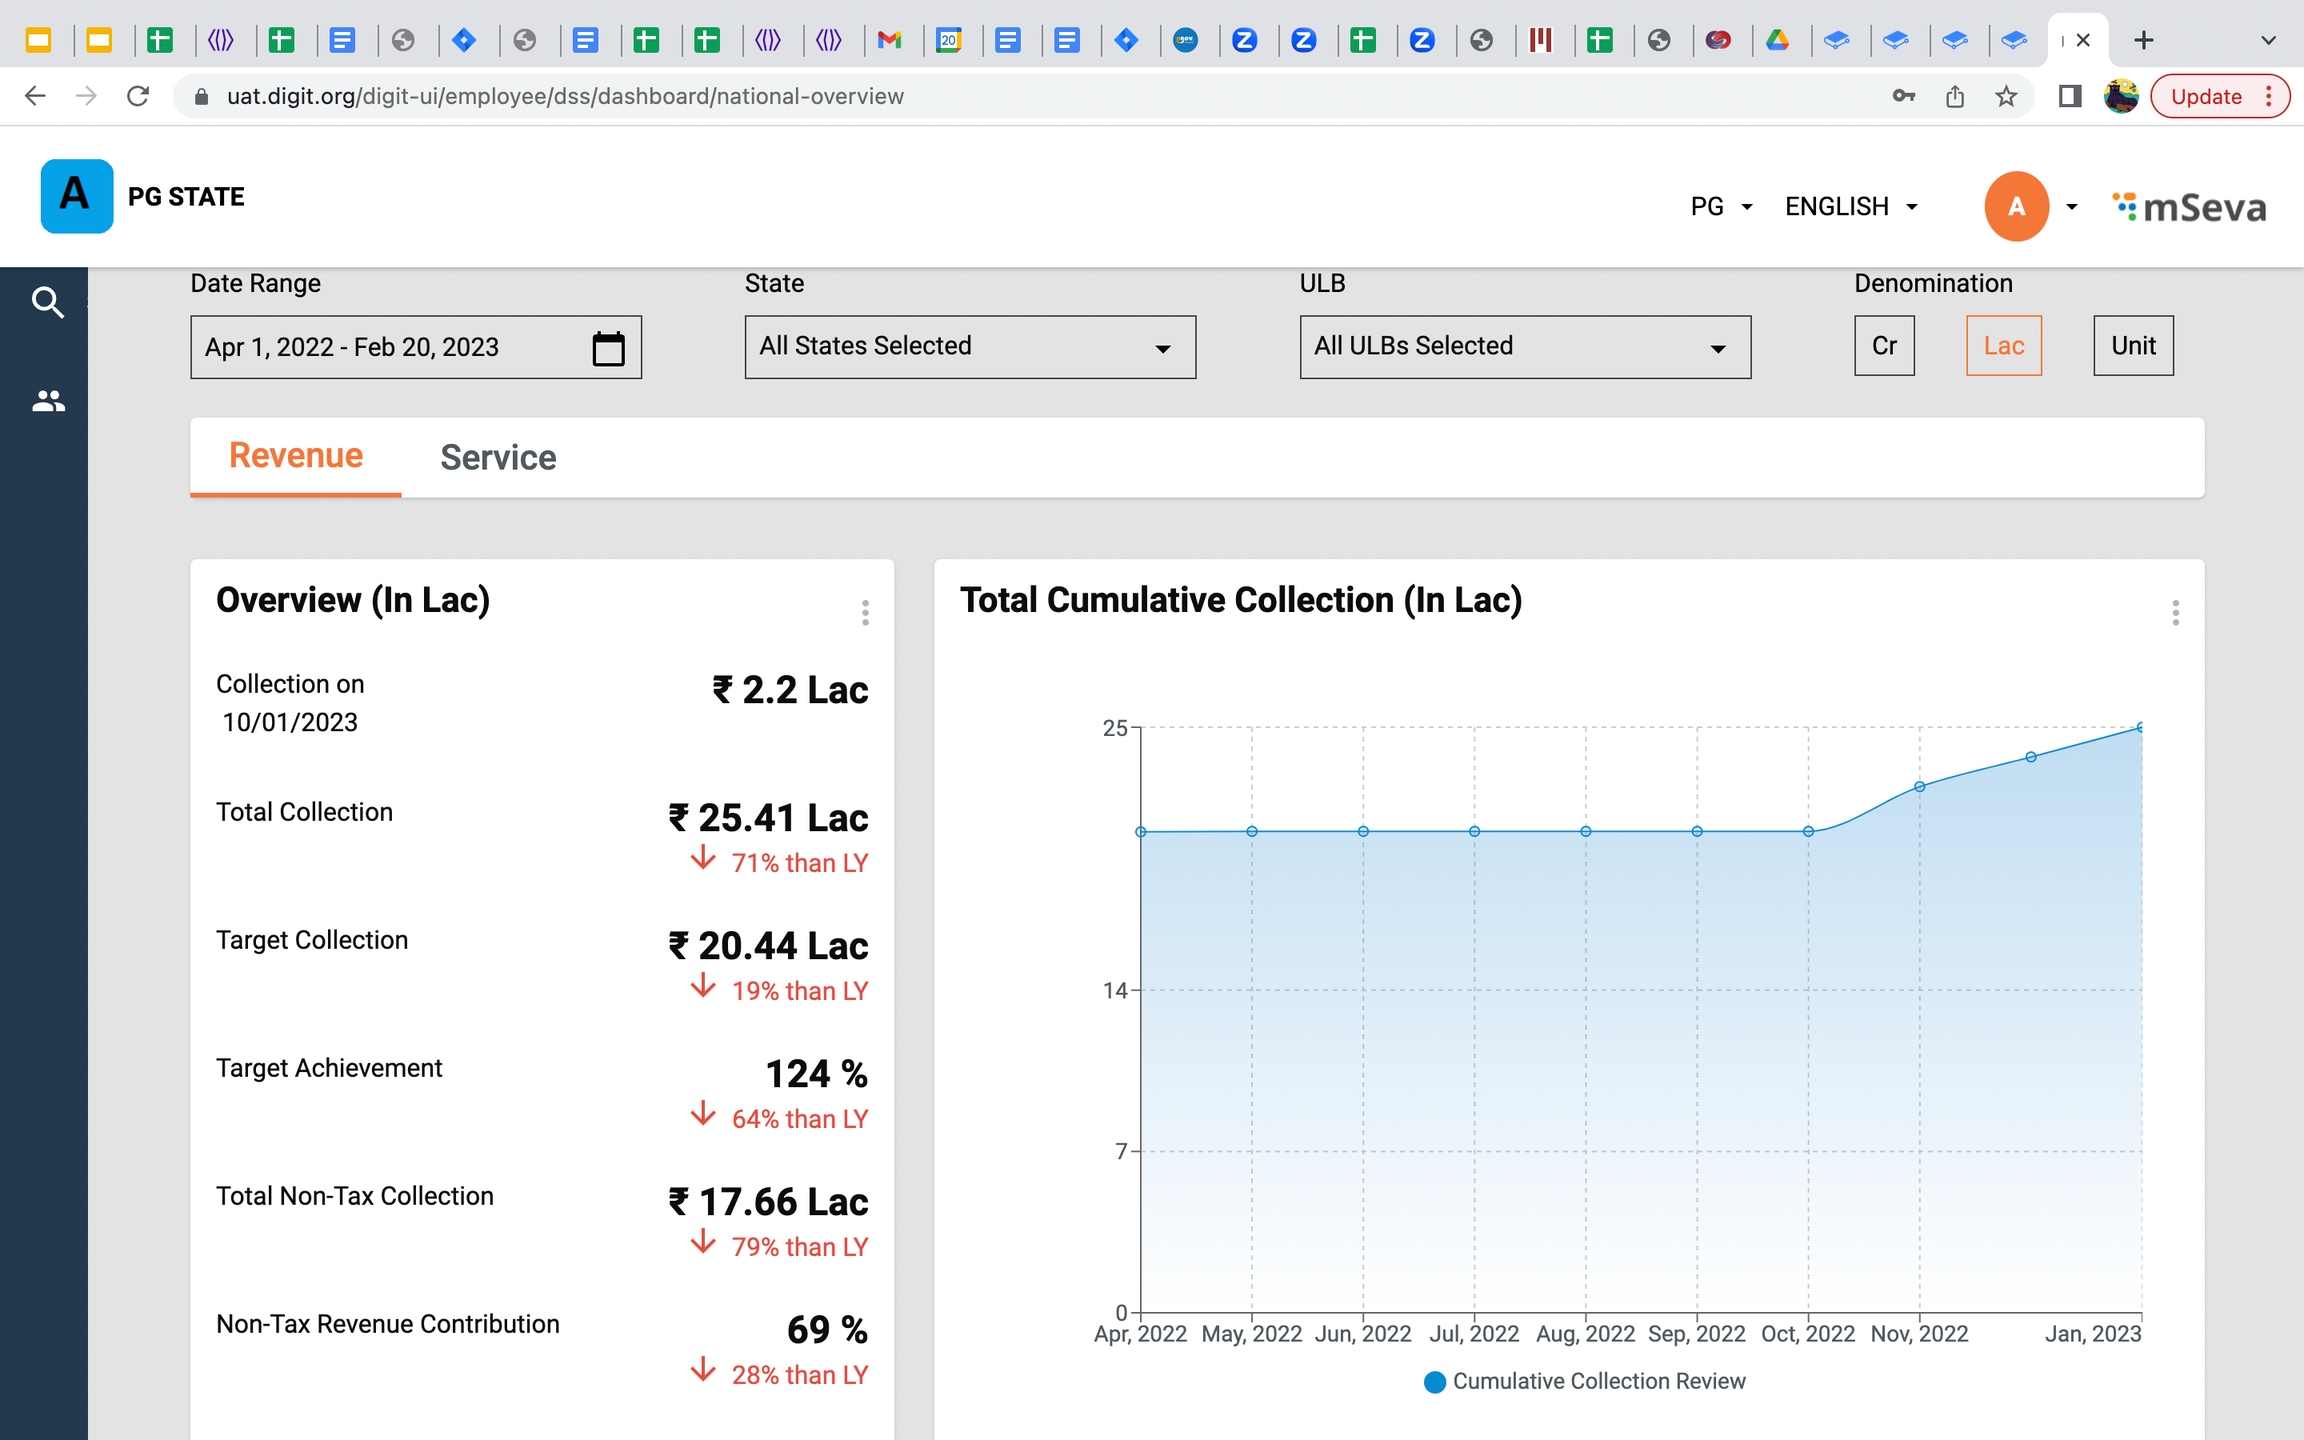
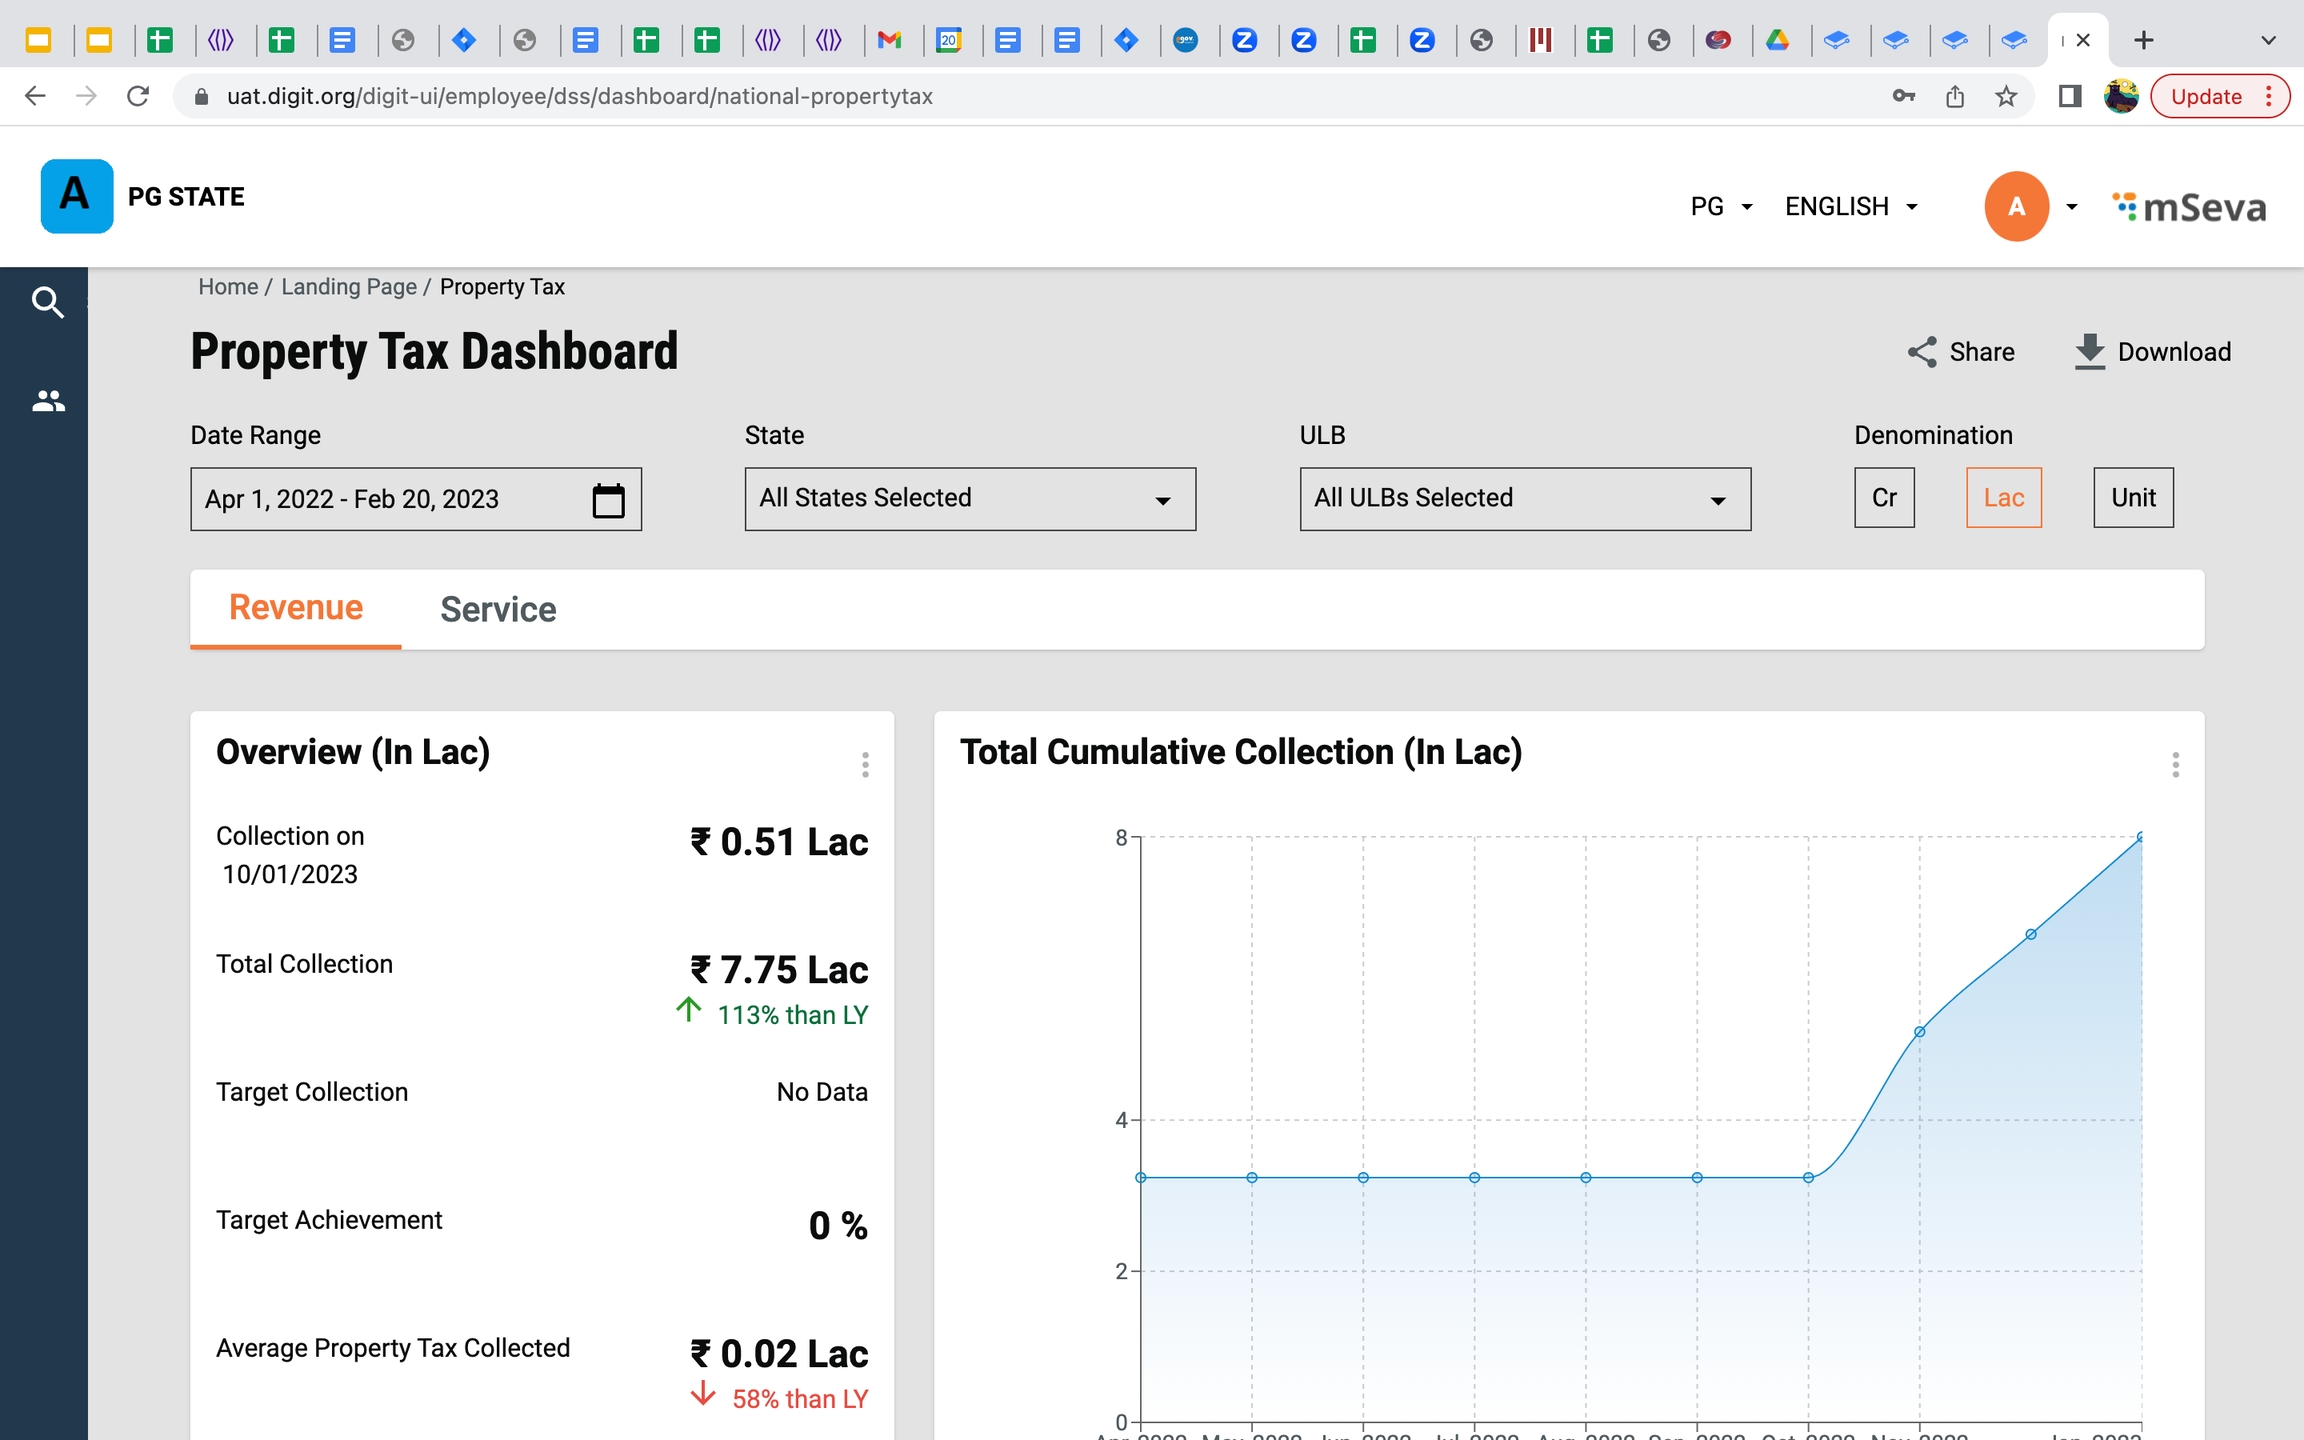


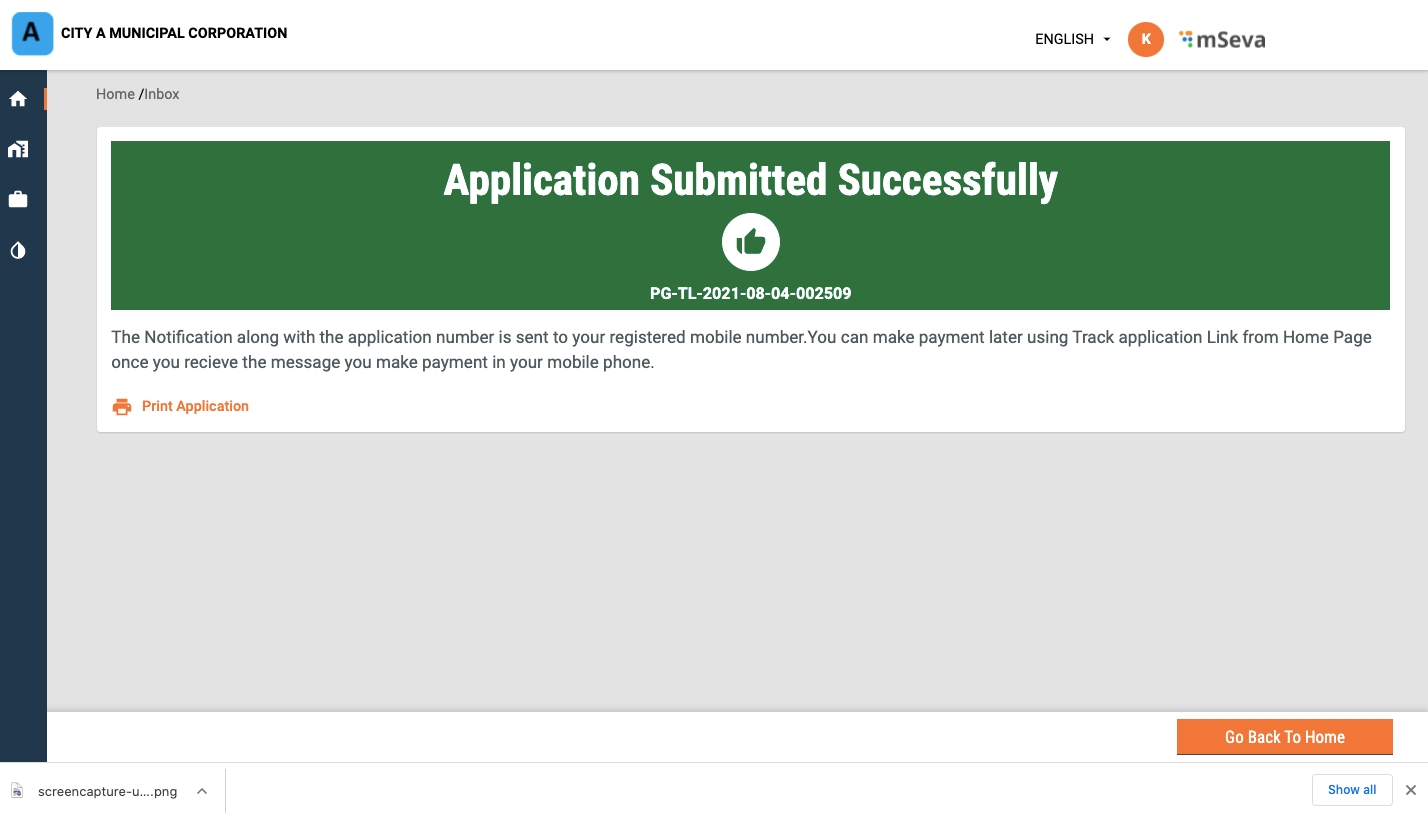

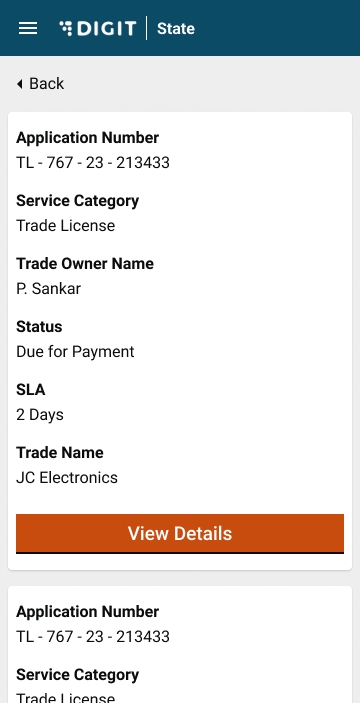
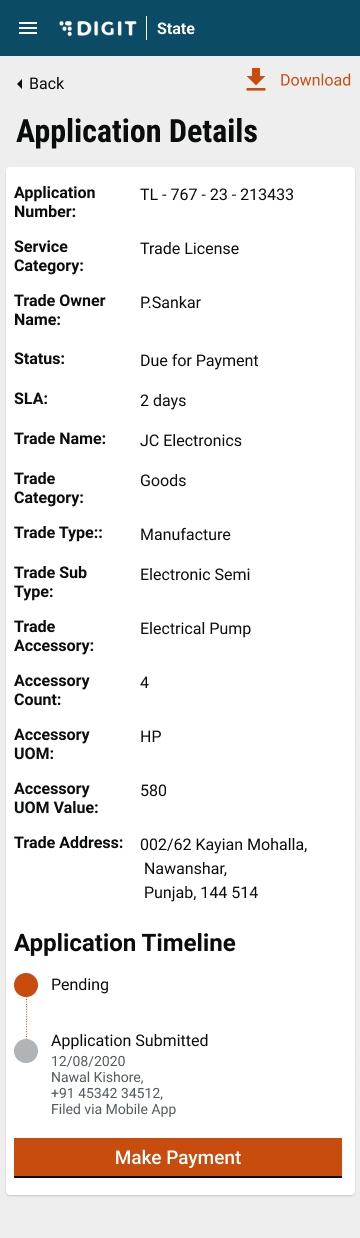
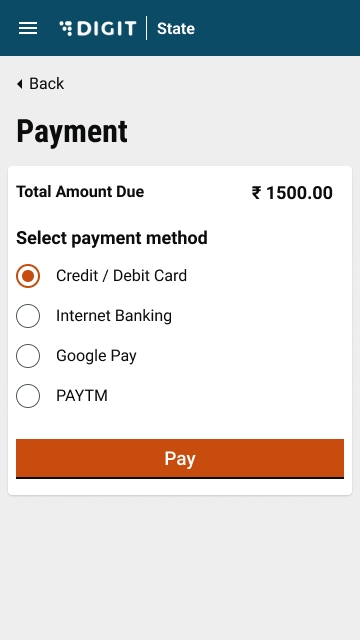
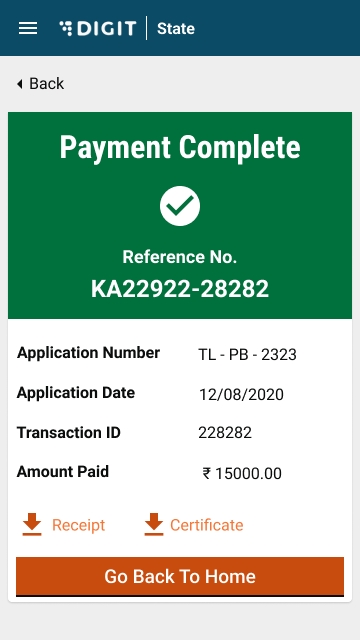
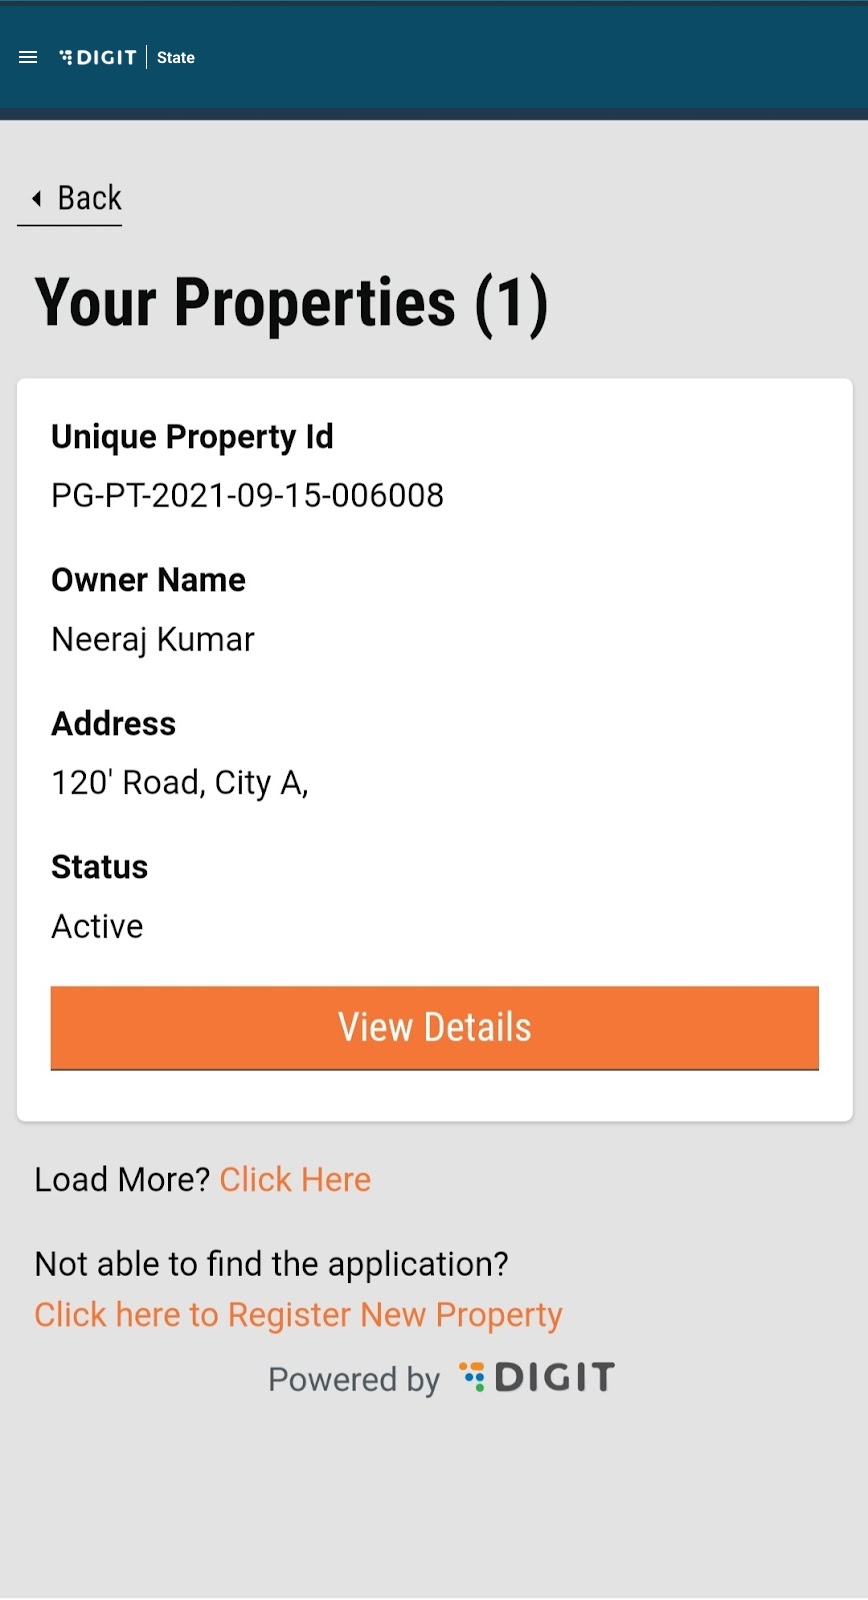
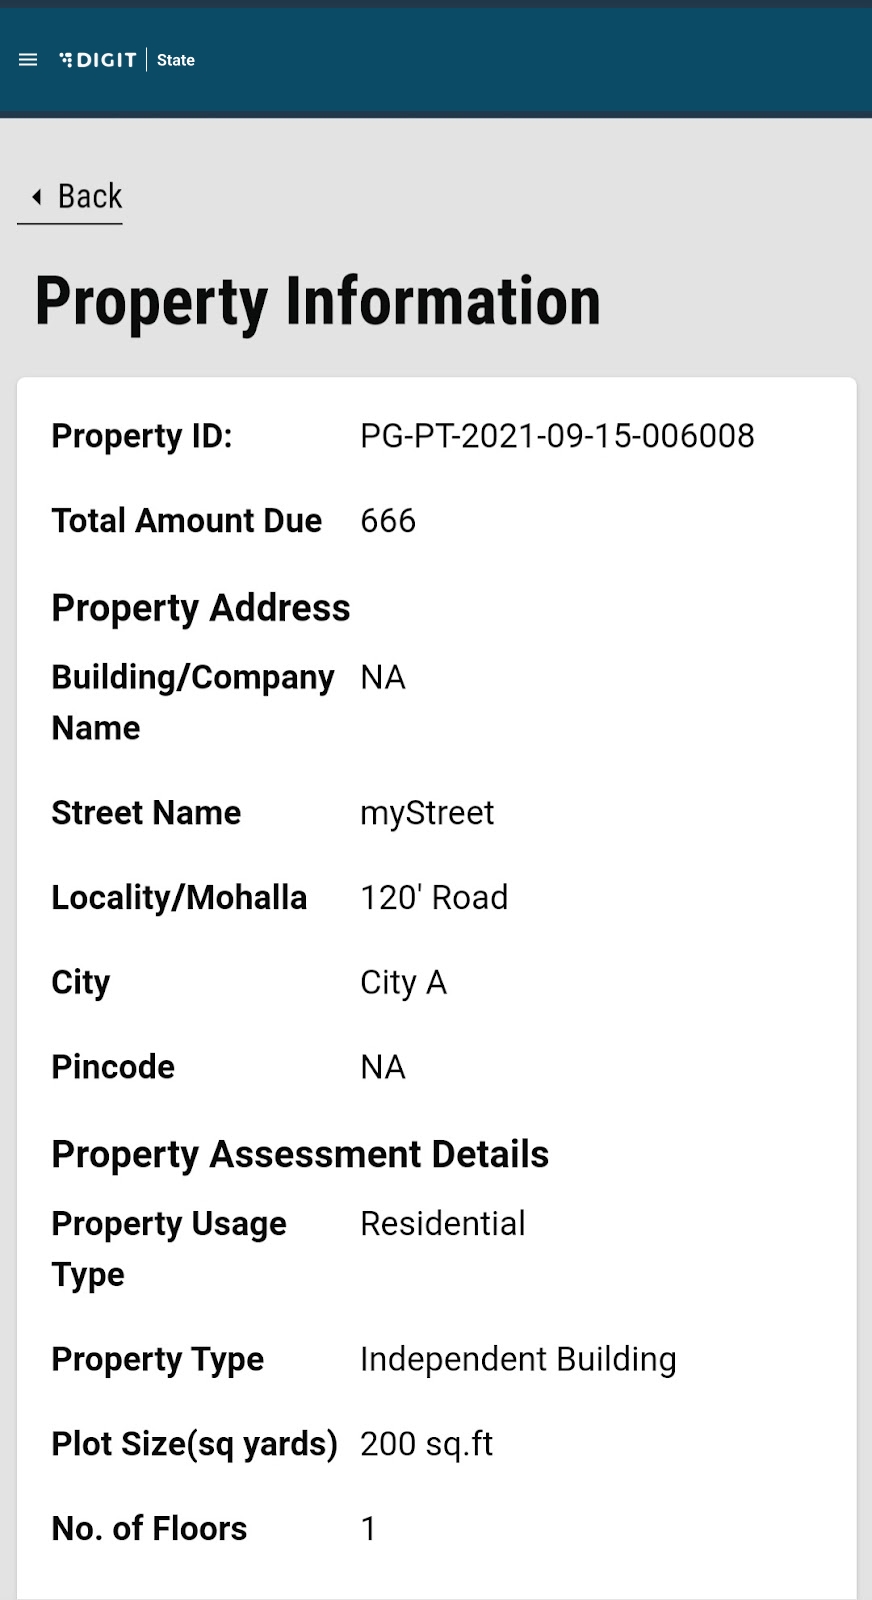
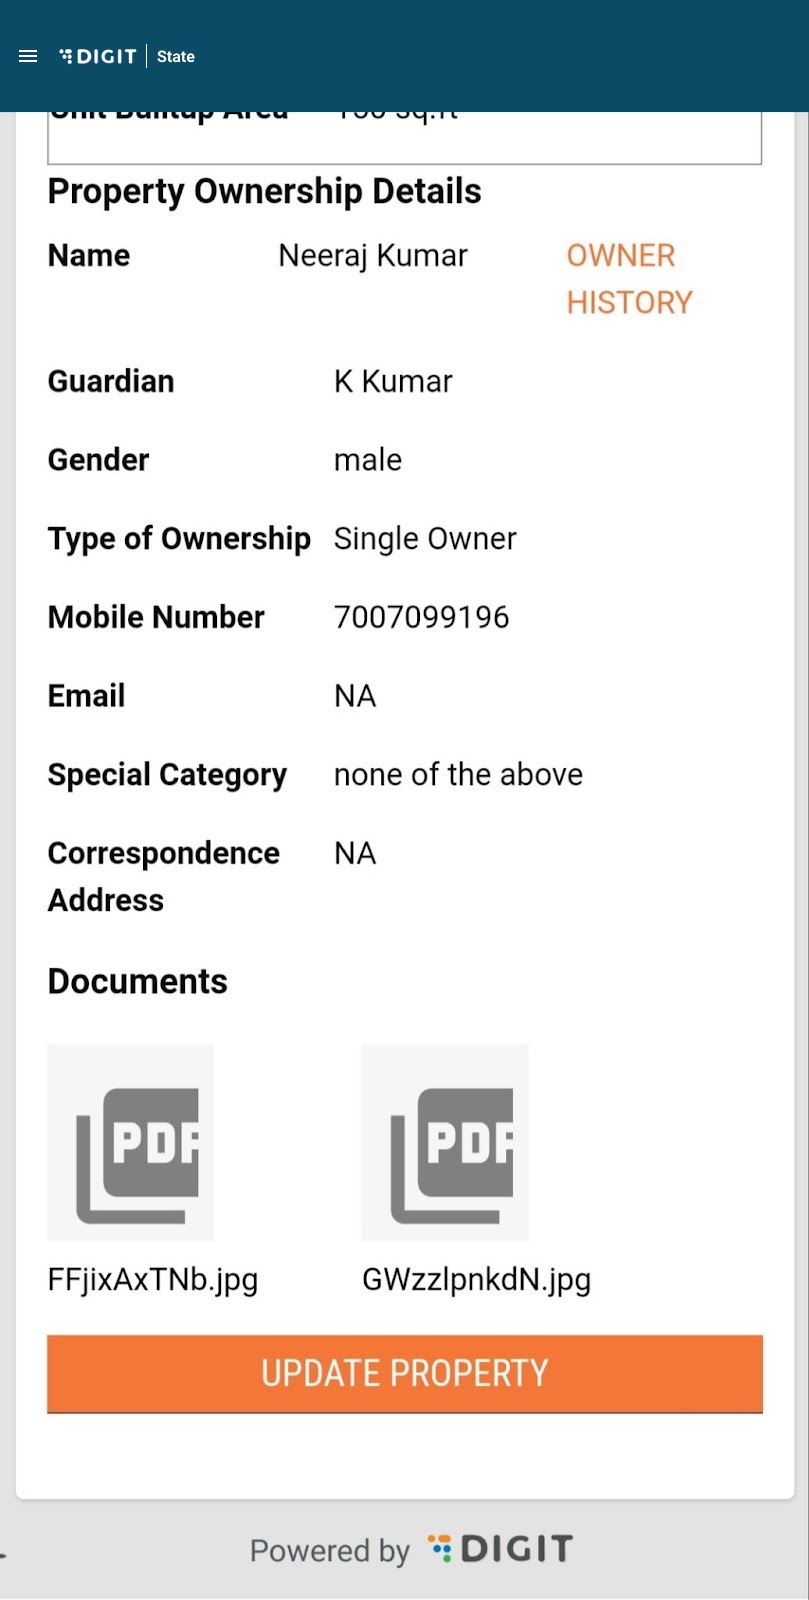
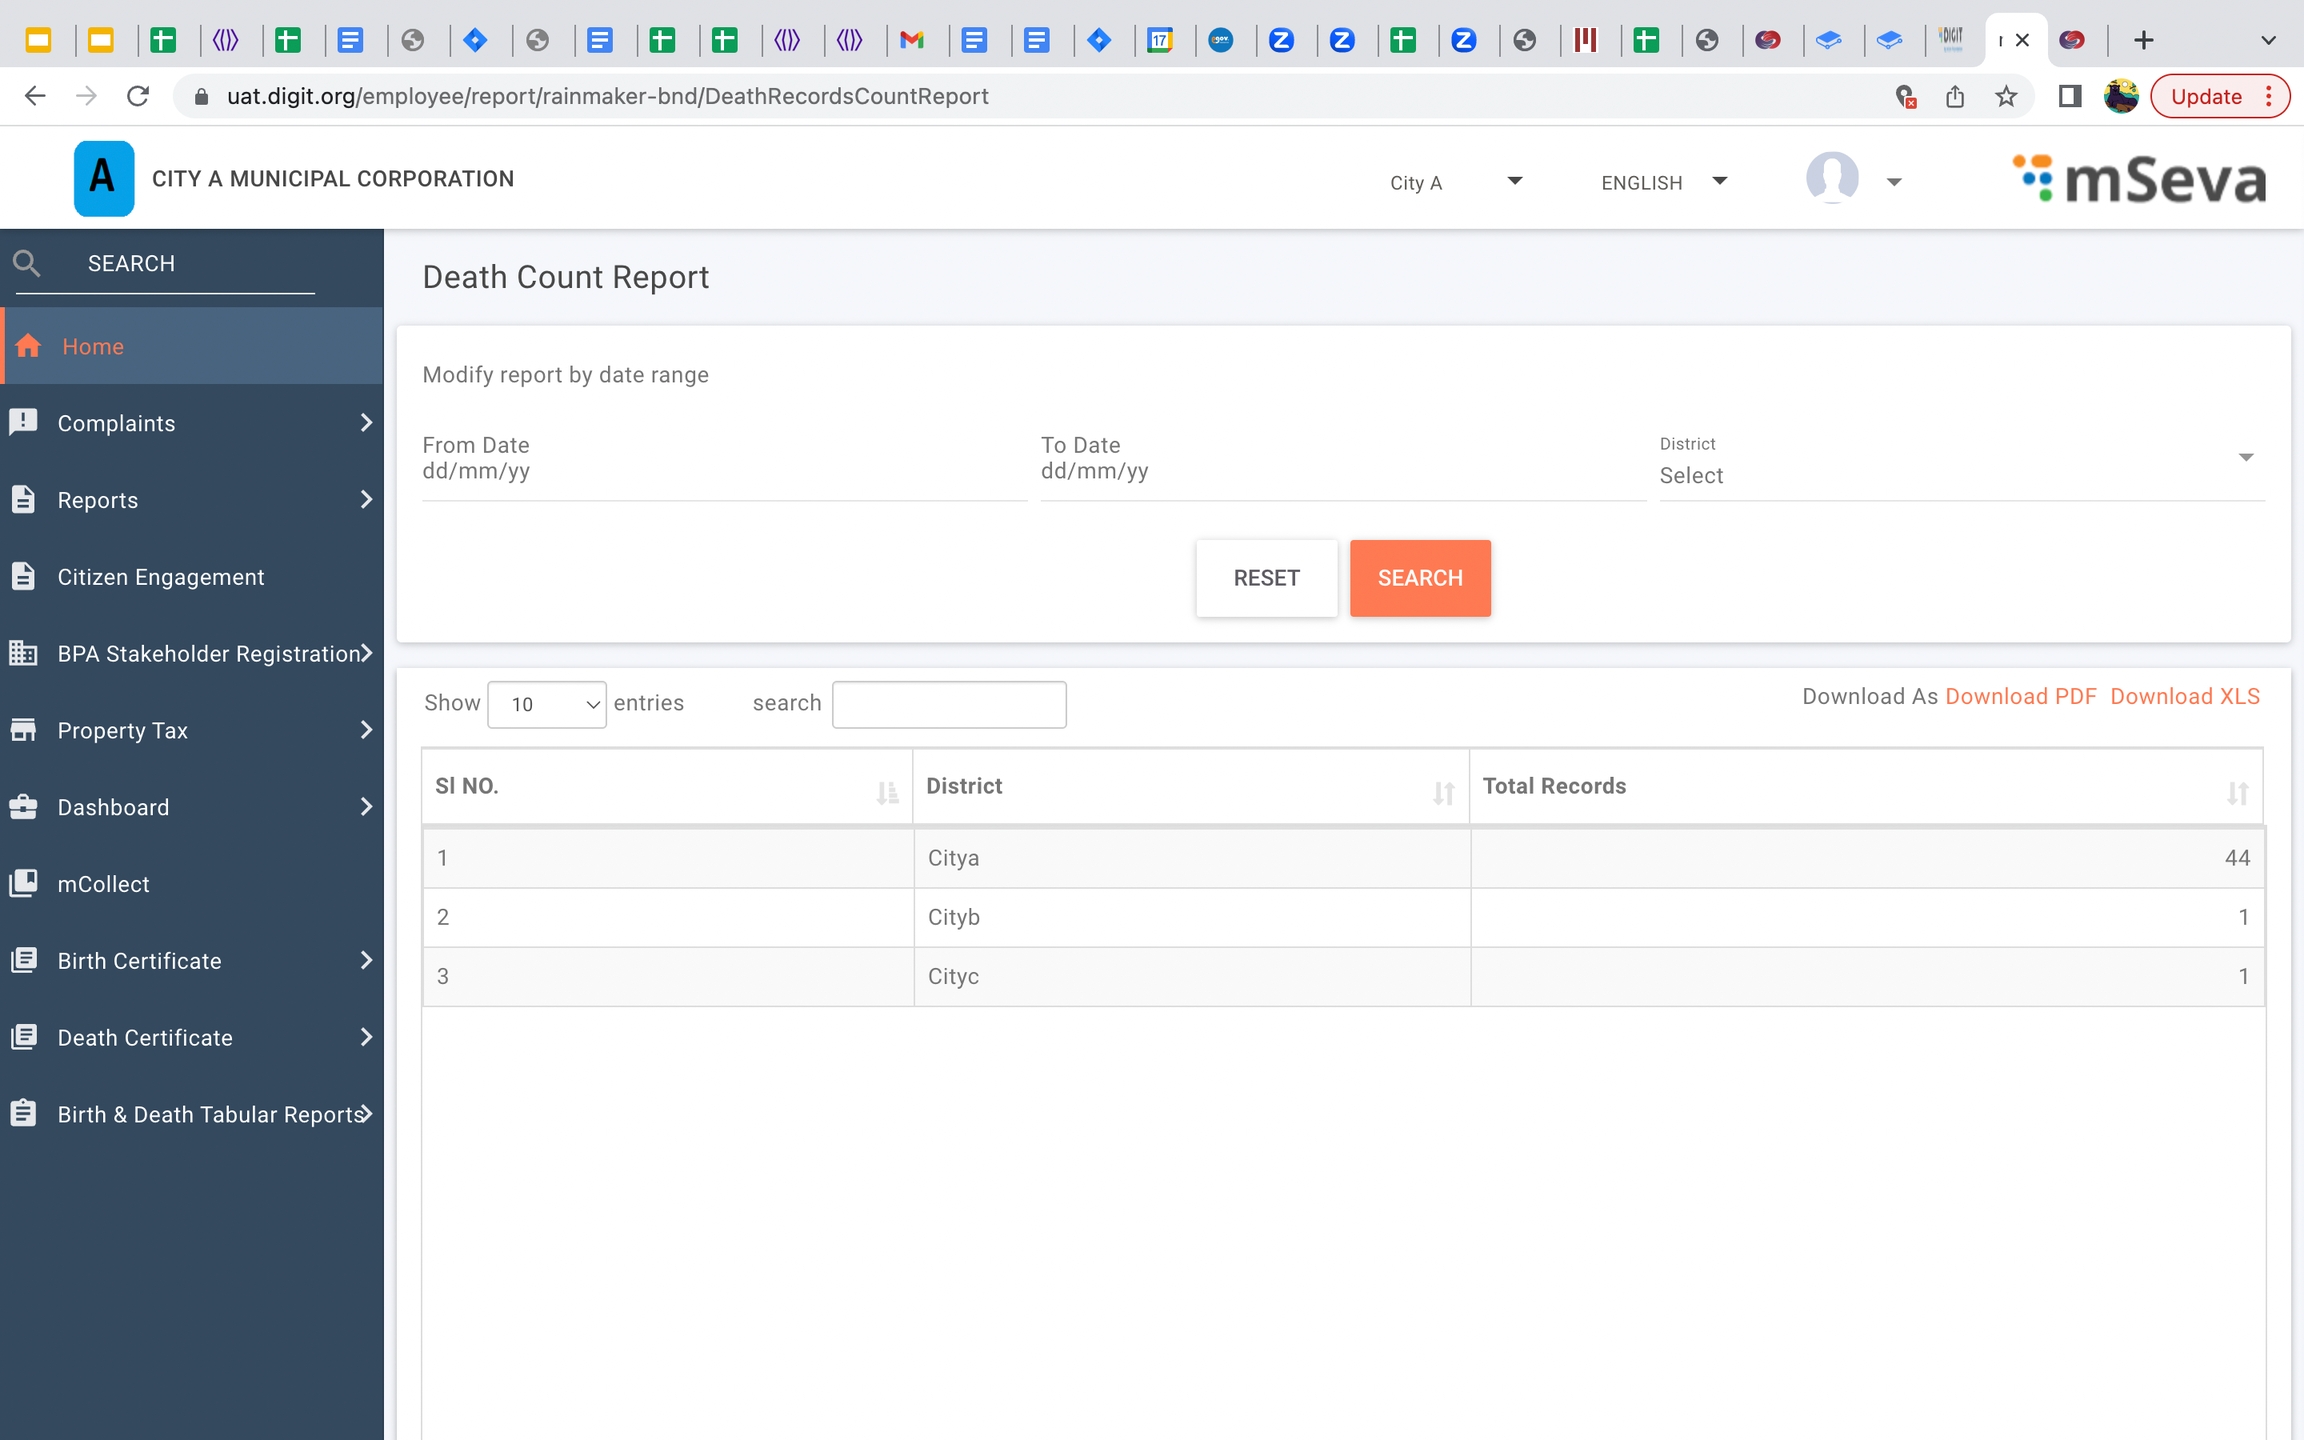
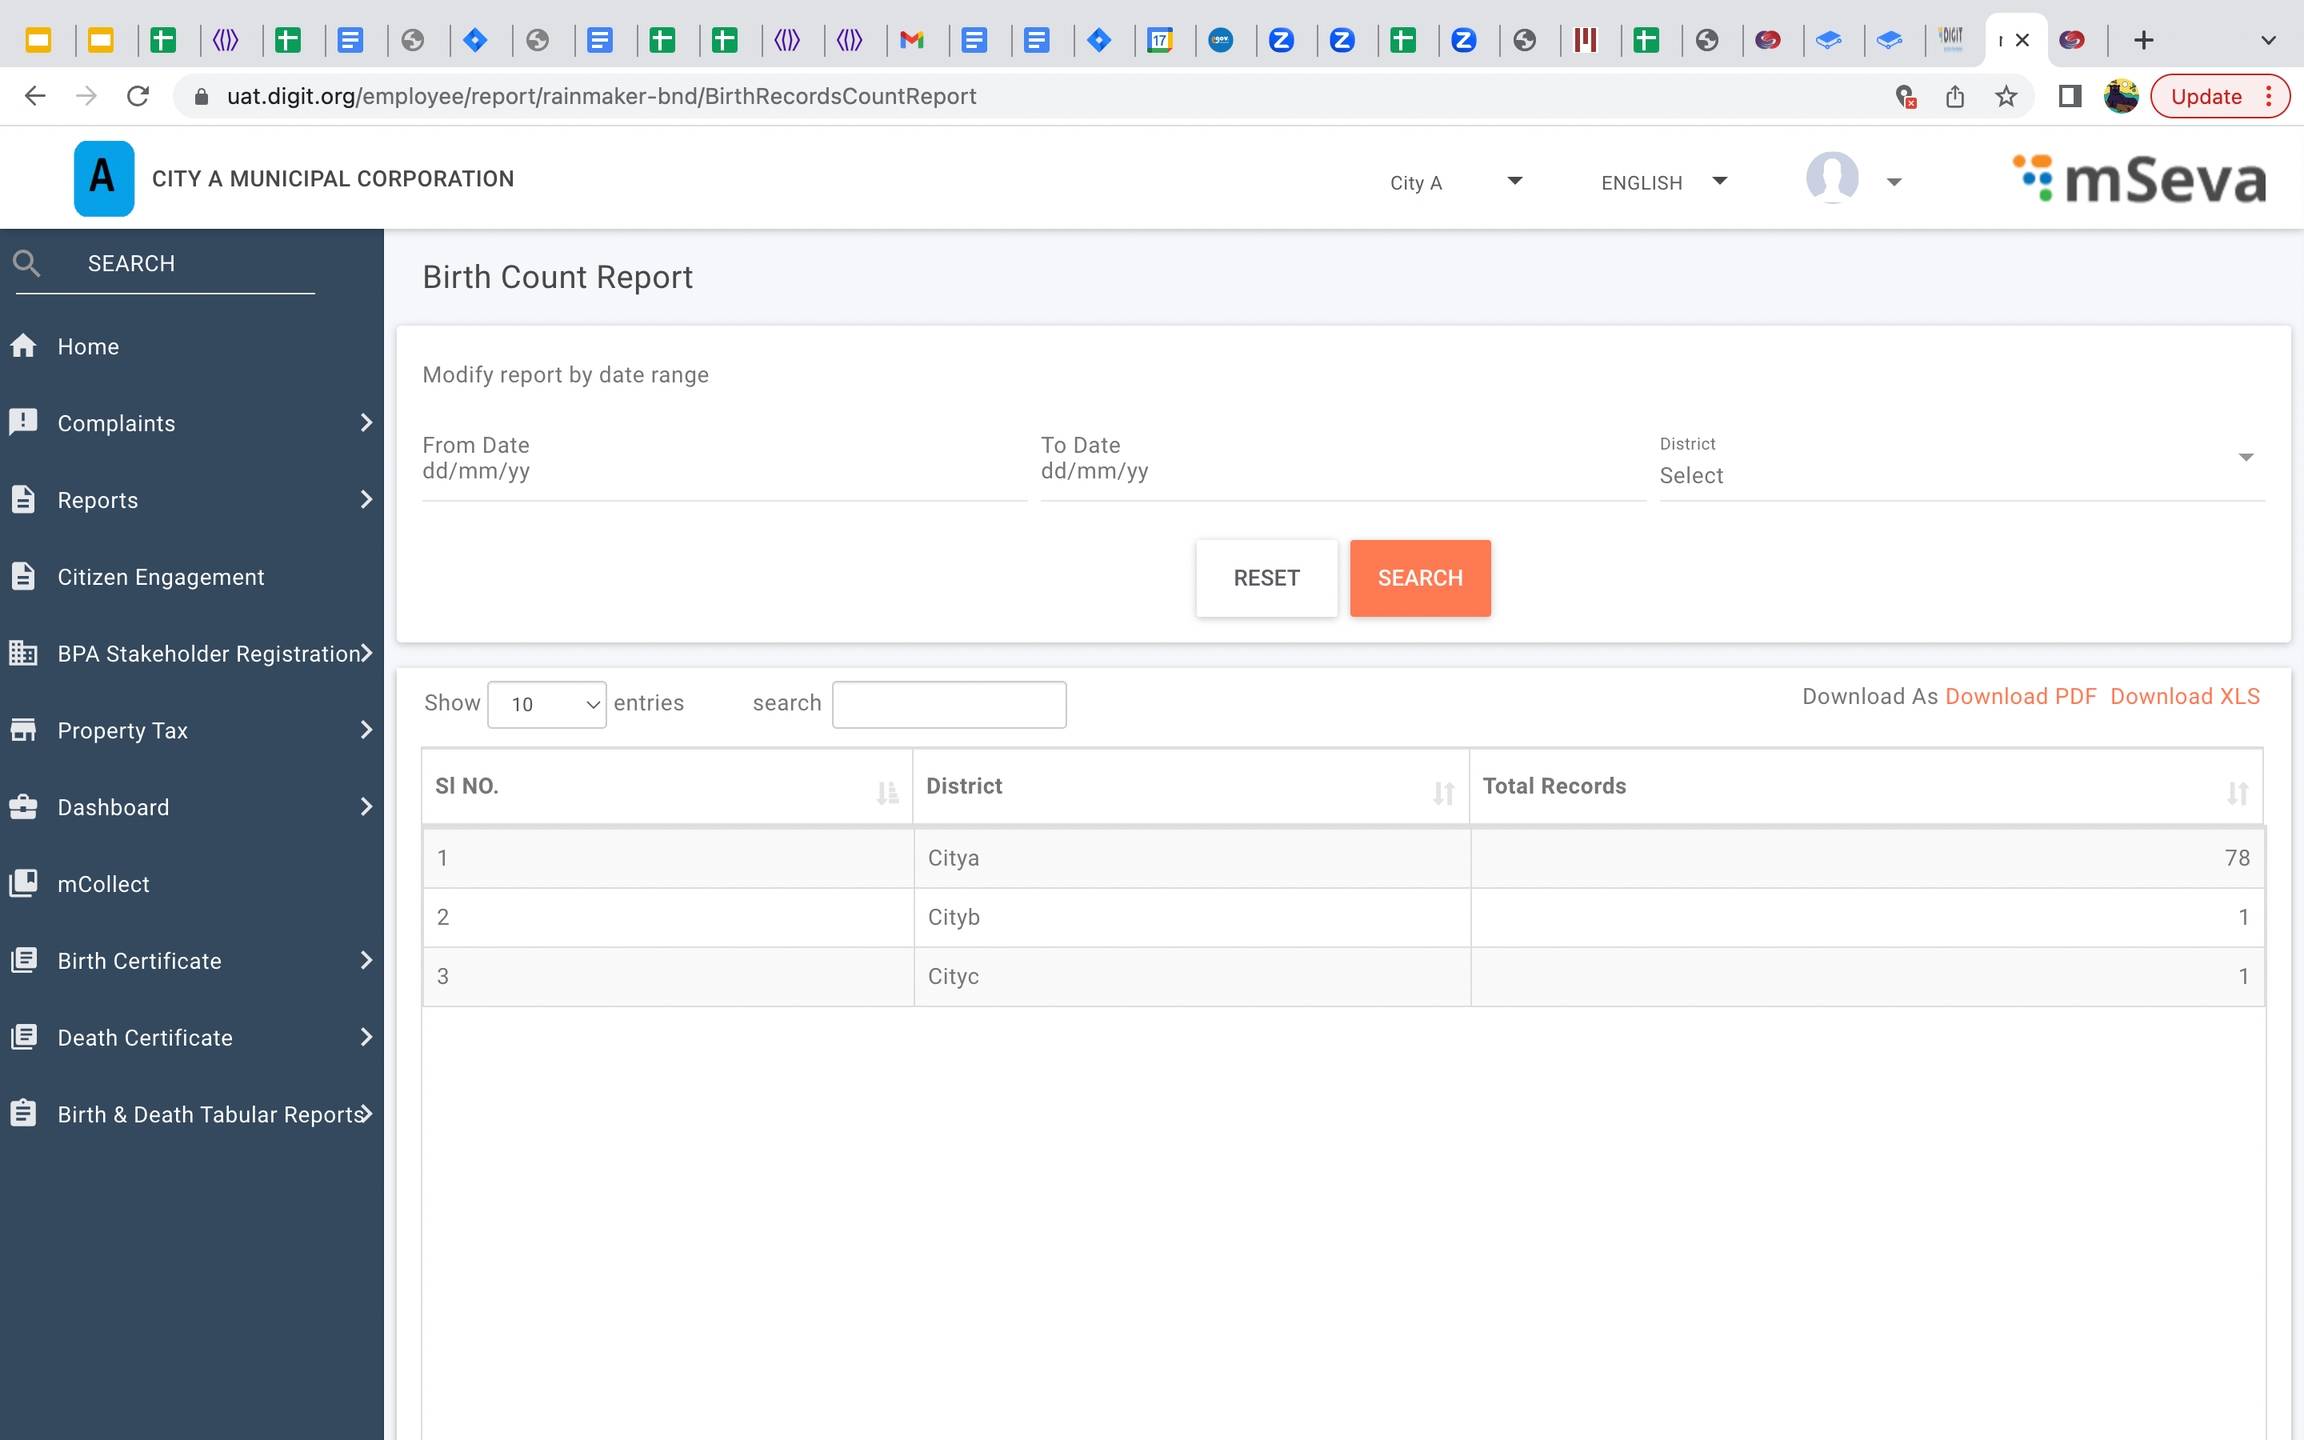
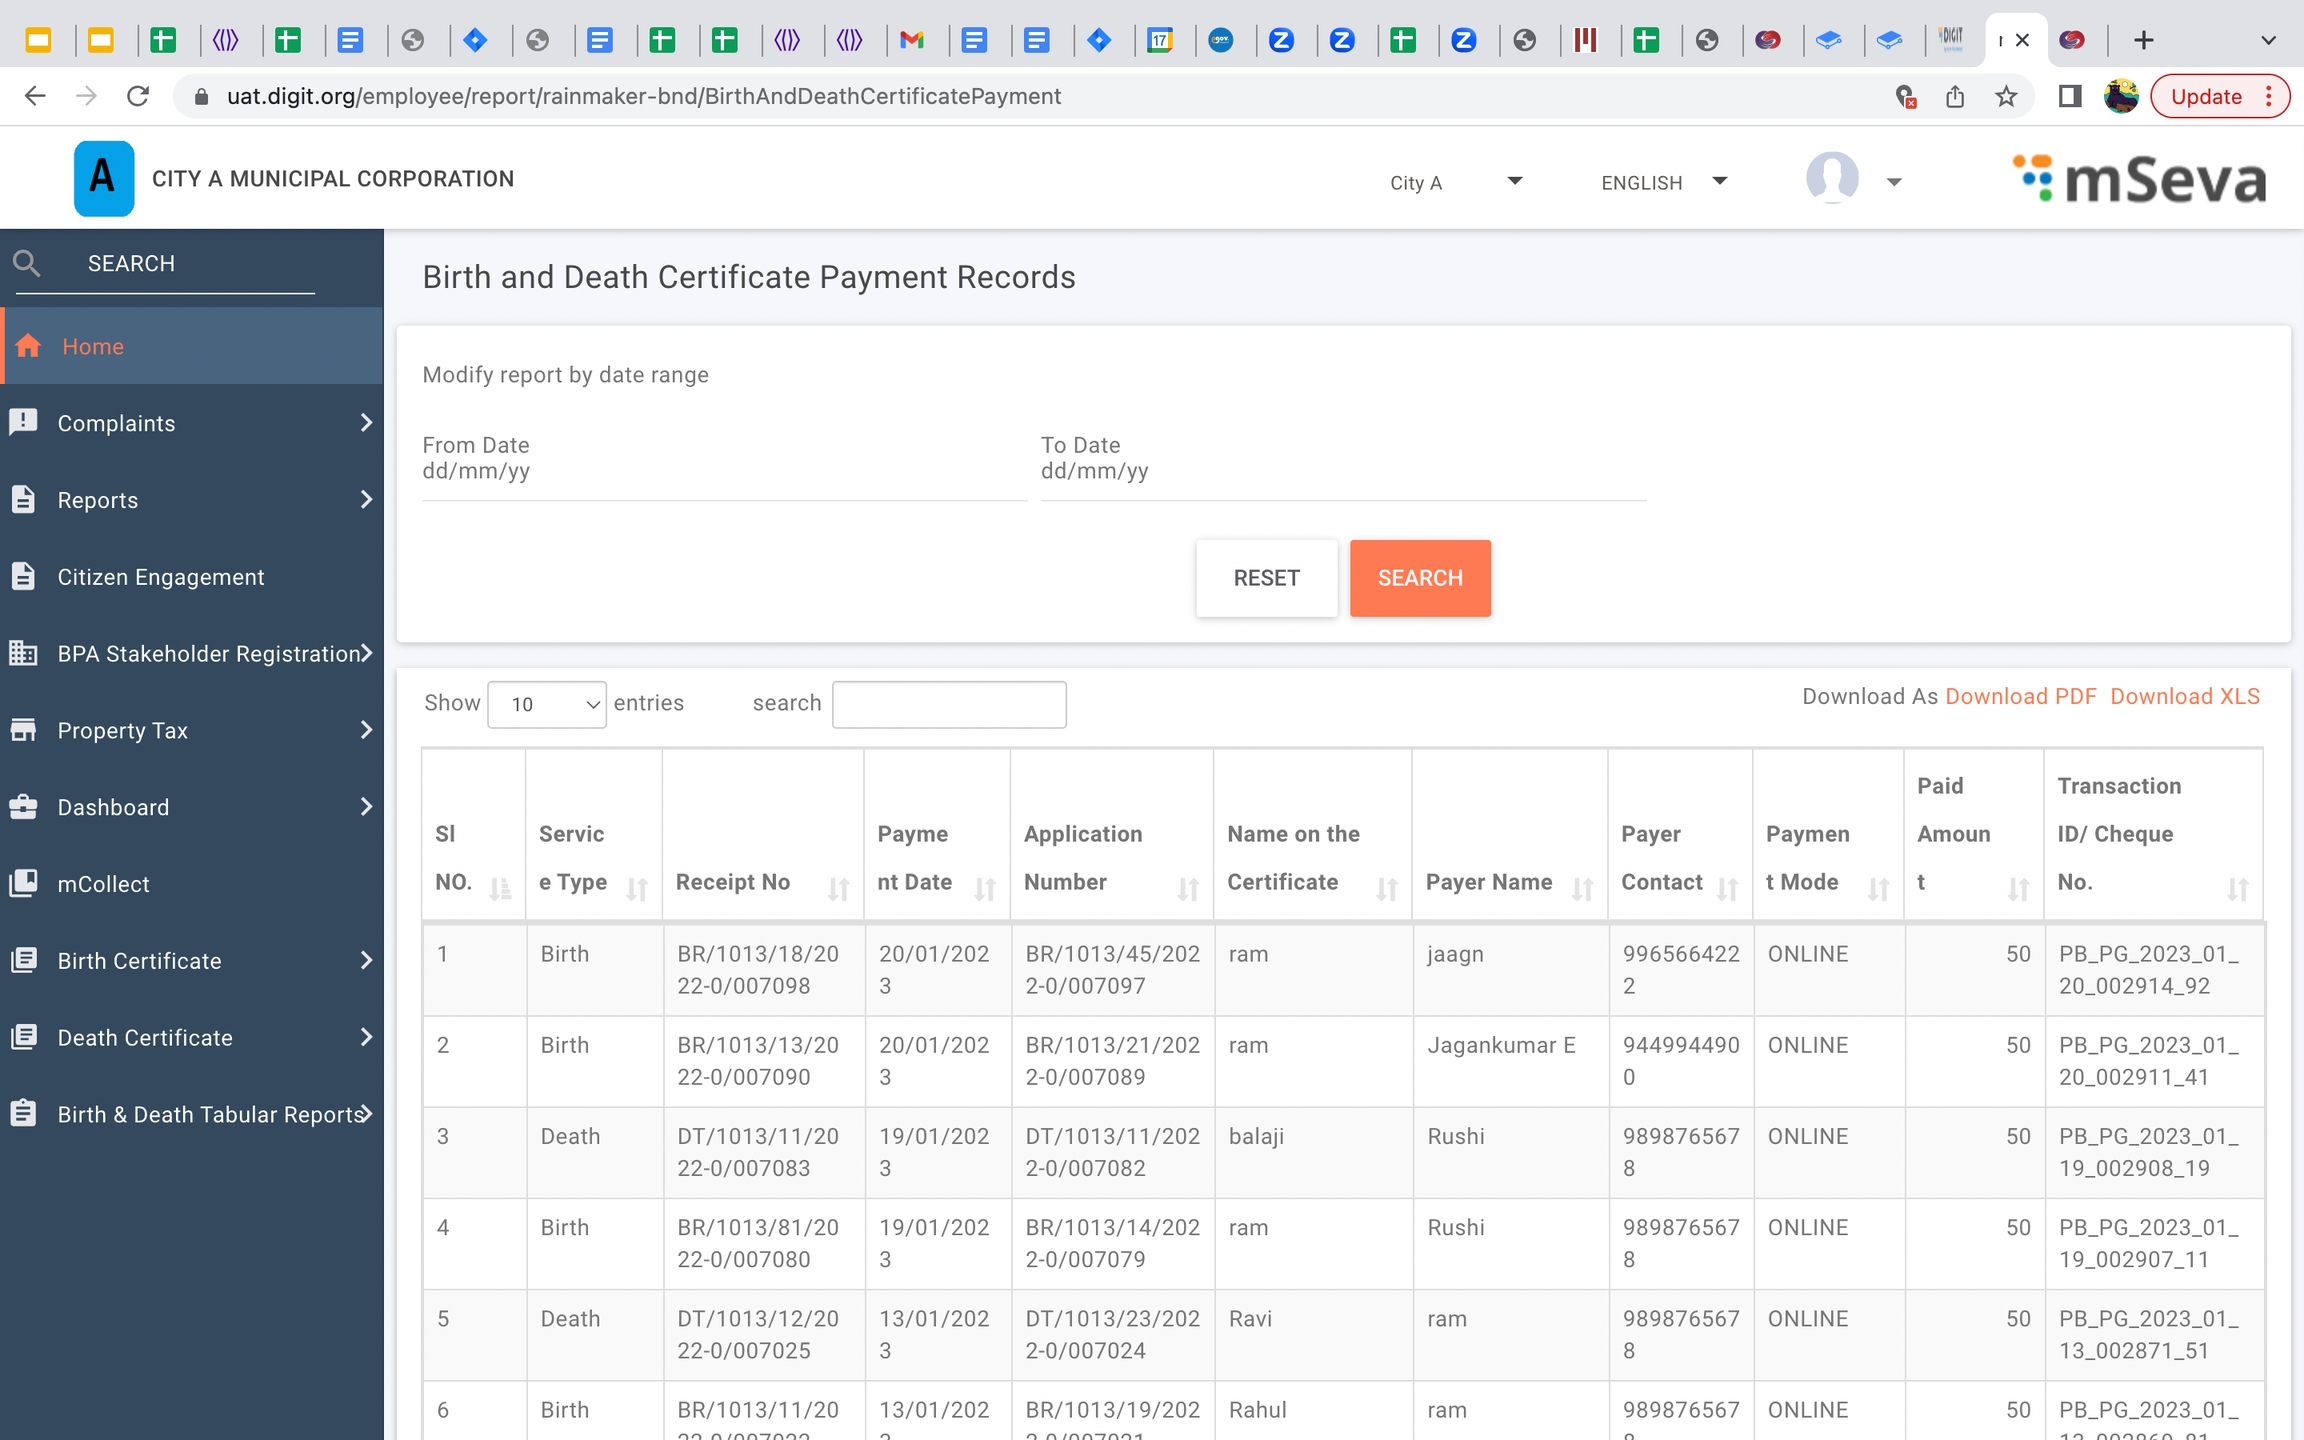
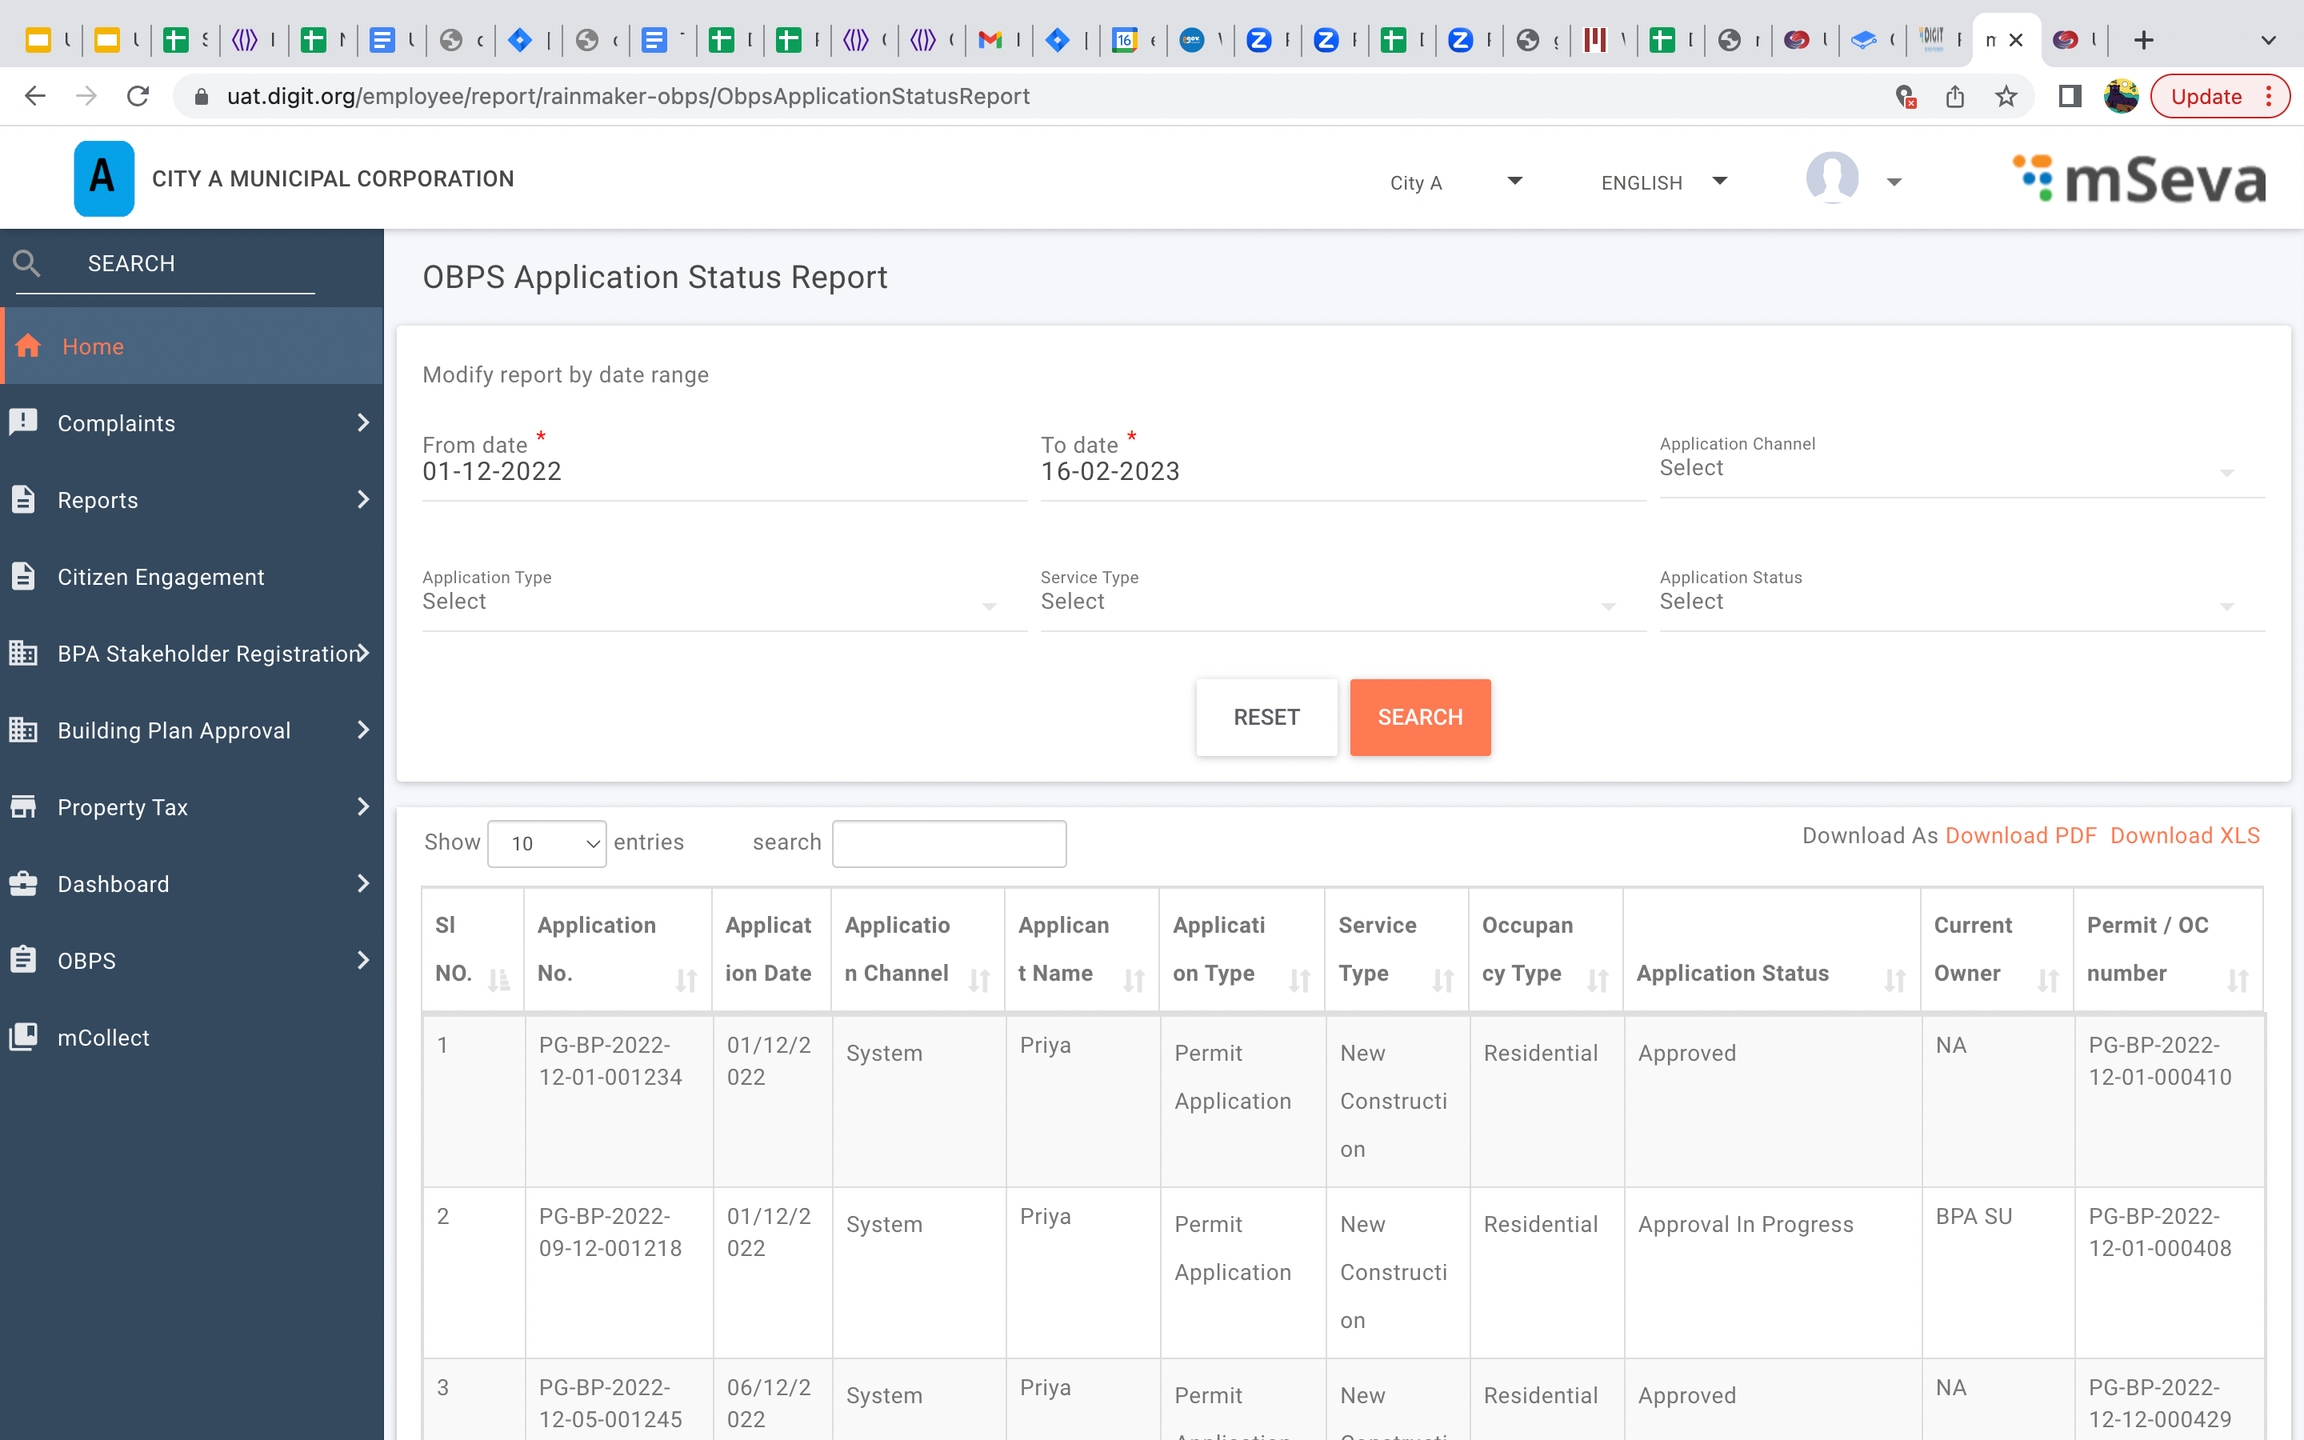
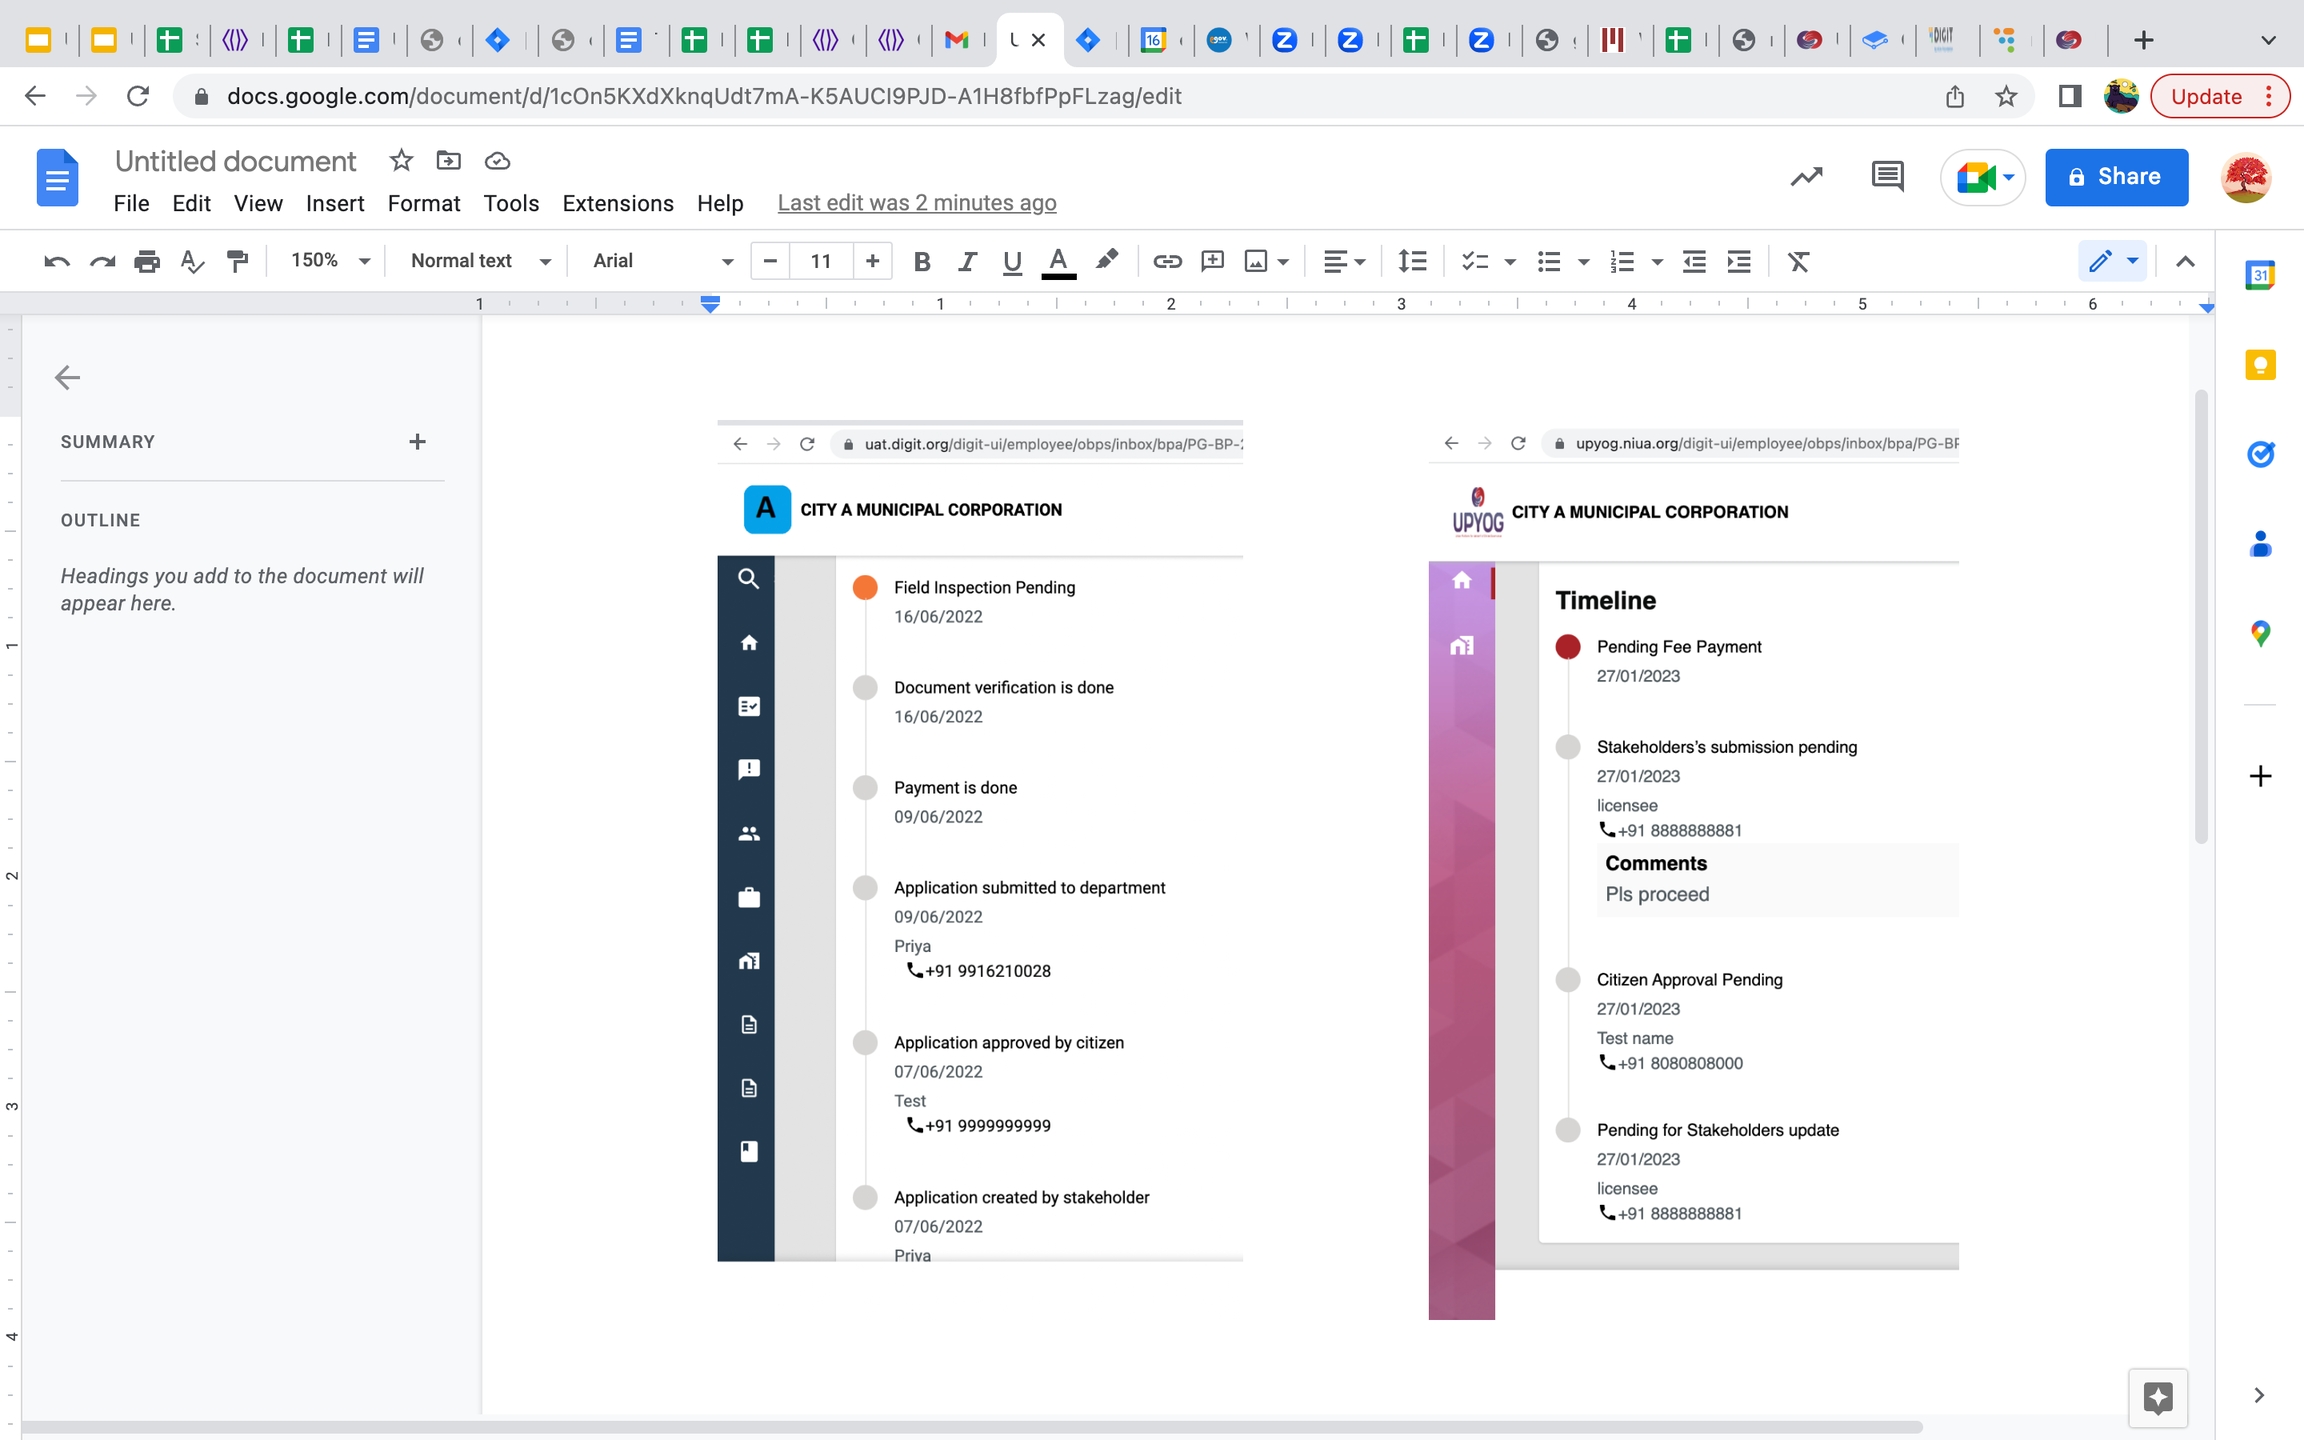
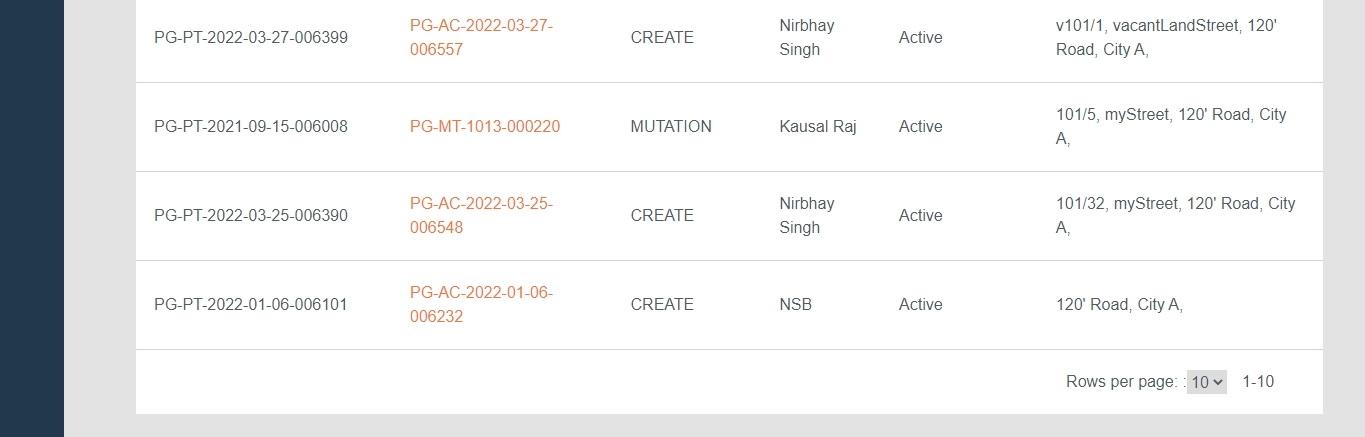
होटल
TC2
Text
256
Yes
Name of the Trade Type in English. Eg: Goods, Services etc.
3
Trade Type Name (In Local Language)
Text
256
Yes
Name of the Trade Type in Local Language (as decided). Eg: Service is described as “सर्विस” in Hindi
4
Trade Category Code
Reference
64
Yes
The Code assigned to the . Eg: TC1 For Goods, TC2 for Services
Enter a Trade Type Name (In English).
Enter the Trade Type Name (In Local Language).
1
TRADE_TYPE_MEDICAL
Hospital
अस्पताल
TC1
2
TRADE_TYPE_HOTEL
1
Trade Type Code
Alphanumeric
64
Yes
The Code assigned to the Trade Type. Eg: TRADE_TYPE_MEDICAL is assigned to Hospitals
3
1
Make sure that each and every point in this reference list has been taken care of
1
The format of the Trade Type Code defined should be alphanumeric and unique
TRADE_TYPE_MEDICAL
TRADE_TYPE_HOTELS
2
Trade Type Name (in either language) should not contain any special characters
Hospital: [Allowed]
#Hospital! : [Not allowed]
Hotels
Trade Type Name (In English)
Allocate the License Fee according to Trade Classification Level (Types/Subtypes).
Map the License fee with the respective Trade Classification Level.
1
TRADE_SMALL_BAKERY
Small Bakery
2500
2000
The table above contains sample data.
1
Trade Sub Type Code
Reference
64
Yes
The Code assigned to the . Eg: TRADE_SMALL_BAKERY is assigned to Bakery
2
Download the data template attached to this page.
Get a good understanding of all the headers in the template sheet, their data type, size, and definitions by referring to the ‘Data Definition’ section of this document.
Identify the “Trade Sub Types” that exists at a ULB/ State level.
Collect the above information and feed it below the “Trade Sub Type Name” column accordingly. The Description of Trade Sub Type Name must be provided as per the language specified in the respective column.
Add the “Trade Sub Type Code” respectively against the identified trade type(s).
Fill in the New License Fee & New Renewal Fee accordingly. The New License Fee & Renewal Fee can be the same as well as distinct, depending on the by-laws/ mandate followed by the State/ULB.
Fill in the fields related to Units of Measurement (UOM Unit, From/To) for the available trades only.
The checklist is a set of activities to be performed once the data is filled into a template to ensure data type, size, and format of data is as per the expectation. These activities have been divided into 2 groups as given below.
This checklist covers all the activities which are common across the entities.
1
Make sure that each and every point in this reference list has been taken care of
This checklist covers the activities which are specific to the entity.
1
Trade Type Name (In either Language) should not contain any special characters
Small Bakery: [Allowed]
#Small_Bakery! : [Not allowed]
1
PUCCA
Pucca
पक्का
IMMOVABLE
2
KUTCHA
Kutcha
कच्चा
The table above contains sample data.
1
Code
Alphanumeric
64
Yes
Unique code to identify each and every record uniquely
2
Download the data template attached to this page.
Refer to the ‘Data Definition’ section of this document for more details on data type, size, and definitions.
Contact the person who shared this template with you to discuss and clear your doubts.
Enter the relevant structure sub types with its proper mapping with structure type.
Verify the data once again by going through the checklist and making sure that each and every point mentioned in the checklist is covered.
The checklist is a set of activities to be performed once the data is filled into a template to ensure data type, size, and format of data is as per specifications. These activities have been divided into 2 groups as given below.
This checklist covers all the activities which are common across the entities.
1
Make sure that each and every point in this reference list has been taken care of.
A separate entity-specific checklist is not needed for this entity data template.
Before you proceed with the documentation, make sure the following pre-requisites are met -
Java 8
Kafka server is up and running
egov-persister service is running and has tl-services persister config path added in it
PSQL server is running and database is created
Used for license generations in trade licenses, stakeholder registration and issue lockdown pass
Define roles to applicants on successful application to access Building Plan Approval services at the time of stakeholder registration
Generate application number and license number
Support workflows
Provide notification on various status changes for an application
Add MDMS configs required for Trade License and BPA stakeholder registration and restart MDMS service
Deploy the latest version of tl-services service
Add tl-service persister yaml path in persister configuration and restart persister service
Add Role-Action mapping for API’s
Create businessService (workflow configuration) according to trade license and stakeholder registration
Add tl-service indexer yaml path in indexer service configuration and restart indexer service
Following application properties in the Trade License service are configurable.
egov.idgen.tl.applicationNum.format
PB-TL-[cy:yyyy-MM-dd]-[SEQ_EG_TL_APL]
The format of the TL application number
egov.idgen.tl.licensenumber.format
PB-TL-[cy:yyyy-MM-dd]-[SEQ_EG_PT_LN]
The format of the TL license number
egov.idgen.bpa.applicationNum.format
PB-SK-[cy:yyyy-MM-dd]-[SEQ_EG_TL_APL]
The format of the Stake holder application number
The trade-license service is currently used to issue trade licenses, perform stakeholder registration and issue lockdown pass.
Provide backend support for the different license registration process.
Mseva and SMS notifications on application status changes.
The elastic search index for creating visualizations and Dashboards.
Bpa Stakeholder registration provides new roles to the user to access the Building Plan Approval system.
Supports workflow which is configurable
To integrate, host of tl-services service should be overwritten in the helm chart.
{servicename}/_create/ _create should be added as the create endpoint for creating any license in the system
{servicename}/_search/ _search should be added as the search endpoint. This method handles all requests to search existing records depending on different search criteria
{servicename}/_update/ _update should be added as the update endpoint. This method is used to update fields in existing records or to update the status of the application based on workflow.
Local Setup
API Swagger Documentation (Trade License)
In all below endpoints if the service name is BPAREG it is treated as a stakeholder registration application and if it is TL or if it is absent then the application is treated as trade license application.
Stakeholder registration APIs:- https://www.getpostman.com/collections/d18b79ccfb69ee8bb526
Trade-License APIs:- https://www.getpostman.com/collections/99f98723c45f97024831
{servicename}/_create, _create
This API is used to create an application for the license in the system. Whenever an application is created an application number is generated and assigned to the application for future reference.
{servicename}/_search, /_search
This API is used to search the applications in the system based on various search parameters like mobile number, the application number, status etc.
{servicename}/_update, _update
The _update API is used to update the application information or to forward the application from one state to another.
In the case of the stakeholder registration if the application reaches the last stage the role depending on the license type is given to the user.
{servicename}/{jobname}/_batch, /_batch
Searches trade licenses that are expiring and send a reminder SMS to owner's of the licenses
applicationTypeRENEWALworkflowCodeDIRECTRENEWAL,Edit Renewal: If there is any change in any fields and clicks on submitting an application, an update API call is made with respect to edit renewal (applicationType: RENEWAL,workflowCode: EDITRENEWAL )and update the application and it will go into the edit renewal flow.
Units, Accessories, Owners and documents details in case of Edit/Renewal flow
Employee can edit units in both cases, employee can add and delete multiple units, please find the file below reg all use cases: digit-ui-internals/TLTradeUnitsEmployee.js at main · egovernments/digit-ui-internals
Employee cannot edit accessories in both cases, the employee can not add and delete multiple units and all fields are in disable state, please find the file below reg all use cases: digit-ui-internals/TLAccessoriesEmployee.js at main · egovernments/digit-ui-internals
Employee can edit in both cases, expect ownership details, ownership details field is in disable state in both cases. please find the file below reg all use cases: digit-ui-internals/TLTradeUnitsEmployee.js at main · egovernments/digit-ui-internals
Employee can edit the documents in both cases, please find the file below reg all use cases:
Acknowledgement Screen
After a successful update call, the user is routed to the acknowledgement screen.
EDIT Flow: It is also the same as renewal flow only, but we are passing the action action: RESUBMIT on the update call with all the changes.
Application/ Trade Details: Application Details/Trade Details
TL Create New Application: New Trade License Application
1
/egov-mdms-service/v1/_search
TL_CEMP
954
2
/tl-services/v1/_create
TL_CEMP
1685
3
Select the correct option to indicate the Number of Basements.
Enter the Ground Floor Details like Unit Usage Type, Occupancy, and Total Super Built-Up Area (sq ft).
Click on the Add One More Unit option to add G+1 or G+2 and additional floor details.
If the Occupancy type is Tenanted/Rented, enter the Total Annual Rent (INR) value.
In case the Unit Usage Type is non-residential, enter the Sub Usage Type details to provide information on the type of business for which the property is used.
Provide the Pin Property Location on the map if you are at the building location while submitting the registration application. You can Skip and Continue if you are not at the location.
Enter the Pincode of the area in response to the question Do you know the pincode? Click on Skip and Continue option if you do not know the Pincode.
Select the relevant City and the Locality from the drop-down list in the Provide Property Address screen to pinpoint the location of the property.
Enter the Street Name, Door/House No. of the property in the Provide Property Address screen.
Enter a suitable Landmark detail in the Provide Landmark screen to identify the property location.
Choose the applicable Document Type as a declaration of the document you want to upload as Proof of Address. Click on the Choose File button to attach the scanned copy of the selected document.
Select the applicable option in the Provide Ownership Details screen to indicate the ownership type of the property.
Enter details like Name, Gender, Mobile Number, Guardian and Relationship with the guardian in the Owner Details screen.
Select the applicable option in the Special Owner Category screen to indicate if the owner belongs to a specific category.
Enter the Owner's Address. Check the Same As Property Address box if the correspondence address of the owner is the same as the property address. The property address is auto-populated as the owner's address.
Select the Document Type you want to upload as Proof of identity. Click on Choose File button to attach and upload a scanned copy of the selected document.
Please review your application details before submitting it. In case of any changes to the submitted details click on the Change button adjacent to the filled-in details.
Check mark the declaration box and then click on the Submit button. A success message is displayed along with the application no. and unique property ID. Click on the Download Acknowledgement Form button to download a copy of the acknowledgement.
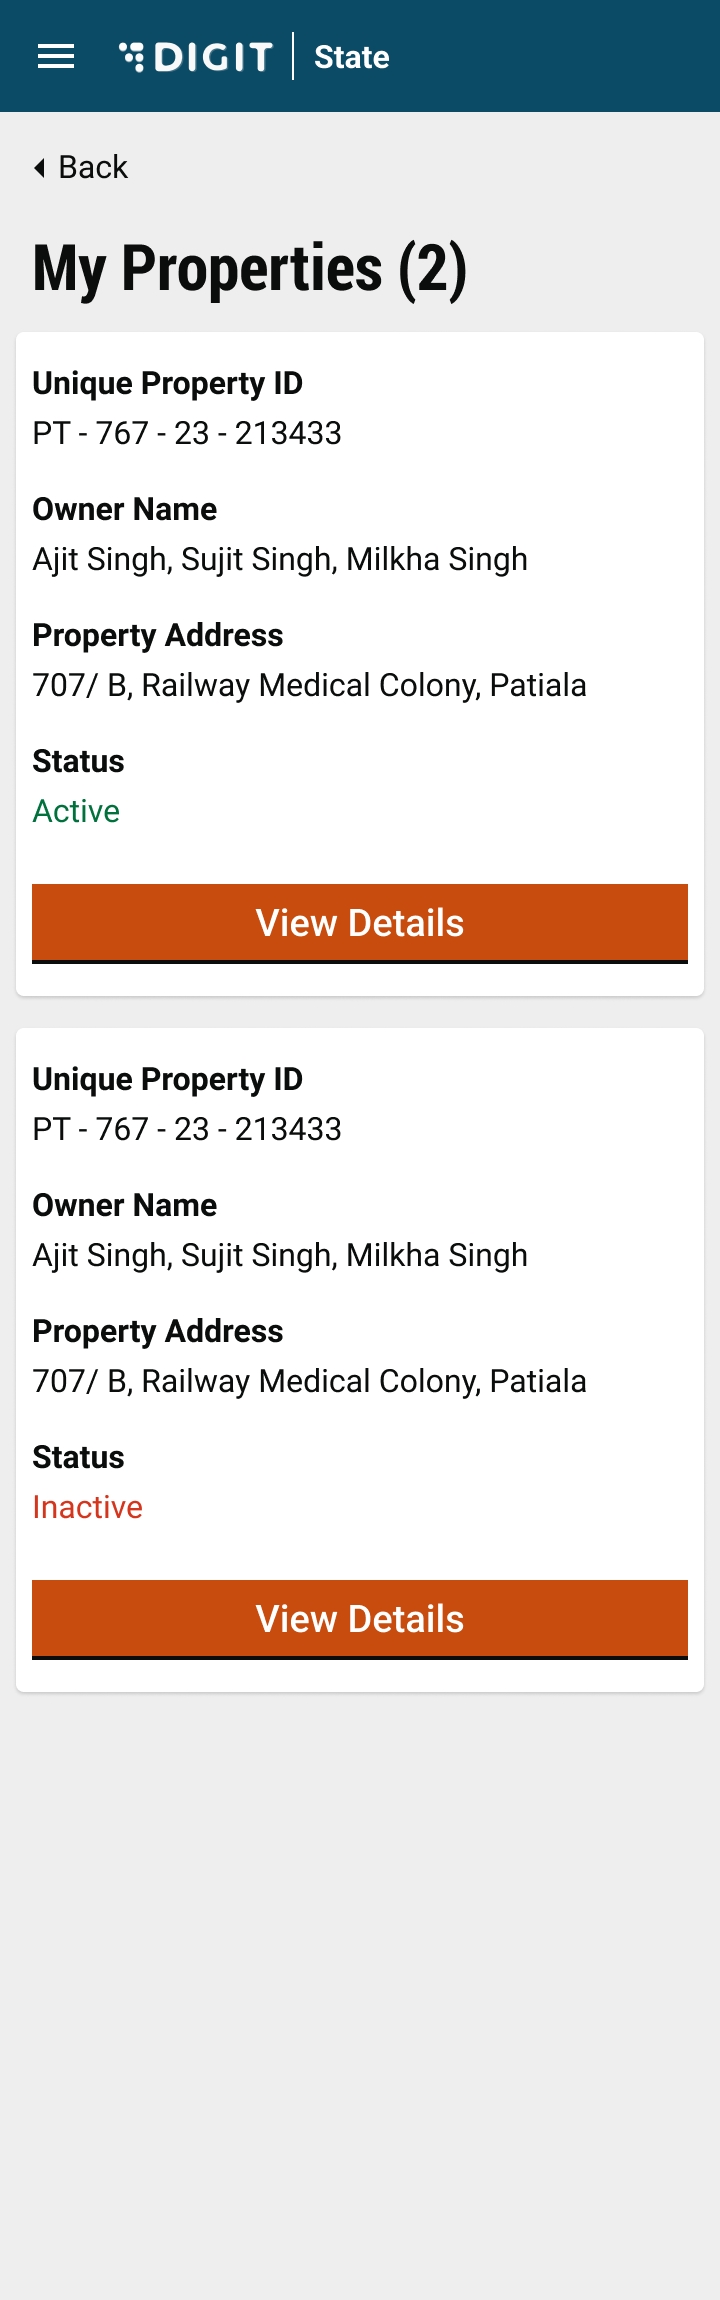
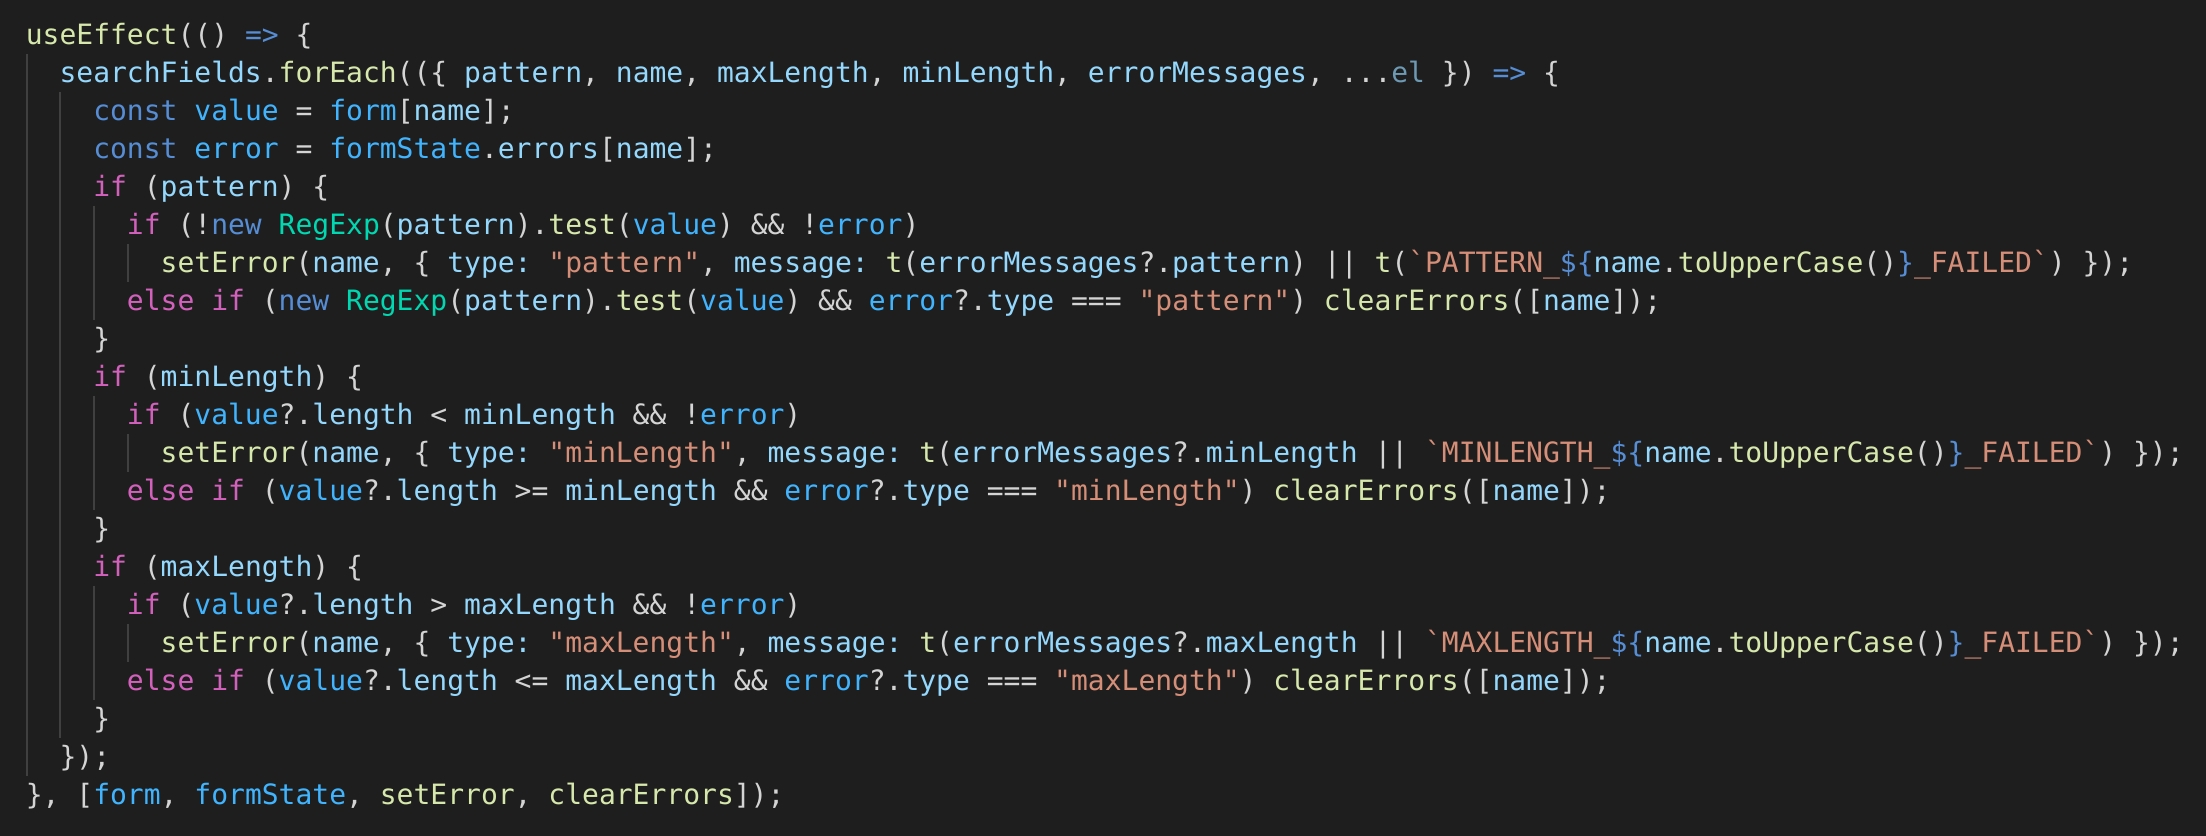
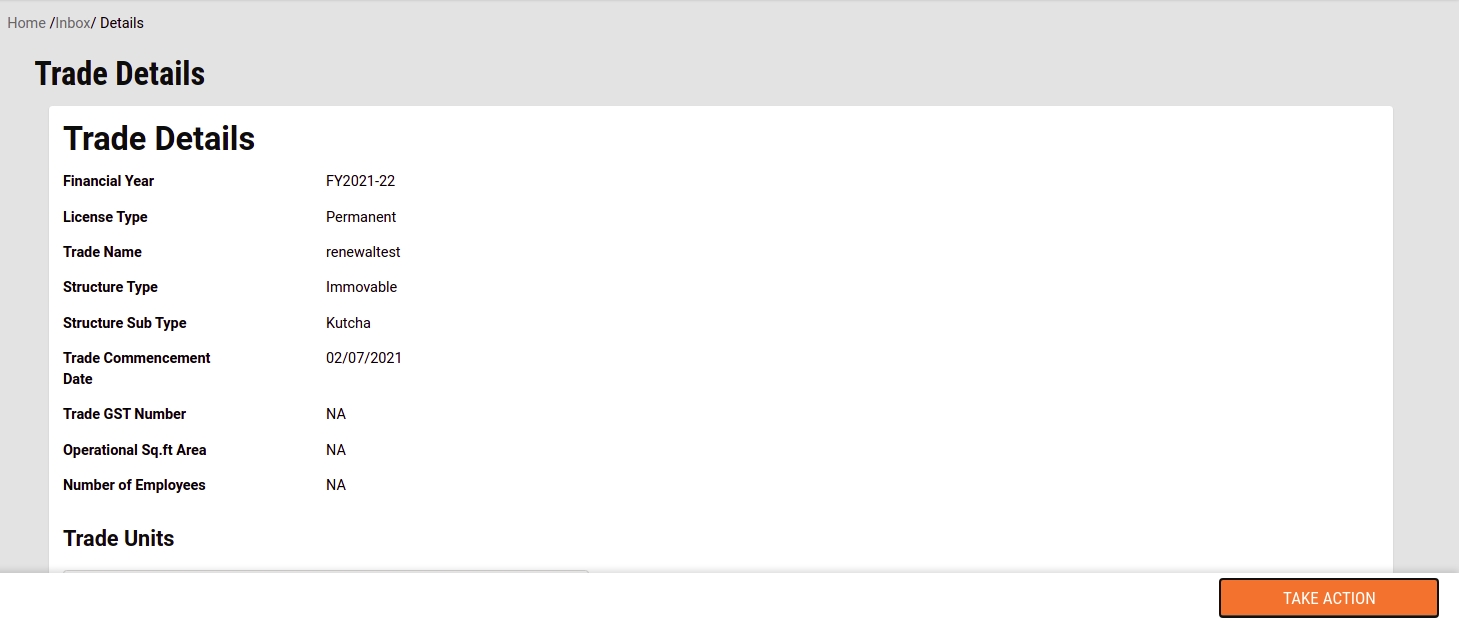
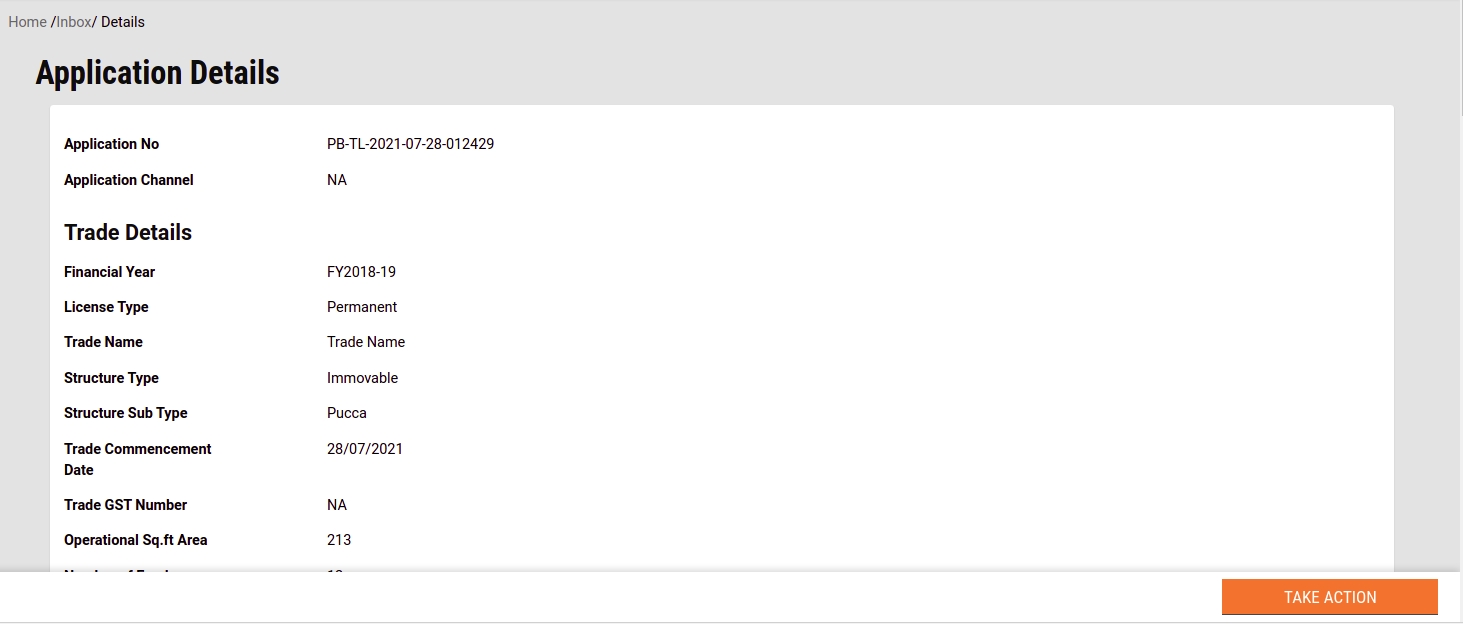
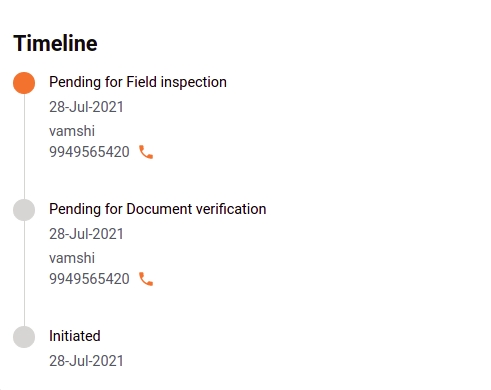
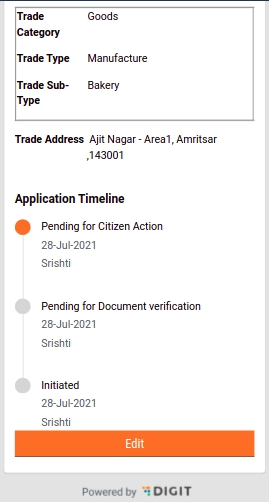
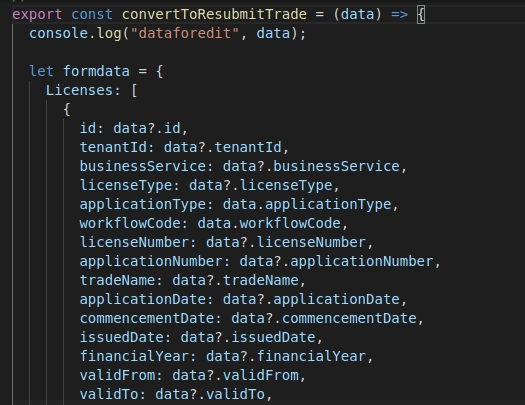
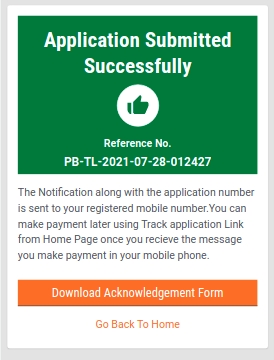
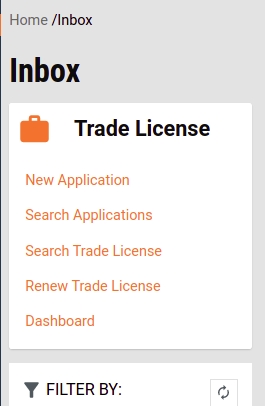
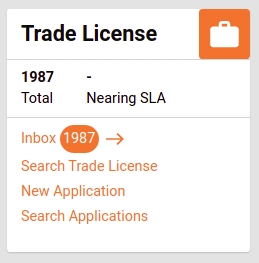
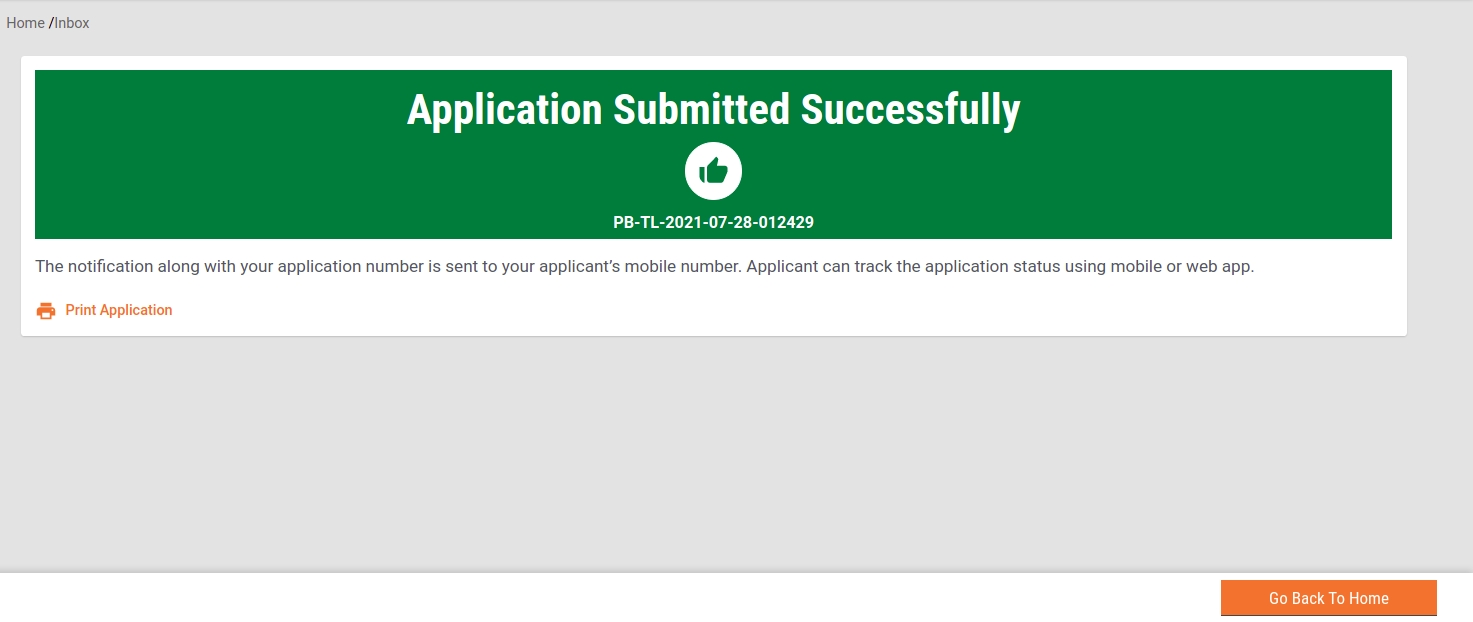
Along with the rates, the Trade License application process does require certain documents as an attachment of proof. The proof can be defined by a set of documents ranging from
Identification Proof (Drivers License/ Voter Card/ Adhaar/ Pan etc.)
Trade Premises Proof (Lease Agreement, Electricity Bills, etc).
Misc Documents (Affidavit, Self- Declaration, etc).
The Number and the Documents required could vary across the State, ULB(s), and might be dependent on Trade Subtypes, all of which are totally configurable on DIGIT.
The table above contains sample data.
Download the data template attached to this page.
Get a good understanding of all the headers in the template sheet, their data type, size, and definitions by referring to the ‘Data Definition’ section of this document.
In case of any doubt, please reach out to the person who has shared this template with you to discuss and clear your doubts.
Identify the “
The checklist is a set of activities to be performed once the data is filled into a template to ensure data type, size, and format of data is as per the expectation. These activities have been divided into 2 groups as given below.
This checklist covers all the activities which are common across the entities.
This checklist covers the activities which are specific to the entity.
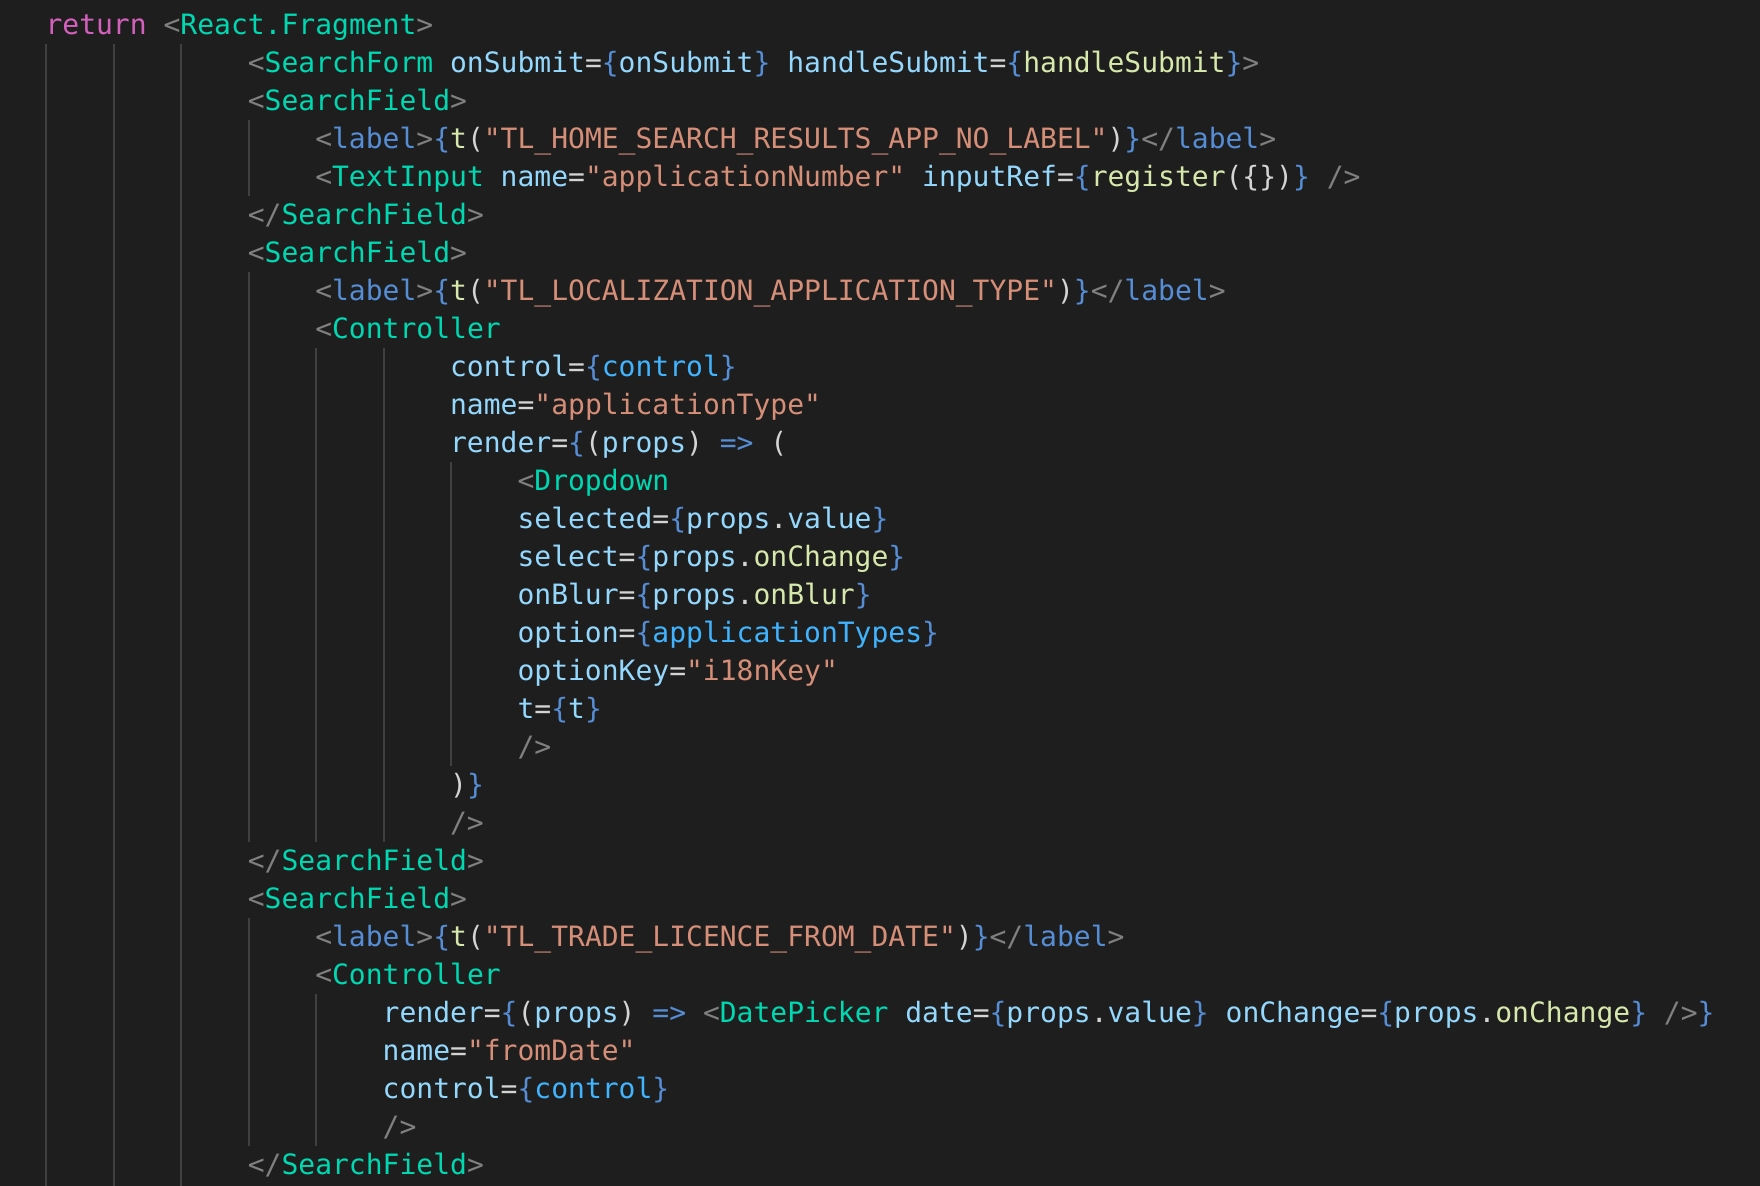
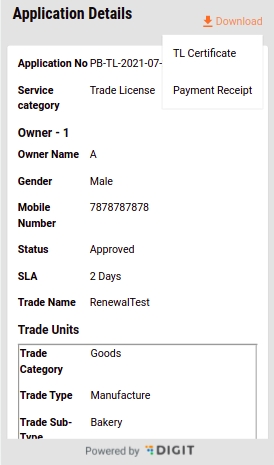
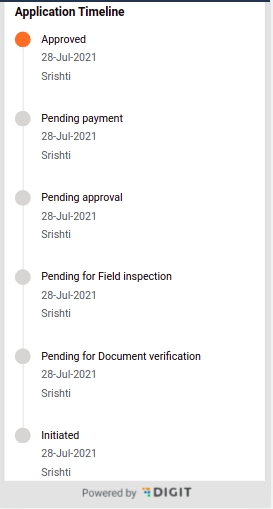
Workers
1
20
2
TRADE_SMALL_BAKERY
Small Bakery
3000
2500
Workers
21
30
2
TRADE_MED_BAKERY
Medium Bakery
5000
4500
Workers
1
30
Trade Sub Type Name (In English)
Text
256
Yes
Name of the Trade Sub Type in English. Eg: Small Bakery
3
New License Fee
Decimal
(6,2)
Yes
The fee charged when the license applied for the respective trade for the first time.
4
Renewal License Fee
Decimal
(6,2)
Yes
The fee charged when the license applied for the respective trade for the renewal.
5
UOM
Text
64
No
The Units of Measurement” associated with the Trade. Eg: Workers is the UOM associated with the trade “Bakery”
6
UOM From
Integer
6
No
Initial Range from which the “Units of Measurement” is applicable for a Trade
7
UOM To
Integer
6
No
Final Range to which the “Units of Measurement” is applicable to a Trade
IMMOVABLE
3
HDV
Hand Driven Vehicle
हाथ चालित वाहन
MOVABLE
4
MDV
Motor-Driven Vehicle
मोटर चालित वाहन
MOVABLE
Structure Sub Type* (In English)
Text
256
Yes
Structure sub type in English
3
Structure Sub Type* (In Local Language)
Text
256
Yes
Structure sub type in local language e.g. in Hindi, Telugu etc.
4
Structure Type Code*
Reference
64
Yes
Unique code of structure type to establish the mapping with Structure Type
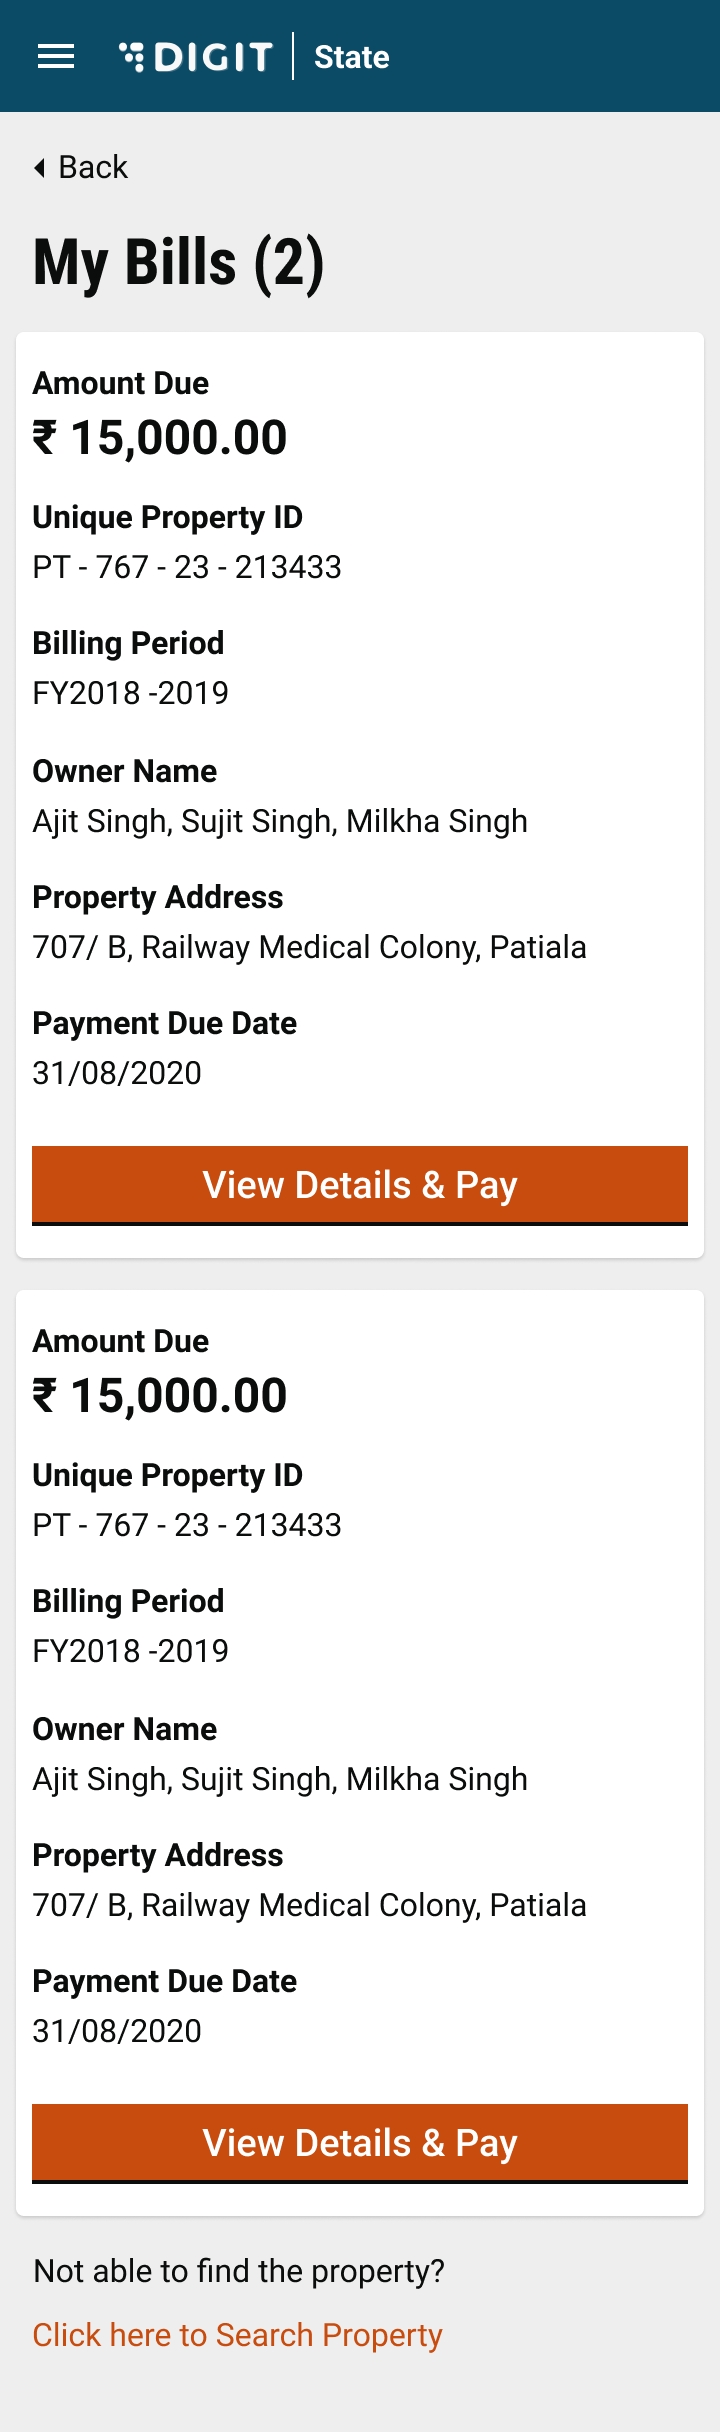

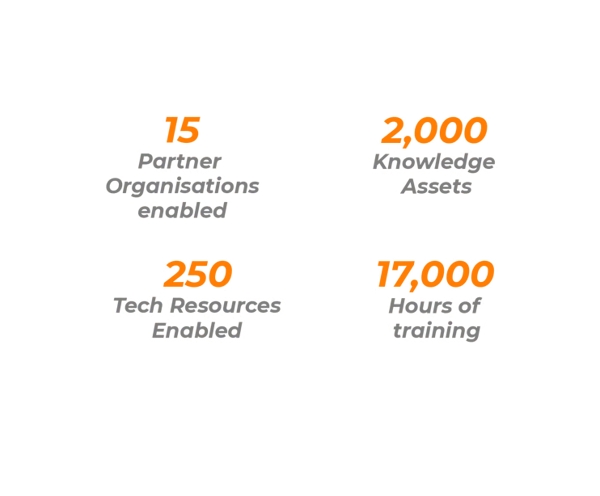
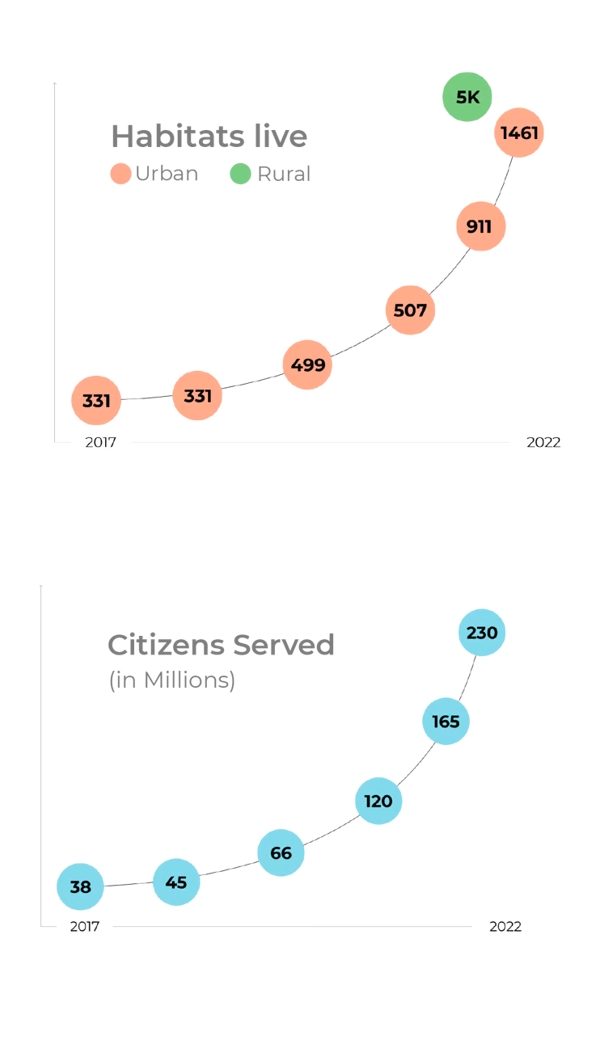
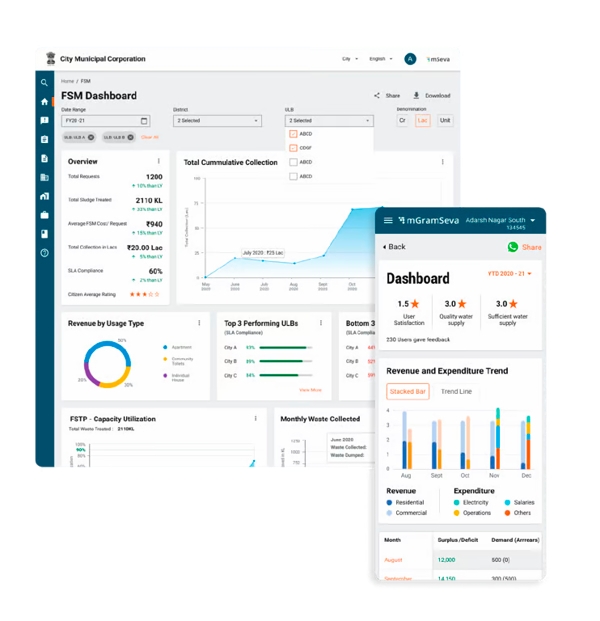
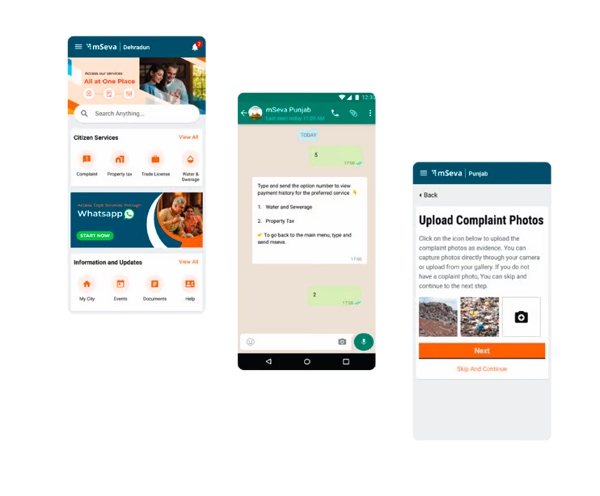
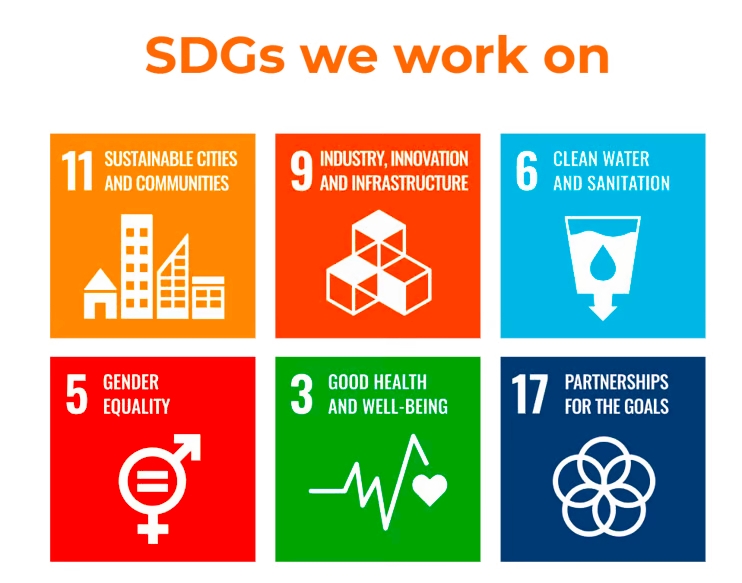
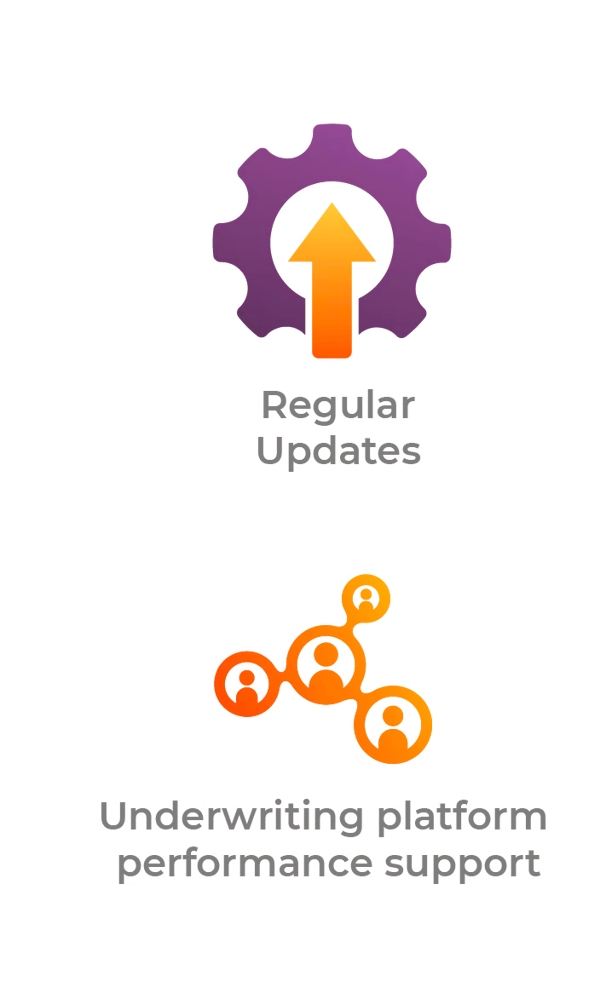
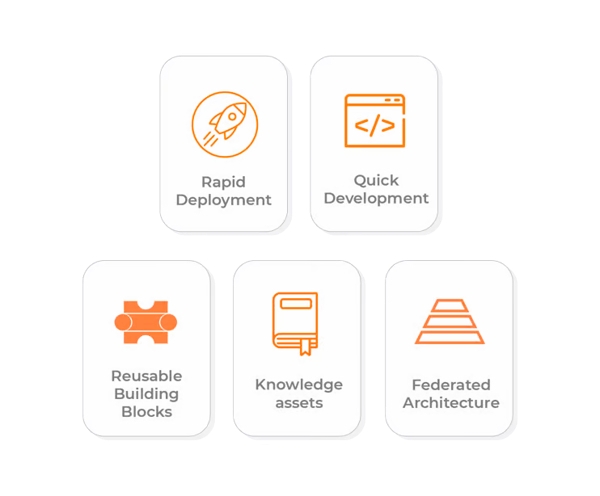

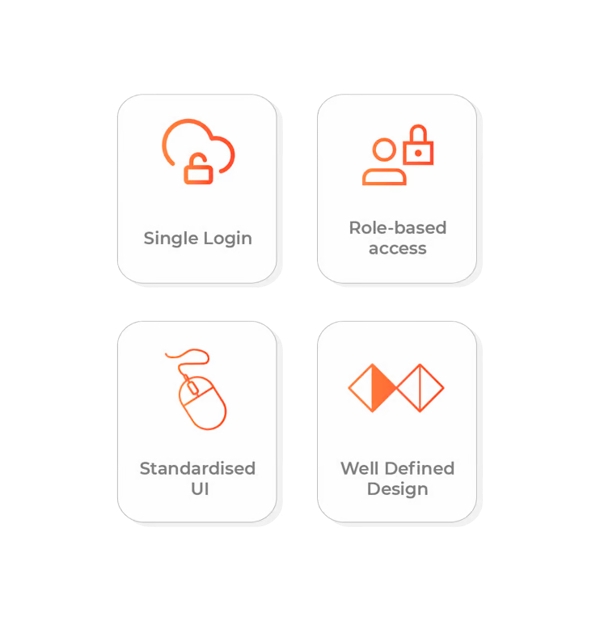
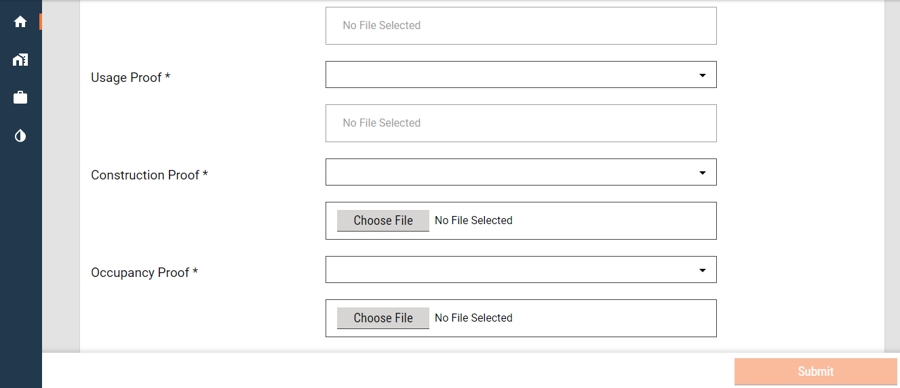
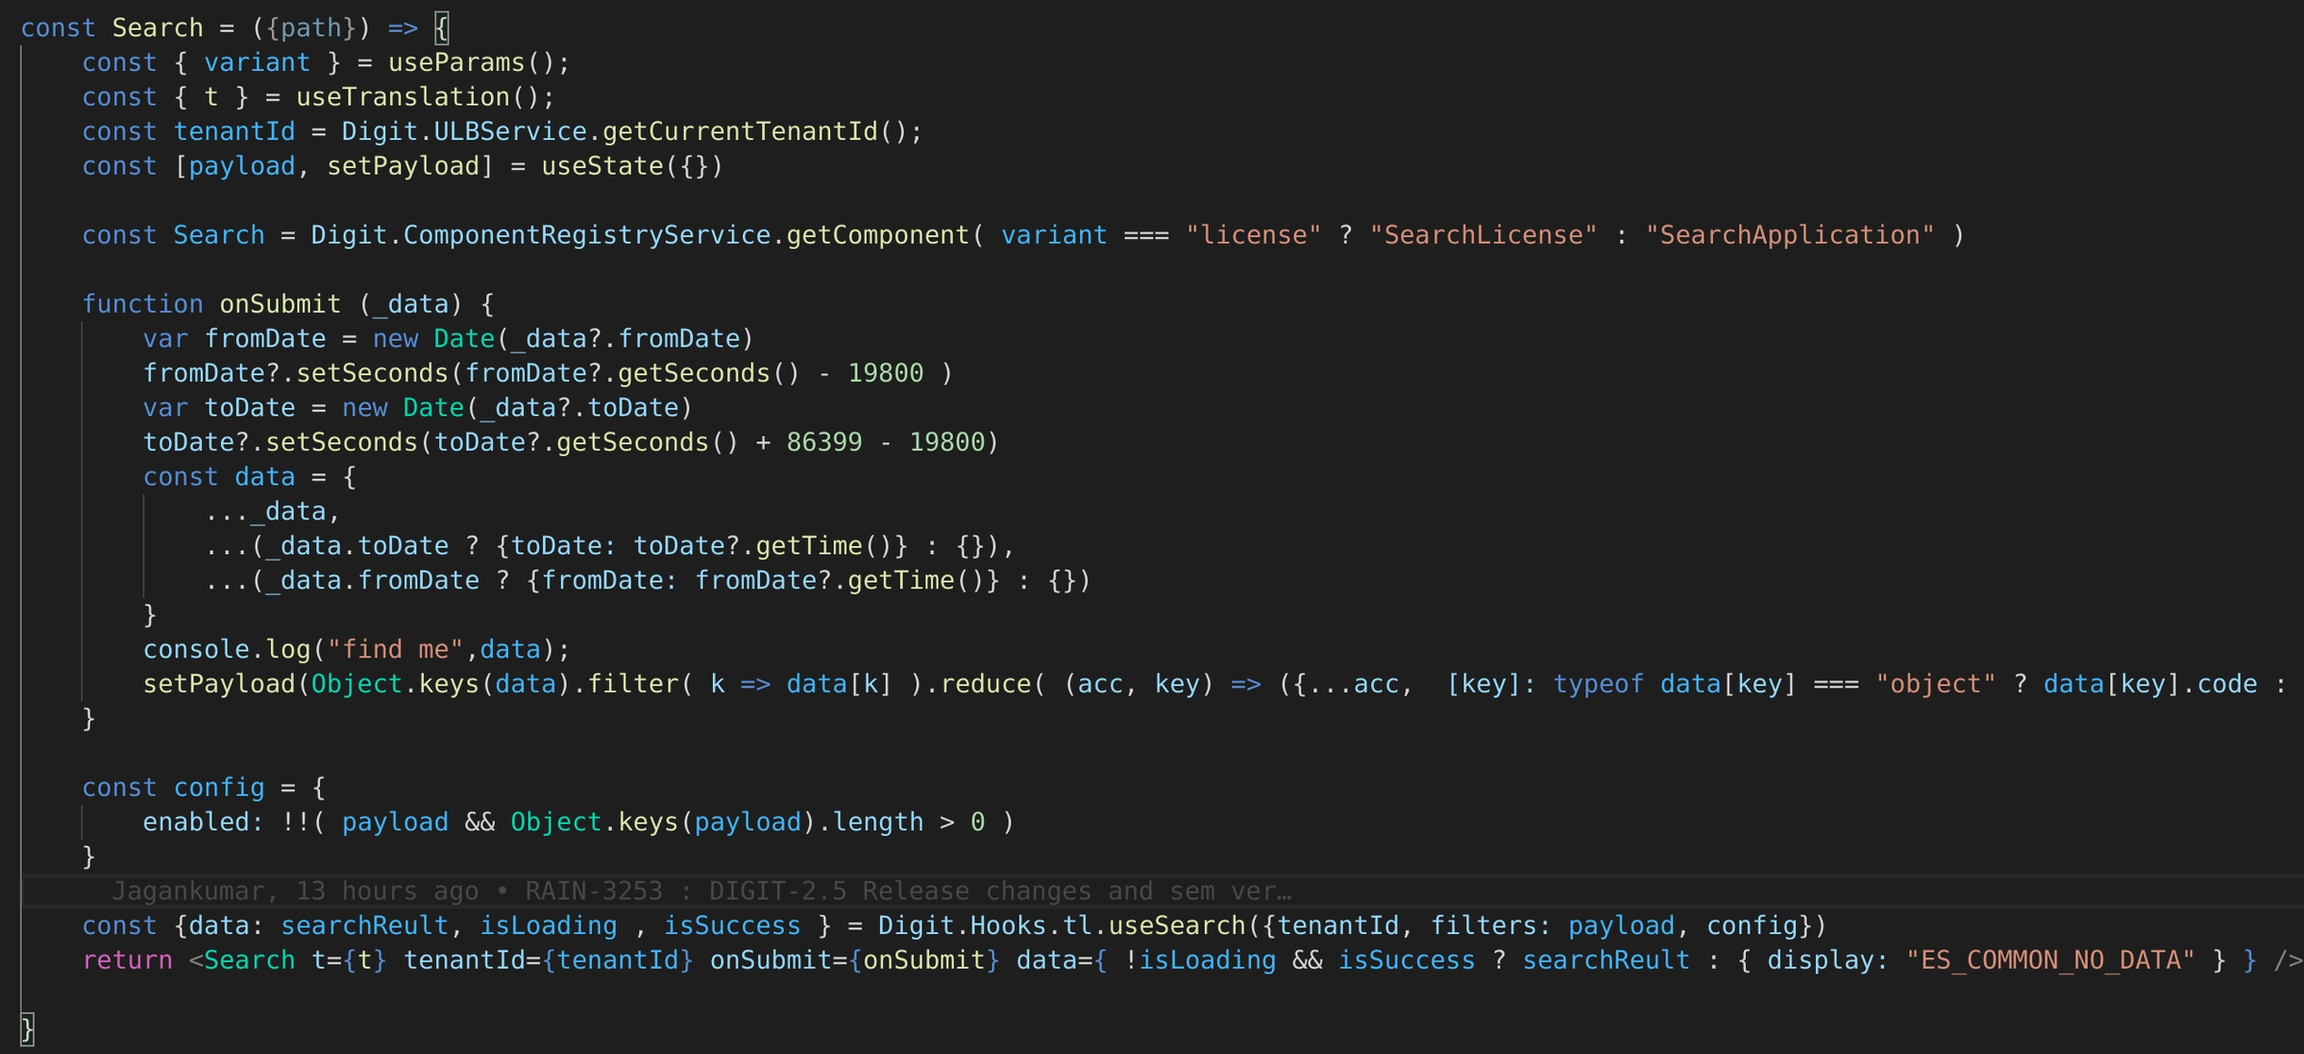
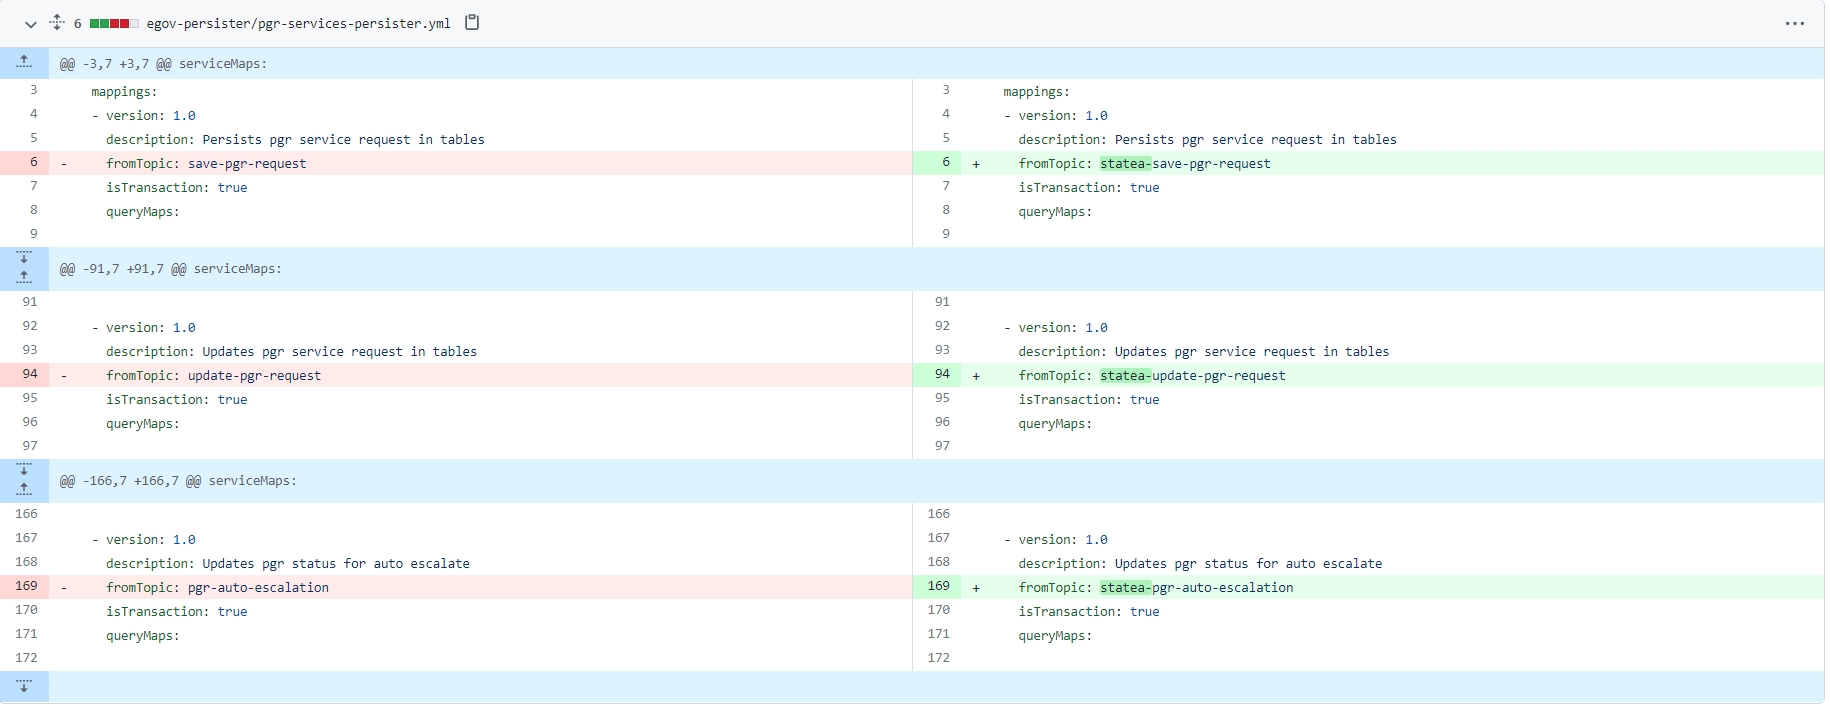
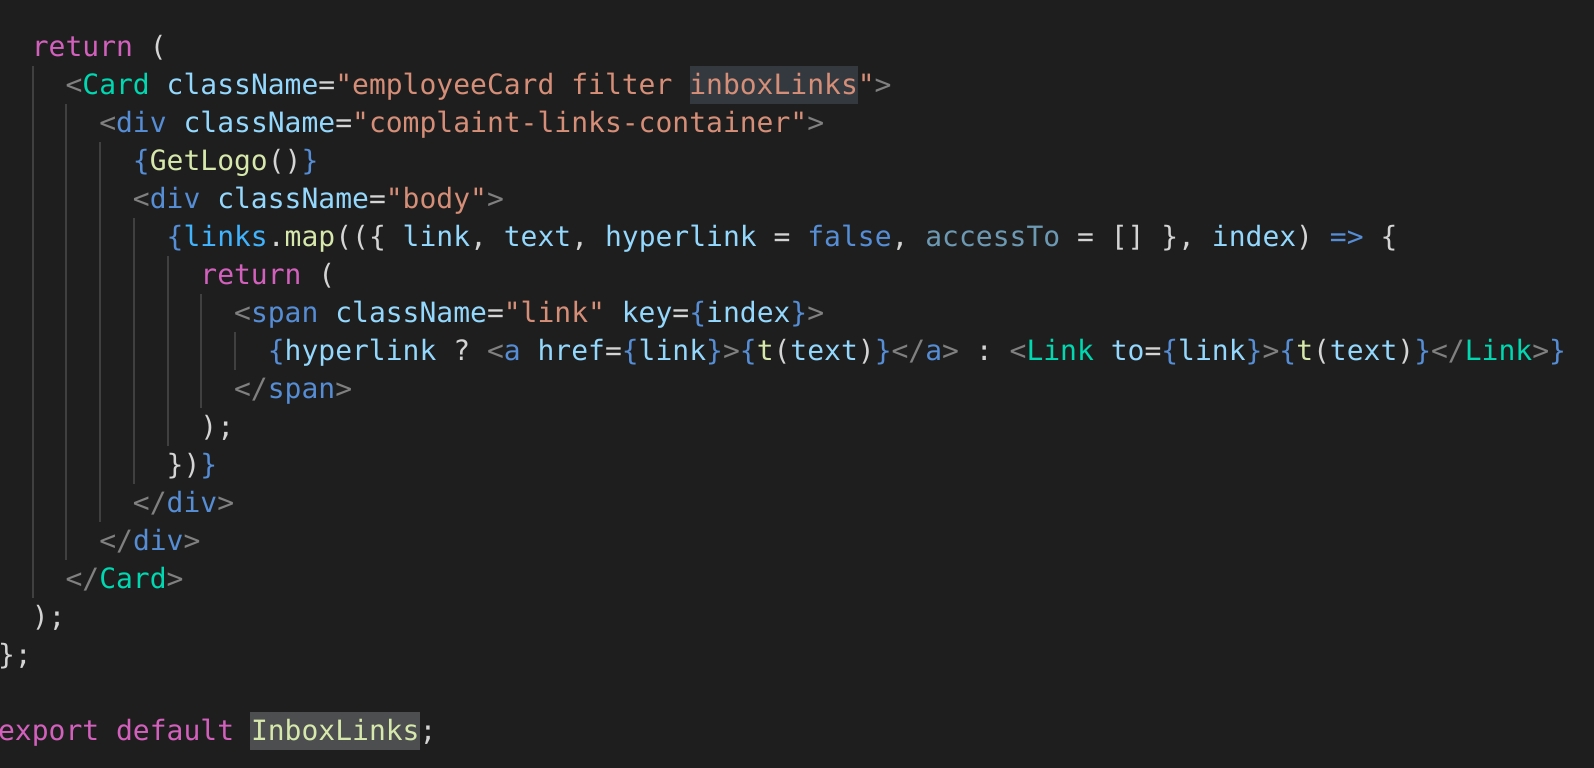
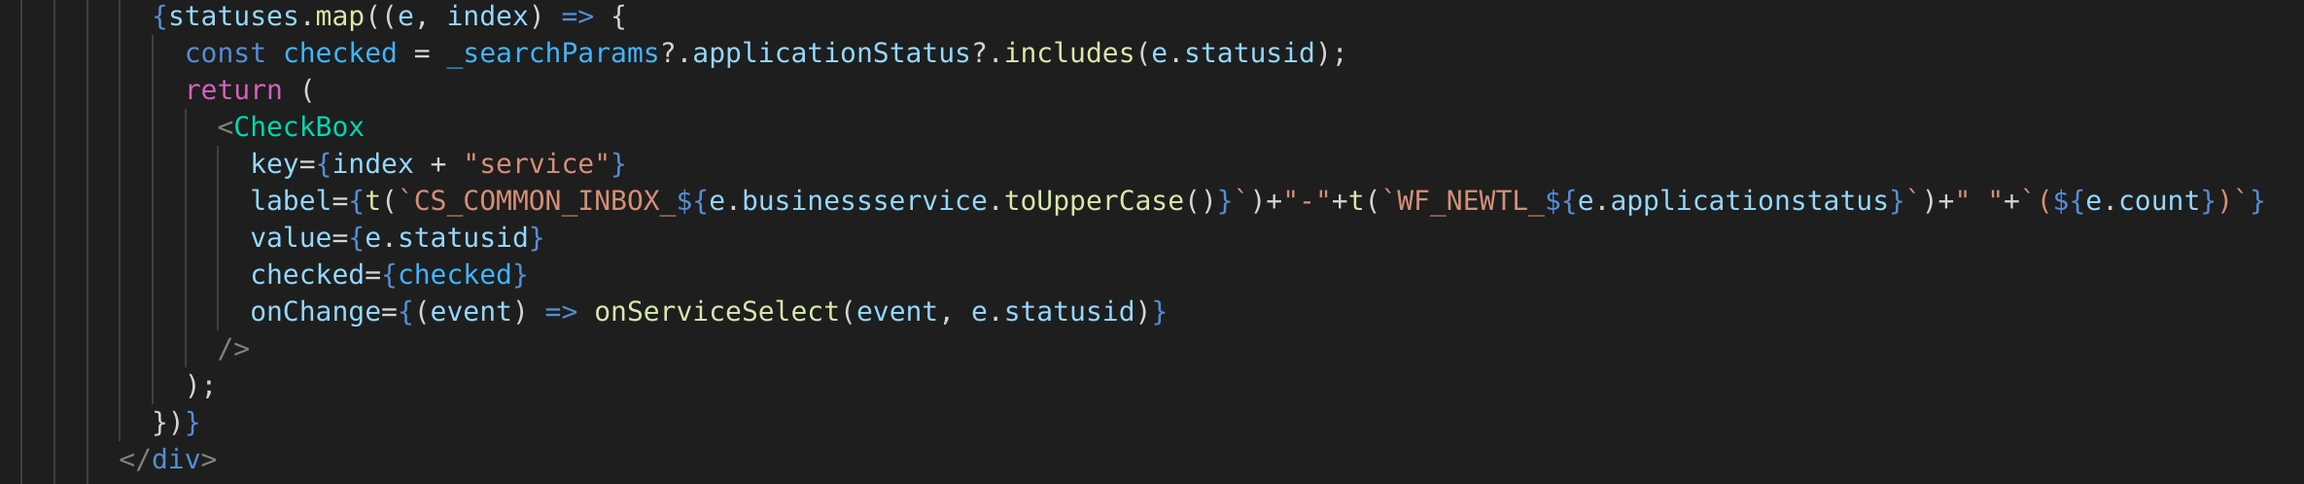
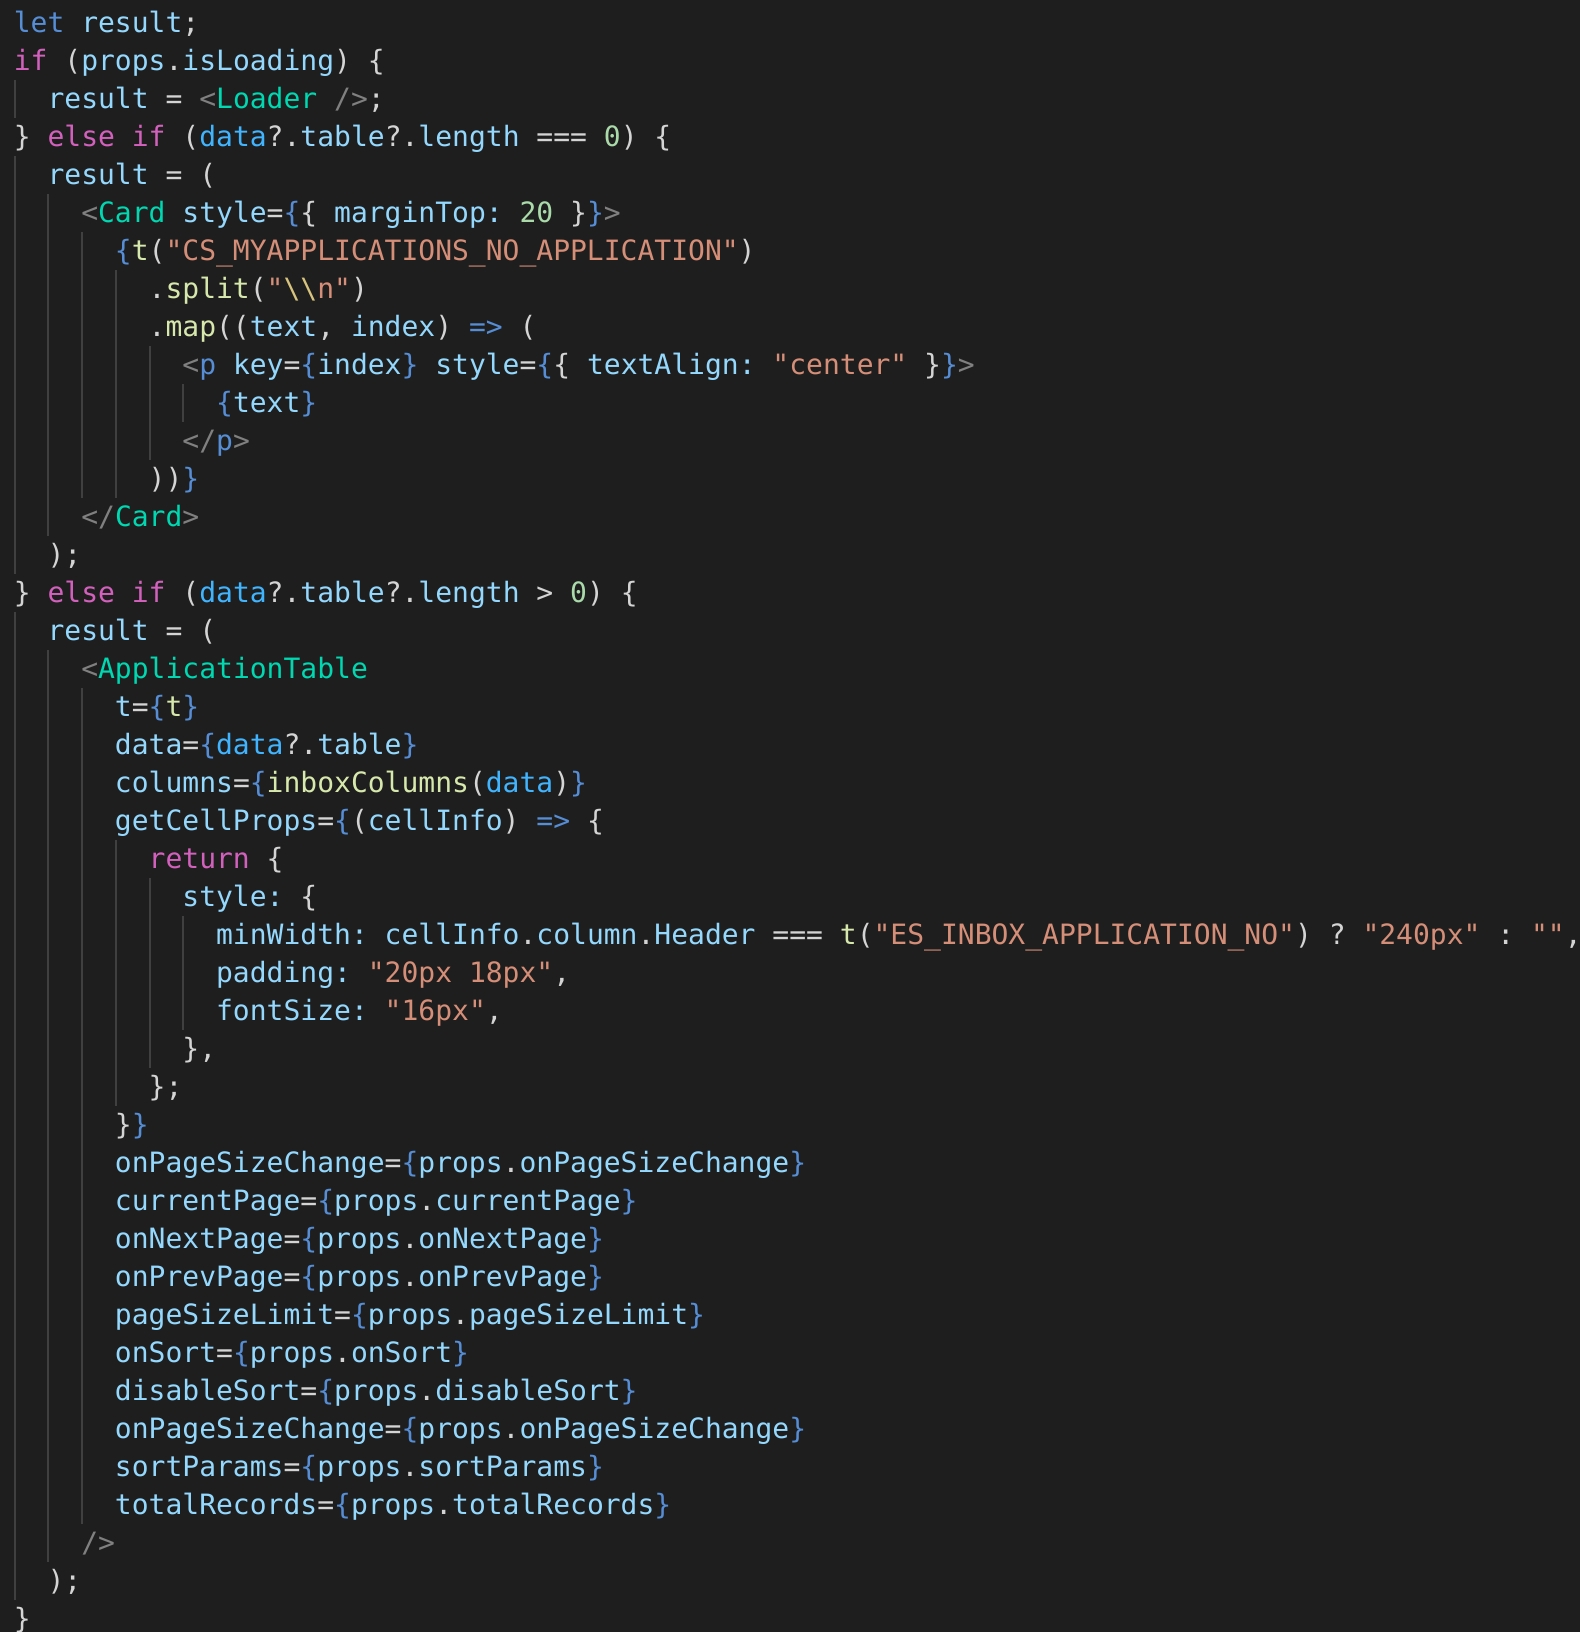
Small Bakery
Renewal
PAN/VOTER ID
ELEC BILL
Text
256
Yes
Name of the Trade Sub Type in English Eg: Clinic
3
Application Type
Text
256
Yes
Type of application for which the documents related to trade are configured. It can either be new or renewal
4
Document 1
Reference
256
Yes
The primary document required as a verification parameter. Refer to the
5
Document 2
Reference
256
Yes
The Secondary Document required as a verification parameter. Refer to the
Collect the above information and feed it below the “Trade Sub Type Name” column accordingly. The Description of Trade Sub Type Name must be provided as per the language specified in the respective column.
Add the “Trade Sub Type Code” respectively against the identified trade type(s).
Fill in the *Document 1 & *Document 2 columns respectively.
1
TRADE_SMALL_BAKERY
Small Bakery
New
PAN/VOTER ID
LAND LEASE
2
1
Trade Sub Type Code
Reference
64
Yes
The Code assigned to the Trade Sub Type. Eg: TRADE_SMALL_BAKERY is assigned to Bakery
2
1
Make sure that each and every point in this reference list has been taken care of
1
Trade Sub Type Name (In either Language) should not contain any special characters
Small Bakery: [Allowed]
#Small_Bakery! : [Not allowed]
TRADE_SMALL_BAKERY
Trade Sub Type Name (English)
My Connections
My Applications
My Payments
My Bills
Search and Pay
Apply for a new connection
Apply for disconnection
View Connection Details
View Consumption Details
View Application Details
Pay Water and Sewerage Bill
Pay Application Fee
Water Inbox
Sewerage Inbox
Apply for a new connection
Modification of connection
Bill Amendment
Application Workflows
Search Connection
Search Application
View Connection Details
View Consumption Details
Add Meter Reading
View Application Details
Collect Application Fee
Collect Water and Sewerage Bill
Connection Details
Application Acknowledgement/ From
Estimation Notice
Sanction Letter
Disconnection of water and sewerage connection.
Disconnection Notice PDF
Application acknowledgement/form PDF
Receipt Register
Collection Register
Defaulters Report
Masking of PII data
Option to unmask the PII data
Audit trail of the unmasking of PII data
CITIZEN
Apply for new connection
UI/UX revamp and change in application form to remove the information which is to be filled by employee.
Search and Pay
UI/UX revamps and added by Door no. and Owner’s Name.
My Payments
UI/UX revamp of payment history to My Payments.
My Bills
Added My Bills to list all the bills due for payment.
None
egov.idgen.bpa.licensenumber.format
PB-SK-[cy:yyyy-MM-dd]-[SEQ_EG_PT_LN]
The format of the Stake holder license number
egov.tl.max.limit
100
Max number of records to be returned
citizen.allowed.search.params
tenantId, applicationNumber, limit, offset, licenseNumbers
The search parameters on which citizen can search
employee.allowed.search.params
tenantId, applicationNumber, applicationType, status, mobileNumber, fromDate, toDate, licenseNumbers, oldLicenseNumber, limit, offset
The search parameters on which employee can search
persister.save.tradelicense.topic
save-tl-tradelicense
The name of kafka topic on which create request is published
persister.update.tradelicense.topic
update-tl-tradelicense
The name of kafka topic on which update request is published
persister.update.tradelicense.workflow.topic
update-tl-workflow
The name of kafka topic on which update request is published
/tl-services/v1/_update
TL_CEMP
1686
4
/tl-calculator/billingslab/_search
TL_CEMP
1684
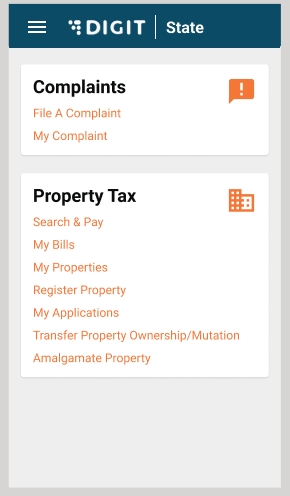
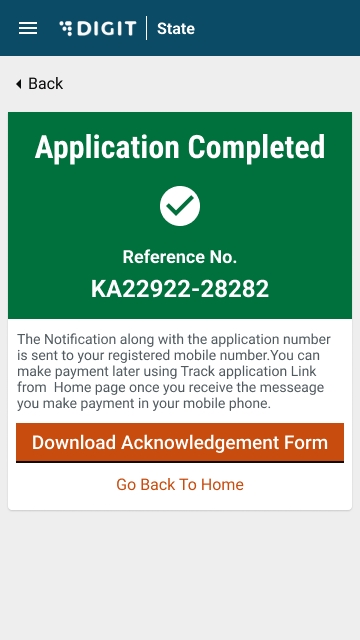

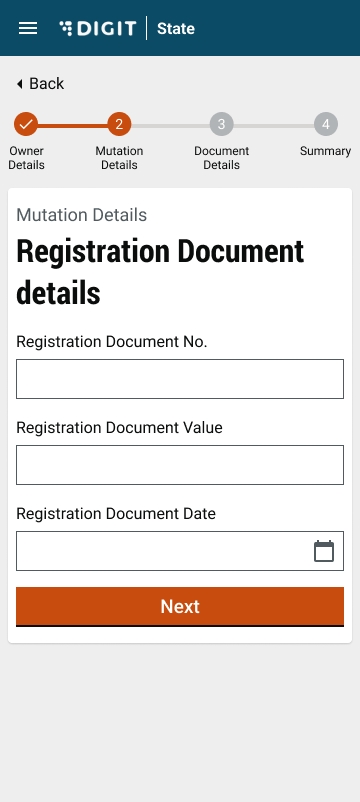
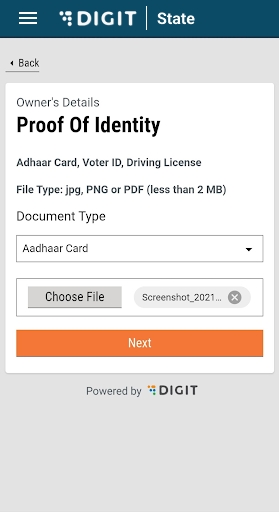
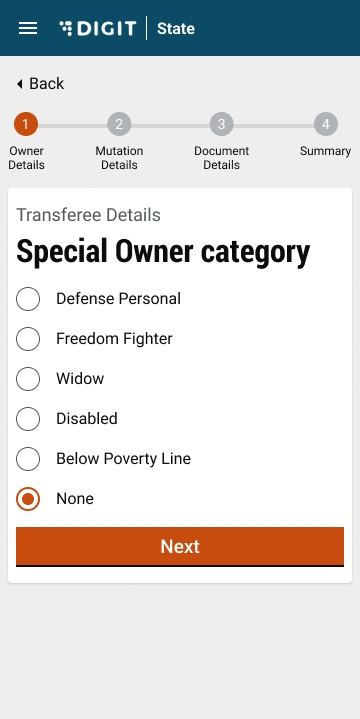
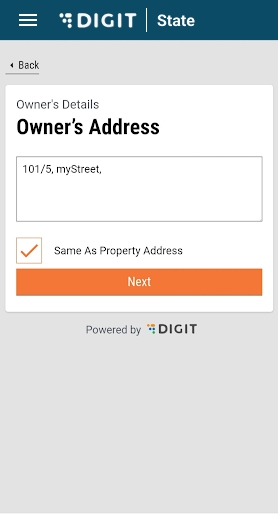

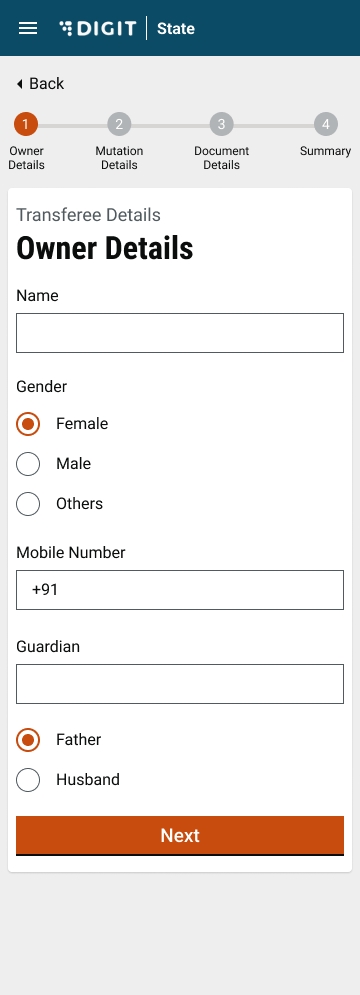
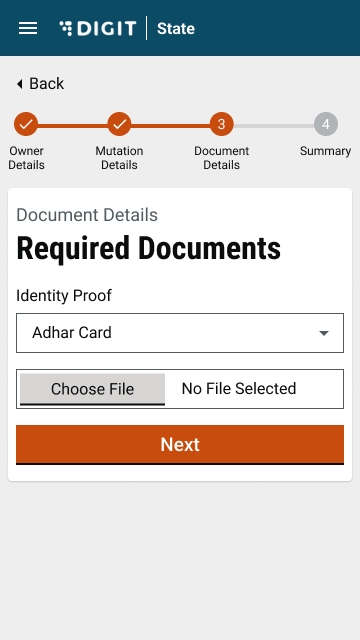
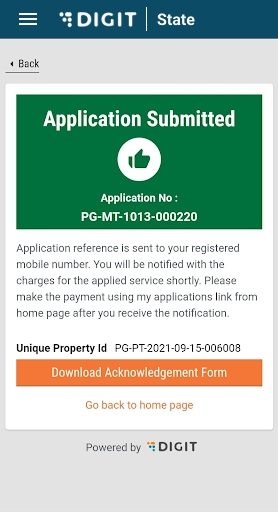
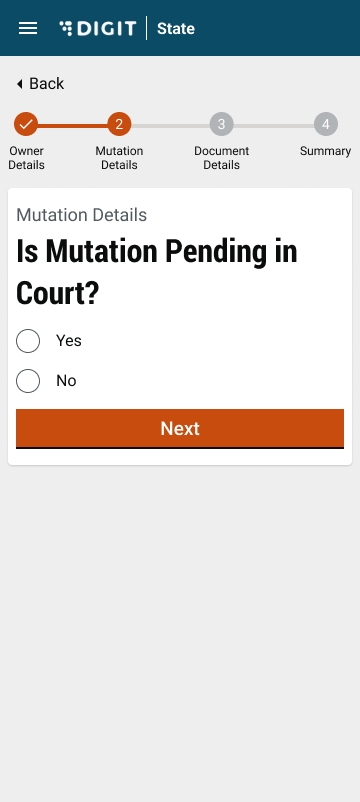
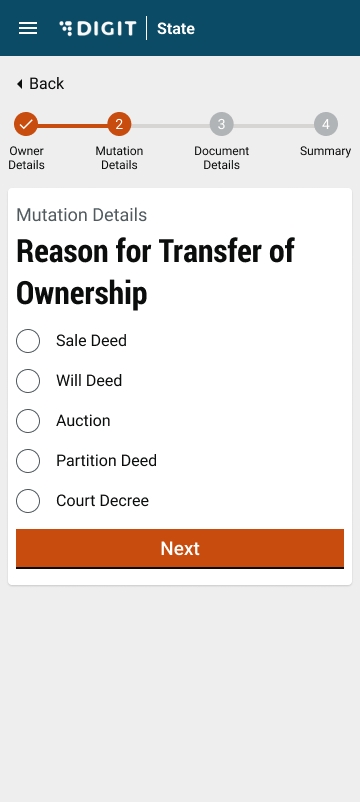

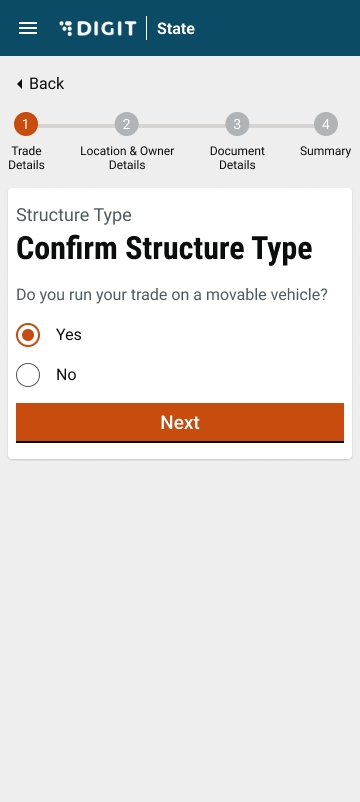
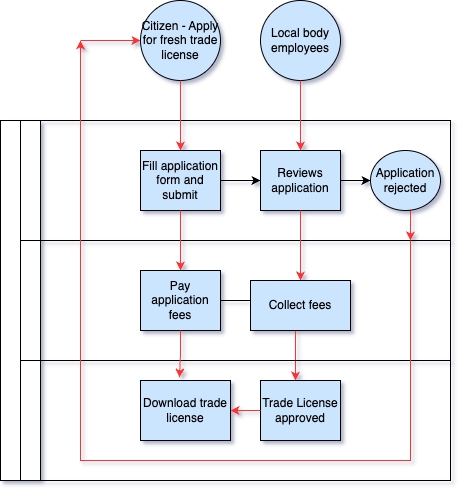
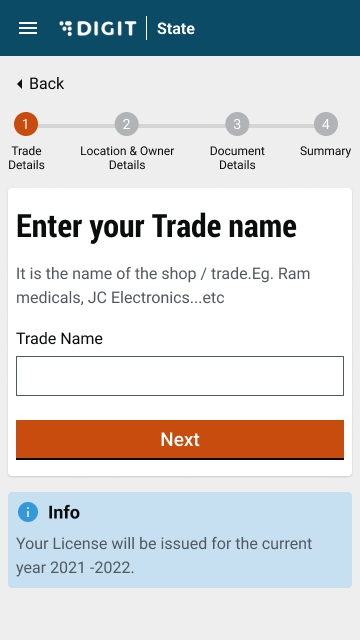
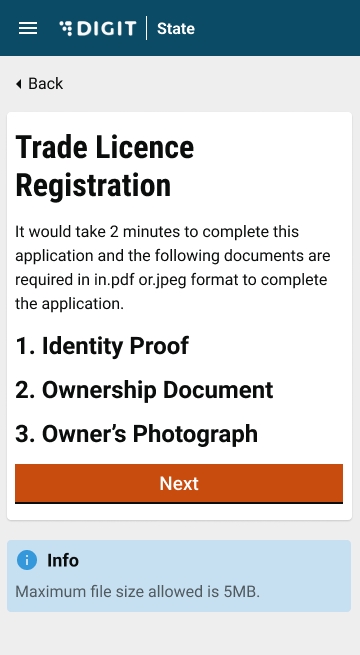
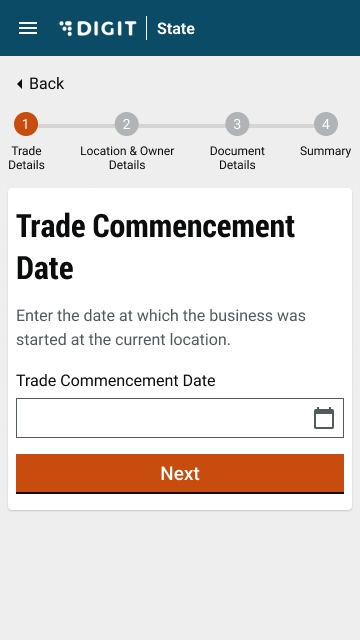
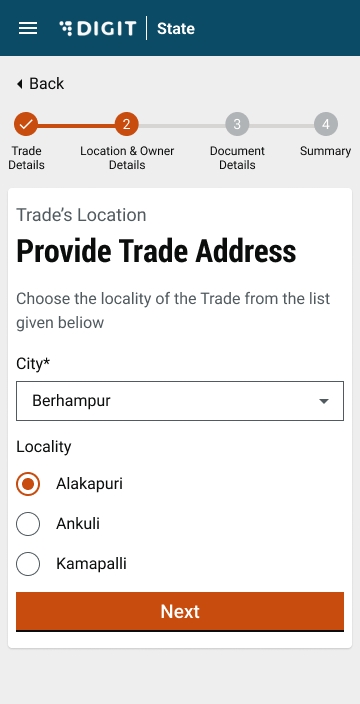
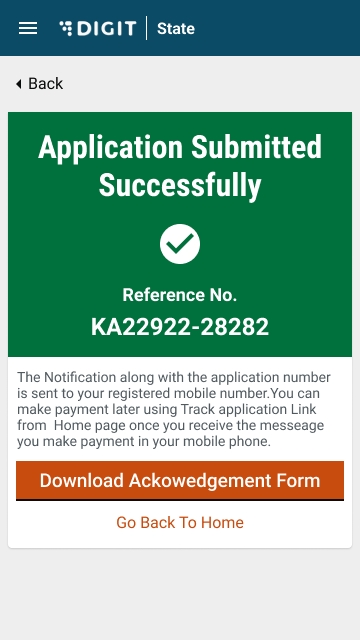
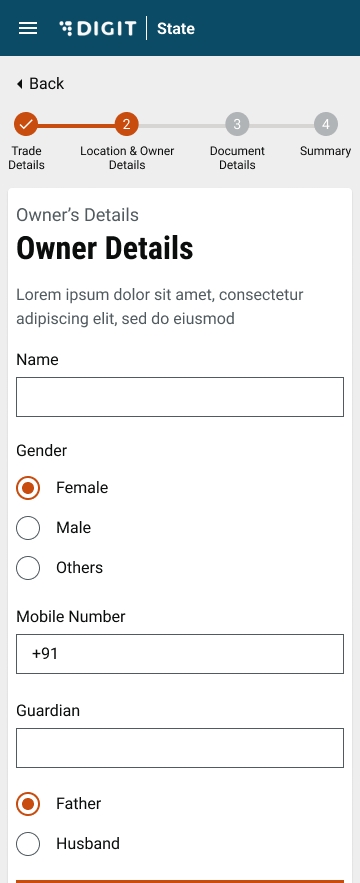
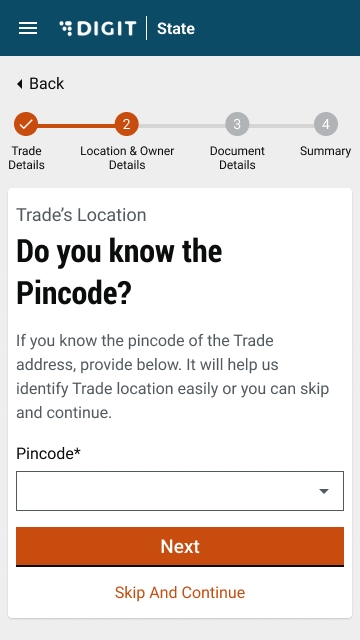
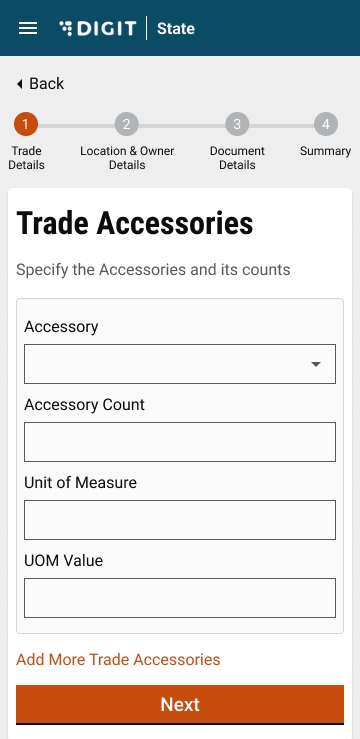
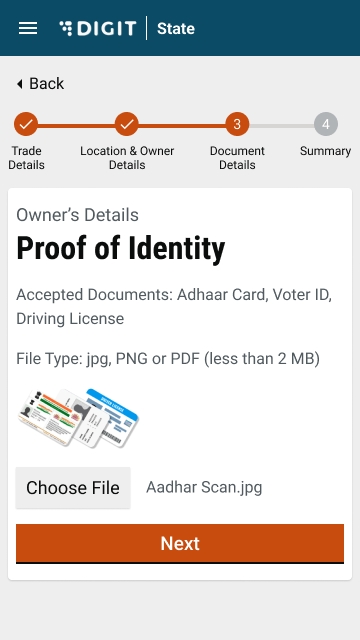
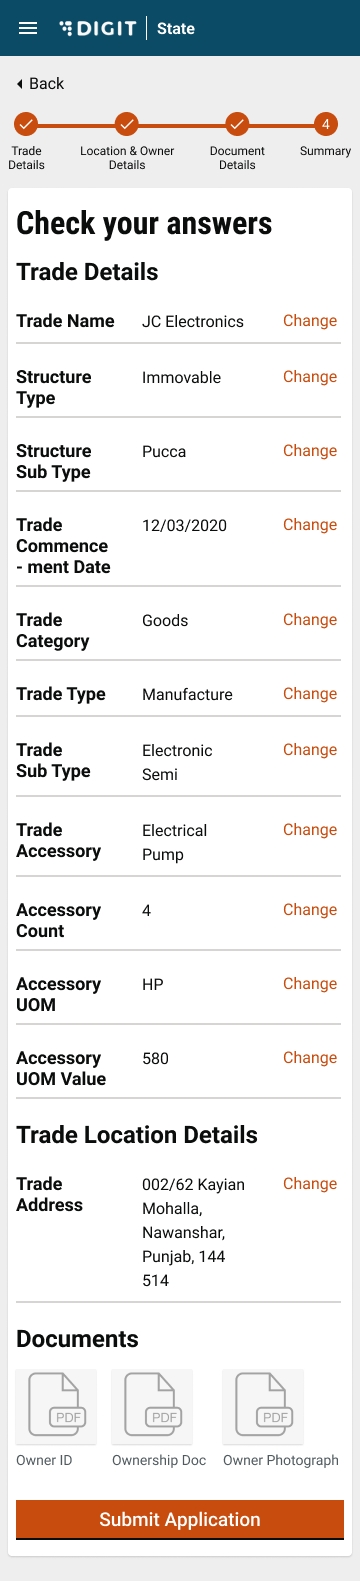
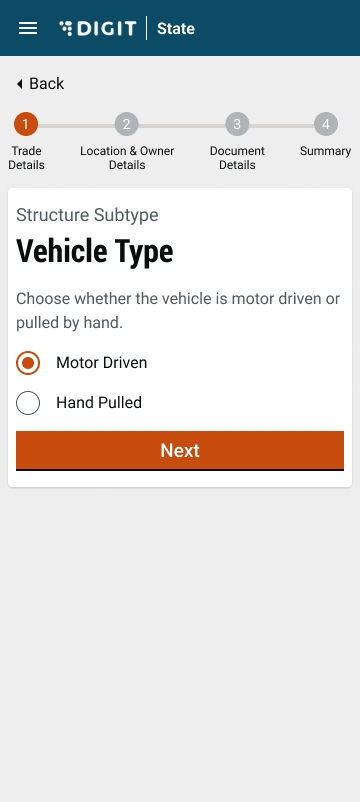
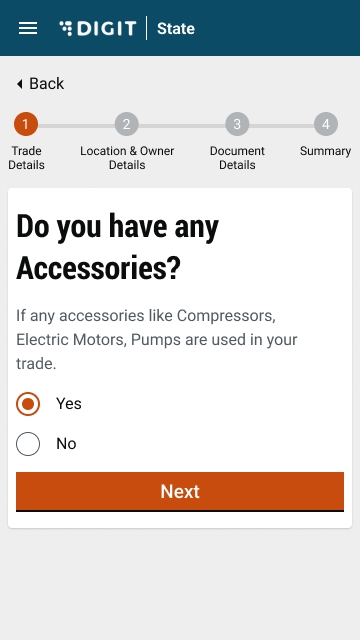
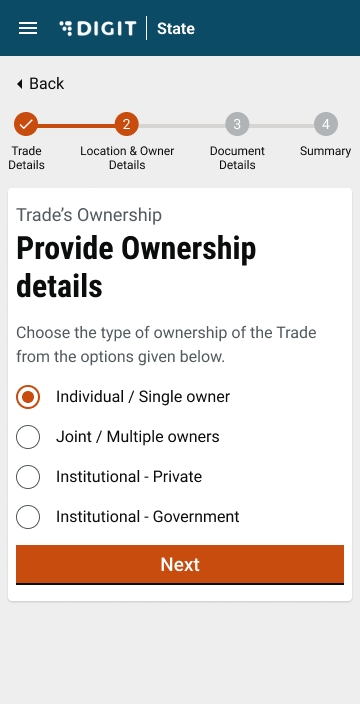
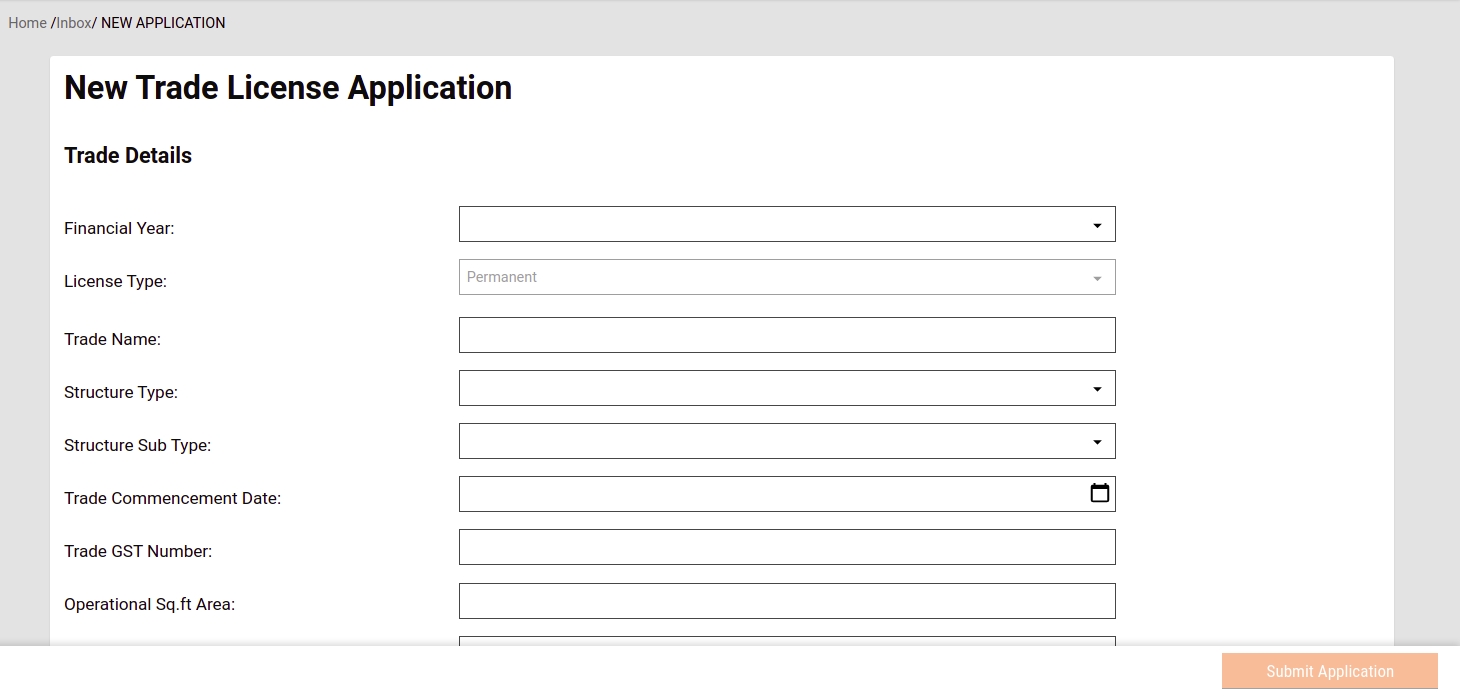
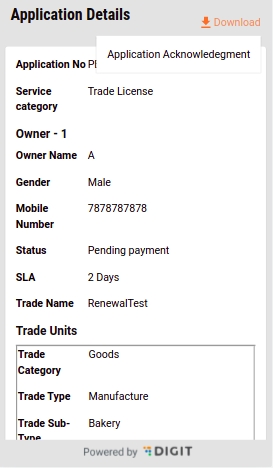
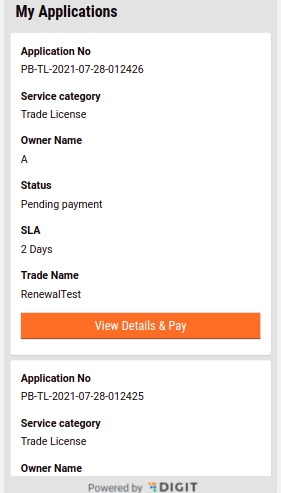
@Sl No
Checklist
Yes/No/Partially
Reference link
Owner
Date(mm/dd/yyyy)
Remarks
1
Product Release Notes
Yes
Kavi
Business License Calculator service is used to calculate the Trade license fees/renewal fees based on the defined billing slabs. This service enables the TL admins to create billing slabs with different combinations of license type, trade type, structure type and accessory type. The service is designed in such a way that it can be used to serve different types of licenses.
Before you proceed with the configuration, make sure the following pre-requisites are met -
Java 8
Kafka server is up and running
egov-persister service is running and has tl-calculation-persister & tl-billing-slab-persister config path added in it
PSQL server is running and a database is created to store TL Application data
TL Admin an Employee of ULB with TL_Admin role can create, update billing slab(s)
ULB Employee with TL_CREATOR and TL_ADMIN can search billing slab(s)
TL service internally calls tl-calculator to generate demand.
Deploy the latest version of tl-service and tl-calculator
Add tl-calculation-persister.yml & tl-billing-slab-persister.yml file in config folder in git and add that path in persister . (The file path is to be added in environment yaml file in param called persist-yml-path )
tl-calculator will be integrated with tl-services. tl-services internally invoke the tl-calculator service to calculate and generate demand for the charges.
Tl calculator application is used to calculate the Trade license Fees based on the different billing slabs in the DB that's why the calculation and demand generation logic will be separated out from TL services. So in future, if calculation logic needs to modify then changes can be carried out for each implementation without modifying the TL services.
TL application to call /tl-calculator/v1/_calculate to calculate and generate the demand for the TL application
ULB Employee can create billing slab calling /tl-calculator/billingslab/_create
ULB Employee can update billing slab calling /tl-calculator/billingslab/_update
ULB Employee can search billing slab calling /tl-calculator/billingslab/_search
TBD
(Note: All the API’s are in the same postman collection therefore the same link is added in each row)
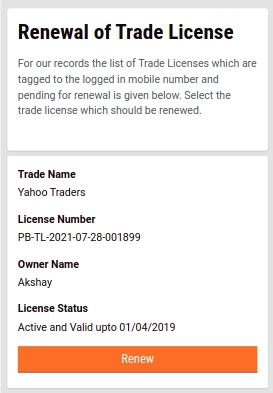
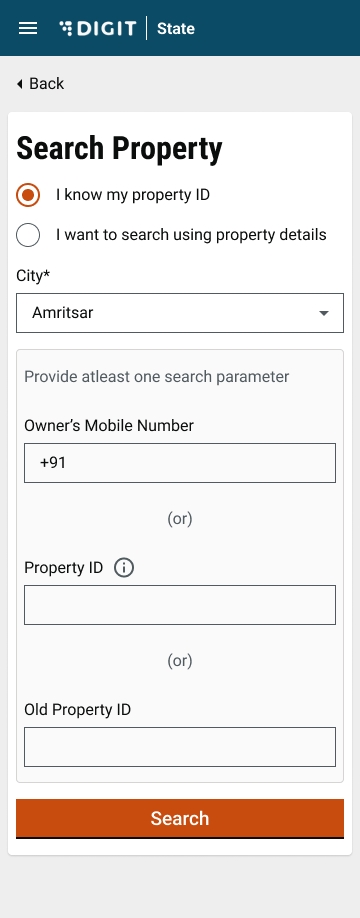
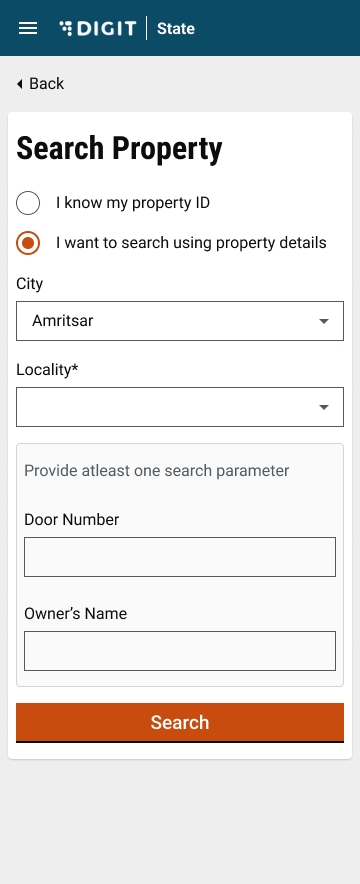
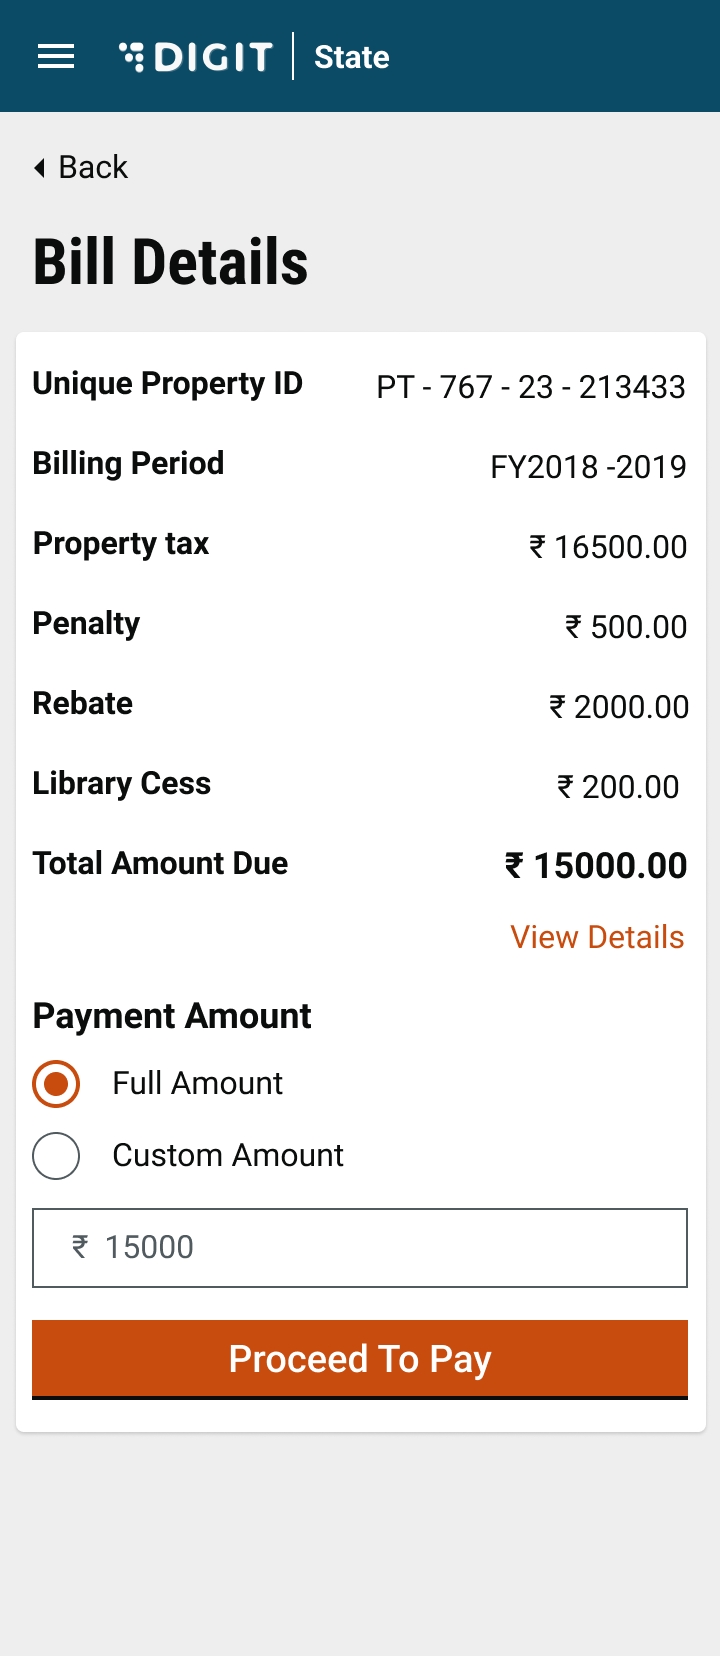
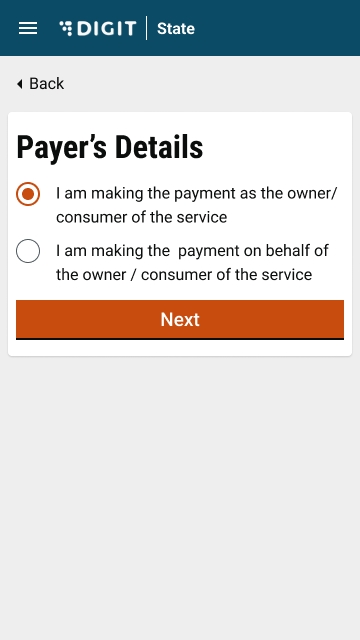
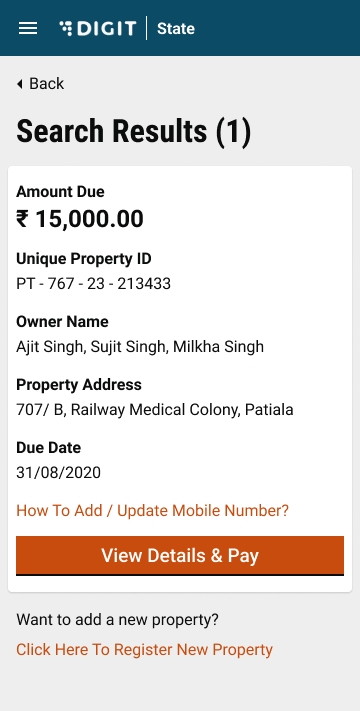

My Connections
UI/UX revamp of Search Connection and Card view of Connection Details.
View Connection Details
UI/UX revamps of complete view connection details.
View Consumption Details
UI/UX revamps of complete view of consumption details.
My Applications
UI/UX revamps of Search Application to My Applications and Card view of application details.
View Application Details
UI/UX revamps of complete view application details.
Pay Application Fee
UI/UX revamps of complete flow of payment of application fee.
Apply for disconnection
A new feature added to allow the consumer of the service to apply for is disconnection.
Data Privacy Audit Report
This report is added to see the details who all have unmasked to see the logged in user’s PII data.
EMPLOYEE
Employee Inbox
UI/ UX revamp of inbox and separating out the water and sewerage inboxes.
Apply for new connection
UI/ UX revamp of and change in application form to remove the information which is to be filled by Field Inspector.
Search Applications
UI/ UX revamp of Search Application.
View Application Details
UI/ UX revamp of Search Application details.
Application Workflow
UI/ UX revamp of all the states of application flow and the option to edit the application by the FI only to add the additional details
Collect Application Fee
UI/ UX revamp of Collect Application Fee.
Search Connection
UI/ UX revamp of Search Connection.
Collect Water/ Sewerage Bills
UI/ UX revamp of Collect the Water/ Sewerage Bills.
View Connection Details
UI/ UX revamp of view connection details
View Consumption Details
UI/ UX revamp of view consumption details
Add Meter Reading
UI/ UX revamp of add meter reading.
Modify Connection
UI/ UX revamp of modify connection.
Bill Amendment
UI/ UX revamp of bill amendment.
Apply for disconnection
New feature to apply for disconnection has been added.
Data Privacy
Data privacy aspect is added to mask the PII data of a consumer and capturing the information up on unmasking of PII to generate the report.
View Connection Details
View Application Details
Modify Connection
Reports
Receipt Register
Collection Register
Defaulters Report
2
List of services that needs to be upgraded
Yes
Kavi/Priyanka
Verified.
3
Verify Configs, MDMS, devOps Changes
Yes
Pradeep/Vinoth
Verified
4
Verify test cases for all enhancements/updates
Yes
Gurjeet
5
Verify performance testing report
Gurjeet
No report found
6
Verify backward compatibility testing report
Yes
Gurjeet
7
Verify the documents for released features
Yes
Pradeep/Vinoth
8
Backward compatibility testing by disabling central instance flag on existing environment
Yes
Vinoth/Gurjeet
Verified the backward compatibility in UAT environment by disabling the flag and deploying latest builds.
9
Setup fresh central instance from scratch for two states and verify
Yes
Vinoth
Verified documents and updated missing gaps in the document.
10
Impel-Singoff
Yes
Vinoth/Gurjeet
15/09/2023
Verified
11
Technical discussion on central instance with Partners
Yes
Vinoth/Pradeep
31/07/2023
Technical Discussion with NIUA and PWC team done on 31st July '23.
12
Demo on Release features to partners
Yes
Vinoth/Pradeep
18/05/2023
Demo Provided 18th May 2023 to Impel partners.
13
Staging upgradation plan
Yes
Vinoth
14
Deployment strategy for DIGIT 2.9
Yes
NIUA Team /Ajay
15
Address queries raised by partner on central instance
No
Queries raised by NIUA to be addressed post Gate 2 as additional effort is required.
NIUA Team /Ajay
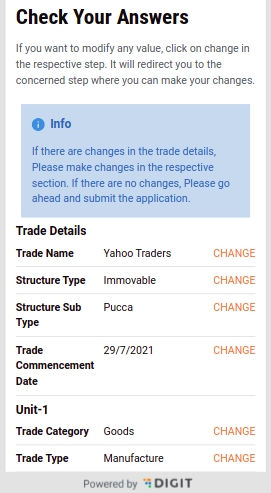
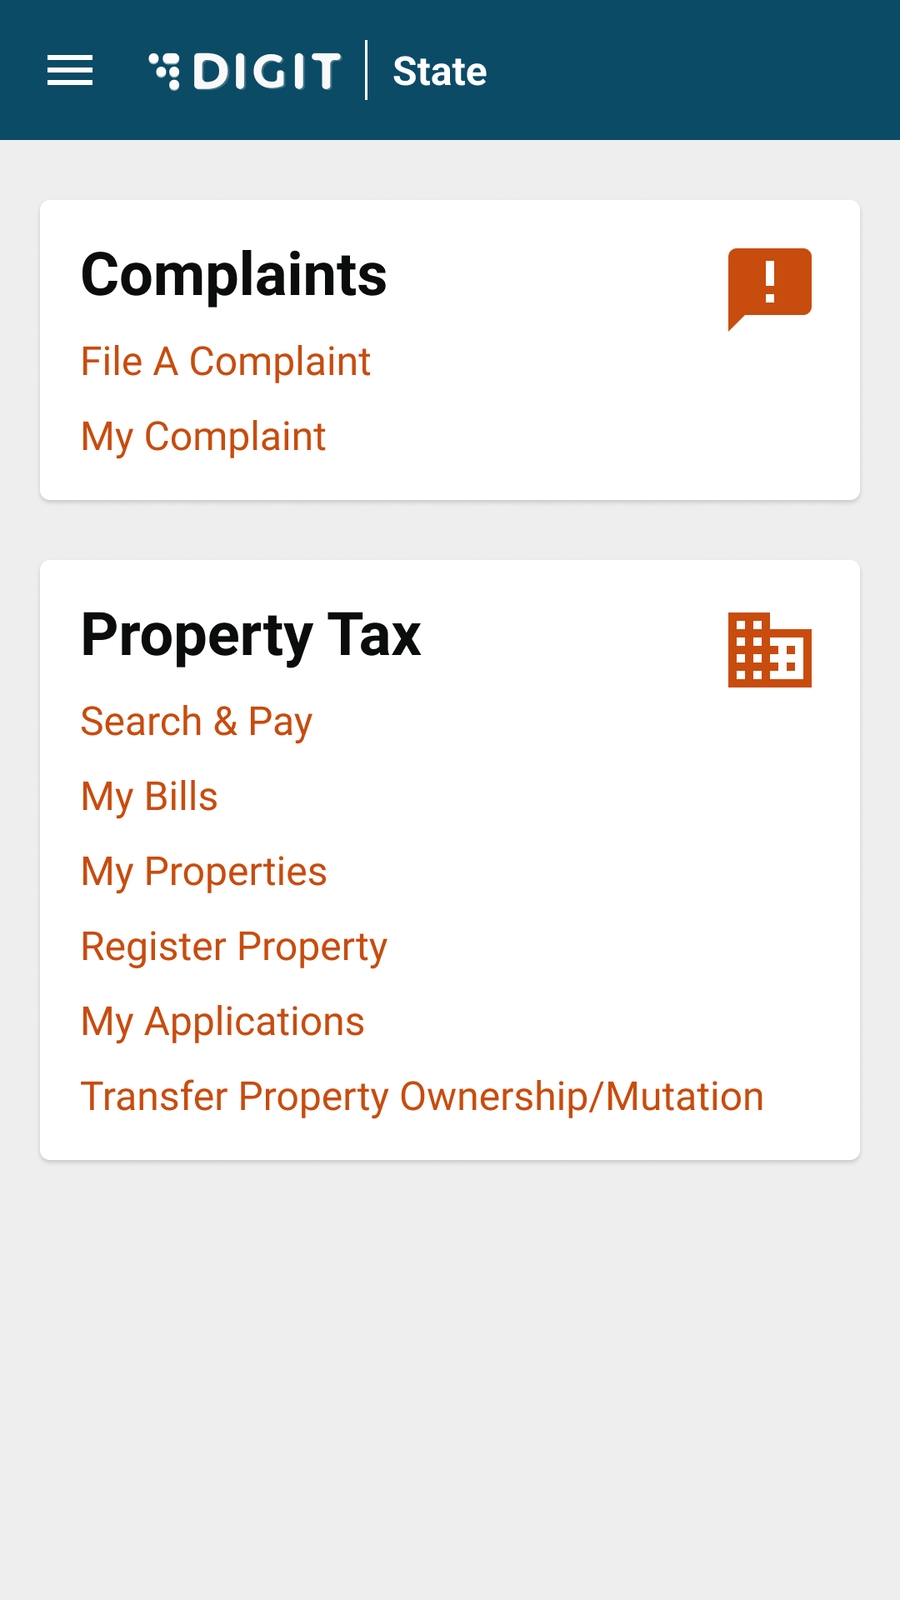


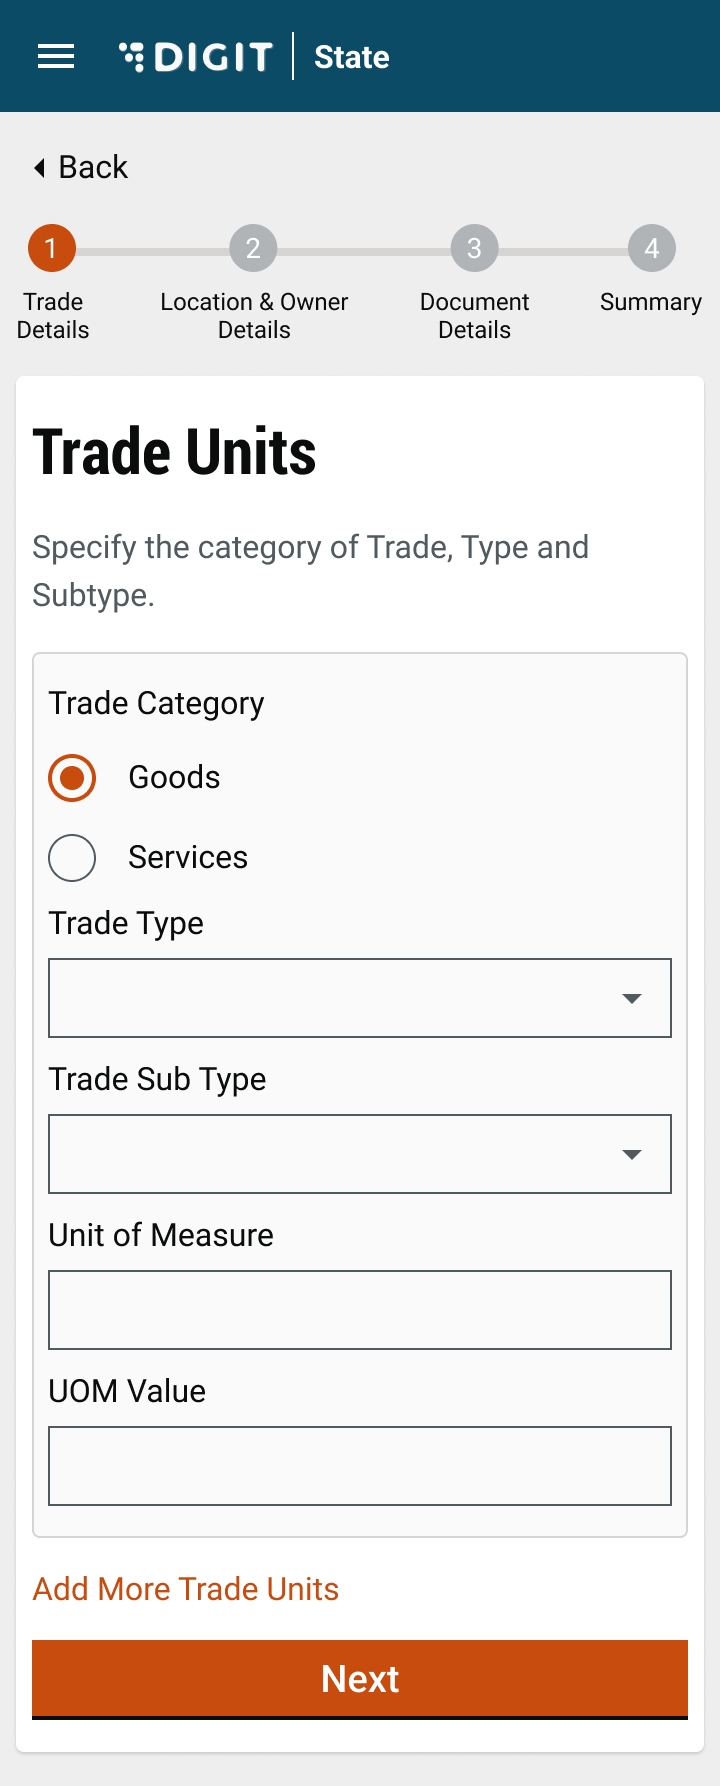
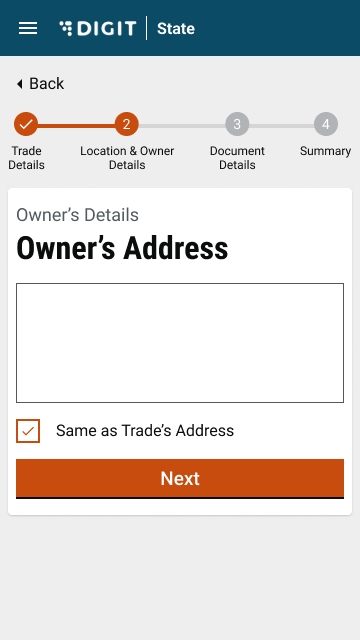
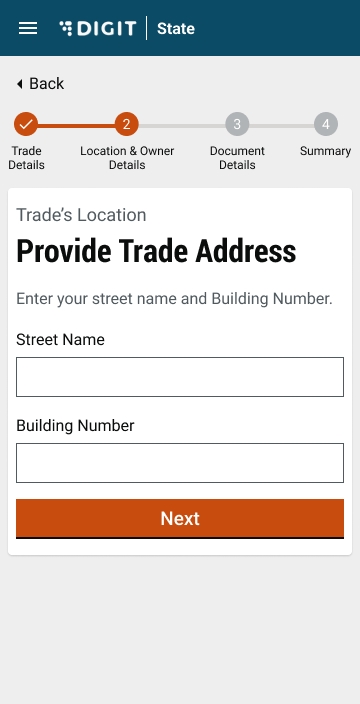
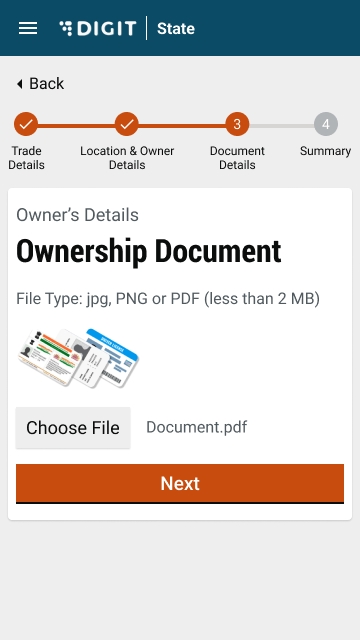
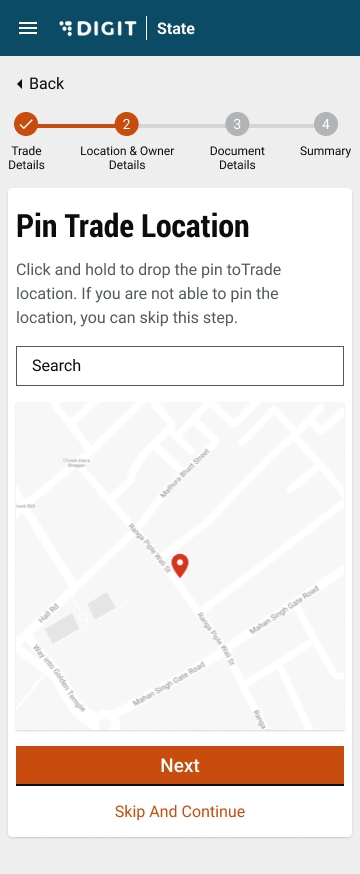
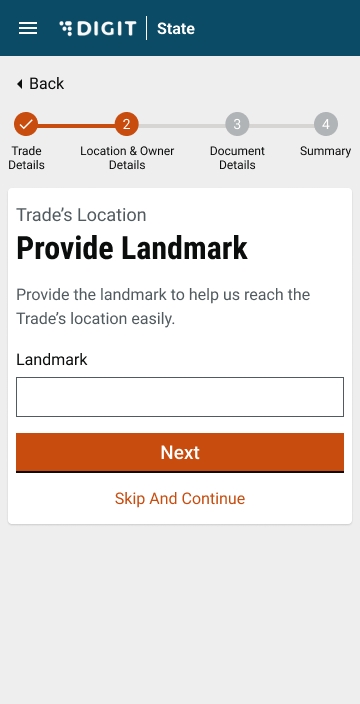
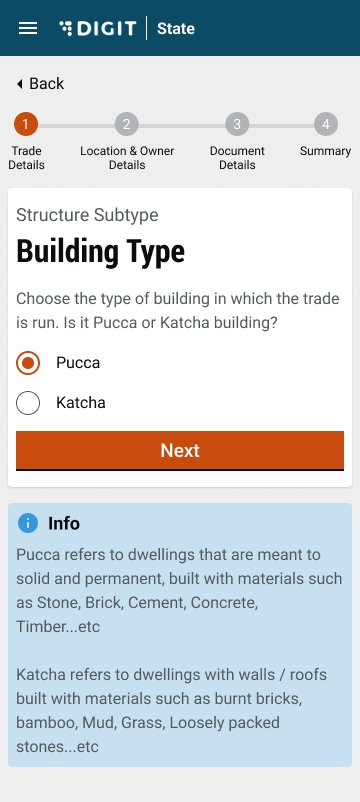
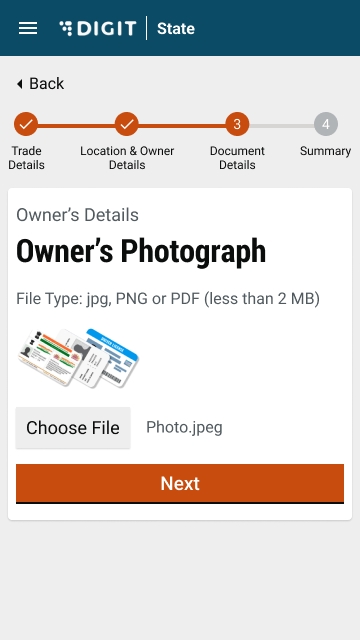
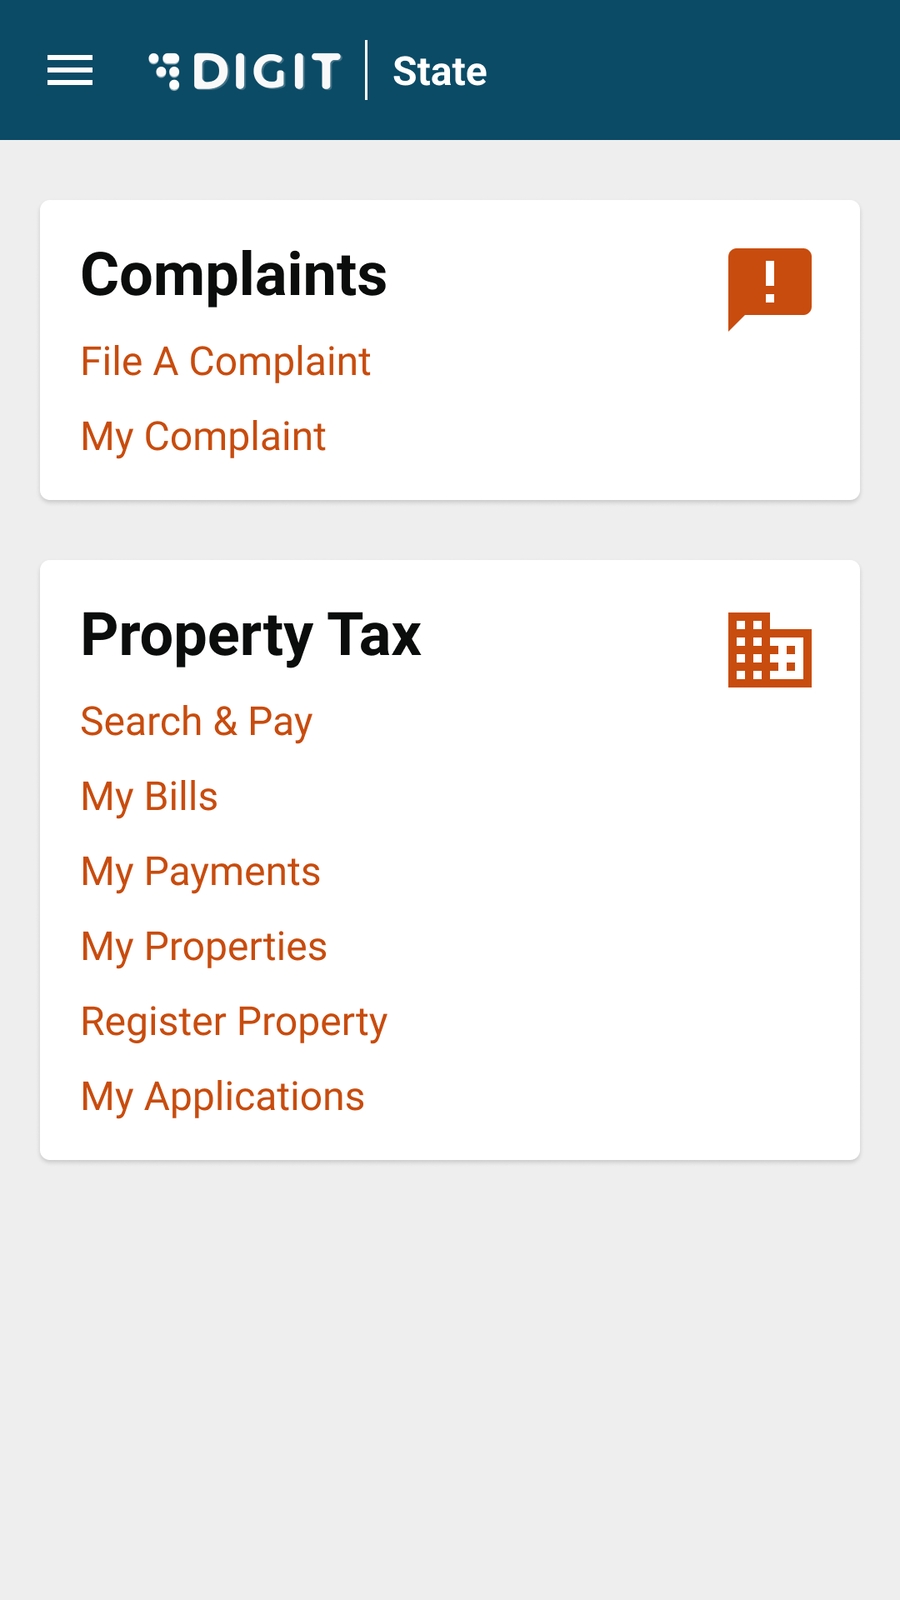
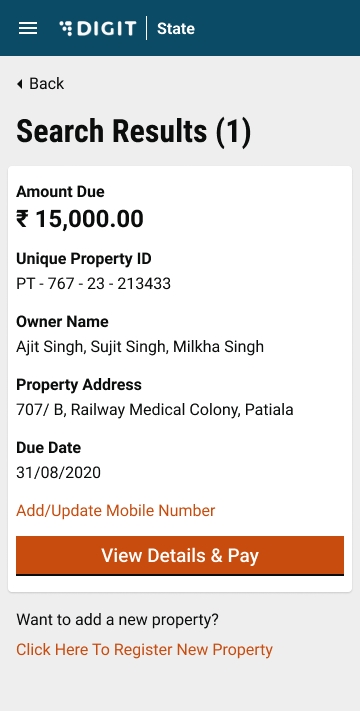
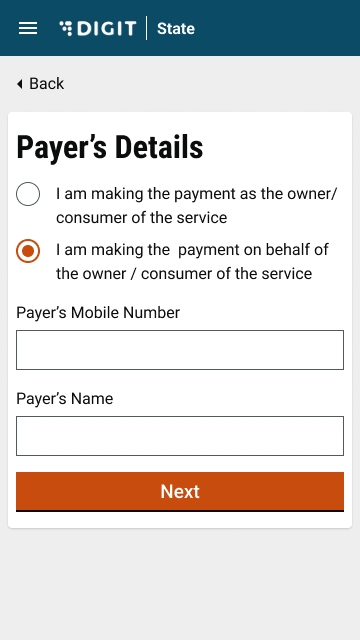
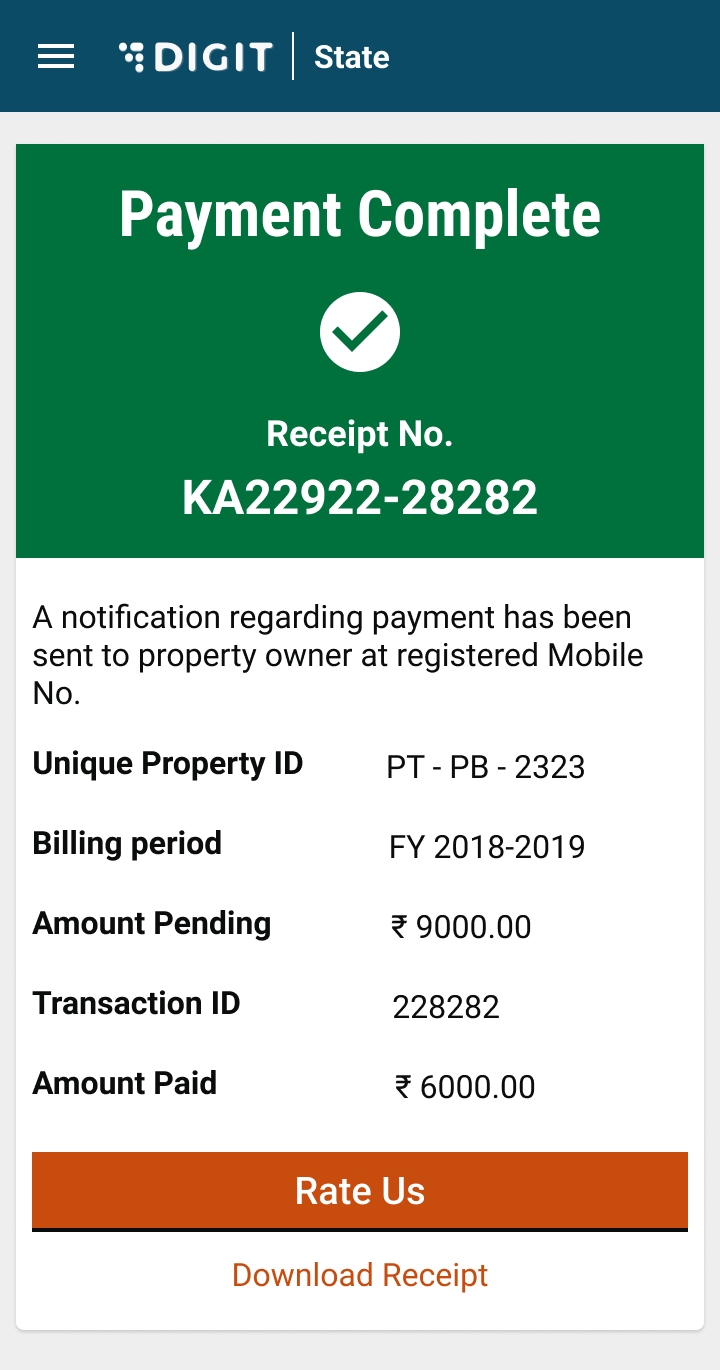

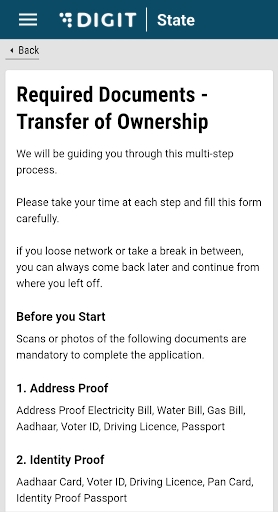

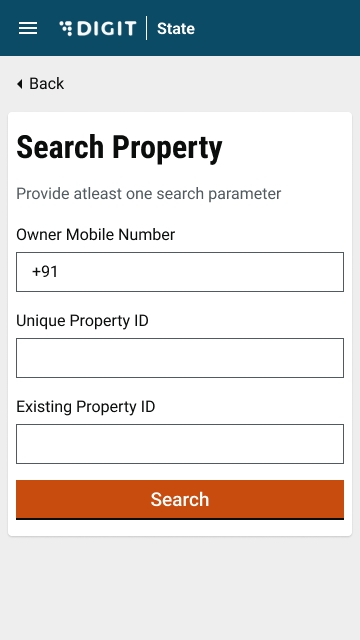

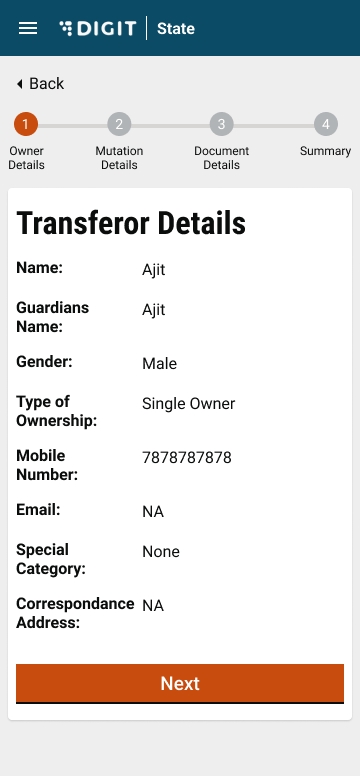
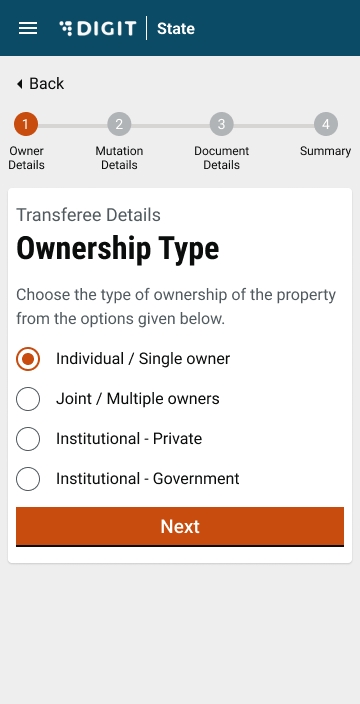
Following services should be up and running:
egov-perister
egov-mdms
tl-services
billing-service
Title
Link
API Swagger Contract
Trade License Document
Title
Link
tl-calculator/billingslab/_create
tl-calculator/billingslab/_search
tl-calculator/billingslab/_update
tl-calculator/v1/_calculate
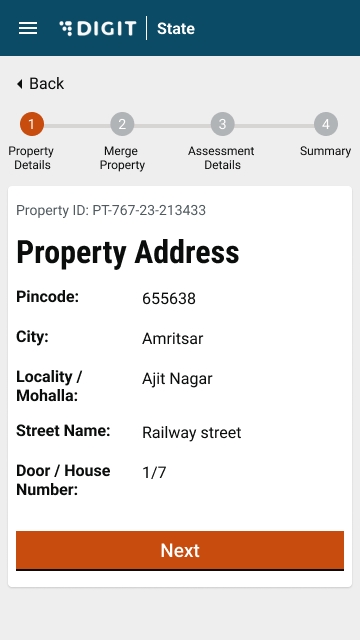
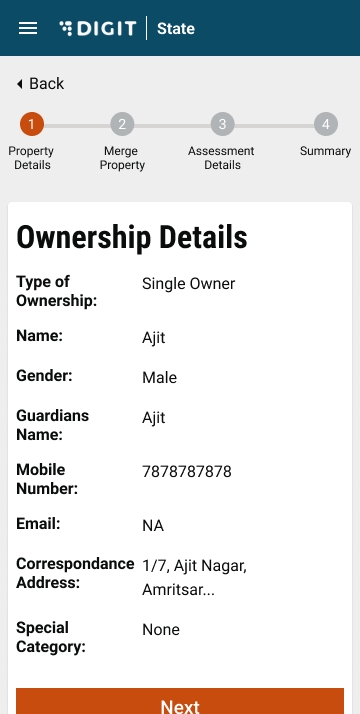
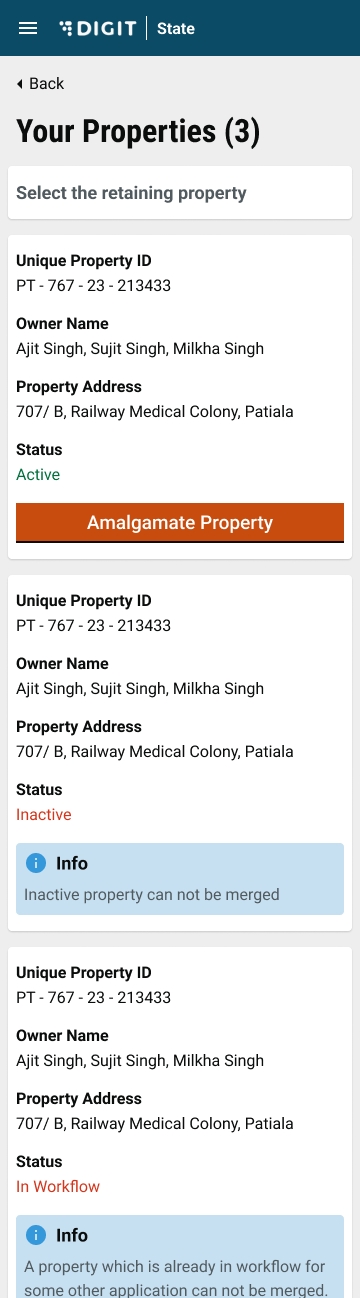

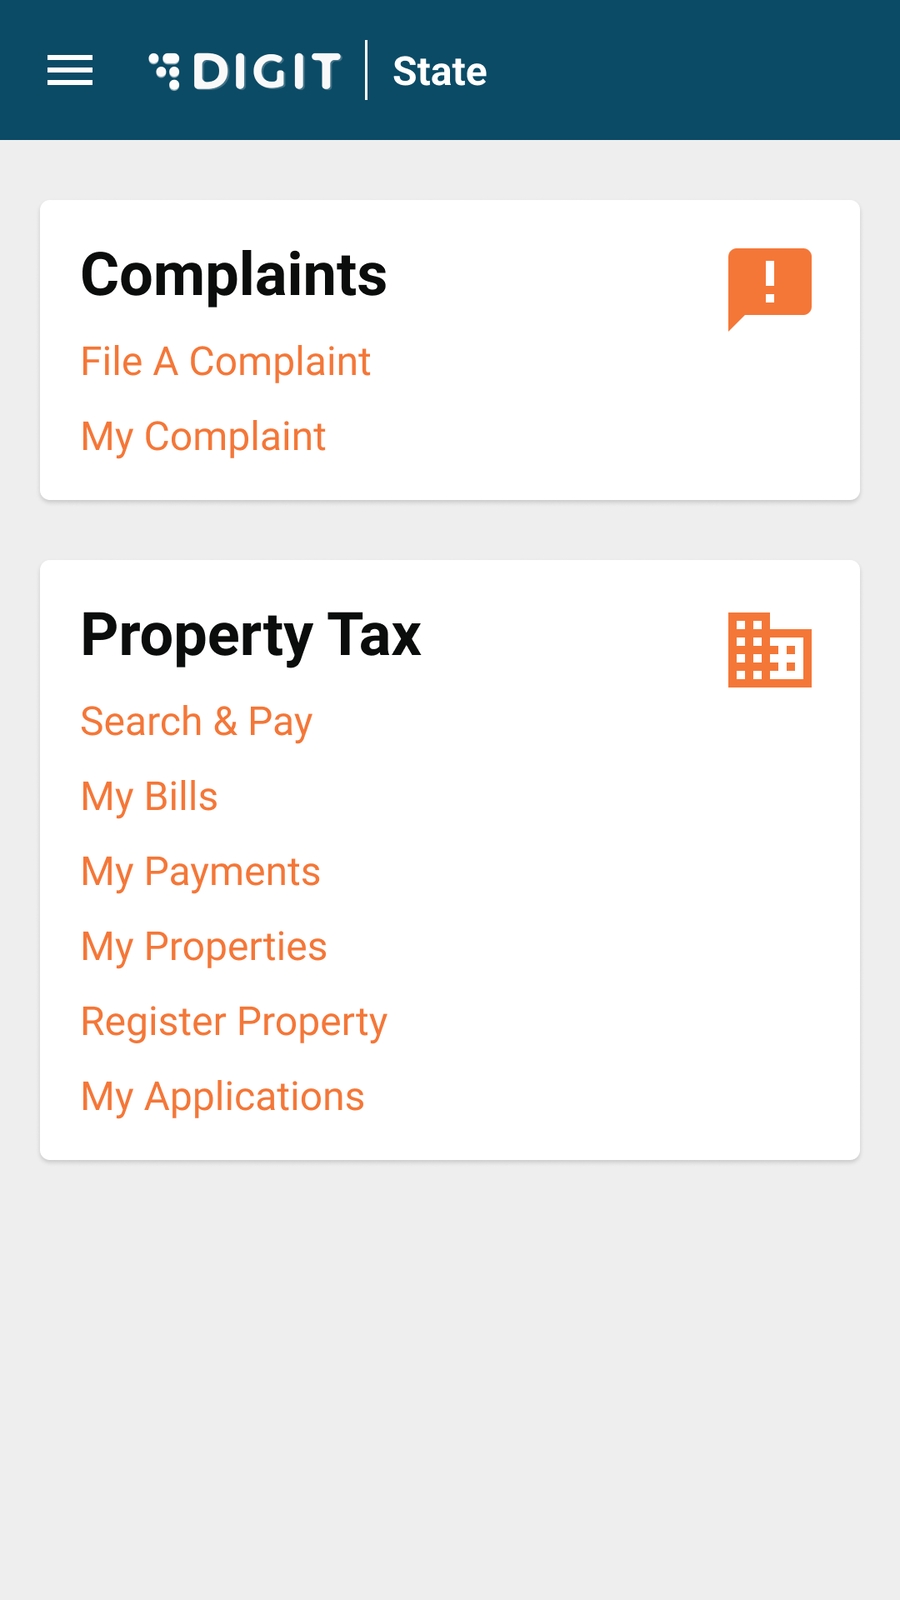
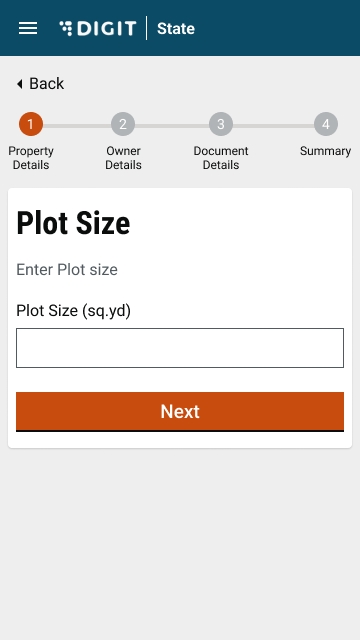
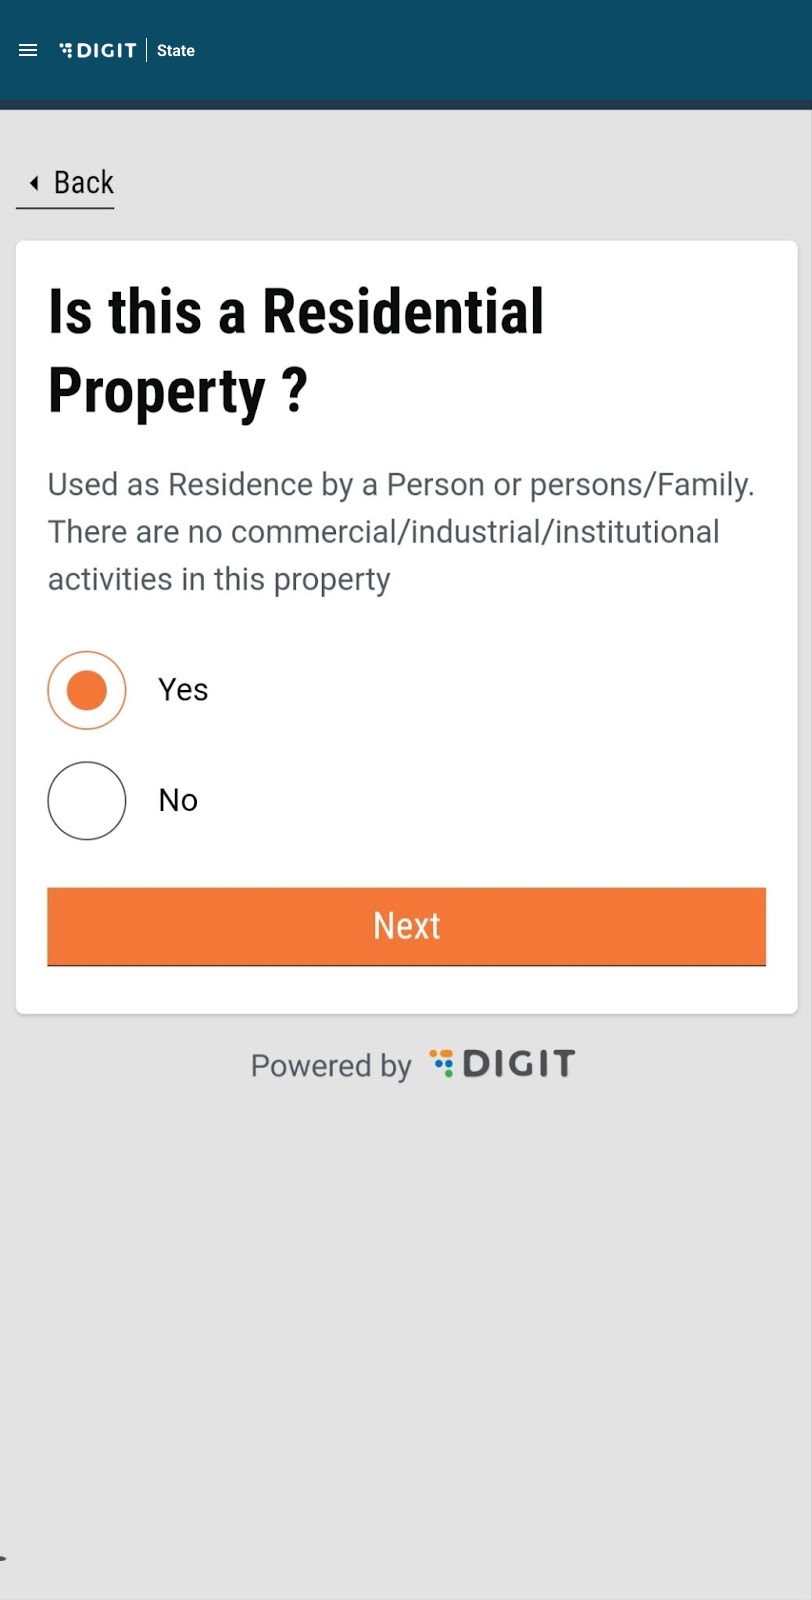
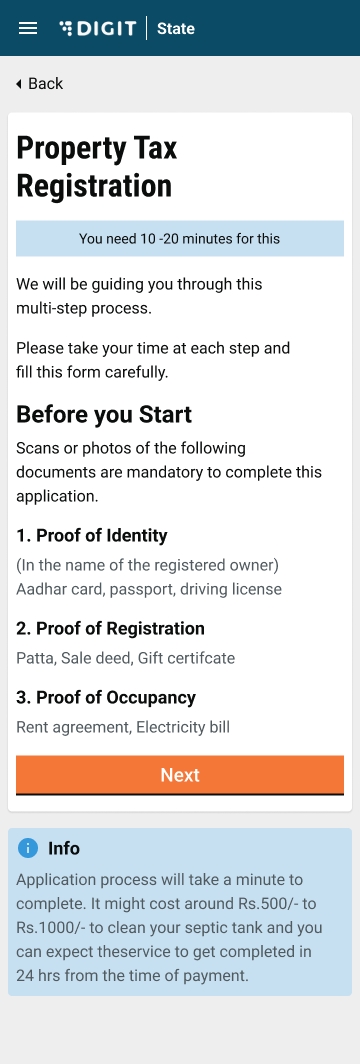
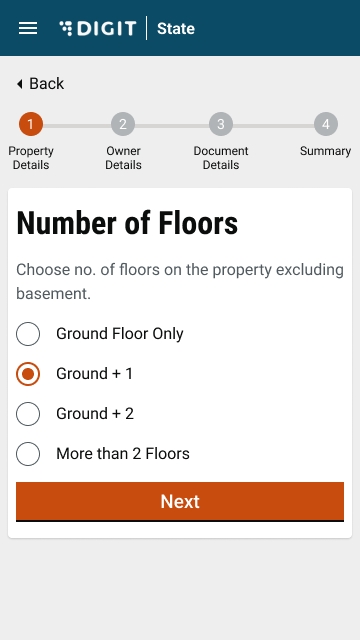
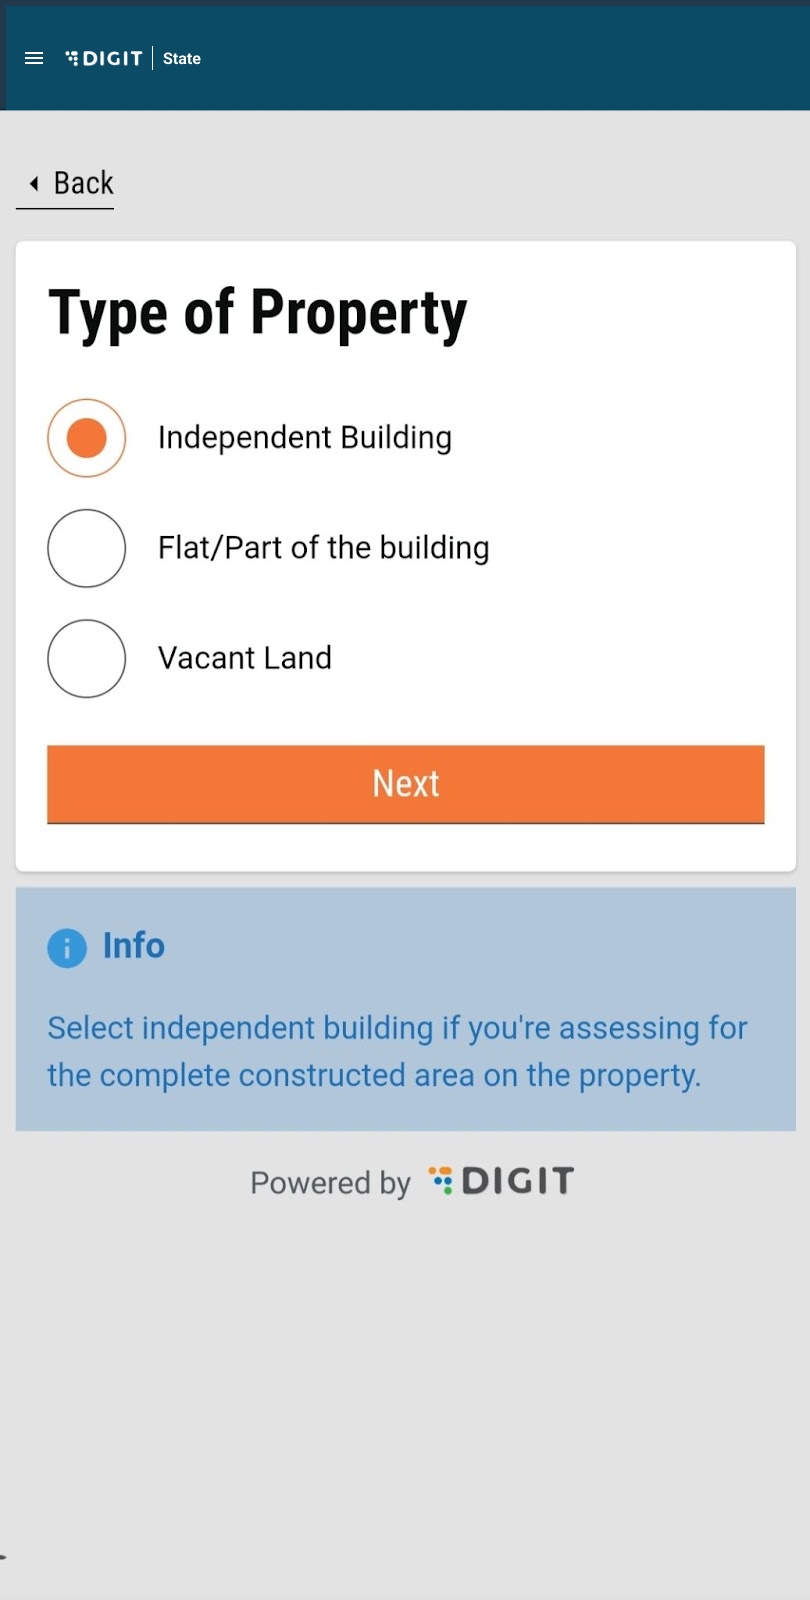
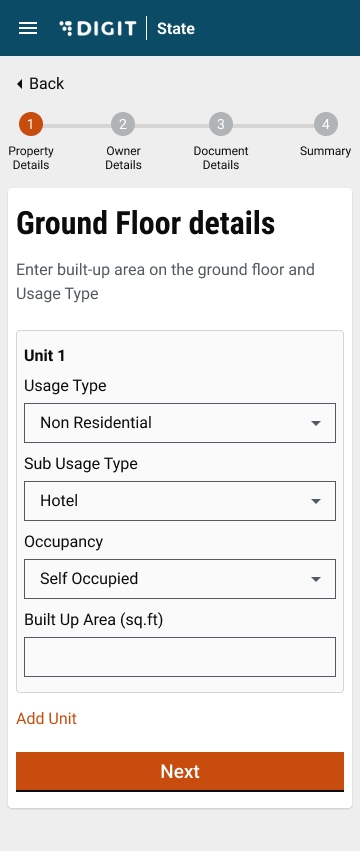
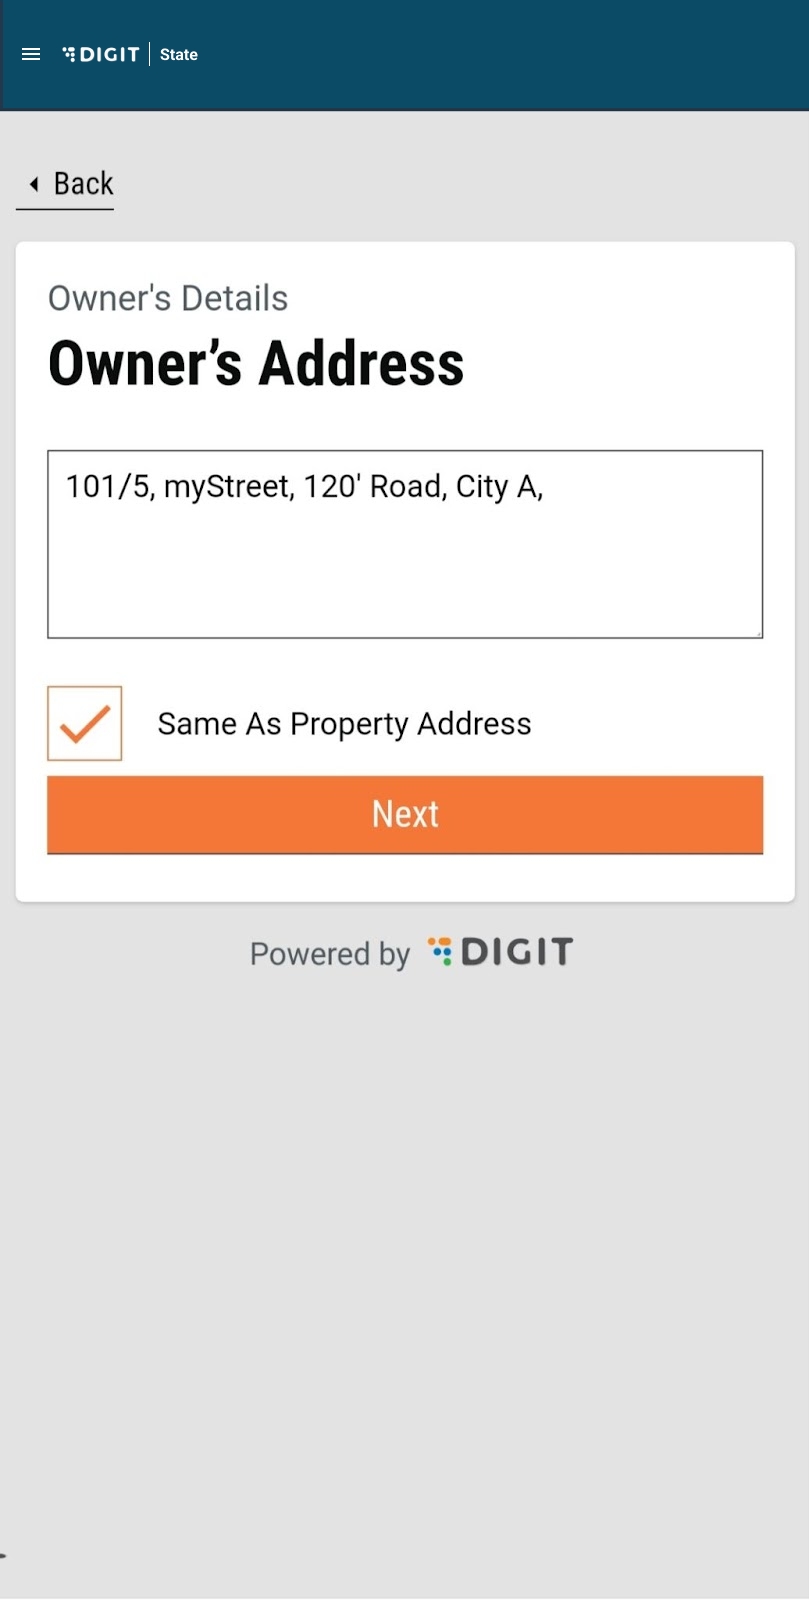


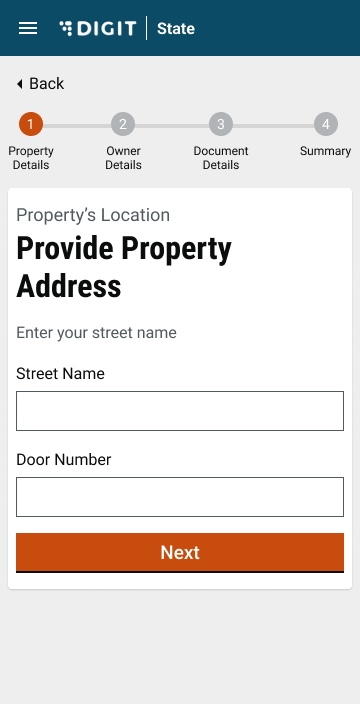
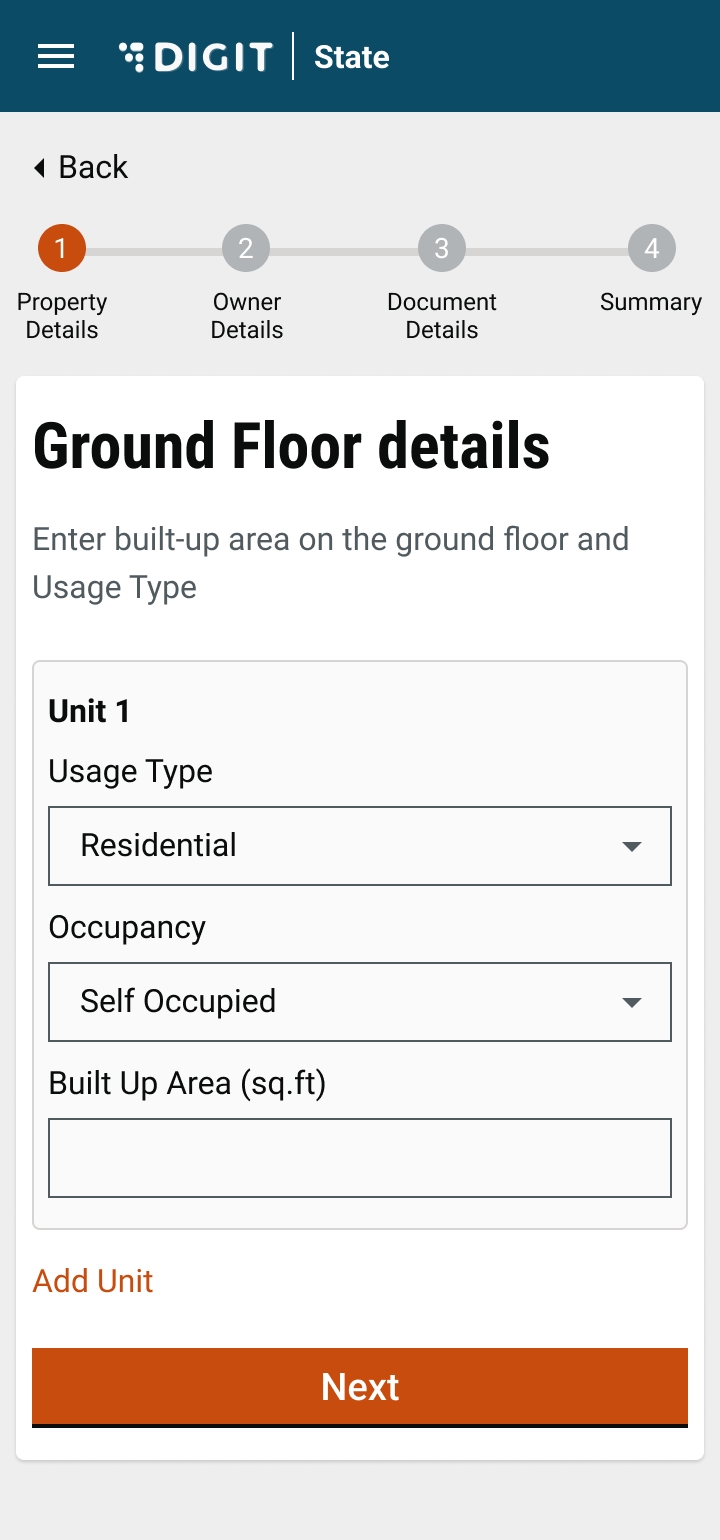
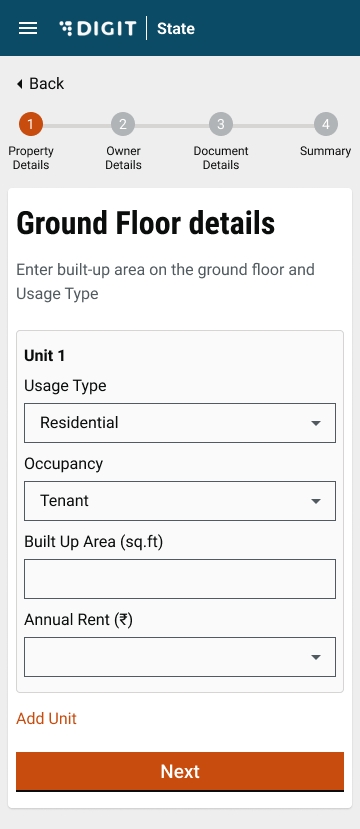
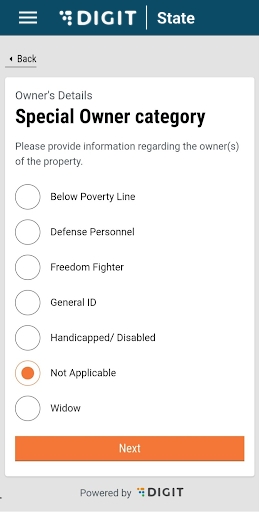
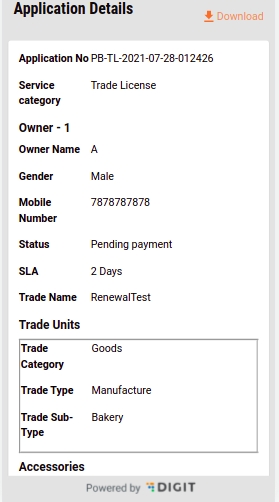
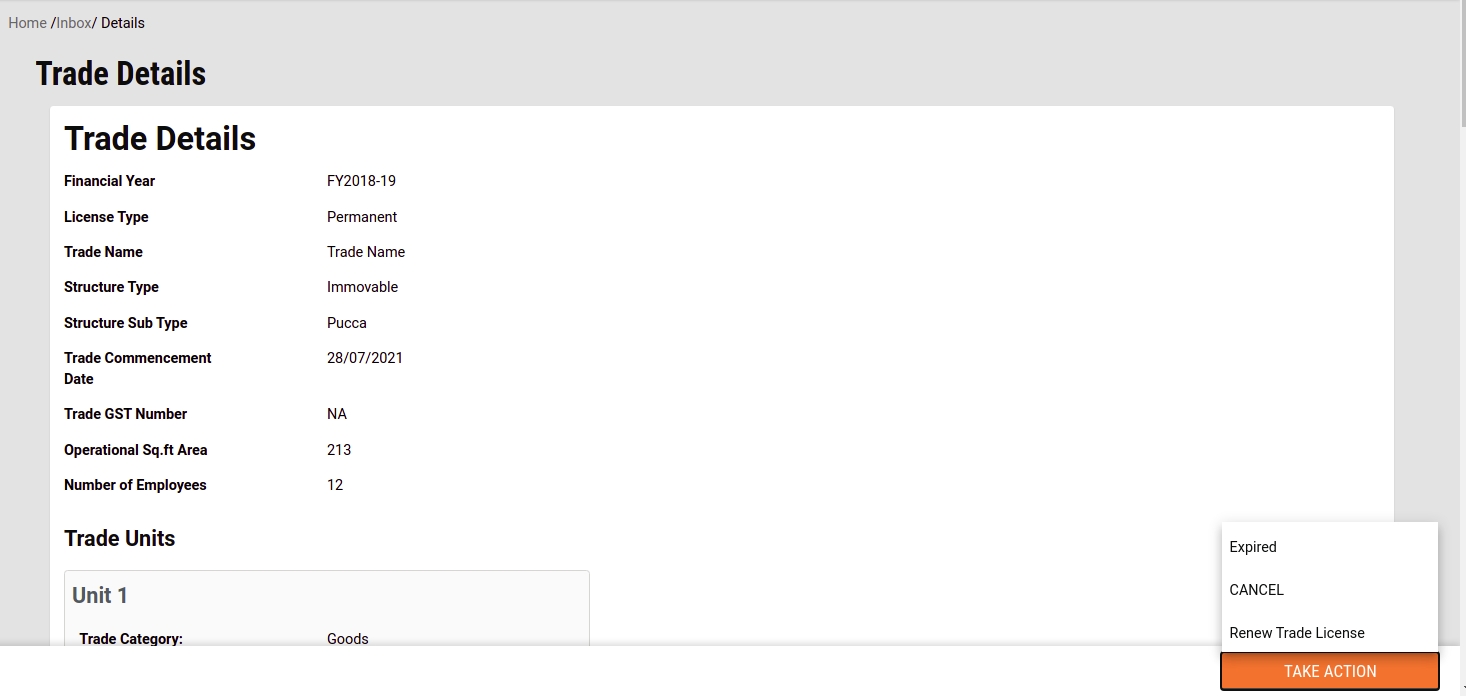
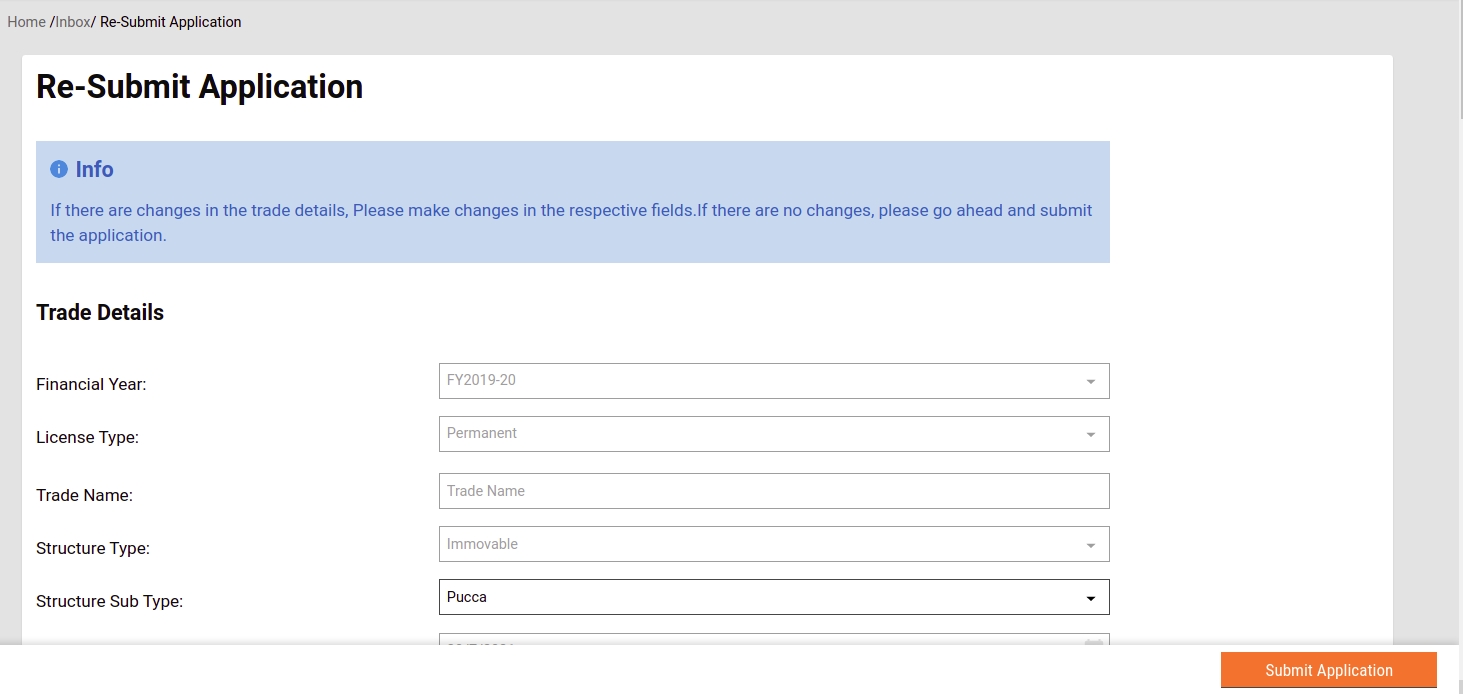

Functional overview for stakeholders
The Local Business License Issuing application provides a digital interface, allowing citizens to apply for the Trade Licence and subsequently make the trade licence fee payment online.
The Local Business License Issuing application enables:
Ease of doing business — Traders can apply for new licences, renewals, amendments, and supplemental licences
{
"tenantId": "pb",
"moduleName": "TradeLicense",
"Penalty": [
{
"rate": 10,
"minAmount": 0.0,
"flatAmount": 0.0,
"fromFY": "2018-19",
"startingDay": "1/09/2018"
},
{
"rate": 10,
"minAmount": 0.0,
"flatAmount": 0.0,
"fromFY": "2015-16",
"startingDay": "1/04/2016"
}
]
} {
"tenantId": "pb",
"moduleName": "TradeLicense",
"Rebate": [
{
"rate": 10,
"maxAmount": null,
"flatAmount": 0.0,
"fromFY": "2018-19",
"endingDay": "31/03"
},
{
"rate": 10,
"maxAmount": null,
"flatAmount": 0.0,
"fromFY": "2019-20",
"endingDay": "31/03"
}
]
}[
{
"id": {{PLACEHOLDER1}},
"name": "TL BillingSlab Create",
"url": "/tl-calculator/billingslab/_create",
"displayName": "TL BillingSlab Create",
"orderNumber": 1,
"parentModule": "",
"enabled": false,
"serviceCode": "",
"code": "null",
"path": ""
},
{
"id": {{PLACEHOLDER2}},
"name": "TL BillingSlab Update",
"url": "/tl-calculator/billingslab/_update",
"displayName": "TL BillingSlab Update",
"orderNumber": 1,
"parentModule": "",
"enabled": false,
"serviceCode": "",
"code": "null",
"path": ""
},
{
"id": {{PLACEHOLDER3}},
"name": "TL BillingSlab Search",
"url": "/tl-calculator/billingslab/_search",
"displayName": "TL BillingSlab Search",
"orderNumber": 1,
"parentModule": "",
"enabled": false,
"serviceCode": "",
"code": "null",
"path": ""
},
{
"id": {{PLACEHOLDER4}},
"name": "TL Calculation",
"url": "/tl-calculator/v1/_calculate",
"displayName": "TL Calculation",
"orderNumber": 1,
"parentModule": "",
"enabled": false,
"serviceCode": "",
"code": "null",
"path": ""
}
][
{
"rolecode": "TL_ADMIN",
"actionid": "{{PLACEHOLDER1}}",
"actioncode": "",
"tenantId": "pb"
},
{
"rolecode": "TL_ADMIN",
"actionid": "{{PLACEHOLDER2}}",
"actioncode": "",
"tenantId": "pb"
},
{
"rolecode": "TL_CREATOR",
"actionid": "{{PLACEHOLDER3}}",
"actioncode": "",
"tenantId": "pb"
},
{
"rolecode": "TL_CEMP",
"actionid": "{{PLACEHOLDER3}}",
"actioncode": "",
"tenantId": "pb"
},
{
"rolecode": "TL_CEMP",
"actionid": "{{PLACEHOLDER4}}",
"actioncode": "",
"tenantId": "pb"
}
]
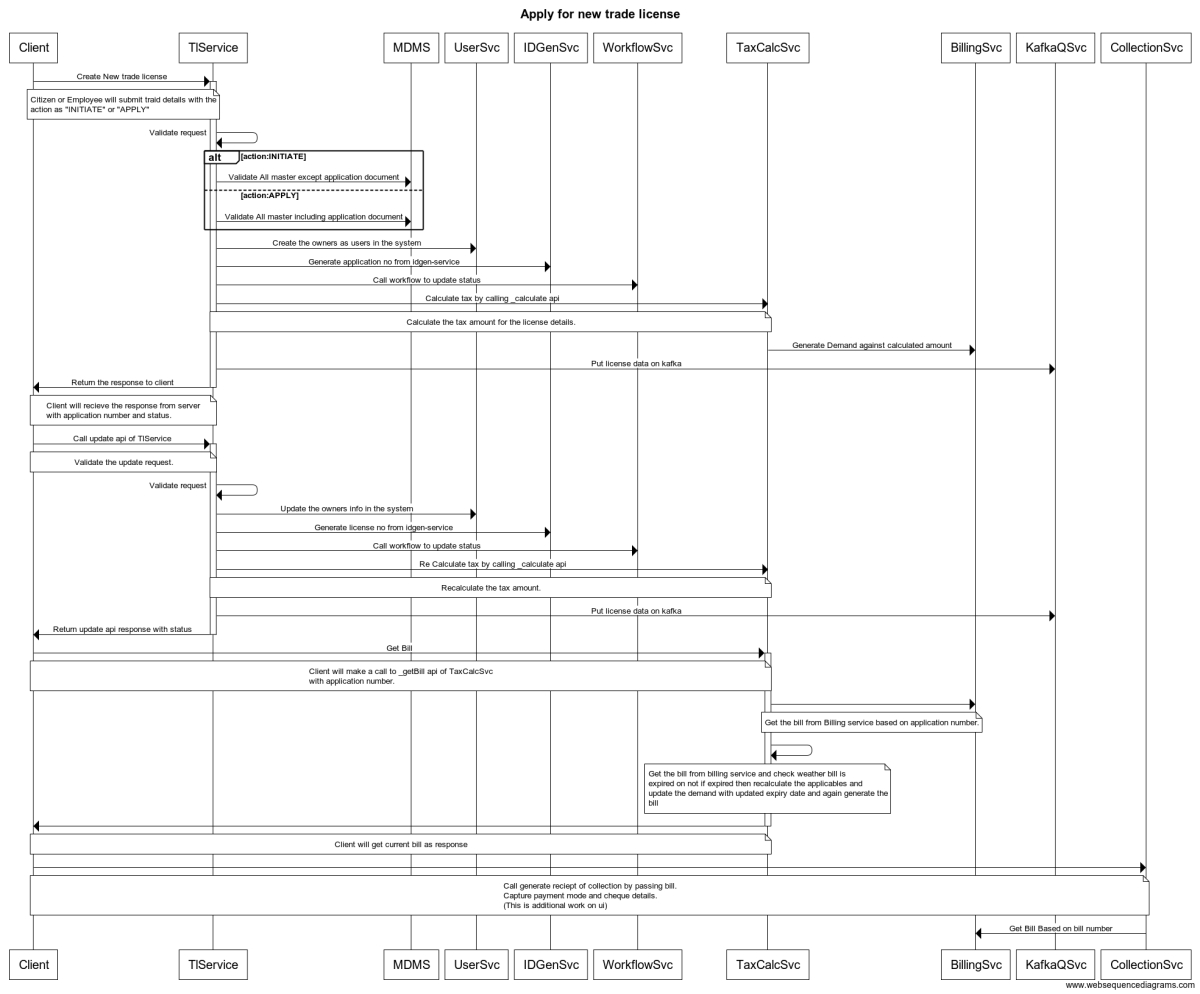
Regulatory Tracking — Administrators can track and manage regulatory processes
Shorter Timelines — Streamline and automate business licencing processes and help a business to be set up quickly
Data-driven decision making — The application collates valuable information on the economic activity and employment opportunities in a ULB
The list below summarizes the key features supported by the TL module -
Key capabilities offered by this functional component -
OTP-based login for citizens via Web/Mobile App
OTP-based login for employees via Web/Mobile App
Provision for language selection during registration for both employees and citizens
Provision of creating a personalized profile for citizens and employees on the Web/App
Login credentials for the various hierarchies of employees
Role-based access for performing different actions relating to Trade License modules
Users can apply for a new Trade Licence from the system. They can select the type of license to apply. The user enters trade details, owner details and documents after which the application can be reviewed and submitted. Similarly, a counter employee can also apply for a trade licence on behalf of the citizen. The system has a workflow integration that enables stage-wise approval before issuing the Trade Licence.
Key capabilities offered by this functional component -
Citizens can apply for a new trade licence through mobile app/web
Citizens/CSC can capture trade details, trade units, accessories, owner details, address, purpose, date of issuance, licence number etc.
Citizens/CSC can upload supporting documents
Citizens/CSC can calculate breakup based on selected trade
Citizens/CSC can select multiple accessories for the trade
Citizens/CSC can apply for multiple trade licences
Citizens/CSC can download/print application summary
Citizens/CSC can download/print trade reference number
Citizens/CSC can view the applied licences
The system has the facility to deliver the service online & through SEWA KENDRA.
The portal displays all the information including the processes and documents required for citizen convenience.
The system has the facility to assign a unique identification number based on the licence type, which will be used for all future transactions linked to the licence.
The system has the facility to assign the application to the respective Inspector for survey and verification. After the application is submitted, it goes to the document verifier. The next step after document verification is field inspection. After the field inspector’s approval, the TL is approved by the approver.
Key capabilities offered by this functional component -
Document Verifier - verifies & forwards or rejects the application
Licensing Inspector - verifies and forwards the application
Licensing Inspector - sends back or rejects the application
Licensing Inspector - approves the application
Citizen - pays for the licence post-verification process online or at the CSC
CSC - collects fee post-verification
The system allows the printing of the licence and sending the licence through e-mail.
The system allows SMS alerts to the applicant regarding the date of inspection/visit by the inspector and approval/rejection of the application.
The system allows the inspector to enter the field visit details and a field visit report is generated and automatically routed to the superintendent.
The system has the facility to edit/update the application based on the inspection report against the application.
The system has the facility to provide a hassle-free renewal process for citizens and employees, leading to increased revenues, by reducing unlicensed trades. The system allows the sending of SMS and email notifications and reminders based on the renewal cycle.
Key capabilities offered by this functional component -
The citizen can pay for the licence post-verification process
CSC - collects fees post-verification
The system allows intimating the applicant about the payment of the licence fee through SMS/email
The system allows the generation of receipts for the payment
The payment modes enabled are Card (offline), cash, cheque, DD
Following reports offered by the module -
Cancelled receipt register report
Trade licence collection
Trade licence application status- showing the number of licences approved/rejected.
Trade licence ULB-wise status
State dashboard: View Reports for Total Licences, Licences Issued, Payment Collected, Payment Distribution
Notifications - The system can send notifications to citizens. These notifications can be sent for various steps like - verification completion, payment reminder, and payment confirmation. These notifications can be sent in the language chosen by the ULB through all channels - SMS, WhatsApp, and Email.
Configurable Masters - The system provides the following masters that can be configured as per the State’s requirements:
Charges & calculation: calculation engine, rebate, penalty,
Rate Master
State Masters: Trade Ontology, Documents List, Accessories, Ownership, Employee Data Mapping, Boundary Data Mapping, Fee Matrix (Licence Fees)
System specification in compliance with the Ease of Doing Business (EODB) BRAP 2019
80
Sector Specific
2
Implement an online application system with the following features:
i. Online submission of application without the need to submit physical copy of application
ii. Eliminate physical touchpoint for document submission
iii. Allow option of online payment of application fee
iv. Allow applicant to track status of application online
v. Applicant can download the final certificate online
Already available in the system
Registration, Login, Creation of User Profile
Provision for Language Selection during first-time registration via Mobile/Web app.
OTP Based Login for Citizen/ Employee via Mobile/ Web App
Login Credentials for the various hierarchy of employees
Provision of Personalized Profile for Citizen/ Employee on Web App
Applying for a Trade Licence
Citizen/CSC: Enters Trade Details, Trade Units, Accessories, Owner Details.

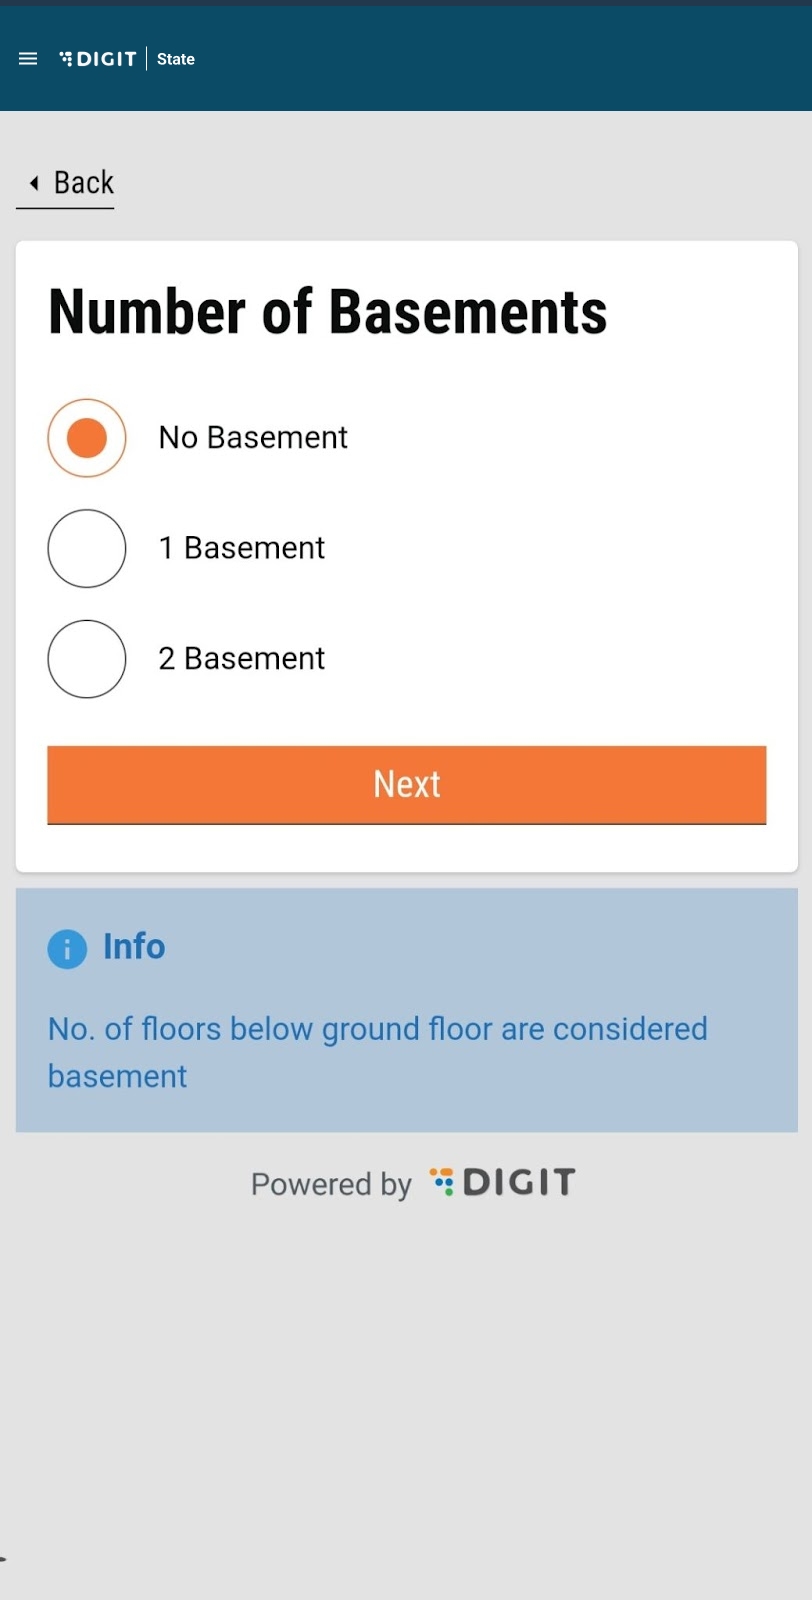

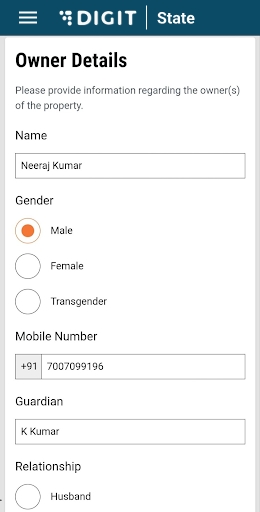
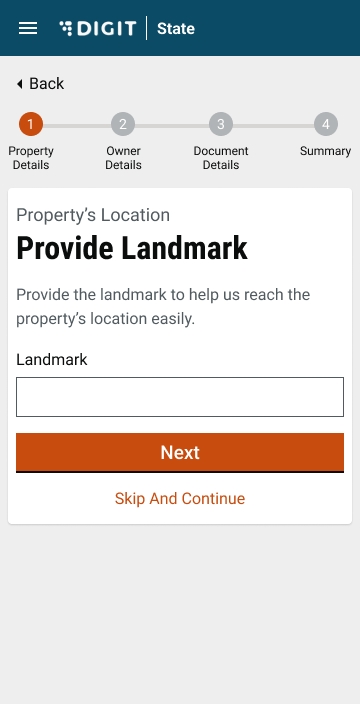
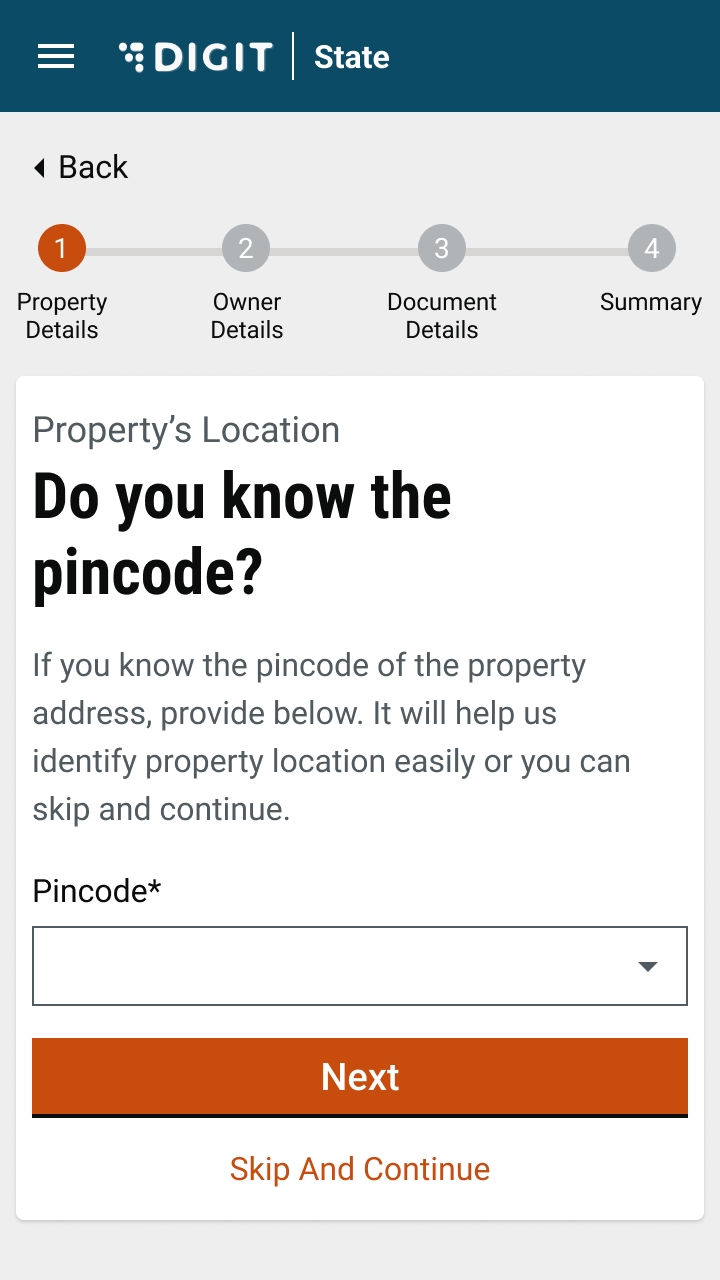
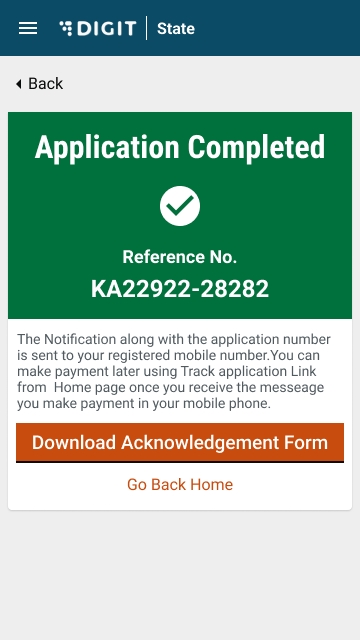
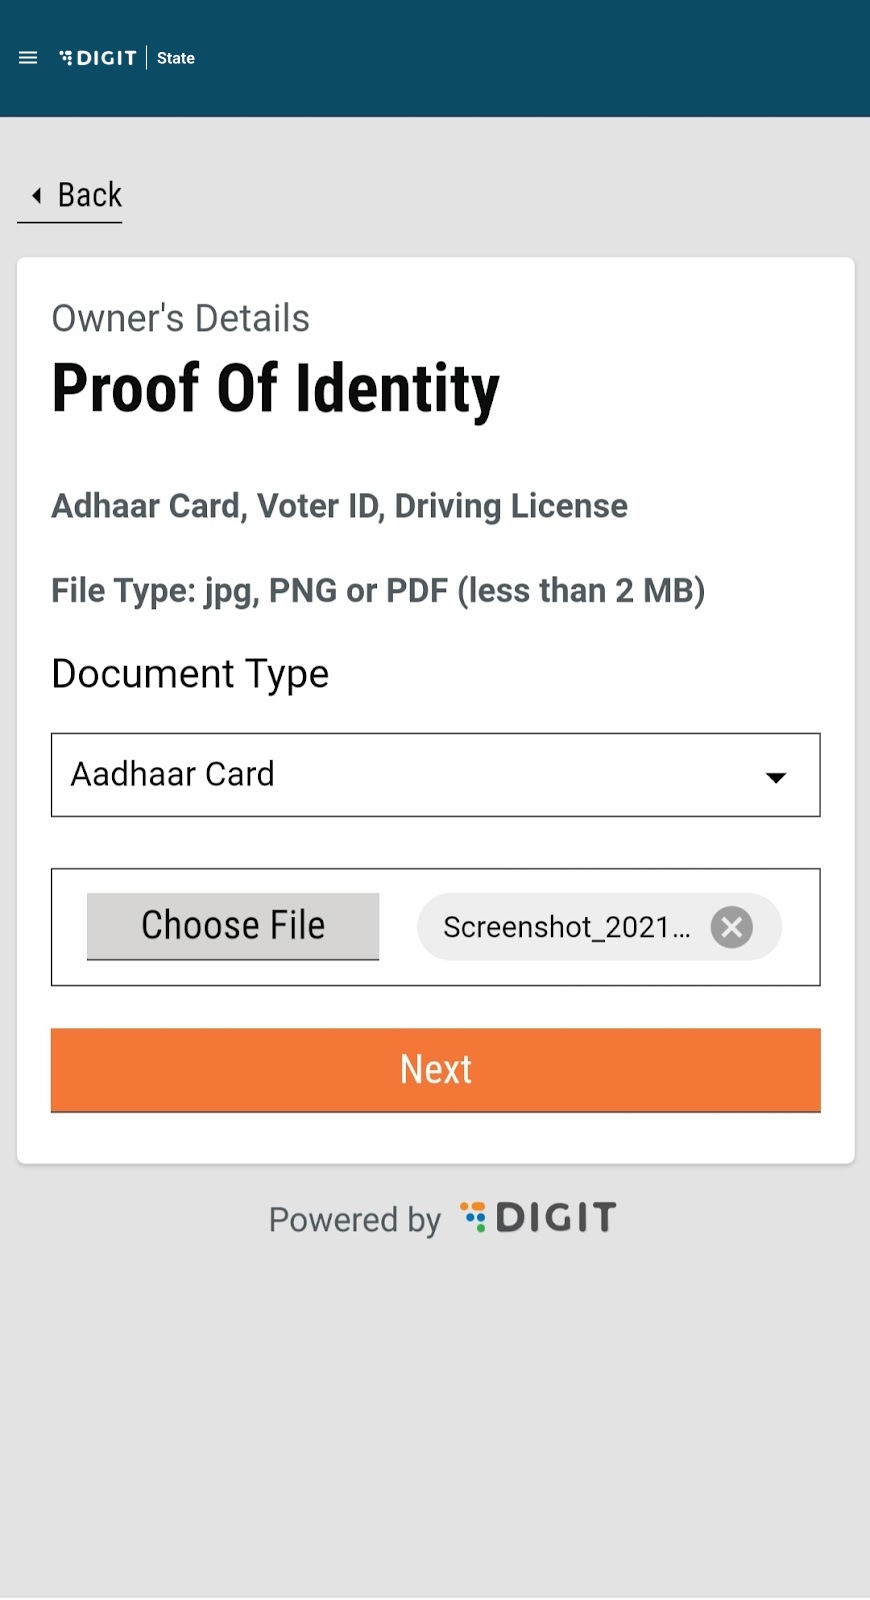
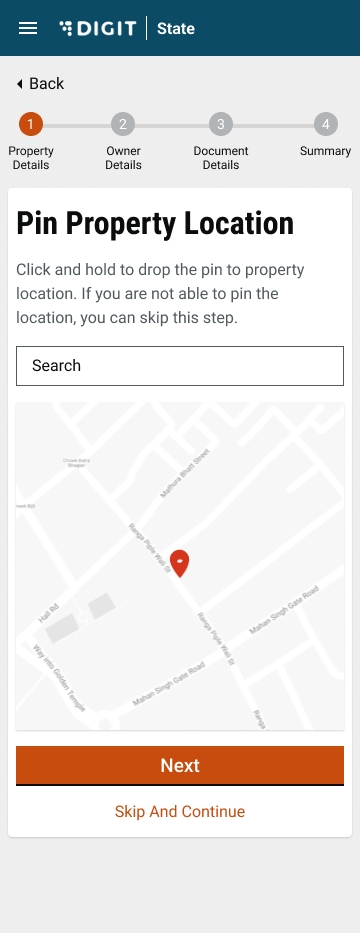
Citizen/CSC: Upload Documents
Citizen/CSC: ULB Wise Trade Selection
Citizen/CSC: Calculation Breakup Based on Selected Trade
Citizen/CSC: Multiple Accessories Field Count
Citizen/CSC: Multiple Trade Licence
Citizen/CSC: Download/Print Application Summary
Citizen/CSC: Download/PRINT Trade Reference No
Citizen/CSC: View the applied licences
Citizen: Pays for the licence post-verification
CSC: Collects fee post verification
Issue of trade licence
Document Verifier : Verify & Forward/ Reject the application
Licencing Inspector: Verify and Forward/ Send back/ Reject the Application.
Licencing Officer: Approve/ Send back the Application
Licencing Officer: Reject/ Cancel the Application
Modification to a Trade Licence
Edit/ Update the Application based on the Inspection report against the application.
Renewal of a Trade Licence
Renew trade licence
Payment and Fee
Configurable Workflow Rights : Edit & Payment Collection
Payments & Collection : Various Payment Modes
Dashboards and reports
Cancelled Receipt Register Report
Trade licence collection
Trade licence application status- showing the number of licences approved/rejected
Trade licence ULB-wise status
State Dashboard: View Reports for Total Licences, Licences Issued, Payment Collected, Payment Distribution
General features
Notifications : SMS Notifications
Charges & Calculation : Calculation Engine
Charges & Calculation : Rebate/ Penalty- Date Based
Charges & Calculation : Ad-Hoc Rebate/ Penalty
Charges & Calculation : Exemptions Trade Type & Owner Type
Configuration masters
Configurable Workflow Rights : Edit & Payment Collection
Configurable Verification & Approval

Objective: To provide the facility for the user to create a trade license application for the current year by citizen users or counter employees.
Users can apply for a trade license application by clicking on the Apply for Trade License button. Users can add all the information as per the questions asked across the workflow. The summary screen at the end of the flow displays all details for review. Users can click on the submit button after review. The application for a trade license is created for the current financial year.
Apply Flow - The trade license registration screen is displayed after login which helps users identify the documents required to apply for a trade license. A citizen info card at the bottom of the page displays any additional information about the maximum size of the file that can be uploaded.
Trade License Details/Assessment Flow - This flow captures the trade-specific information required for registering the trade.
Trade Name - The user provides the name of the trade. An info card is displayed at the bottom of the screen stating that the license will be issued for the current financial year. The financial year value is retrieved from the MDMS.
Structure Type - The users can select yes or no based on whether the trade has mobility or not. If yes, the next screen prompts you to enter the vehicle type. If no, the next screen moves to the building type page.
Vehicle Type / Building Type - The options for vehicle and building type are fetched from the MDMS. The Building Type screen displays an information card about the pucca or kuccha options.
Commencement Date - It defines the date on which the trade started or will start in the future.
Trade Units - Users must provide the trade category as either goods or services. Based on the selected option the Trade Type is loaded from the MDMS as a drop-down list. The trade sub-type options are loaded based on the selected trade type. The unit of measure and UOM value get pre-populated from the MDMS as per the options selected above.
Users must enter at least one unit to move forward. Clicking on Add More Unit option enables users to enter additional units. Clicking on the delete icon on the top right corner of the unit card removes the unit.
Accessories - The Accessory page inquires if there are any accessories required for the business. Accessories may not be compulsory for all trades. If yes, it will move to the accessory details page. If not, it will skip it altogether and will load the address flow.
Accessory details - The options for accessories are retrieved from the MDMS. The Unit of Measure or UOM is pre-populated and cannot be edited. The users can edit the UOM value and the accessory count. In some cases, these are pre-populated from the MDMS. Clicking on Add More Trade Accessory button allows users to add multiple accessories.
If the citizen selects Movable as the structure type in the previous screens, then the flow will jump to the owner details flow. Here the Same as Property Owner’s check box will not be visible.
If the citizen selects Immovable as the structure type then the user is allowed to add the property details. Once the property is added, the flow will redirect to the owner details flow where the Same as Property Owner check box is displayed. If the user checks it, the following details get auto-populated and the screen skips to the proof of Identity page.
Common PT integration with TL: After entering the trade details, users have the option to either search and integrate the already created property or create new lightweight property data for the trade license. This step can be skipped and users can proceed with the normal address details flow.
Once a property is selected user can see the details of the property on the property details page. Refer to the document for more details.
Address Details Flow - In the next flow, users have to enter the trade address details. This flow is straightforward, without any conditional routing.
Users can pinpoint the location in the Geo-location map, according to which pin code and city, as well as locality, is auto-filled.
Owner Details Flow - Finally, the users need to enter the trade owner details. Ownership can be Single or Multiple Owners. According to which the details are filled.
In the case of single/multiple owners, the following screen is displayed. The remaining flows remain the same.
Users can add multiple owners by clicking on the add owner button - a similar functionality as in trade units and accessories. The Add Owner button is not visible in case the user selects a single owner on the previous page.
The user must provide the owner's primary address and upload three documents that include address proof, owner identity and owner photograph.
Check Page and Acknowledgement Screen - Users can cross-verify the data entered throughout the flow in the Check page. Clicking on the change option adjacent to the data fields allows users to make any changes or updates to the data. The user is redirected back to a corresponding information page and the entire flow is repeated once again to submit the application.
The Applying of Trade License Create API is called. Create API snippet:1create: "/tl-services/v1/_create"
If the API response is successful, then the Acknowledgement Screen is displayed, otherwise Failed Acknowledgement Screen is displayed.
Clicking on the Download Acknowledgement Form button downloads the PDF copy of the acknowledgement.
On the Trade Units page, values for trade type and trade subtype have been loaded by the following MDMS call:
The following validations have been added for the same :
When users select trade type and then subtype, it is compared with the available billing slab. The hook for this is given below. In case the billing slab is not there it will not allow users to move forward and an error message is displayed.
Once the correct trade type and subtype are added and the correct billing slab is there, the UOM value validation is added. This checks the value in the given range, mentioned in the billing slab object and displays an error if the value is outside of the range.
All screens are developed using the new-UI structure followed previously in FSM, PGR and PT, except for multi-component.
The link for the Apply Trade License Main Index is given here and it helps understand the starting point of the flow:
The TL (Trade License) module is segregated into a specified structure. The screen configuration is inside the PageComponent folder, and the configuration for routing of the pages are mentioned under the config folder which is common for both citizen users and employees. Below is the snippet for folder structure and routing configuration.
The pages folder is where the high-level configuration for controlling the whole flow is mentioned, for citizens and employees. Citizen flows include Create, Edit Trade, Renewal, Applications and Search Trade. The index or the starting point of the entire flow is available in this folder.
In the Accessory-details page, the Billing slab search API "/tl-calculator/billingslab/_search" is called. This returns the array list of all the accessories for which the billing slab has been configured. If the response returns an empty array then the options are curated from the MDMS API mentioned in the MDMS data section.
After completing the flow the user can download the acknowledgement PDF form of the License created. PDF generation config link:
The Utils folder basically contains all the methods used throughout the TL module. Additional common methods can be imported and added to this folder.
For creating an application the Create API from Trade License is called using the React hooks. This is declared in the hooks/elements/TL as TLService.
There are multiple pages within the workflows where data is imported from the MDMS. The table below lists the pages .js files for distinct page components.
React Hooks are used to call MDMS data that is shared across the modules. Below is the code snippet for the MDMS call.
Localisation keys are added to the ‘rainmaker-tl’ locale module. In future, if any new labels are implemented in the Trade License (Citizen) it is pushed to the locale DB in the rainmaker-tl locale module. Below is an example of a few locale labels.
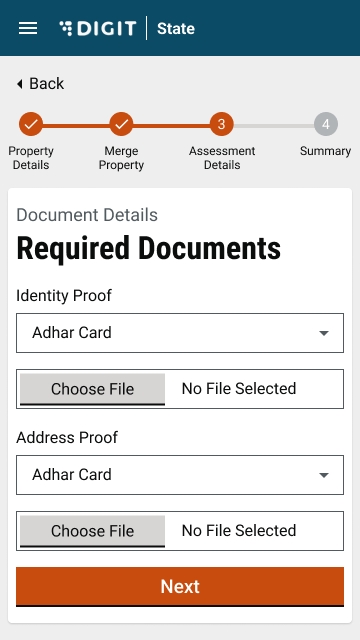
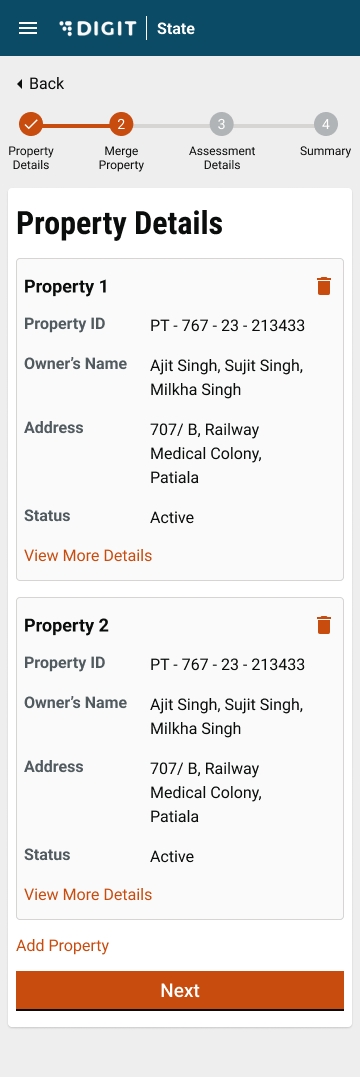
Type of mobility trade
common-masters
StructureType
SelectBuildingType
Type of Steady Trade
common-masters
StructureType
SelectTradeUnits
List of trade category and its corresponding type and sub-type
TradeLicense
TradeType
SelectAccessoriesDetails
Lit of Accessory and its Unit of measure and UOM value
TradeLicense
AccessoriesCategory
TLSelectAddress
List of cities and its corresponding localities
TradeLicense
tenants
SelectOwnerShipDetails
categories imported are single and multiple owner.
common-masters
OwnerShipCategory
SelectOwnerDetails
List of Gender options.
common-masters
GenderType
1862
CITIZEN
/tl-calculator/billingslab/_search
1684
CITIZEN
/tl-services/v1/_update
1686
CITIZEN
/localization/messages/v1/_search
1531
CITIZEN
TradeLicense
List of documents required for registration
TradeLicense
Documents
SelectTradeName
Current Financial Year
egf-master
FinancialYear
/egov-mdms-service/v1/_search
954
CITIZEN
/tl-services/v1/_create
1685
CITIZEN
/filestore/v1/files/url
1528
CITIZEN
SelectVehicleType
/billing-service/bill/v2/_fetchbill
const { isLoading, data: Data = {} } = Digit.Hooks.tl.useTradeLicenseMDMS(stateId, "TradeLicense", "TradeUnits", "[?(@.type=='TL')]");const { data: billingSlabTradeTypeData, isLoading : isBillingSlabLoading } = Digit.Hooks.tl.useTradeLicenseBillingslab({ tenantId: tenantId, filters: {} }, {
select: (data) => {
return data?.billingSlab.filter((e) => e.tradeType && e.applicationType === "NEW" && e.licenseType === "PERMANENT" && e.uom);
}});export const newConfig = [
{
head: "",
body: [
{
type: "component",
component: "TLInfoLabel",
key: "tradedetils1",
withoutLabel: true,
hideInCitizen: true,
}
]
},const { isLoading, data: Documentsob = {} } = Digit.Hooks.tl.useTradeLicenseMDMS(stateId, "TradeLicense", "TLDocuments");Citizen
citizen:v1.10.0-beta-90968a5987-33
Employee
employee:v1.10.0-beta-90968a5987-45
DSS Dashboard
dss-dashboard:v1.10.0-beta-0ad561e837-4
unchanged
Digit-UI
DIGIT UI
digit-ui:v1.7.0-beta.2-6e3654830c-511
Core Services
Service-request
service-request:v1.0.0_beta-cddd1fb55c-12
unchanged
Signed Audit
audit-service:v1.0.0-24873ba-3
unchanged
Encryption
egov-enc-service:v1.1.4-1f3649156d-5
xState Chatbot
xstate-chatbot:v1.1.1-44558a0602-1
Searcher
egov-searcher:v1.1.6-bc771ff4d4-6
Payment Gateway
egov-pg-service:v1.2.3-ffbb7a6-2
Filestore
egov-filestore:v1.2.4-9934605-2
Zuul - API Gateway
zuul:v1.3.1-76bf31f-2
Mail Notification
egov-notification-mail:v1.2.0-9fde481c92-1
SMS Notification
egov-notification-sms:v1.2.0-9fde481c92-2
Localization
egov-localization:v1.1.3-44558a0602-2
Persist
egov-persister:v1.1.6-1f3649156d-3
ID Gen
egov-idgen:v1.2.3-44558a0602-2
User
egov-user:v1.2.8-9fde481c92-2
User Chatbot
egov-user-chatbot:v1.2.8-9fde481c92-2
MDMS
egov-mdms-service:v1.3.3-1f3649156d-4
URL Shortening
egov-url-shortening:v1.1.2-010cd85ad6-3
Indexer
egov-indexer:v1.1.8-36a0a061fd-34
Report
report:v1.3.6-3ad63f2273-4
Workflow
egov-workflow-v2:v1.3.1-1f3649156d-5
PDF Generator
pdf-service-db:v1.2.2-5d71b59949-18
Chatbot
chatbot:v1.1.6-44558a0602-1
Access Control
egov-accesscontrol:v1.1.3-852f5ea3a0-3
Location
egov-location:v1.1.5-fbea79700d-1
OTP
egov-otp:v1.2.3-9fde481c92-1
User OTP
user-otp:v1.2.1-1f3649156d-2
NLP Engine
nlp-engine:v1.0.0-fbea6fba-21
unchanged
Egov Document-Uploader
egov-document-uploader:v1.0.1-a1ef7d4187-1
National Dashboard Ingest
national-dashboard-ingest:v1.0.1-44558a0-4
National Dashboard Kafka Pipeline
national-dashboard-kafka-pipeline:v1.0.1-44558a0-4
Egov Survey Service
egov-survey-services:v0.0.1-a9d54c2543-25
unchanged
Internal Gateway
internal-gateway:v0.0.1-44558a0-3
Business Services
Apportion
egov-apportion-service:v1.1.5-44558a0602-1
Collection
collection-services:v1.1.6-855dc9a-2
Billing
billing-service-db:v1.3.5-a4d411ecd0-16
HRMS
egov-hrms:v1.2.7-bc771ff4d4-4
Dashboard Analytics
dashboard-analytics:v1.1.9-aea1817792-10
Dashboard Ingest
national-dashboard-ingest:v1.0.1-44558a0-4
EGF Instrument
egf-instrument:v1.1.4-d93a120c25-2
unchanged
EGF Master
egf-master:v1.1.3-d93a120c25-2
unchanged
Finance Collection Voucher Consumer
finance-collections-voucher-consumer:v1.1.6-d93a120c25-4
Municipal Services
Trade License
tl-services:v1.1.9-a7462eff5a-7
Trade License Calculator
tl-calculator:v1.1.6-3ad63f2273-4
Fire NOC
firenoc-services-db:v1.3.3-4550d93cde-34
Fire NOC Calculator
firenoc-calculator:v1.2.3-3ad63f2273-13
Property Services
property-services:v1.2.2-a7462eff5a-57
Property Tax Calculator
pt-calculator-v2:v1.1.6-3ad63f2273-10
Property Tax
property-services:v1.2.2-8566918dfc-66
Water Charges
ws-services:v1.7.5-a7462eff5a-20
Water Charges Calculator
ws-calculator:v1.4.4-3ad63f2273-13
Sewerage Charges
sw-services:v1.7.5-a7462eff5a-14
Sewerage Charges Calculator
sw-calculator:v1.4.4-a7462eff5a-18
BPA Calculator
bpa-calculator:v1.1.2-3ad63f2273-7
BPA Services
bpa-services:v1.1.7-a7462eff5a-18
User Event
egov-user-event:v1.2.0_beta-97005a72ec-3
PGR
rainmaker-pgr:v1.1.4_beta-e3769f2e9f-1
PGR Service
pgr-services:v1.1.8-3ad63f2273-7
Land Services
land-services:v1.0.5-3ad63f2273-6
NOC Services
noc-services:v1.0.6-3ad63f2273-11
FSM
fsm:v1.2.0-98a12c2748-224
unchanged
FSM Calculator
fsm-calculator:v1.1.0-32caf0d992-41
unchanged
Vehicle
vehicle:v1.2.0-180a328097-97
unchanged
Vendor
vendor:v1.2.0-a28b192446-64
unchanged
eChallan Services
echallan-services:v1.1.1-a7462eff5a-14
eChallan Calculator
echallan-calculator:v1.0.3-3ad63f2273-5
Inbox
inbox:v1.3.1-1f3649156d-10
Turn-IO
turn-io-adapter:v1.0.1-3d7f744977-4
Birth and Death Services
birth-death-services-db:v1.0.2-d43fa051aa-41
Utilities Services
Custom Consumer
egov-custom-consumer:v1.1.1-d93a120c25-2
egov-pdf:v1.2.1-cb236eaf66-8
eDCR
eDCR
egov-edcr:v2.1.2-bdebd6c5c1-26
Finance
Finance
egov-finance:v3.0.2-3c708604d0-1
Configs Stateb
Configs Central
MDMS StateB
unchanged
MDMS Central
unchanged
DevOps StateB
DevOps Central
Localization
unchanged
QA Automation
unchanged
Frontend (old UI)
Functional overview for stakeholders
The Property Tax System provides a digital interface to make property assessments, pay property tax, generate payment receipts and monitor tax collection. The citizens can use it, Urban Local Body (ULB) counter field employees and ULB Administrators to accomplish their specific tasks. It is available as a mobile and web-based application.
The property tax application features can be broadly classified as the following modules:
Registration, Login and Creation of User Profile
Filling an Assessment for a Property
Searching for a Property
Modifications to a Property
Generate Demand Notice
Payments collection and Receipts
Dashboards and Reports
General Features
OTP Based Login for Citizens via Web/Mobile App
OTP Based Login for Employees via Web/Mobile App
Provision for language selection during first-time registration for both employees and citizens
Provision of creating a personalized Profile for Citizens and employees on the Web App
Login Credentials for the various hierarchy of employees
Role-based access for performing different actions relating to property tax modules
This feature enables citizens and employees to self-assess a new property for a financial year. It helps in registering the property in the system. The details of the property can be entered online and can be assessed for the calculation of the taxes.
The property tax system design is user-friendly and reduces the chances of error. The system calculates the tax automatically and creates the demand. If a user wants to reassess his property for any reason (for example - incorrect data, change in property etc), it can be done by editing the details of the last assessment.
An employee can edit the details of the last assessment, on behalf of the citizen based on the owner’s input. Citizens can track down the status of their incomplete assessment. Any incomplete assessment can be searched and completed.
Citizen/CSC can assess new property (by different financial years).
Citizen/CSC can capture Address, Assessment Info, and Owner information for all property types like residential houses, flats and commercial buildings.
o Sample Details captured include -
Door Number,
Mutation number,
Number of floors,
Area covered,
Citizens or employees can track down the status of their incomplete assessment. Any incomplete assessment can be searched and completed.
Citizens/CSC can search for property using
Mobile No
City
Property Tax Unique ID
Citizens/ CSC can view incomplete assessments
Citizens/CSC can reassess searched property
View property details and pending dues
The property tax system provides the ability to capture mutation and transfer of ownership. It reduces interfaces between the user and the State and thus promotes greater transparency. It also helps in reducing the time taken for mutation after registration. The system provides the ability for alteration of assessment after verification and inspection. Any structural changes like addition/extension/reduction of existing built-up area or construction type OR utility changes like usage or occupancy impact the increase/decrease in property tax demand. These changes can be handled by the ‘Additional/Alteration of Assessment’ feature.
The system provides the ability for bifurcation/ amalgamation of property. The property bifurcation/ amalgamation undergoes an approval process. The parent property needs to be modified accordingly, which can be done in the system.
Mutation of property and change of ownership details
Capture extension/ addition and alteration and reassessment based on changed property details
Bifurcation of property
Amalgamation of property
The system can automatically generate demand notices for a financial year based on set triggers like time-based rollover on the completion of a financial year. The system notifies the citizens about the demand through SMS/Email. The generated bills can also be grouped and printed for physical distribution by the ULB employees. The system enables employees to merge and download bills based on defined parameters to plan distribution drives.
Generate demand notice based periodically
Group demand notices
Print demand notices
Cancel demand notices
Send notifications to citizens on demand generation- SMS, WhatsApp, Email, physical bill
The citizen/ employee can view the payment status of previous assessments from the Assessment History section. It allows users to pay assessment fees fully or partially. Assessment receipts can be downloaded from the assessment history section within the property details.
Payment of property tax - online, cheque, cash, DD, during assessment
Partial payment of property tax - online, cheque, cash, DD, during assessment
The system allows a citizen to pay for anyone's property without changing the demand
The system can also be integrated with PoS machines to enable doorstep collection of property tax and issue of receipt
Property tax reports provide the facility to access the receipt register, cancelled receipt register, account receipt register, ULB-wise PT collection report, and DCB Register. All reports can be downloaded in PDF/XLS format. State-level administrators can monitor property tax collections, assessments and other information at a state level through dashboards.
State Dashboard: View Reports for Total Collections, Properties Assessed, ULBs on Prod, Usage Type, Payment Distribution
State Dashboard: PT Collection Timeline (Monthly, Weekly)
State Dashboard: ULB Wise (Collection, Assessments)
Cancelled Receipt Register Report
PT Collection Report (ULB/Date Wise)
Notifications - The system can send notifications to citizens. These notifications can be sent for various steps like - assessment completion, payment reminder, and payment confirmation. These notifications can be sent in the language chosen by the ULB through all channels - SMS, WhatsApp, and Email.
Legacy Data Migration - The system can migrate Demand and Collection. In most states, the preliminary step would be to migrate Legacy data of existing properties/connections along with the Demand and Collection details. This would ensure that subsequent demand generation happens through the system.
Configurable Masters - The system provides the following masters that can be configured as per the State’s
Requirements -
Charges & Calculation: Calculation Engine, Rebate, Penalty,
Rate Master
State Masters: Property Ontology, Documents List, Employee Data Mapping, Boundary Data Mapping
System specification in compliance with the Ease of Doing Business (EODB) BRAP 2019.
7
Land administration and Transfer of Land and Property
3
Digitize land transaction deeds of last 10 years at all sub-registrar offices and make the same available on an online system to check for ownership details and history. The metadata should be searchable for each record and a soft copy of the registered deed should be available. The searchable metadata available should be:
i. Name of buyer
ii. Name of seller
iii. Survey no.
iv. Registration number
v. Registration date
The feature of ‘Property Registry’ in the product will enable this recommendation
8
Land administration and Transfer of Land and Property
3
List of Features- Property Tax
Registration, Login, Creation of User Profile
Provision for Language Selection during first time registration via Mobile/ Web App.
OTP Based Login for Citizen/ Employee via Mobile/ Web App
Login Credentials for various hierarchy of employees.
Provision of Personalized Profile for Citizen/ Employee on Web App
Filing an assessment for a property
Citizen/CSC : Assess New Property (By Different Financial Years).
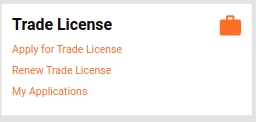
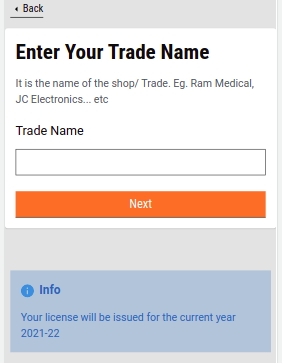
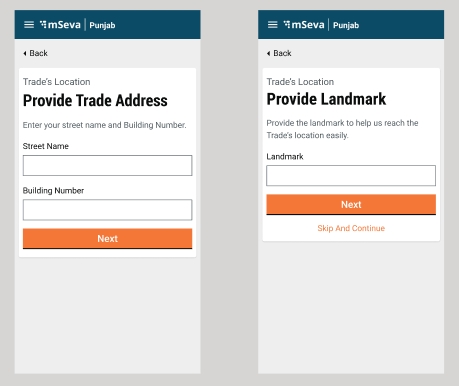
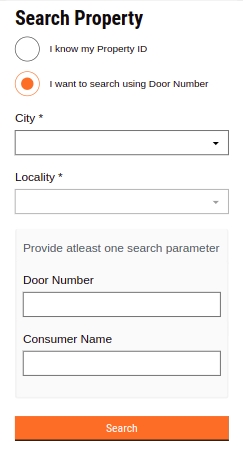
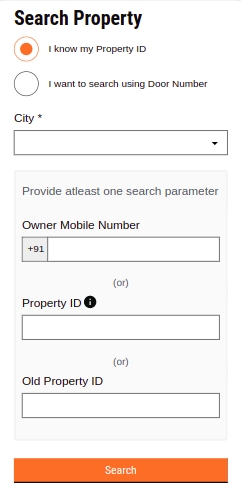
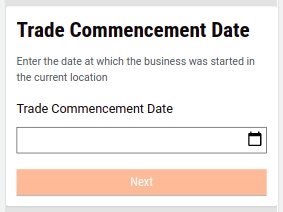
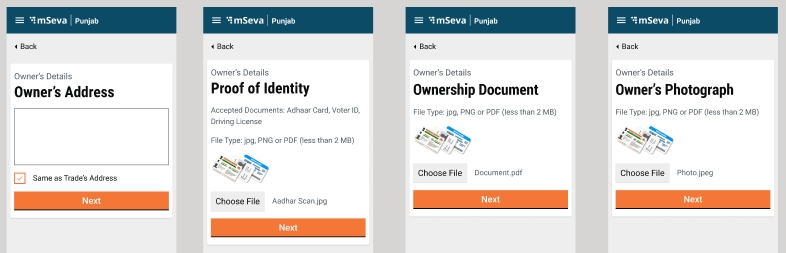
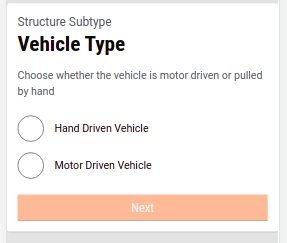
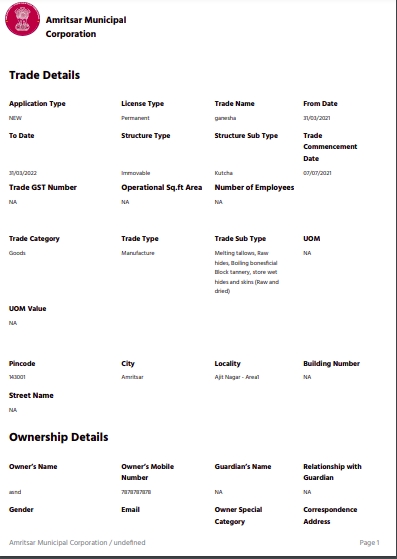
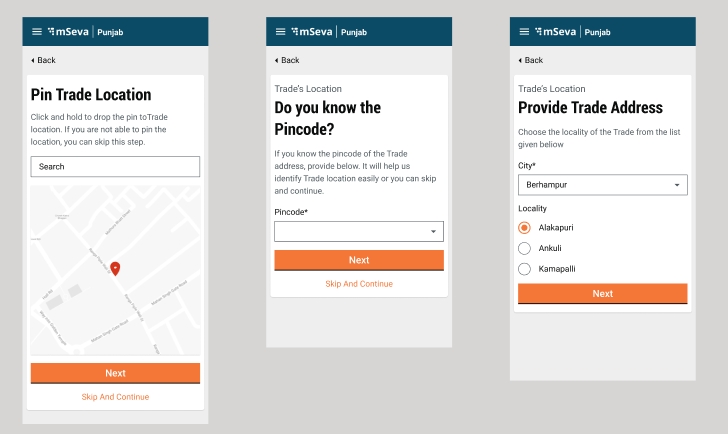
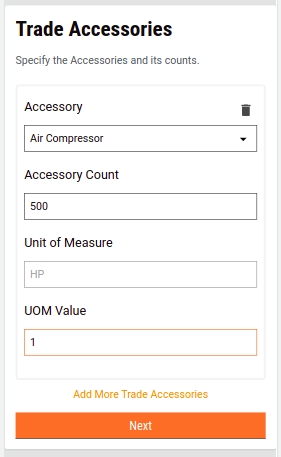
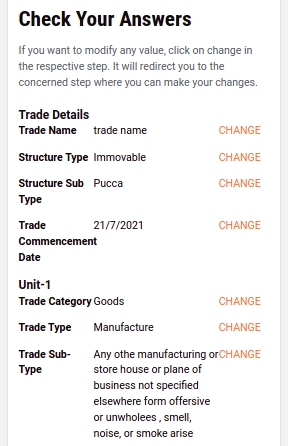
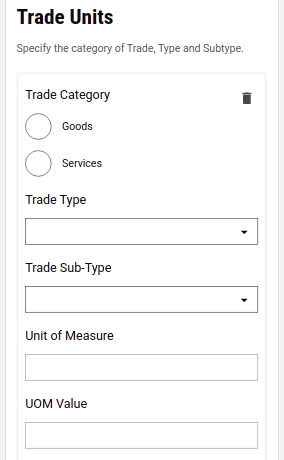
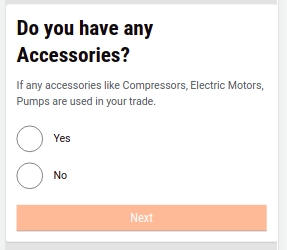

Owner and co-owner,
Mailing & permanent address,
Built year
Individual room measurements
The system computes the property taxes automatically as per state-specific processes and rules.
The system has a facility to make entries in the system by the inspector after a site visit and assessment of the same by the superintendent.
The system dynamically calculates the late fees, interest, rebates, etc for demand generation.
The system fetches the previous year's property data while e-filing the current year to calculate the dues.
The system assigns a unique property ID based on the process defined in the ULBs.
Citizen/CSC: View/Print Summary of filled form
Assessment form
Assessment form is also sent by email to citizen
Upload documents
Ownership/Title related
ID Proof
Any other statutory documents
Digitize and publish the updated Record of Rights (ROR) at all Revenue department offices online in public domain for all areas of the State/UT. The searchable metadata available should be:
i. Name of buyer
ii. Name of seller
iii. Date of mutation
iv. Survey no.
The Property tax system enables this capability
9
Land administration and Transfer of Land and Property
2
Digitize and publish data of Property Tax payment dues online in public domain for all the Urban Local Bodies (ULBs) in the State/UT. The searchable metadata available should be:
i. Name of the Property Tax payer
ii. Property Tax dues
iii. Survey no. of land / Unique Identification no. of property
This feature is enabled by the citizens itself
10
Land administration and Transfer of Land and Property
2
Digitize cadastral maps of all rural areas in the State/UT and make them available in public domain
This can be enabled and worked on by the state team
11
Land administration and Transfer of Land and Property
5
Integrate the below-mentioned records on one website:
i. Data of land transaction deeds for last 10 years at all sub-registrar offices (Name of buyer, Name of seller, Registration number, Registration date, Survey no.),
ii. Updated Record of Rights at all Revenue department offices (Date of mutation), and
iii. Data of Property Tax payment dues at all urban areas of the State/UT (Name of the Property Tax payer, Property Tax dues)
iv. Revenue Court case data (Court case number, Name of parties involved, Date of filing of court case, Status of case [Ongoing/Resolved])
v. Civil Court case data (Court case number, Name of parties involved, Date of filing of court case, Status of case [Ongoing/Resolved])
The website should be publicly accessible. It will help in establishing property ownership and identify tax encumbrances. The integration should be done for all areas of the State/UT.
The integration with external portals and systems of other departments can be enabled by state teams who can enhance the offered product to cater to this recommendation
12
Land administration and Transfer of Land and Property
2
Implement an online application system having the following features
i. Mandatory Online application submission including submission of draft deed and other documents
ii. Provision of online payment of Stamp duty and Registration fee
iii. Auto generation of appointment date and time on making the payment of Stamp duty and Registration fee
The system will provide these capabilities which can be customised as per the state specific rules and regulations
13
Land administration and Transfer of Land and Property
1
Provide model deed templates for sale, gift, lease, mortgage and rent in downloadable and editable format along with instructions to use them
This provision is made available through the ULB portal to make these features accessible to the citizens
14
Land administration and Transfer of Land and Property
2
Integrate the mutation process with the registration process and mandate initiation of mutation process (Revenue department and/ or ULB) as soon as the deed is registered. Ensure that:
i. Information to mutation authority to be automatically shared on completion of transaction (registration). This should be considered as initiation of mutation process.
ii. No separate application from transferee to be required.
iii. SMS/email should be sent to transferee/ transferor to inform about the initiation of mutation
The integration with external portals and systems of other departments can be enabled by state teams who can enhance the offered product to cater to this recommendation
Citizen/CSC : Capture Address, Assessment Info, Owner Info.
Citizen/CSC : View/Print Summary of Filled Form
Searching for a property
Citizen/CSC : Search Property (By Mobile No,City, Property Tax Unique ID, Existing ID).
Citizen/CSC : View the Searched Property
Citizen : View My Properties
Citizen : View Incomplete Assessments
Citizen/CSC : Edit the Searched Property
Citizen/CSC : Reassess Searched Property
Generate demand notice
Generate Demand Notice based on periodic basis
Group/ Print/ Cancel Demand Notices
Send notifications to citizens on demand generation- SMS, Whatsapp, Email, Physical bill
Modifications to a property
Mutation of property and change of ownership details
Capture Extension/ Addition and Alteration and reassessment based on changed property details
Bifurcation/ Amalgamation of property
Payment collection and receipts
Payment of TAX (Online,Cheque,Cash,DD) : During Assessment
Payment of TAX (Online,Cheque,Cash,DD) : Partial Payment
Citizen/CSC : Download Receipts for payments
Dashboards and reports
State Dashboard : View Reports for Total Collections, Properties Assessed, ULBs on Prod, Usage Type, Payment Distribution
State Dashboard : PT Collection Timeline (Monthly,Weekly)
State Dashboard : ULB Wise (Collection, Assessments)
Cancelled Receipt Register Report
PT Collection Report (ULB/Date Wise)
General features
Notification
Legacy data migration
System assigns a unique property ID based on the Process defined in the ULBs.
System has the facility to classify the property based on its type.
System allows changing the type of property.
Configuration masters
Configurable Rate Master (ULB Specific) : Fire Cess/ Building Height
Charges & Calculation : Calculation Engine, Rebate, Penalty
State Masters : Property Ontology, Documents List, Employee Data Mapping, Boundary Data Mapping

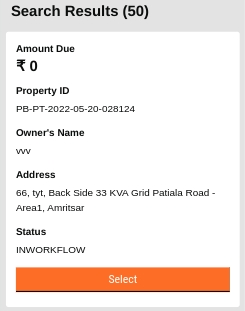
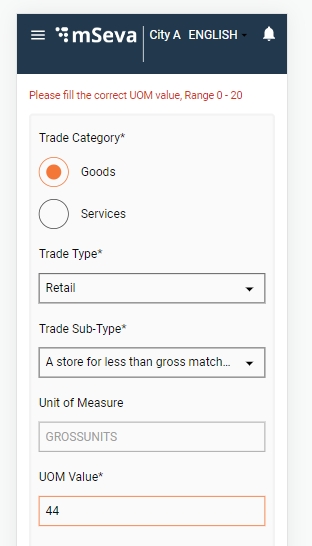
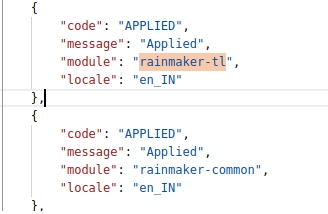
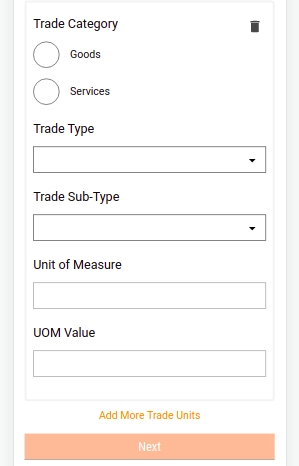
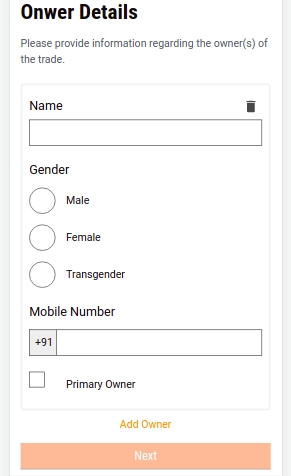
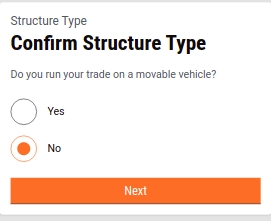
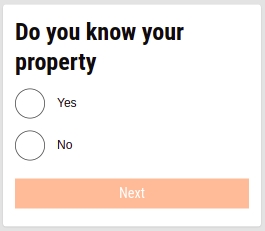
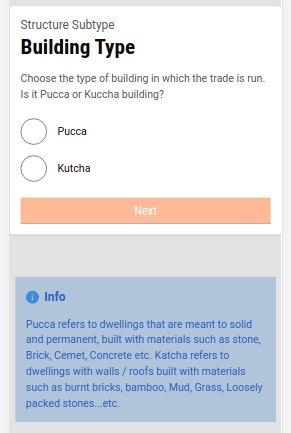
DIGIT 2.9 Gate 2 Release Checklist
1
Development is completed for all the features that are part of the release.
Yes
@Kaviyarasan P
@Kaviyarasan P
Code is frozen by APR-2023
2
Test cases are documented by the QA team, and reviewed by the product owners and test results are updated in the test cases sheet.
Yes
@Gurjeet Singh
@Priyanka Samantaroy
No new test cases for central instance are there. All existing test cases should work as is.
3
The incremental demo of the features showcased during the sprint showcase and feedback incorporated. If possible list out the JIRA tickets for feedback.
Yes
@Kaviyarasan P
Demo given on 18-APR-2023 for Citizen Feedback Citizen Consent Form DSS New KPIs. Central Instance - No demo required.
4
UI/UX Audit review by UX Architect is completed along with feedback incorporation for any changes in UI/UX.
Yes
@Andrew Jones
@Vamshikrishna Kole
UI/UX audit is done and review comments are incorporated.
5
Incremental demos to the product owners are completed as part of the sprint and feedbacks are incorporated.
Yes
@Megha S @P. Sankar
@P. Sankar
Demo given on 18-APR-2023 for Citizen Feedback Citizen Consent Form DSS New KPIs. Central Instance - No demo required.
6
QA signoff is completed by the QA team and communicated to the product owners. All the tickets QA signoff status is updated in the JIRA.
Yes
@Gurjeet Singh
QA signoff was completed. Sign-off dates 14th April 2023 Citizen Feedback Citizen Consent Form DSS New KPIs Central Instance - 15th September 2023
7
UI, API Technical documents are updated for the release along with the configuration documents.
Yes
UI documentation for central instance
@Kaviyarasan P
@Vamshikrishna Kole
8
UAT promotion and regression testing from the QA team is completed. QA team has shared the UAT regression test cases with the product owners.
Yes
@Gurjeet Singh
No new test cases for central instance are there. All existing test cases should work as is.
9
API Automation scripts are updated for new APIs or changes to any existing APIs for the release. API automation regression is completed on UAT, the automation test results are analyzed and necessary actions are taken to fix the failure cases. Publish the list of failure use cases with a reason for failure and the resolution taken to fix these failures for the release.
No
@Gurjeet Singh
Not picked up in this release due to lack of resources. We do not have QA resource who can write automation scripts.
10
The API backward compatibility testing is completed.
Yes
@Gurjeet Singh
@Kaviyarasan P
Tested on 25-AUG-2023
11
The communication is shared with the product owners for the completion of UAT promotion and regression by the QA team. The product owners have to give a Product signoff within one week of this communication.
Yes
@Gurjeet Singh
@KeerthiBhaskara-eGov
@Megha S
UAT signoff was completed. Sign-off dates 14th April 2023 Citizen Feedback Citizen Consent Form DSS New KPIs
Central Instance- No communication required
12
UAT Product Signoff communication is received from the Product owners along with the release notes and User guides (if applicable).
Yes
@Megha S
@P. Sankar
UAT product signoff for Citizen Feedback Citizen Consent Form DSS New KPIs
given on 19th April 2023
Central Instance - UAT product signoff not needed. Central Instance is a separate environment
13
The GIT tags and releases are created for the code changes for the release.
Yes
@Priyanka Samantaroy
@Kaviyarasan P
14
Verify whether the Release notes are updated
Yes
@Priyanka Samantaroy
@Kaviyarasan P
15
Verify whether all UAT Builds are updated along with the GIT tag details.
Yes
@Priyanka Samantaroy
@Kaviyarasan P
16
Verify whether all MDMS, Configs, InfraOps configs updated.
Yes
@Priyanka Samantaroy
@Kaviyarasan P
17
Verify whether all docs will be Published to http://urban.digit.org by the Technical Writer as part of the release.
Yes
@Kaviyarasan P,
@Pradeep Kumar,
@Ajay Rawat, @Megha S
@Anjoo Narayan
18
Verify whether all test cases are up to date and updated along with necessary permissions to view the test cases sheet. The test cases sheet is verified by the Test Lead.
Yes
@Gurjeet Singh
No new test cases for central instance are there. All existing test cases should work as is.
19
Verify whether the UAT credentials sheet is updated with the details of new Users and Roles if any
Yes
@Gurjeet Singh
No new credentials required for - Citizen Feedback Citizen Consent form DSS New KPIs
New credential for Central Instance Attached
20
Verify whether all the localization data was added in UAT including Hindi and updated in Release Kits.
Yes
@Priyanka Samantaroy
@Kaviyarasan P
No new localization added for the central instance
21
Verify whether the product release notes and user guides are updated and published
Yes
Product Owners
22
The Demo of released features is done by the product team as part of the Sprint/Release showcase.
Yes
Demo given on 18-APR-2023 for Citizen Feedback Citizen Consent Form DSS New KPIs. Central Instance - No demo required.
23
Technical and Product workshops/demos are conducted by the Engineering and Product team to the implementation team (Implementation handover)
Yes
@Kaviyarasan P
@Kaviyarasan P
Technical and Product workshops/demo conducted on 23-July-2023
24
Architect SignOff and Technical Quality Report
Yes
@Kaviyarasan P
@Ghanshyam Rawat
Signed off by @Kaviyarasan P on 31-July-2023
25
Success Metrics and Product Roadmap
Yes
@Ajay Rawat
26
Adoption Metrics
Yes
@Ajay Rawat
27
Program Roll-out Plan
Yes
@Ajay Rawat
@Pradeep Kumar
28
Implementation checklist
Yes
@Pradeep Kumar/@Vinoth
Prepared.
29
Implementation Roll-out plan
Yes
@Pradeep Kumar/@Vinoth
30
Gate 2
Yes
@Ajay Rawat
31
The Internal release communication along with all the release artefacts are shared by the Engineering/Product team.
Yes
@Priyanka Samantaroy
@Kaviyarasan P
32
Plan for upgrading the staging/demo instance with the release product - within 2-4 weeks based on the period where no demos are planned from staging for the previous version of the released product.
Yes
@Pradeep Kumar/@Vinoth
33
The Release communication to partners is shared by the GTM team and the Webinar is arranged by the GTM team after the release communication - within 2-4 weeks of the release.
No
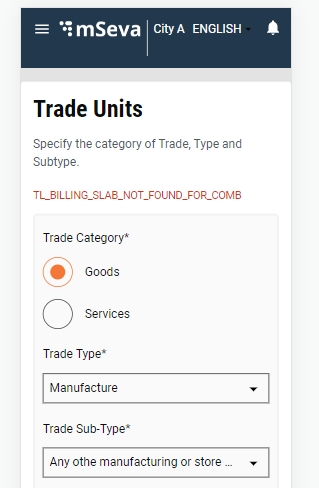
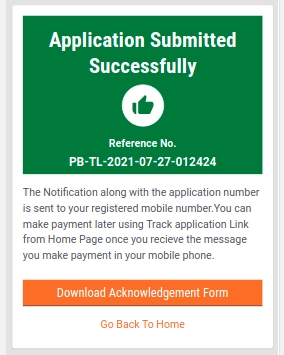
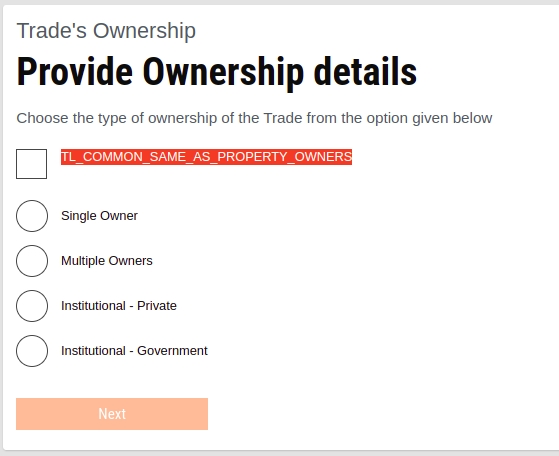
Product requirements document for amalgamation of properties
What does amalgamation of properties mean?
Two or more than two adjacent properties of an owner(s) are merged to form a single property. On merging of properties, merged properties are removed from the assessment registers while the retaining property is modified to add the merged property(ies) dimensions. The retaining and merged properties relationship is maintained for future reference. The combination of properties for which amalgamation can be done is given below.
Building + Building
Building + Vacant Land
Vacant Land + Vacant Land
How is the amalgamation of properties accomplished on the ground?
The amalgamation is considered a service and the owner(s) has to apply for it. A single application is created for the amalgamation of properties with details of all the properties and the required documents are produced in support of the application. There is no application/ processing fee associated with the amalgamation of properties.
Below are state-wise approximate figures of amalgamation applications received and processed in a year.
How to achieve this with the Property Tax System?
A new application type ‘AMALGAMATION’ is created.
Application no. format is defined.
Only one application is created and the record of the same is maintained. All the properties involved in amalgamation are linked to that application.
Workflow components are integrated and the wf status of retaining and merge properties are maintained as ‘In Workflow’ while the application is in flow.
All the properties should be active, INACTIVE and WORKFLOW properties are not eligible for amalgamation.
There should be any application in flow for other services as well linked with a merging property. E.g. Water Connection, Sewerage Connection, and Trade License.
The owner (s) of the retaining property should always be a superset of the owner(s) of the merging property. It means there should not be a case where any owner of the merging property(ies) is not the one from the owners of the retaining property.
There should not be an application related to water connection linked with a merging property in the workflow.
In the case of water and sewerage connections associated with merging property to be moved to retaining property, it has to be achieved in the WnS module itself by modifying the connection.
In the case of water and sewerage connections associated with merging property to be closed, it has to be achieved in the WnS module itself by using closure connection activity.
In the case of trade licenses associated with merging properties to be moved to retaining property, it has to be achieved in the TL module itself on renewal of trade.
In the case of trade licenses associated with merging properties to be closed, it has to be achieved in the TL module itself by using the closure of trade features.
Accounting entries are passed for these transactions in terms of demand modifications.
Employee
Login → Search Property → View Property Details → Select ‘Amalgamation’ Action
Citizen
Login → Amalgamation Menu → Search Property → Search Result → Select Property.
Application No. Format
Application No. should follow the given format. PT-<running sequence>
User Flow
Citizen/ Counter Employee - Application is initiated by citizen/ counter employee.
Document Verification - The application and documents attached to it are verified by a document verifier.
Field Inspection - The field inspector performs the field visit for the physical verification of properties.
Approval of Application - The application is approved by the approver and the changes requested in the application come into effect in case the application fee is not applicable.
Payment of application fee - In the case the application fee is applicable, the changes related to amalgamation come into effect only after the payment of the application fee.
Please click here to see the wireframes in Figma.
Screenshots are attached below.
Apply for amalgamation
Login into the account (If not already logged in)
Select retaining the property for amalgamation
The user will be displayed all the properties currently linked with the logged-in account and allowed to select one of them as a retaining property.
The retaining property address and ownership details are displayed on the apply screen.
Select a property to merge.
The user will be displayed a list of all those properties which are owned by him/ her as a single owner or joint owner and allowed to select a property based on the below conditions. The owner(s) of the merging property should be a subset of the owner(s) of the retaining property.
There should not be any dues on the property.
The property should be active, also there should not be any application in flow for an integrated module associated with the property.
The property should belong to the same locality as the retaining property.
Modify the assessment details of retaining property
Property Type
Plot Size
Number of basements
Number of floors
Unit details
Usage
Sub-usage
Occupancy
Built-up Area
In case, the property type is ‘Flat’, the flat details are modified.
In the case property type is vacant land, vacant land details are modified.
Documents attachment and summary of the application
Apply for amalgamation
Property is searched and property details are viewed.
Select the action ‘Amalgamate Property’ from the action list.
UC 1 - Same Owner’s Residential Properties
There are two properties A and B, both are residential in nature and belong to the same owner “xyz”.
Illustration: Suppose A is the retaining property while B has to be merged with A.
Property A address remains unchanged.
Property A ownership details remain unchanged.
So assessment details of property A are modified according to the assessment details of B. Below given are the activities which can be performed to modify the assessment detail of property A.
The land area of A is increased to include B into A.
One more UNIT is added to A representing B.
An additional floor is added to A representing B.
The existing UNIT area of A is increased.
Property B is linked with the application which is deactivated on completion.
UC 2 - Same Owner’s Mixed Properties
There are two properties A and B, A is residential while B is non-residential and belongs to the same owner “xyz”.Illustration: Suppose A is the retaining property while B has to be merged with A.
Property A address remains unchanged.
Property A ownership details remain unchanged.
So assessment details of property A are modified according to the assessment details of B. Below given are the activities which can be performed to modify the assessment detail of property A.
UC 3 - Solo Owner Of One Property And Joint Of Others
There are two properties A and B, “xyz” is the only owner of property A while he/she is the joint owner of property B.Illustration:
In case, property B is the retaining property, property A is merged according to usage cases #1 and #2.
In case, property A is the retaining property, property B is first mutated in the name of the owners of property A using the mutation process.
UC 4 - Properties Of Two Different Owners
There are two properties A and B, the owner of property A is “xyz” while the owner of property B is “def”.Illustration:
In case A is going to be retaining property, property B is to be first mutated in the name of “xyz” using the mutation process.
In case B is going to be retaining property, property A to be first mutated in the name of “def” using the mutation process.
There are two properties A and B, the owner of property A is “xyz” which is institutional ownership while the owner of property B is “def” which is individual ownership.
It is a similar case to #4, and the property is to be mutated first to initiate amalgamation.
[On the basis of application received manually]
1000
Odisha
[On the basis of application received manually]
NA
Though there are no instances observed where the application fee is charged for amalgamation, the applicability of the application fee is to be made configurable.
The uniqueness of the owner (Individual) is identified based on the below-given attributes.
Owner’s Name
Owner’s Gender
Owner’s Guardian Name
Relationship with Guardian
The uniqueness of the owner (Institutional) is identified based on the below-given attributes.
Institute Name
Institute Type
Authorised Person Name
No final document is generated as proof of amalgamation.
Applicant(s) is/are intimated through SMS/ email notifications about the status and completion of the application.
Any integration impact to be handled.
Water and sewerage connection with merging properties to be moved to retaining property or to be brought to closure.
Trade licenses associated with merging properties are to be moved to retaining property or to be brought to closure.
Modules linked with property tax have to expose the API to check the status of applications in respective modules associated with a property.
Dues related to water and sewerage charges for the connections associated with merging properties are not taken care of here.
The total land area of retaining property = Land area of retaining + Total land area of properties to be merged.
The total built-up area of retaining property = Built-up area of retaining + Total built-up area of properties to be merged.
Properties to be merged are deactivated on completion of the process while retaining property remains active.
Amalgamation will be effective from the date of approval of the application.
Initiate new application for properties amalgamation
I can merge adjunct property(ies) into main property.
Citizen
Notification for my property amalgamation application
I can keep track of my application (notification sent will be according to workflow)
Employee (Workflow)
Amalgamation application in my inbox
I can take appropriate action on the application.
Employee
Search application
I can see the application details.
Citizen
My Applications
I can see the application details to keep track of the application.
Yes
City name of the property.
Locality/Mohalla
Display
Yes
Locality or mohalla name property is located.
Street Name
Display
Yes
Street name property is located.
Door No./House No.
Display
Yes
House or door no. of the property.
Ownership Details
Ownership Type
Display
Yes
Display of ownership type.
Institution Name
Display
Yes
It is applicable for the ownership type institution.
Institution Type
Display
Yes
It is applicable for the ownership type institution.
Name
Display
Yes
Name of the owner of property or the authorised person in case of institutional property.
Guardian Name
Display
Yes
Name of guardian and applicable for single and multiple ownership type only.
Gender
Display
Yes
Gender of owner/authorised person of the property.
Landline No.
Display
Yes
Office landline no. in case of institutional ownership.
Mobile No.
Display
Yes
Mobile no. of the owner/ authorised person.
Designation
Display
Yes
Designation of the authorised person
Display
Yes
Email address of owner/ authorised person.
Corresponding Address
Display
Yes
Corresponding address of the owner/ authorised person.
Merge Propertie(s)
Property ID
Textbox
Yes
To search and add the property. A button with the label ‘Search and Add’.
Search Property
Hyperlink
Yes
To search the property by other params too and add it to the application.
Property 1
Property ID
Display
Yes
Unique Property ID.
Property Address
Display
Yes
Full address of property.
Property Owners
Display
Yes
Comma separated list of property owners.
View Property Details/Remove Property
Hyperlink
Yes
To view the completed property details/ remove the added property.
Assessment Details
Property Type
Drop-down
Yes
Type of property
Property Usage
Drop-down
Yes
Usage of property, residential, non-residential, or mixed.
Plot Size (In Sq Ft)
Textbox
Yes
Total area of land in square feet on which the property is constructed.
Unit 1
Floor No.
Drop-down
Yes
Floor no. unit is located.
Usage
Drop-down
Yes
Usage of unit, residential/ non-residential.
Sub-Usage
Drop-down
Yes
Sub-usage of unit, mandatory in case of non-residential usage.
Occupancy
Drop-down
Yes
The type of occupancy of property.
Annual Rent
Textbox
Yes
Annual rent in INR, in case property is rented out.
Built-up Area
Textbox
Yes
Built-up area of the unit in square feet.
Documents
File Picker
Yes
The documents required to process the request.
Timelines
Workflow
Yes
Display of workflow steps completed.
Pending for document verification
Pending for field inspection
Verify and Forward
Field Inspector
Pending for field inspection
Pending approval for amalgamation
Send Back
Document Verifier
Pending for document verification
Pending for citizen action
Send Back
Field Inspector
Pending for field inspection
Pending for document verification
Send Back
Approver
Pending approval for amalgamation
Pending for field inspection
Send Back To Citizen
<roles having access>
<Current Status>
Pending for citizen action
Re-submit
Citizen/ Counter Employee
Pending for citizen action
Pending for document verification
Re-submit
Document Verifier
Pending for document verification
Pending for field inspection
Re-submit
Field Inspector
Pending for field inspection
Pending approval for amalgamation
Approve
Approver
Pending approval for amalgamation
Approved
Reject
<roles having access>
<Current Status>
Rejected
Annual Rental
The existing UNIT rental value of A is increased.
The remaining attributes would remain unchanged. Like Usage, Sub Usage, and Occupancy. Though these also can be edited if required.
Property usage is changed to Mixed.
One more UNIT is added to A representing B and UNIT usage and sub-usage is kept according to property B, commercial in this case.
An additional floor is added to A representing B.
The existing UNIT area of A is increased.
The existing UNIT rental value of A is increased.
Property B is linked with the application which is deactivated on completion.
Andhra Pradesh
[On basis of data available in the property tax system]
453
Punjab
[On the basis of application received manually]
3000
Uttarakhand
[On the basis of application received manually]
1500
Employee/Citizen
Search a property by unique property ID
I can create an application for amalgamation of property(ies)
Employee/Citizen
Search a property by owner’s mobile no.
I can create an application for amalgamation of property(ies)
Employee/Citizen
Search a property by owner’s name or by door no.
I can create an application for amalgamation of property(ies)
Property Address
Pincode
Display
Yes
Pincode of area property is located.
City
Initiate Application
Citizen/ Counter Employee
Initiated
Submit Application
Citizen/ Counter Employee
Initiated
Pending for document verification
Verify and Forward
Cantonment Boards
Employee/Citizen
Display
Document Verifier


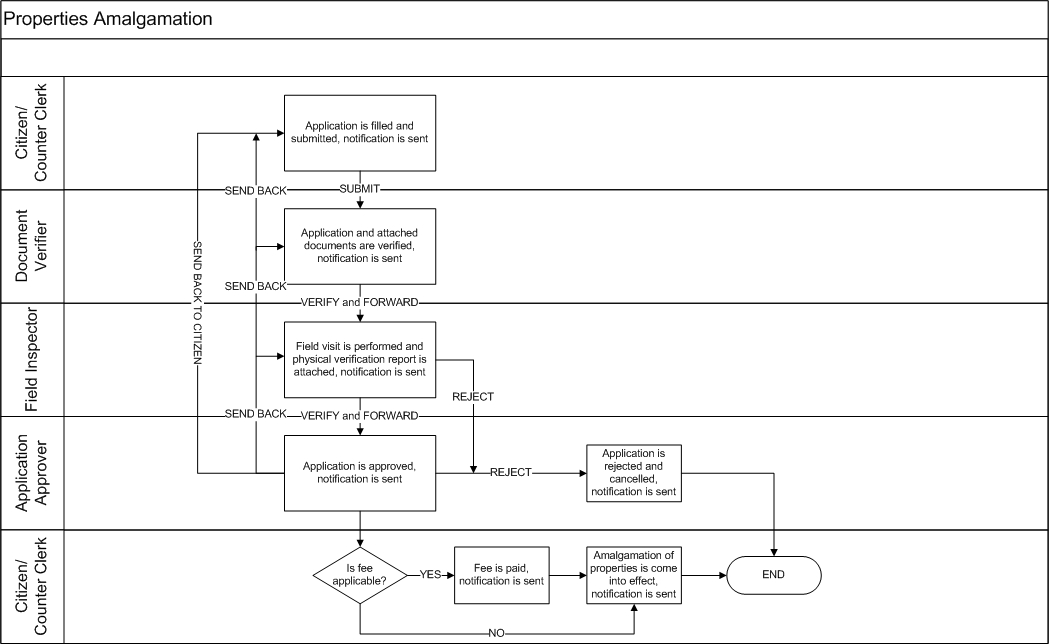
What does bifurcation of property mean?
A property is divided into two or more parts.
New properties which come into existence are called child properties.
The property that got bifurcated is known as parent property.
The owner(s) of the parent and child properties remain the same.
The relationship of child and parent properties is maintained to track the bifurcation.
Change in ownership of child properties is achieved through the Mutation (Title Transfer) process.
A building property can be divided into.
Building + Building
Building + Vacant Land
A vacant land property can be divided into vacant lands only.
How is the bifurcation of property accomplished on the ground?
The bifurcation is considered a service and the owner(s) has to apply for it. An application is submitted for a property bifurcation with the required supporting documents. There is no fee associated with the bifurcation of property application.
Below are state-wise approximate figures of amalgamation applications received and processed in a year.
How to achieve this with the DIGIT Platform?
A new application type ‘BIFURCATION’ is created.
The no. of properties resulting due to bifurcation is restricted to five which is configurable and can be changed according to the need of implementations.
The application number format is defined and configured.
Only one application is created and the record of the same is maintained and the new properties created as a result of bifurcation are linked to that application.
Validations
The parent property should be active.
Ownership of all the properties (parent + child) remains the same.
The total land area of the parent property (before bifurcation) should be equal to the total land area of all the properties (parent + child).
The total built-up area of the parent property (before bifurcation) should be equal to the total built-up area of all the properties (parent + child).
Login → Search Property → View Property Details → Select ‘Bifurcate Property’ Action.
Login → Bifurcate Property → Search Property → Search Result → Select Property.
Application no. should follow the given format - PT-<runningsequence>
Citizen/ Counter Employee - Application is initiated by citizen/ counter employee.
Document Verification - The application and documents attached to it are verified by a document verifier.
Field Inspection - The field inspector performs the field visit for the physical verification of properties.
Approval of application - In the case no application fee is applicable, the application is approved and bifurcation comes into effect with approval.
Figma Link -
UC1: There is property ‘A’ which has to be divided into 2 properties of the same usage and in the name of the same owner(s).
One new property ‘B’ record is created keeping the address and owner(s) details the same as property ‘A’.
New door no. is provided to property ‘B’.
Assessment detail is added to newly created property ‘B’ keeping usage the same as ‘A’.
Property ‘A’ is modified to change the assessment details while the change in address and owner’s detail is now allowed.
UC2: There is property ‘A’ which has to be divided into 2 properties of different usage and in the same of the same owner(s).
One new property ‘B’ record is created keeping the address and owner(s) details the same as property ‘A’.
New door no. is provided to property ‘B’.
Assessment detail is added to the newly created property ‘B’.
Property ‘A’ is modified to change the assessment details while the change in address and owner’s detail is now allowed.
UC3: There is property ‘A’ which has to be divided into 2 properties and for the second property owner(s) to be changed.
Property ‘A’ is modified to change the assessment details while the change in address and owner’s detail is now allowed.
One new property ‘B’ record is created keeping the address and owner(s) details the same as property ‘A’.
New door no. is provided to property ‘B’.
Assessment detail is added to the newly created property ‘B’.
UC4: There is property ‘A’ which has to be divided into 2 properties and for both properties' owner(s) to be changed.
Property ‘A’ is modified to change the assessment details while a change in address and owner’s details is now allowed.
One new property ‘B’ record is created keeping the address and owner(s) details the same as property ‘A’.
New door no. is provided to property ‘B’.
Assessment detail is added to the newly created property ‘B’.
On the basis of application received manually
Orissa
On the basis of application received manually
The workflow component is integrated.
The status of parent and child properties is maintained as ‘In Workflow’ while the application is in flow.
On the approval of the application, bifurcation comes into effect and all the properties become active.
Newly created properties are given a new property ID.
Though there are no instances where the application fee is charged for bifurcation, the applicability of the application fee is to be made configurable.
Bifurcation comes into effect from the date of approval of the application.
No final document is generated as proof of bifurcation.
Applicant(s) is/are intimated through SMS/ email notifications about the status and completion of the application.
All the child properties inherit the ownership from the parent property.
2.
As a
Employee orCitizen
I want
Search a property by owner’s mobile no.
So that
I can create an application for bifurcation of property.
3.
As a
Employee or Citizen
I want
Search a property by owner’s name or by door no.
So that
I can create an application for bifurcation of property.
3.
As a
Employee orCitizen
I want
Initiate new application for property bifurcation
So that
I can create an application to bifurcate a property.
4.
As a
Citizen
I want
Notification for my property bifurcation application
So that
I can keep track of my application (notification sent will be according to workflow)
5.
As a
Employee (Workflow)
I want
Bifurcation application in my inbox
So that
I can take appropriate action on the application.
6.
As a
Employee
I want
Search application
So that
I can search and see the application details.
7.
As a
Citizen
I want
My Applications
So that
I can see the application details and keep track of the application.
Payment of application fee - In the case the application fee is applicable, bifurcation comes into effect only after the payment of the application fee.
Yes
City name of the property.
Locality/ Mohalla
Display
Yes
Locality or mohalla name property is located.
Street Name
Display
Yes
Street name property is located.
Door No./ House No.
Display
Yes
House or door no. of the property.
Ownership Details
Ownership Type
Display
Yes
Display of ownership type.
Institution Name
Display
Yes
It is applicable for the ownership type institution.
Institution Type
Display
Yes
It is applicable for the ownership type institution.
Name
Display
Yes
Name of the owner of property or the authorized person in case of institutional property.
Guardian Name
Display
Yes
Name of guardian and applicable for single and multiple ownership type only.
Gender
Display
Yes
Gender of owner/authorized person of the property.
Landline No.
Display
Yes
Office landline no. in case of institutional ownership.
Mobile No.
Display
Yes
Mobile no. of the owner/ authorized person.
Designation
Display
Yes
Designation of the authorized person
Display
Yes
Email address of owner/ authorized person.
Corresponding Address
Display
Yes
Corresponding address of the owner/ authorized person.
Assessment Details
Property Type
Drop-down
Yes
Type of property
Property Usage
Drop-down
Yes
Usage of property, residential, non-residential, or mixed.
Plot Size (In Sq. Ft.)
Textbox
Yes
Total area of land in square feet on which the property is constructed.
Unit 1
Floor No.
Drop-down
Yes
Floor no. unit is located.
Usage
Drop-down
Yes
Usage of unit, residential/ non-residential.
Sub-usage
Drop-down
Yes
Sub-usage of unit, mandatory in case of non-residential usage.
Occupancy
Drop-down
Yes
The type of occupancy of property.
Annual Rent
Textbox
Yes
Annual rent in INR, in case property is rented out.
Built-up Area
Textbox
Yes
Built-up area of the unit in square feet.
Child Propertie(s)
Add Child Property
Icon
Yes
To add child property.
Property 1
Property ID
Display
Yes
Unique Property ID.
Door/ House No.
Display
Yes
House no./ Door no. of newly created child property.
Property Type
Display
Yes
Type of property of child property.
Property Usage
Display
Yes
Usage of child property, residential, non-residential, or mixed.
Plot Size (In Sq. Ft.)
Display
Yes
Total area of land in square feet on which the child property is constructed.
No. of floors
Display
Yes
No. of floors child property is having.
Total Builtup Area (Sq. Ft.)
Display
Total built-up area of the child property across all the floors.
Property 2
Property ID
Display
Yes
Unique Property ID.
Door/ House No.
Display
Yes
House no./ Door no. of newly created child property.
Property Type
Display
Yes
Type of property of child property.
Property Usage
Display
Yes
Usage of child property, residential, non-residential, or mixed.
Plot Size (In Sq. Ft.)
Display
Yes
Total area of land in square feet on which the child property is constructed.
No. of floors
Display
Yes
No. of floors child property is having.
Total Builtup Area (Sq. Ft.)
Display
Total built-up area of the child property across all the floors.
View Property Details/ Remove Property
Hyperlink
Yes
To view the completed property details/ remove the added property.
Documents
File Picker
Yes
The documents required to process the request.
Timelines
Workflow
Yes
Display of workflow steps completed.
Property Type
Drop-down
Yes
Type of property
Property Usage
Drop-down
Yes
Usage of property, residential, non-residential, or mixed.
Plot Size (In Sq. Ft.)
Textbox
Yes
Total area of land in square feet on which the property is constructed.
Unit 1
Floor No.
Drop-down
Yes
Floor no. unit is located.
Usage
Drop-down
Yes
Usage of unit, residential/ non-residential.
Sub-usage
Drop-down
Yes
Sub-usage of unit, mandatory in case of non-residential usage.
Occupancy
Drop-down
Yes
The type of occupancy of property.
Annual Rent
Textbox
Yes
Annual rent in INR, in case property is rented out.
Built-up Area
Textbox
Yes
Built-up area of the unit in square feet.
Pending for document verification
3
Verify and Forward
Document Verifier
Pending for document verification
Pending for field inspection
4
Verify and Forward
Field Inspector
Pending for field inspection
Pending approval for bifurcation
5
Send Back
Document Verifier
Pending for document verification
Pending for citizen action
6
Send Back
Field Inspector
Pending for Field inspection
Pending for document verification
7
Send Back
Approver
Pending approval for bifurcation
Pending for field inspection
8
Send Back To Citizen
<roles having access>
<Current Status>
Pending for citizen action
9
Re-submit
Citizen/ Counter Employee
Pending for citizen action
Pending for document verification
10
Re-submit
Document Verifier
Pending for document verification
Pending for field inspection
11
Re-submit
Field Inspector
Pending for field inspection
Pending approval for bifurcation
12
Approve
Approver
Pending approval for bifurcation
Approved
13
Reject
<roles having access>
<Current Status>
Rejected
Once the bifurcation application is closed, a mutation application seeking change in the owner(s) is applied either for newly created property ‘B’ or existing property ‘A’ based on the need.
Once the bifurcation application is closed, mutation applications seeking change in the owner(s) are applied for newly created property ‘B’ and existing property ‘A’.
Andhra Pradesh
On basis of data available in the property tax system
1624
Punjab
On the basis of application received manually
Uttarakhand
On the basis of application received manually
1.
As a
Employee orCitizen
I want
Search a property by unique property ID
so that
I can create an application for bifurcation of property.
Property Address
Pincode
Display
Yes
Pincode of area property is located.
City
Property ID
Display
Yes
Unique Property ID.
Door/ House No.
Display
Yes
Full address of property.
Assessment Details
1
Initiate Application
Citizen/ Counter Employee
Initiated
2
Submit Application
Citizen/ Counter Employee
My properties and selecting a property for bifurcation. The property should not be inactive or in the workflow.
Parent property address and ownership details are displayed.
Parent property assessment details are edited and the flow of screens is according to the property type of the parent property.
Property Type: Individual Building
Property Type: Flat/ Part of building
Property Type: Vacant Land
Child property (ies) is/are added to the application. To add the child property, the flow of property registration is used with the below-given limitations.
Pincode, City, Locality and Street Name is inherited from parent property and are not allowed to edit. The House/ Door No. is entered newly.
Ownership and owner details are also inherited from parent property and are not allowed to edit.
The assessment details are entered afresh following the validations about the parent and child properties.
Documents and application summary page are displayed.
Cantonment Boards
Display
Initiated
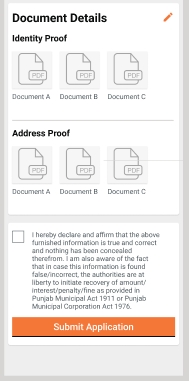

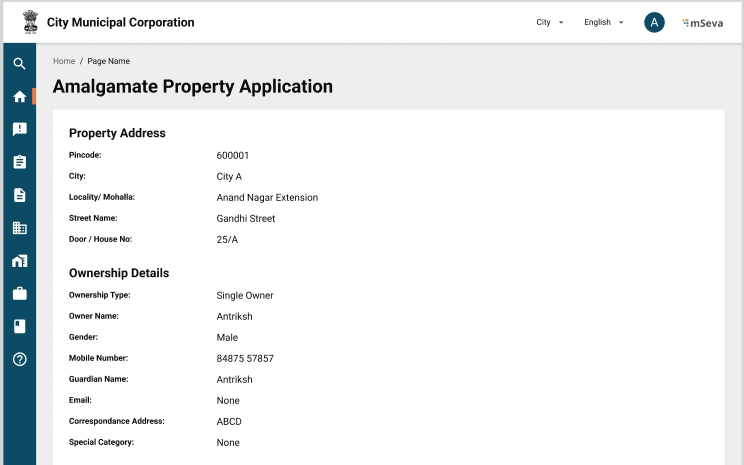
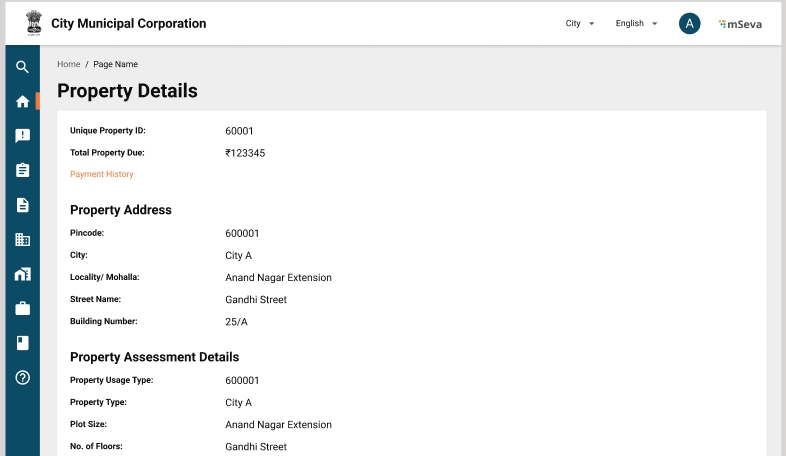
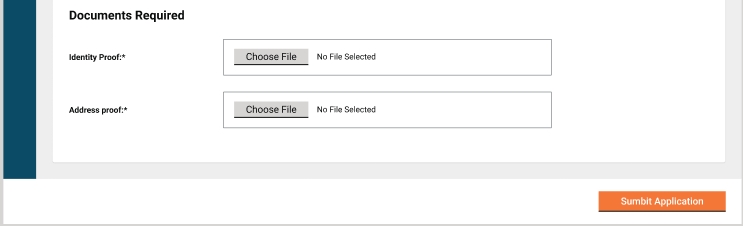
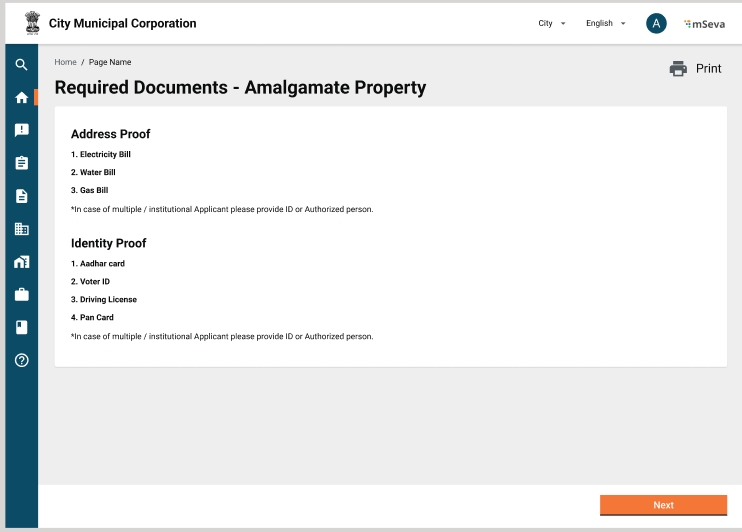
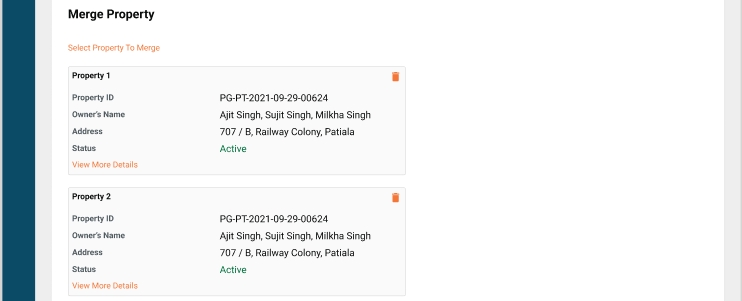
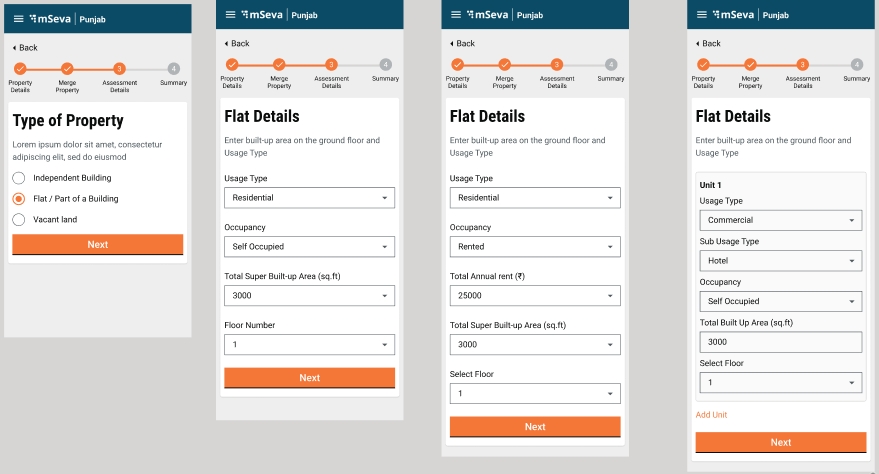
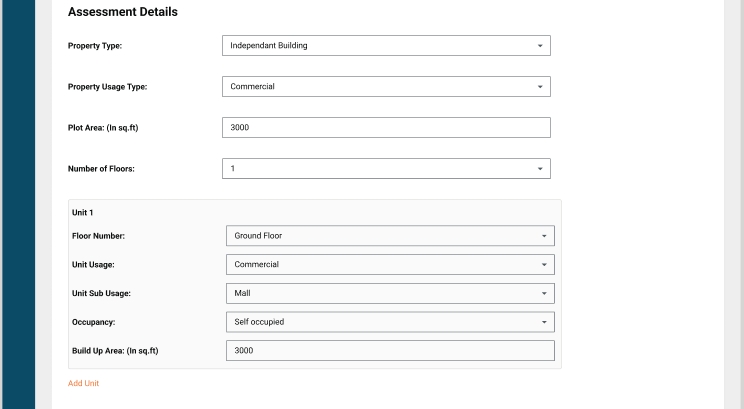
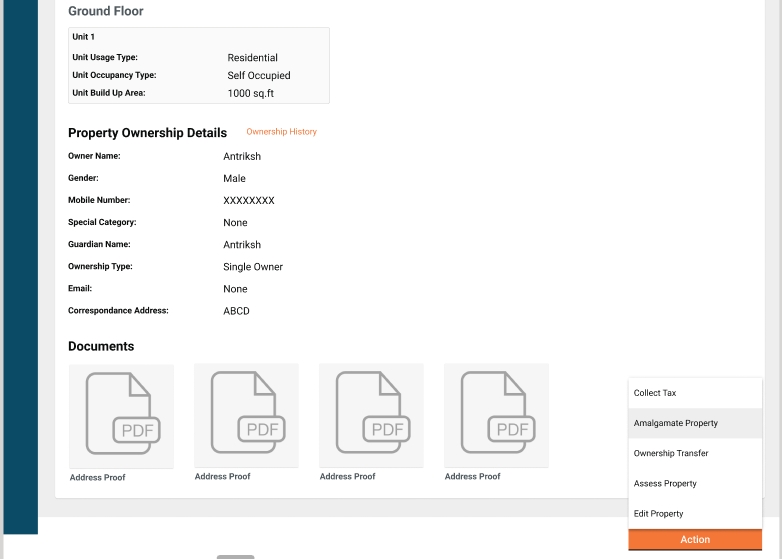
To onboard a new Urban Local Body (ULB) or tenant for the Local Business License Issuing Service modules, follow the steps given below:
In TL, there are two types of billing slab, one is according to the tradeType and the other way is accessoryCategory.
Add following data in MDMS for billing slab push and restart MDMS:
Provide different combinations of UOM rates - fromUOM and toUOM according to tradeType by taking accessoryCategory as null.
Example - From UOM : 0.00 , To UOM : 10,000.00 – Rate : 500.00
Provide different combinations of UOM rates - fromUOM and toUOM according to accessoryCategory by taking tradeType as null.
Example - From UOM : 0.00 , To UOM : 10,000.00 – Rate : 200.00
Tenants
TL Trade Type
Property Type
Ownership Type
Boundary
Owner Type
TL Billing Slab
This service is used to issue licenses to users after verification. The service is designed in such a way that it can be used to serve different types of licenses. Currently used to issue trade licenses, perform stakeholder registration and issue lockdown passes. The service is integrated with workflow where we can define the steps for application approval. Once the application is approved the license is generated.
Add Role-Action mapping for the APIs in MDMS. Following are the required entries.
MDMS Actions & Role Action Mapping for TL
Trade License Calculator service is used to calculate the Trade license fees/renewal fees based on the defined billing slabs. This service enables the TL admins to create billing slabs with different combinations of license type, trade type, structure type and accessory type.
The service is designed in such a way that it can be used to serve different types of licenses.
Add Role-Action mapping for the API’s in MDMS. Following are the required entries.
MDMS Actions & Role Action Mapping for TL
Add Role-Action mapping for the API’s in MDMS. Following are the required entries.
MDMS Actions & Role Action Mapping for PT
The computerized and automatic Business License Issuing system offered by eGov facilitates citizens who seek to apply for a business license within any Urban Local Body with a transparent, speedy, hassle-free and user-friendly procedure. Trade License (TL) is one of the components of a smart city that ensures a check on all the trade practices and increases the ease of conducting business within the state. Keeping in mind the benefits associated with the product offered, the proposed system is about to be implemented in 500+ ULBs across the country in 15 states. (For details on product features refer to
Create Property
To create new property.From citizen end,in create property screen,provide property Type
Property Ownership Details
To provide type of ownership in create property screen
Property Owner Type
To provide owner type in create property screen
Push the localisations as provided in API collection here.
Push the billing-slab of new tenant mentioned in Sample Data - TL Billing Slab.
Push the TL workflow.
Mon - Fri
Sat
Name
Local Name
District Code
District Name
District tenant Code
Dental Lab Services
GOODS.HEALTHCARE.DENTALLABSERVICES
GROSSUNITS
["OWNERIDPROOF", "OWNERSHIPPROOF", "OWNERPHOTO"]
["OWNERIDPROOF", "OWNERSHIPPROOF", "OWNERPHOTO", "OLDLICENCENO"]
true
TL
null
Clothing Retail
GOODS.RETAIL.CLOTHINGRETAIL
GROSSUNITS
["OWNERIDPROOF", "OWNERSHIPPROOF", "OWNERPHOTO"]
["OWNERIDPROOF", "OWNERSHIPPROOF", "OWNERPHOTO", "OLDLICENCENO"]
null
true
TL
null
RETURNINGCITIZENS
Native American or Indigenous Peoples
NATIVEAMRERICANS
None of the above
NONE
ca.alameda
PERMANENT
NEW
IMMOVABLE.PUCCA
Goods
Healthcare
Dental Lab Services
GOODS.HEALTHCARE.DENTALLABSERVICES
ACC-1
FLAT
GROSSUNITS
0.00
10,000.00
200.00
ca.alameda
PERMANENT
NEW
IMMOVABLE.PUCCA
Goods
Retail
Clothing Retail
GOODS.RETAIL.CLOTHINGRETAIL
ACC-2
FLAT
GROSSUNITS
0.00
10,000.00
200.00
ca.alameda
PERMANENT
NEW
IMMOVABLE.PUCCA
Goods
Food & Beverage
Packaged Food Products
GOODS.FOOD & BEVERAGE.PACKAGEDFOODPRODUCTS
null
FLAT
GROSSUNITS
0.00
10,000.00
500.00
ca.alameda
PERMANENT
NEW
IMMOVABLE.PUCCA
Goods
Food & Beverage
Beverage Production
GOODS.FOOD & BEVERAGE.BEVERAGEPRODUCTION
null
FLAT
GROSSUNITS
0.00
10,000.00
500.00
OfficeEmployee
Demo@123
Alameda
6000000003
Common Role for Employees
State Administrator
Administrator
Demo@123
Alameda
6000000004
ISNE-389
TL employee randomly gets navigated to citizen login screen
Removed working of isCreateEnabledEmployee variable because it was redirecting to another url without any reason.
Tenant Details
To show the tenant at login screen
To enable ulb to create application,add tenant in TL module
Trade Type (Business Units) information
New
Renewal
BUILTUP.OFFICE_BUILDING
Office Building
BUILTUP.RETAIL_SPACE
Retail Space
BUILTUP.INDUSTRIAL_PROPERTY
Industrial Property
BUILTUP.MIXED_USE_DEVELOPMENT
Mixed-Use Development
BUILTUP.SELF_STORAGE
Self-Storage
BUILTUP.SHOPPING_MALL
Shopping Mall
FEE_SIMPLE_OWNERSHIP
Fee Simple Ownership
LEASEHOLD_OWNERSHIP
Leasehold Ownership
TENANCY_IN_COMMON_(TIC)
Tenancy in Common (TIC)
ALM001
East End, West End
ALM002
Albany Hill, East Albany
ALM003
North Berkeley, South Berkeley
Veterans
VETERANS
Disabled Individuals
DISABLEINDIVIDUALS
Minority Applicants
MINORITYAPPLICANTS
LGBTQ+ Individuals
LGBTQ
Economically Disadvantaged
ECONOMICALLYDISADVANTAGED
Refugees and Asylum Seekers
REFUGEEANDASYLUMSEEKERS
Employee
Citizen
HRMS, Superuser
HRMSSU1
Demo@123
Alameda
9999009902
Superuser
SUPERSU
eGov@123
California
9999009900
Citizen
6100000010
123456
Architect
6109981231
123456
Common Role for Employees
Property Tax Counter Employee
TL Creator
TL Counter Employee
Counter Employee
CSR
Demo@123
Alameda
6000000001
Common Role for Employees
Property Tax Counter Employee
Business License Document verifier
Business License field inspector
BPA Services verifier
BPA Field Inspector
BPA NOC Verifier
FireNoc Approver
Airport Authority Approver
FieldEmployee
Demo@123
Alameda
6000000002
/tl-services/v1/_create
EMPLOYEE,CITIZEN,TL_APPROVER,TL_CEMP
/tl-services/v1/_update
EMPLOYEE,CITIZEN,TL_DOC_VERIFIER,TL_FIELD_INSPECTOR,TL_APPROVER,TL_CEMP
/tl-services/v1/_search
EMPLOYEE,CITIZEN,TL_APPROVER,TL_CEMP,TL_DOC_VERIFIER,TL_FIELD_INSPECTOR
/collection-services/payments/_create
TL_CEMP,SUPERUSER,EMPLOYEE
/inbox/v1/_search
TL_CEMP,TL_DOC_VERIFIER,TL_FIELD_INSPECTOR,TL_APPROVER,AIRPORT_AUTHORITY_APPROVER
/tl-calculator/billingslab/_search
SUPERUSER,EMPLOYEE,TL_APPROVER,TL_CEMP,CITIZEN,TL_DOC_VERIFIER,TL_FIELD_INSPECTOR
/tl-calculator/billingslab/_create
SUPERUSER
/tl-calculator/billingslab/_update
SUPERUSER
tl-calculator/v1/_getbill
EMPLOYEE,TL_APPROVER,TL_CEMP,CITIZEN
/tl-calculator/v1/_calculate
SUPERUSER
/property-services/property/_search
CITIZEN,PT_CEMP,PT_DOC_VERIFIER,PT_FIELD_INSPECTOR,PT_APPROVER,TL_CEMP
/property-services/property/_create
CITIZEN,PT_CEMP,TL_CEMP
/property-services/property/_update
CITIZEN,PT_CEMP,PT_DOC_VERIFIER,PT_FIELD_INSPECTOR,PT_APPROVER,TL_CEMP
/pt-calculator-v2/propertytax/v2/_estimate
PT_CEMP,CITIZEN,TL_CEMP
/property-services/assessment/_create
SUPERUSER,PT_CEMP,CITIZEN,TL_CEMP,CITIZEN
/property-services/assessment/_search
TL_CEMP,SUPERUSER,PT_CEMP,CITIZEN
ISNE-378
TL: Create new application issue when user selects TL owner details from PT
In the code level, it is hardcoded that if ownershipcategory code includes (“SINGLEOWNER”or ”MULTIPLEOWNERS” or “INSTITUTIONAL”) then only it will form the owner object. https://github.com/egovernments/egov-mdms-data/commit/51a50852dd4a312aaea8c1b824864fd7bc7f0c47 https://github.com/egovernments/egov-mdms-data/commit/dc8930811e28f0042b7694bf466870929cd5b483
ISNE-366
TL: Accessory category options not displayed in UI
Accessory category needs to be added to TL billing slab
Property type and Ownership category are required to be having a dot separated value in mdms
ISNE-392
TL: Pop up message to be displayed when user clicks on payment button
Localization updated
ISNE-393
TL: Financial Year hard coded for TL renewal
Need to make it dynamic based on current TL validity period
Financial year was hard coded in the code,so fetched current financial year and from mdms data - validfrom and validto and Removed the hardcoded part of financial year. https://github.com/egovernments/DIGIT-Dev/commit/0971443040d2c192816165a93629f8df93489335
To add Business Units
Returning Citizens (formerly incarcerated)
Common Role for Employees
Property Tax Counter Employee
TL Approver
Counter Employee
BPA Services Approver
BPAREG doc verifier
BPAREG Approver
For the offered product, the implementation process can be divided into seven major distinctive stages. Each stage has predefined entry and exit criteria, roles & responsibilities to assure objective monitoring and decision-making for the overall success of the engagement. The whole implementation lifecycle is typical of 38-42 weeks for the State, keeping in mind the entry and exit criteria defined at the beginning and end of each stage are met on time recommended.
Stage Zero is that of program setup and onboarding which is a pre-requisite for the initiative to kick-off and requires setup of the governance model, implementation Team and decision regarding other significant elements of the initiative like funding and procurement process.
Stage One - requires scoping of the initiative and decisions on the priorities for implementation by the State Implementation Team.
Stage Two - the State Team works on identifying and finding solutions to the significant gaps in the product offered with respect to the need of the State.
Stage Three - involves the Configuration and customization of the product offered. This involves working on various aspects of State-specific needs and incorporating them into the product offered.
Stage Four - is about doing a pilot launch in UAT and including all the necessary feedback on the product.
Stage Five - the roll-out of the product is done at the State level (Go Live) from a couple of ULBs to pan-state coverage in batches.
Stage Six - sustenance and ongoing improvements are worked upon while the product is already functioning in the State. (For details on the implementation plan refer to Section 3)
Implementation of the Trade License (TL) module requires meticulous planning and close coordination between various stakeholders at the centre and State levels. The success of the initiative is dependent upon many factors like strong Program governance, availability of trained resources, financial planning, targeted Implementation Team onboarding, focus on last-mile capacity building and ensuring necessary support to the Urban centre. Achievement of all these factors will provide the most effective and efficient roll-out and adoption of the Trade License System in the State.
The purpose of this document is to give an overview of the Trade License System (TLS). The Trade License product provides a digital interface, allowing citizens to apply for the Trade License and subsequently make the payment online.
The Trade License product enables:
Ease of doing business — Traders can apply for new licenses, renewals, amendments, and supplemental licenses
Regulatory Tracking — Administrators can track and manage regulatory processes
Shorter Timelines — It streamlines and automates the business licensing processes and help a business to be set up quickly
Data-driven decision making — The application collates valuable information on the economic activity and employment opportunities in a ULB
The TL product features can be broadly classified as the following modules:
Registration, Login and Creation of User Profile
Applying for a Trade License
Trade License Issue
Modifications to a Trade License
Renewal of Trade License
Payments and Fee
Dashboards and Reports
General Features
Click here to view module capabilities and product functional specifications.
This section provides an overview of the methodology for State-wide implementation of TL. The Implementation of TL is distributed across seven distinct stages. Each stage has predefined entry & exit criteria and roles & responsibilities. This is to ensure objective monitoring and decision-making for the overall success of the program. Details of each stage are defined in this section.
TL implementation program is expected to be completed approximately between 38- 42 weeks with the resource deployment by the State and System Integrator (SI) Team (as defined below). However, it is critical that activities and exit criteria set for each stage are achieved to adhere to this timeline.
This is a set of initial critical activities undertaken on receiving a letter of Enrolment or MOU from the State. Successful completion of these activities assures that the program is started with crucial personnel, System Integrator (SI) Teams, and funds.
Duration
4-6 weeks
Entry Criteria
Acceptance Letter/MoU by State
Exit Criteria
Finalise Trade License Program Vision
Finalise funding for the program
Define State-specific procurement process
Trade License Cell appointment (*). Consisting of:
*Details of TL cells are mentioned in section 4 of this handbook
System Integrator and state will agree on program scope, program timelines, and budgeting & resourcing.
This stage envisages the in-person interaction of crucial State officials and implementation System Integrator (SI) Teams to kick-start the program. This stage may require multiple interactions/meetings with different interest groups. The principal objective of these interactions is to identify scope and planning strategies for phasing/ rollout, create an active collaboration & Governance approach and agree on a high-level timeline for the engagement.
Entry Criteria
Program setup (Stage 0) is complete
SI Team signed-up
Key Activities
Project kick-off meeting and consultation from stakeholders
Identify & agree on high-level scope and exclusions
Identify pilot ULBs (using criteria such as business penetration, revenue generated from previous TL systems etc.)
Exit Criteria
Publish the program charter
Implementation plan agreement with priority features and broad timelines
Program Governance Model
Program Success Metrics
*Exploration is required to understand the Inter and Intra Departmental Jurisdictions of Local Governments with respect to Trade License.
#Details of TL cell is mentioned in section 4 of this handbook
During the Solution design stage, key State officials and members, who are subject matter experts, are expected to share State acts and policies and help interpret the same for the System Integrator (SI) Team. This stage baselines the State-specific product features in the Product Configuration report.
Entry Criteria
Program Charter
TL cell appointment
Key Activities
Standardisation of all TL processes
Initiate policy change if needed, based on the Processes defined
Define criteria for success
Conduct Product familiarisation workshop
Exit Criteria
State Sign Off and Publishing of the TL processes, data template/workflows
Finalisation of Roll-out plan (in different phases)
Product Configuration Report Sign Off
Solution agreement for required State- specific product customisations
This stage consists of a series of developments in accordance with the detailed project plan to ensure the smooth functioning of the customised product. Master Data Collection & Environment Setup will be achieved in this phase. Further monitoring and maintenance strategies are put in place.
Entry Criteria
Product Configuration Report has been Signed Off by the state
Sign-off on data approach (Data collection/migration/correction/ sync-up/validation)
State Sign Off and Publishing of the TL processes, data template/workflows
Key Activities
Setting up development environments
Development/customisation of reports and dashboards
Development/Integration of portal
Third-Party Integrations (Payment gateway, Handheld/pos device)
Exit Criteria
Configured/Customized product that is ready for UAT
Set up of Monitoring, support & maintenance of Dashboards
finalization of Initial Reporting and Dashboard KPIs
Identification of participants for UAT session
During this stage, a demonstration of the product followed by a hands-on session is conducted for the ULB officials. Necessary training of ULB officials and resources required for UAT is conducted and identified respectively. The establishment of the State Support Team and required processes are initiated in this stage.
Entry Criteria
Configured/Customized product ready for UAT
Pilot ULB Officials associated with TL are available for UAT & Training
Key Activities
UAT Environment Setup
Issues/bug identification and resolution
Regression UAT and Sign off from Pilot ULBs/ State
Setting up the Production environment
Exit Criteria
UAT Sign-off & Go Live for Pilot ULBs
Setup of review and monitoring cadence
On successful Go-Live in the Pilot ULBs, and further fine-tuning to stabilize the product, the solution will be rolled out to the rest of the ULBs in phases. Guidance and support from the State Team will be required to create the rollout plans and ensure the necessary infrastructure for training and deployment is available at each ULB.
Entry Criteria
A pilot has been successful in the State
there are less than 3 open critical incidents (issues) with respect to product, implementation and data
Key Activities
ULB configurations phase wise as per the Project Plan
Verification and migration of ULB data phase wise as per the Data Agreement Sign Off provided by the State
Establishment of bug ticketing tool for resolving ground level issues by the state team
Exit Criteria
State-wide Rollout in batches:
Adoption tracking & Review Cadence operational
Help Desk Effectiveness assured
Critical Bugs fixed
The final stage consists of strategies to ensure the sustenance of the product in the State. Systems are put in place to ensure the continuous tracking of data and provisions are made to improve the product if new data suggest.
Entry Criteria
Rollout Phase 1(First set of ULBs where rollout will happen after Pilot)
Key Ongoing Activities
Adoption Review Meetings as per the vision defined for the program.
Meetings are chaired by the Program Head
Need to be conducted weekly
TL Cell Focuses on Using data for:
This section outlines the activities involved in each stage of the implementation along with the responsibility and accountability of critical stakeholders - State, eGov Team and System Integrator Team onboard.
TL Cell: TL Cell is the government-appointed body chaired by the Principal Secretary/Secretary, Urban Development Department with members from Urban Development Department etc.
Resource requirements for the TL cell required to be formed by the State
Project Head
1
Domain Expert
2
District Nodal Officer
1 per district
MIS Expert
4
eGOv Team: eGov Team is the technical partner of the project which will provide all necessary support to the State concerning the implementation, Program Designing etc.
System Integrator (SI)Team: SI Team will be responsible for consulting, program management and the implementation of products in the ULBs in close collaboration with the TL cell, technical partner (eGov) and various other stakeholders.
Task/Activity
eGov
State Leadership
Appoint of TL Cell
Consult
Execute
Finalise funding for the program
Consult
Execute
Task/Activity
eGov
TL Cell
SI Team
Identify & agree on scope and exclusions
Consult
Consult
Execute
Identify pilot ULBs
Task/Activity
eGov
TL Cell
SI Team
Standardisation of all TL processes
Consult
Execute
Define criteria for success
Task/Activity
eGov
TL Cell
SI Team
Setting up development environments
Consult
Execute
Development/customisation of reports and dashboards
Task/Activity
eGov
TL Cell
SI Team
UAT Environment Setup
Consult
Consult
Execute
Issues/bug identification and resolution
Task/Activity
eGov
TL Cell
SI Team
ULB configurations phase wise as per the Project Plan
Consult
Execute
Verification and Migration of ULB data phase wise as per the Data Agreement Sign Off provided by the State
Task/Activity
eGov
TL Cell
SI Team
Adoption Review Meetings as per the vision defined for the program
Consult
Execute
Consult
TL Cell Focuses on Using data for:
tracking field issues and performance data to identify improvements
identify additional Integrations around TL to make processes more robust towards enhancing TL revenues (e.g Upstream and downstream Processes)
Infrastructure
The actual Infra will be provided based on the questionnaire inputs received from the state
The state will take care of providing necessary project infrastructure and office facilities during the program for all on-site project Team members, which will be confirmed during the initiation phase. This includes workspace, office equipment (e.g., telephone with STD, fax machine, photocopy machine, etc.), stationery, PC/workstation, project LAN and internet access, etc.
The state will provide the necessary administrative support staff to carry out day-to-day project administration tasks, e.g., meeting rooms, Videoconferencing, etc.
Project Scope
Any new requirements received from State during the implementation phase will be handled through a change management process
State Team
The state will nominate a reasonably sized multifunctional Team from various departments of the State to be responsible for the implementation. The state Team would be required for information, validation, and execution through the implementation cycle and the Team members should be reasonably empowered to take decisions. Any delay in the decision-making process and the non-availability of the State Team may have an impact on the schedule.
The participants from State are expected to have a thorough understanding of the State’s internal processes.
The state will engage internal and external stakeholders required for this engagement and ensure their availability whenever needed.
Documentation
The Tech Implementation Partner will ensure provision of the following:
User education and training documentation delivery as per the default product documentation of the identified product versions.
Product manuals are expected to be shared with the State as part of the user manual.
Training
Training to the end-users will be driven by the state Team.
The state will be responsible for providing the necessary infrastructure required for the Training, which includes the following readiness.
Training Rooms (Parallel Training Sessions) with Projector, White Board, Markers, Internet Connection, sufficient seating capacity, Desktop/Laptop for each participant and availability of Network for Trainees to connect to the server.
Vision: Defining the time frame to go live, the time frame to scale it pan state, the value proposition of the programme for the state and year-on-year financial targets and adoption targets
Project Plan: A detailed plan of Program schedule/timelines, implementation phases, team structure and ongoing support and maintenance is required.
System Integrator: The Entity/Company collates all the subsystems required for the project and integrates them to achieve the program objective
Program Charter: Outline of implementation plan agreement with priority applications and broad timelines, program governance model, program success metrics and capacity building.
Acceptance Letter/MOU: Formal Acceptance/Sign Off of the Client State with a clear mandate of the Program
Program Success Metrics: Defining the parameters (which are measurable) prior to the program, on which the success of the program is to be measured on the completion of the program
Project steering committee: The key body within the governance structure is responsible for the business issues associated with the project that are essential in ensuring the delivery of the project outputs and the attainment of project outcomes.
Project governance: Set of policies, regulations, functions, processes, procedures and responsibilities that define the establishment, management and control of projects, programmes and portfolios.
Scoping: List of activities measured against the time taken to complete them in accordance with the project goals
Baseline data: Set of information that serves as a foundation to compare other data acquired afterwards
Project Kick-off meeting: Meeting with the project team and the client of the project. This meeting would follow the definition of the base elements for the project and other project planning activities
Fitment Study: GAP Study of the Existing/Required Field Process Vs Product
Data migration: Existing Records of the functional activities need to be moved into the Database of the newly released Application
Data collection: Required data for the roll-out of the applications, which needs to be collected from the existing functional process
Data validation approach: This approach enables the sanctity of the Data with built-in validation by the Design
Data synchronization: The process of establishing consistency among data from a source to a target data storage and vice versa and the continuous harmonization of the data over time.
Pilot Implementation: Any new process is tested out as a pilot in one or two instances before pan implementation
Pilot ULB: The ULBs selected for the pilot implementation are called pilot ULBs.
Roll out: On successful clearance of the Pilot, the Process/Application/Services are implemented across all Offices/ULBs
Deployment: Deployment defines the complete package of Software components set up in a particular environment
Customization: Details of changes to be made in the Product to comply with the needed field process
Configuration: Defining existing content such as Options and Variables based on the requirements on the ground
Product walkthrough: Explaining to the users step-by-step through a set of actions that they need to take to achieve a specific outcome
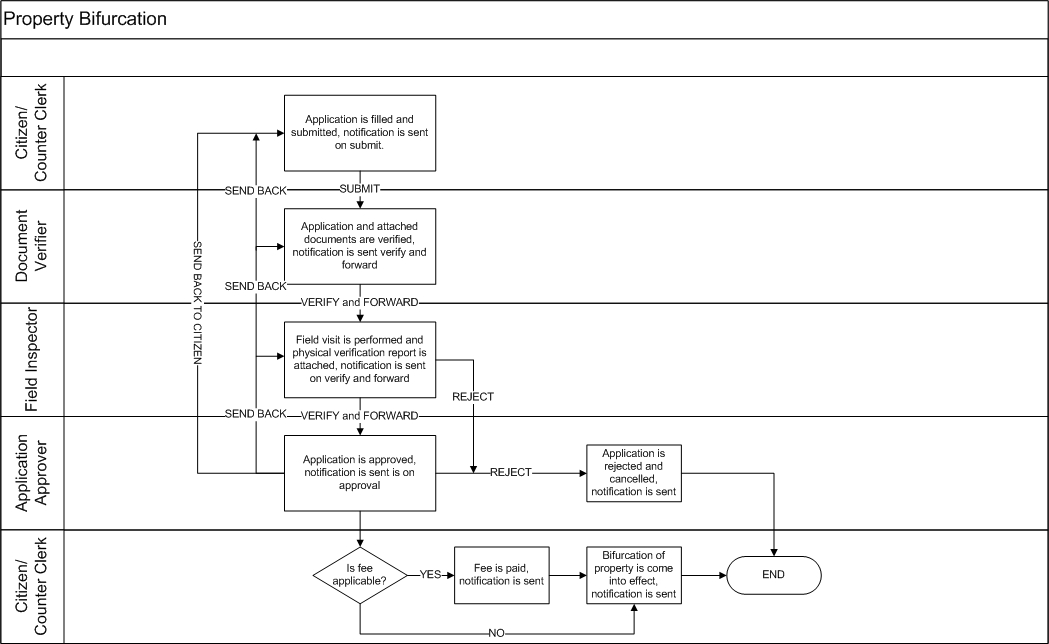
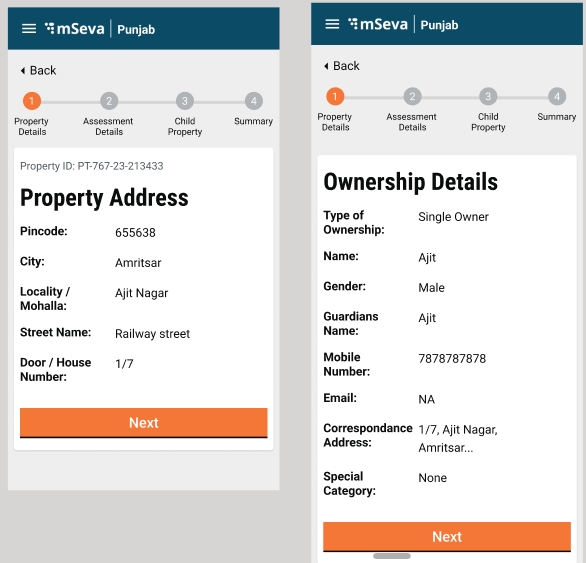
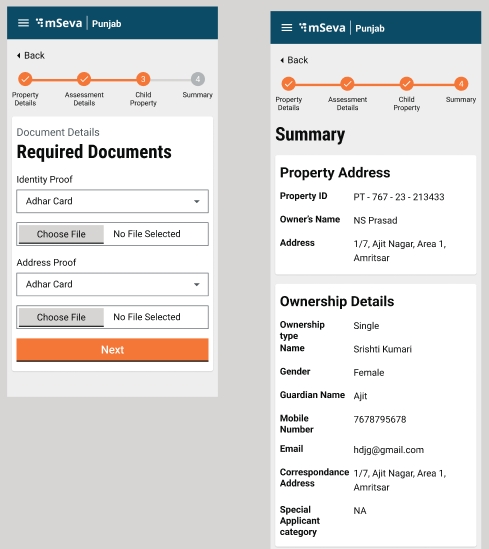
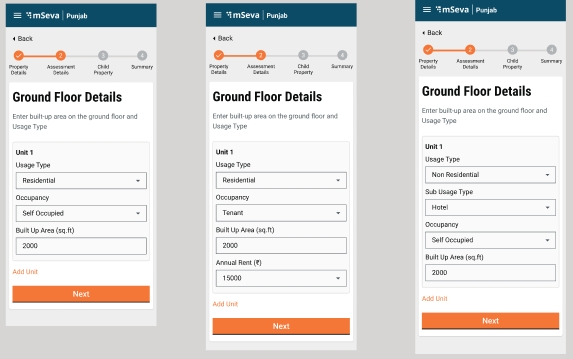
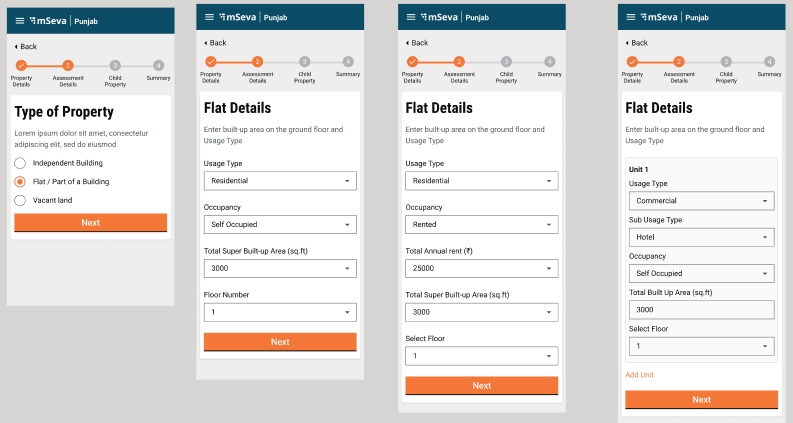
// {
"tenantId": "ca.alameda",
"licenseType": "PERMANENT",
"applicationType": "NEW",
"structureType": "IMMOVABLE.PUCCA",
"tradeType": "GOODS.HEALTHCARE.DENTALLABSERVICES",
"accessoryCategory": null,
"type": "FLAT",
"uom": "GROSSUNITS",
"fromUom": "0",
"toUom": "10000",
"rate": "500"
}//{
"tenantId": "ca.alameda",
"licenseType": "PERMANENT",
"applicationType": "NEW",
"structureType": "IMMOVABLE.PUCCA",
"tradeType": null,
"accessoryCategory": “ACC-1”,
"type": "FLAT",
"uom": "GROSSUNITS",
"fromUom": "0",
"toUom": "10000",
"rate": "200"
}//[
{
"tenantId": "ca",
"businessService": "DIRECTRENEWAL",
"business": "tl-services",
"businessServiceSla": 172800000,
"states": [
{
"tenantId": "ca",
"sla": null,
"state": null,
"applicationStatus": "APPLIED",
"docUploadRequired": false,
"isStartState": true,
"isTerminateState": false,
"isStateUpdatable": false,
"actions": [
{
"tenantId": "ca",
"currentState": null,
"action": "INITIATE",
"nextState": "PENDINGPAYMENT",
"roles": [
"CITIZEN",
"TL_CEMP"
],
"active": true
}
]
},
{
"tenantId": "ca",
"sla": null,
"state": "PENDINGPAYMENT",
"applicationStatus": "PENDINGPAYMENT",
"docUploadRequired": false,
"isStartState": true,
"isTerminateState": false,
"isStateUpdatable": true,
"actions": [
{
"tenantId": "ca",
"currentState": "PENDINGPAYMENT",
"action": "PAY",
"nextState": "APPROVED",
"roles": [
"CITIZEN",
"TL_CEMP",
"SYSTEM_PAYMENT"
],
"active": true
}
]
},
{
"tenantId": "ca",
"sla": null,
"state": "APPROVED",
"applicationStatus": "APPROVED",
"docUploadRequired": false,
"isStartState": false,
"isTerminateState": true,
"isStateUpdatable": false,
"actions": null
}
]
},
{
"tenantId": "ca",
"businessService": "EDITRENEWAL",
"business": "tl-services",
"businessServiceSla": 172800000,
"states": [
{
"tenantId": "ca",
"sla": null,
"state": null,
"applicationStatus": null,
"docUploadRequired": false,
"isStartState": true,
"isTerminateState": false,
"isStateUpdatable": false,
"actions": [
{
"tenantId": "ca",
"currentState": null,
"action": "INITIATE",
"nextState": "INITIATED",
"roles": [
"CITIZEN",
"TL_CEMP"
],
"active": true
}
]
},
{
"tenantId": "ca",
"sla": null,
"state": "INITIATED",
"applicationStatus": "INITIATED",
"docUploadRequired": false,
"isStartState": true,
"isTerminateState": false,
"isStateUpdatable": true,
"actions": [
{
"tenantId": "ca",
"currentState": "INITIATED",
"action": "INITIATE",
"nextState": "INITIATED",
"roles": [
"CITIZEN",
"TL_CEMP"
],
"active": true
},
{
"tenantId": "ca",
"currentState": "INITIATED",
"action": "APPLY",
"nextState": "APPLIED",
"roles": [
"CITIZEN",
"TL_CEMP"
],
"active": true
}
]
},
{
"tenantId": "ca",
"sla": null,
"state": "APPLIED",
"applicationStatus": "APPLIED",
"docUploadRequired": false,
"isStartState": true,
"isTerminateState": false,
"isStateUpdatable": true,
"actions": [
{
"tenantId": "ca",
"currentState": "APPLIED",
"action": "FORWARD",
"nextState": "FIELDINSPECTION",
"roles": [
"TL_DOC_VERIFIER"
],
"active": true
},
{
"tenantId": "ca",
"currentState": "APPLIED",
"action": "REJECT",
"nextState": "REJECTED",
"roles": [
"TL_DOC_VERIFIER"
],
"active": true
}
]
},
{
"tenantId": "ca",
"sla": null,
"state": "REJECTED",
"applicationStatus": "REJECTED",
"docUploadRequired": false,
"isStartState": false,
"isTerminateState": true,
"isStateUpdatable": false,
"actions": null
},
{
"tenantId": "ca",
"sla": null,
"state": "FIELDINSPECTION",
"applicationStatus": "FIELDINSPECTION",
"docUploadRequired": false,
"isStartState": false,
"isTerminateState": false,
"isStateUpdatable": true,
"actions": [
{
"tenantId": "ca",
"currentState": "FIELDINSPECTION",
"action": "REJECT",
"nextState": "REJECTED",
"roles": [
"TL_FIELD_INSPECTOR"
],
"active": true
},
{
"tenantId": "ca",
"currentState": "FIELDINSPECTION",
"action": "FORWARD",
"nextState": "PENDINGAPPROVAL",
"roles": [
"TL_FIELD_INSPECTOR"
],
"active": true
}
]
},
{
"tenantId": "ca",
"sla": null,
"state": "PENDINGAPPROVAL",
"applicationStatus": "PENDINGAPPROVAL",
"docUploadRequired": false,
"isStartState": false,
"isTerminateState": false,
"isStateUpdatable": false,
"actions": [
{
"tenantId": "ca",
"currentState": "PENDINGAPPROVAL",
"action": "REJECT",
"nextState": "REJECTED",
"roles": [
"TL_APPROVER"
],
"active": true
},
{
"tenantId": "ca",
"currentState": "PENDINGAPPROVAL",
"action": "APPROVE",
"nextState": "PENDINGPAYMENT",
"roles": [
"TL_APPROVER"
],
"active": true
}
]
},
{
"tenantId": "ca",
"sla": null,
"state": "PENDINGPAYMENT",
"applicationStatus": "PENDINGPAYMENT",
"docUploadRequired": false,
"isStartState": false,
"isTerminateState": false,
"isStateUpdatable": false,
"actions": [
{
"tenantId": "ca",
"currentState": "PENDINGPAYMENT",
"action": "PAY",
"nextState": "APPROVED",
"roles": [
"CITIZEN",
"TL_CEMP",
"SYSTEM_PAYMENT"
],
"active": true
},
{
"tenantId": "ca",
"currentState": "PENDINGPAYMENT",
"action": "ADHOC",
"nextState": "PENDINGPAYMENT",
"roles": [
"TL_CEMP"
],
"active": true
}
]
},
{
"tenantId": "ca",
"sla": null,
"state": "APPROVED",
"applicationStatus": "APPROVED",
"docUploadRequired": false,
"isStartState": false,
"isTerminateState": false,
"isStateUpdatable": false,
"actions": [
{
"tenantId": "ca",
"currentState": "APPROVED",
"action": "CANCEL",
"nextState": "CANCELLED",
"roles": [
"CITIZEN",
"TL_CEMP",
"SYSTEM_PAYMENT"
],
"active": true
}
]
},
{
"tenantId": "ca",
"sla": null,
"state": "CANCELLED",
"applicationStatus": "CANCELLED",
"docUploadRequired": false,
"isStartState": false,
"isTerminateState": true,
"isStateUpdatable": false,
"actions": null
}
]
},
{
"tenantId": "ca",
"businessService": "NewTL",
"business": "tl-services",
"businessServiceSla": 172800000,
"states": [
{
"tenantId": "ca",
"sla": null,
"state": null,
"applicationStatus": null,
"docUploadRequired": false,
"isStartState": true,
"isTerminateState": false,
"isStateUpdatable": true,
"actions": [
{
"tenantId": "ca",
"currentState": null,
"action": "INITIATE",
"nextState": "INITIATED",
"roles": [
"CITIZEN",
"TL_CEMP"
],
"active": true
}
]
},
{
"tenantId": "ca",
"sla": null,
"state": "INITIATED",
"applicationStatus": "INITIATED",
"docUploadRequired": false,
"isStartState": true,
"isTerminateState": false,
"isStateUpdatable": true,
"actions": [
{
"tenantId": "ca",
"currentState": "INITIATED",
"action": "APPLY",
"nextState": "APPLIED",
"roles": [
"CITIZEN",
"TL_CEMP"
],
"active": true
},
{
"tenantId": "ca",
"currentState": "INITIATED",
"action": "INITIATE",
"nextState": "INITIATED",
"roles": [
"CITIZEN",
"TL_CEMP"
],
"active": true
}
]
},
{
"tenantId": "ca",
"sla": null,
"state": "APPLIED",
"applicationStatus": "APPLIED",
"docUploadRequired": false,
"isStartState": false,
"isTerminateState": false,
"isStateUpdatable": true,
"actions": [
{
"tenantId": "ca",
"currentState": "APPLIED",
"action": "FORWARD",
"nextState": "FIELDINSPECTION",
"roles": [
"TL_DOC_VERIFIER"
],
"active": true
},
{
"tenantId": "ca",
"currentState": "APPLIED",
"action": "REJECT",
"nextState": "REJECTED",
"roles": [
"TL_DOC_VERIFIER"
],
"active": true
},
{
"tenantId": "ca",
"currentState": "APPLIED",
"action": "SENDBACKTOCITIZEN",
"nextState": "CITIZENACTIONREQUIRED",
"roles": [
"TL_DOC_VERIFIER"
],
"active": true
}
]
},
{
"tenantId": "ca",
"sla": null,
"state": "REJECTED",
"applicationStatus": "REJECTED",
"docUploadRequired": false,
"isStartState": false,
"isTerminateState": true,
"isStateUpdatable": false,
"actions": null
},
{
"tenantId": "ca",
"sla": 86400000,
"state": "FIELDINSPECTION",
"applicationStatus": "FIELDINSPECTION",
"docUploadRequired": false,
"isStartState": false,
"isTerminateState": false,
"isStateUpdatable": true,
"actions": [
{
"tenantId": "ca",
"currentState": "FIELDINSPECTION",
"action": "FORWARD",
"nextState": "PENDINGAPPROVAL",
"roles": [
"TL_FIELD_INSPECTOR"
],
"active": true
},
{
"tenantId": "ca",
"currentState": "FIELDINSPECTION",
"action": "SENDBACK",
"nextState": "APPLIED",
"roles": [
"TL_FIELD_INSPECTOR"
],
"active": true
},
{
"tenantId": "ca",
"currentState": "FIELDINSPECTION",
"action": "REJECT",
"nextState": "REJECTED",
"roles": [
"TL_FIELD_INSPECTOR"
],
"active": true
},
{
"tenantId": "ca",
"currentState": "FIELDINSPECTION",
"action": "SENDBACKTOCITIZEN",
"nextState": "CITIZENACTIONREQUIRED",
"roles": [
"TL_FIELD_INSPECTOR"
],
"active": true
}
]
},
{
"tenantId": "ca",
"sla": 43200000,
"state": "PENDINGAPPROVAL",
"applicationStatus": "PENDINGAPPROVAL",
"docUploadRequired": false,
"isStartState": false,
"isTerminateState": false,
"isStateUpdatable": false,
"actions": [
{
"tenantId": "ca",
"currentState": "PENDINGAPPROVAL",
"action": "REJECT",
"nextState": "REJECTED",
"roles": [
"TL_APPROVER"
],
"active": true
},
{
"tenantId": "ca",
"currentState": "PENDINGAPPROVAL",
"action": "APPROVE",
"nextState": "PENDINGPAYMENT",
"roles": [
"TL_APPROVER"
],
"active": true
},
{
"tenantId": "ca",
"currentState": "PENDINGAPPROVAL",
"action": "SENDBACK",
"nextState": "FIELDINSPECTION",
"roles": [
"TL_APPROVER"
],
"active": true
}
]
},
{
"tenantId": "ca",
"sla": 43200000,
"state": "PENDINGPAYMENT",
"applicationStatus": "PENDINGPAYMENT",
"docUploadRequired": false,
"isStartState": false,
"isTerminateState": false,
"isStateUpdatable": false,
"actions": [
{
"tenantId": "ca",
"currentState": "PENDINGPAYMENT",
"action": "ADHOC",
"nextState": "PENDINGPAYMENT",
"roles": [
"TL_CEMP"
],
"active": true
},
{
"tenantId": "ca",
"currentState": "PENDINGPAYMENT",
"action": "PAY",
"nextState": "APPROVED",
"roles": [
"CITIZEN",
"TL_CEMP",
"SYSTEM_PAYMENT"
],
"active": true
}
]
},
{
"tenantId": "ca",
"sla": null,
"state": "APPROVED",
"applicationStatus": "APPROVED",
"docUploadRequired": false,
"isStartState": false,
"isTerminateState": false,
"isStateUpdatable": false,
"actions": [
{
"tenantId": "ca",
"currentState": "APPROVED",
"action": "CANCEL",
"nextState": "CANCELLED",
"roles": [
"TL_APPROVER"
],
"active": true
},
{
"tenantId": "ca",
"currentState": "APPROVED",
"action": "EXPIRE",
"nextState": "EXPIRED",
"roles": [
"SYSTEM"
],
"active": true
},
{
"tenantId": "ca",
"currentState": "APPROVED",
"action": "MANUALEXPIRE",
"nextState": "MANUALEXPIRED",
"roles": [
"TL_APPROVER"
],
"active": true
}
]
},
{
"tenantId": "ca",
"sla": null,
"state": "CANCELLED",
"applicationStatus": "CANCELLED",
"docUploadRequired": false,
"isStartState": false,
"isTerminateState": true,
"isStateUpdatable": false,
"actions": null
},
{
"tenantId": "ca",
"sla": null,
"state": "CITIZENACTIONREQUIRED",
"applicationStatus": "CITIZENACTIONREQUIRED",
"docUploadRequired": false,
"isStartState": false,
"isTerminateState": false,
"isStateUpdatable": true,
"actions": [
{
"tenantId": "ca",
"currentState": "CITIZENACTIONREQUIRED",
"action": "RESUBMIT",
"nextState": "APPLIED",
"roles": [
"TL_CEMP"
],
"active": true
},
{
"tenantId": "ca",
"currentState": "CITIZENACTIONREQUIRED",
"action": "FORWARD",
"nextState": "APPLIED",
"roles": [
"CITIZEN"
],
"active": true
}
]
},
{
"tenantId": "ca",
"sla": null,
"state": "MANUALEXPIRED",
"applicationStatus": "MANUALEXPIRED",
"docUploadRequired": false,
"isStartState": false,
"isTerminateState": true,
"isStateUpdatable": false,
"actions": null
},
{
"tenantId": "ca",
"sla": null,
"state": "EXPIRED",
"applicationStatus": "EXPIRED",
"docUploadRequired": false,
"isStartState": false,
"isTerminateState": true,
"isStateUpdatable": false,
"actions": null
}
]
}
]
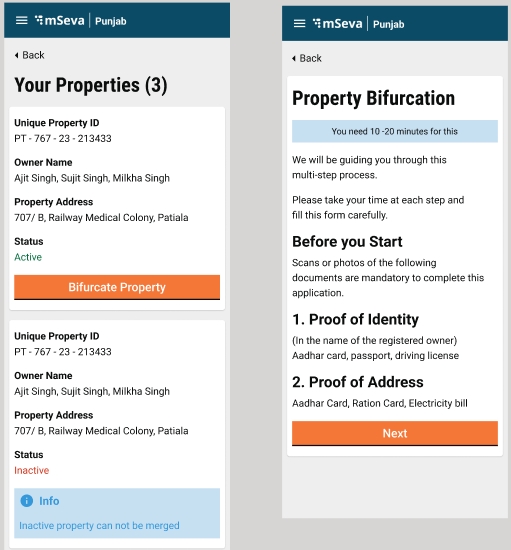
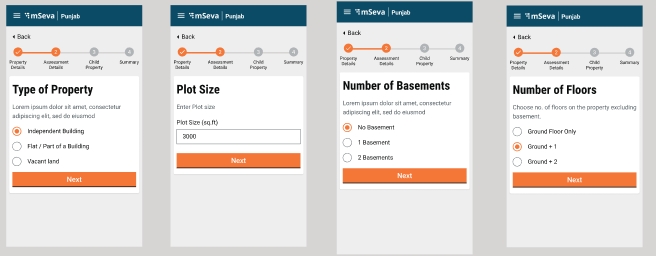
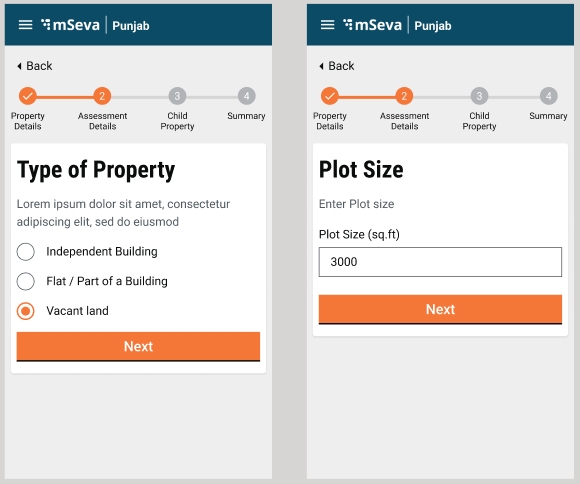

Municipal Corporation
-122.241638
37.765205
null
null
2131
null
ALM001
East End, West End
9876543210
9876543210
Municipal Corporation
-122.241648
37.765215
null
null
2132
null
ALM002
Albany Hill, East Albany
9876543211
9876543209
Region Name
ULB Grade
Longitude
Latitude
Shape File Location
Captcha
Code
DDR Name
Locality Code
Locality Name
ca.alameda
Alameda
null
[14306,14307,14308,14309,14310]
null
CITY
null
null
9.00 AM - 6.00 PM
9.00 AM - 12.00 PM
Alameda
null
null
Alameda
CA_Alameda
ca.albany
Albany
null
[14306,14307,14308,14309,14310]
null
CITY
null
null
9.00 AM - 6.00 PM
9.00 AM - 12.00 PM
Albany
null
null
Alameda
CA_Alameda
null
null
Domain expert
Nodal officer (EO/ Commissioner/ Senior Official)
Program Head
System Integrator (SI) Team sign-up/onboarding
Define Project Steering Committee structure and Project Governance process
Define phases of Rollout/ Deployment
Agreement on Deployment Priorities and high-level delivery timelines
Identify and study all TL process
Definition of TL as per the municipal governance of the State
State wise conceptualization of trade categories
Citizen services/channels around it
Integration with other Departmental processes (*)
Finalise Program Success Metrics for Rollout, Adoption and Governance adhering to the vision of the program
Internal Capacity Building, program logistics at State and ULBs, as per the current scenario
Collection of baseline data to measure end line target for the product (revenue generated, total properties in ULBs etc.)
Circulation of baseline data collection templates to the state/SI Team
Capacity Building
TL Cell formation and appointment (#)
Data preparation/collection kick-off from Pilot ULBs
Cloud Infrastructure procured
Project Office Space allocated
Program Branding (name, logo, tagline etc.)
Initiate collection of master data from pilot ULBs
Finalise data migration/collection/sync-up approach as per requirement
Finalise data validation approach
Capacity Building for making state team aware about basic usage of tools like MS Office, mails etc.
Dashboard design finalisation for Program Tracking
Program tracking mechanism finalization and sign off by the state
Initial reporting structure
Dashboard KPIs
Sign-off on data approach (Data collection/migration/correction/ sync-up/validation)
Detailed project plan
Updation of user manuals and other key documents
Preparation & execution of Test Cases
Setup monitoring, support & maintenance processes, tools and dashboards
TL Legacy data collection from Pilot ULBs as per the data agreement signoff by the state
Capacity Building for making state team aware about basic usage of tools like MS Office, mails etc.
Identify ULB level nodal officers for day to day support
Migration and verification of Pilot ULB data as per the data agreement signoff by the state
Setting up Support Centre & processes (Help Desk)
Training (Users, trainer)
master trainers identified from ground for simultaneous training
Training the Support Resources
Marketing & promotion activities
Go Live & launch event
Setup of review and monitoring cadence/team
Usage/review/Dashboard/Field Visits
Pan State Roll Out - Phase wise
Stabilise product
tracking field issues and performance data to identify improvements
identify additional Integrations around TL to make processes more robust towards enhancing TL revenues (e.g. Upstream and downstream Processes)
Plans of ongoing Sustenance in Place with respect to:
Funding
IT support
Process Effectiveness and Improvements
The state should provide a Project Office and at least one conference room with speakerphone throughout the Project Duration.
All documentation in English and the language requirement of the state.
Define state -specific procurement process
Consult
Execute
System Integrator(SI) Team sign-up/onboarding
Consult
Execute
Finalise Trade License Program Vision
Consult
Execute
Execute
Consult
Project Kickoff - Implementation Methodology Presentation
Consult
Consult
Execute
Product Walkthroughs
Consult
Execute
Define Project Steering Committee structure and Project Governance process
Consult
Consult
Execute
Define phases of deployment/ rollout
Consult
Execute
Agreement on Deployment Priorities and high-level delivery timelines
Consult
Execute
Identify and study all TL process
Consult
Execute
Finalize Program Success Metrics for Adoption and Governance adhering to the vision of the program
Consult
Consult
Execute
Stage 1 - Program kick-off
Task/Activity
eGov
TL Cell
SI Team
Internal Capacity Building, program logistics at State and ULBs, as per the current scenario
Execute
Consult
Collection of baseline data to measure end line target for the product (Revenue generated, total properties in ULBs etc.)
Consult
Execute
Consult
Circulation of baseline data collection templates to the state/SI Team
Execute
Consult
Execute
Consult
Initiate policy change, if needed based on Processes defined
Consult
Execute
Consult
Conduct Product familiarisation workshop
Consult
Execute
Initiate collection of master data from pilot ULBs
Consult
Execute
Finalise data migration/collection/sync-up approach
Consult
Execute
Finalise data validation approach
Execute
Consult
Capacity Building for making state team aware about basic usage of tools like MS Office, mails etc.
Execute
Consult
Dashboard design finalisation for Program Tracking
Execute
Consult
Consult
Execute
Development/Integration of portal
Consult
Execute
Third-Party Integrations (Payment gateway, Handheld/pos device)
Consult
Execute
Updation of user manuals and other key documents
Consult
Execute
Preparation & execution of Test Cases
Consult
Execute
Setup monitoring, support & maintenance processes, tools and dashboards
Consult
Execute
TL legacy data collection from Pilot ULBs (at least)
Consult
Execute
Capacity Building for making state team aware about basic usage of tools like MS Office, mails etc.
Execute
Consult
Verification and Migration of Pilot ULB data
Consult
Execute
Identification of participants for UAT session
Execute
Consult
Consult
Execute
Regression UAT and sign off from Pilot ULBs/ State
Execute
Consult
Setting up the Production environment
Consult
Execute
Setting up Support Centre & processes (Help Desk)
Execute
Consult
Training user
Execute
Consult
Training Trainer
Consult
Execute
Stage 4 – UAT & Go Live
Task/Activity
eGov
TL Cell
SI Team
Training the Support Resources
Consult
Execute
Marketing & promotion activities
Execute
Consult
Go Live & launch event
Consult
Execute
Execute
Setup of review and monitoring cadence/team
Execute
Consult
Execute
Consult
Establishment of bug ticketing tool for resolving ground level issues by the state team
Consult
Execute
Training the Users at the district level
Execute
Consult
Pan State Roll Out – Phase wise
Consult
Execute
Execute
Stabilise product
Consult
Execute
Execute
Consult
Plans of ongoing Sustenance in Place with respect to:
Funding
IT support (infra, helpdesk, ongoing enhancements)
Process Effectiveness and Improvements
Consult
Execute
Consult
Implementation
The scope of the implementation will be limited to the services mentioned in Section 2.
eGoc Team will have an identified SPOC for handling the first level of communication with the client unless discussed and agreed.
eGov Team will not be involved in defining the test cases or executing the test cases.
Necessary signoff would be provided by the state upon completion of the defined milestones.


The objective of this document is to compare the capital value method of property tax assessment with other available methods i.e. annual rental value and unit area value method and evolve the approach to incorporate the capital value system in DIGIT with bare minimum changes.
Uttarakhand - Draft for capital value system, IGRS system study.
Andhra Pradesh - Draft for capital value system, IGRS system study.
The process of assessment of property tax will remain the same as the UAV method for assessment of property tax.
There are broadly 3 methods which are being used for property tax assessment.
Annual Rental Value - In this method tax is calculated on the annual rental value.
Unit Area Value - In this method tax is calculated on annual value.
Capital Value - In this method tax is calculated on capital value.
DIGIT already supports the first 2 methods of property tax assessment while the capital value method is relatively new and needs to be incorporated into DIGIT. DIGIT to provide the configuration to define the method of assessment of property tax upfront.
DIGIT already supports masters which are required to calculate the annual rental/ annual value. Below given table illustrates which of those are relevant for the capital value method.
ULBs are divided into definite smaller units of boundaries to define the unit/ rental rates. In the same way, boundaries are defined by the registration and stamp duty department to define the circle rates. DIGIT has to provide the option to define the boundaries from the registration and stamp duty department.
District → SRO → Block or Segment
ULB - SRO mapping - It is mandatory to have and list the SROs on the screen linked with a ULB.
Locality - Segment/ Block mapping - It is nice to have, but not mandatory. Having this mapping will make the segment/ block list refined to be selected by the applicant.
Below given table lists all the fields/attributes which are captured to record the property detail and use for various purposes like assessing the property tax using the current capital value of the property, generating the demand bills, locating the property, and sending the notification to owners of property etc.
ARV and UAV-specific boundaries are not applicable for the calculation of capital value. CVS has a completely different set of boundaries used by the registration and stamp duty department to define the circle rates and the same is given below. SRO and Block are to be added to the location detail of the property to enable CVM.
In the construction detail, occupancy of the property is irrelevant for the calculation of the property’s capital value while other masters like property type, usage, nature of business, and the construction type are used as it is. However, there would be changes in that the values are a little bit different and defined according to the registration and stamp duty department.
No change is required in existing ownership details.
Documents which are required to avail of the service are already configurable.
Property
Property Registration From (UI)
This needs to be configurable, configured with the start of using the product and can not be changed once the product is live and in use.
It is @1% for every completed year after 10 years up to a maximum of 70%. Up to 10 years of building age depreciation are not provided. For the capital value of land, no depreciation is applicable.
To calculate the capital value of a building which is not a flat in the apartment, the capital value of the constructed area and land on which the building is constructed are calculated separately and then added up to arrive at the property's capital value. The capital value is calculated floor-wise.
Capital Value (Vacant Land) = Area of vacant land * circle rate defined for vacant land;
Capital Value (Individual Building) = Land Capital Value + Builtup area of building * circle rate defined for the building;
The capital value for the apartment is calculated on the super built-up area of the flat. In this case, land capital value is not added to flat capital value.
Capital Value (Flat In Apartment) = Super built-up area of flat * circle rate defined for the building;
Calculation of Property Tax - Property Tax = Capital Value * Tax Rates;
In this approach capital value calculation logic, circle rates and associated masters are maintained in DIGIT itself and any change/ revision in respect of calculation logic, and rates are done at IGRS system, which is manually done in DIGIT.
Masters are maintained in DIGIT.
Circle rates are maintained in DIGIT and get updated when required.
Capital value calculation logic is maintained in DIGIT along with depreciation calculation.
Any change in rate and calculation logic needs a change in DIGIT in terms of configuration/ customization.
In this approach, circle rates are maintained in the IGRS system. While capital value calculation logic and the masters are maintained DIGIT. The API is called to fetch the circle rates from the IGRS system.
Masters are maintained in DIGIT in such a way that values can easily be associated with the master values maintained at the IGRS system.
Circle rates are maintained only at the IGRS system and fetched by DIGIT on the fly. It avoids the need to manually maintain the rates in DIGIT.
Capital value calculation logic is maintained in DIGIT along with depreciation calculation, hence a change in capital value calculation needs a change in DIGIT.
In this approach capital value calculation logic rates are maintained in the IGRS system. While only associated masters are maintained in DIGIT. API is called to fetch the capital value from the IGRS system by passing appropriate values.
Masters are maintained in DIGIT in such a way that values can easily be associated with the master values maintained at the IGRS system.
Circle rates are maintained only at the IGRS system.
Capital value calculation logic is also maintained in the IGRS system only.
DIGIT performs the API call to fetch the capital value from the IGRS system by passing all required data to IGRS.
Suppose circle rates are defined as given below.
** Rates are defined per Sq. Mt.
Suppose there is an open plot with an area of 167 sq. mt. Then the capital value calculated will be.
Capital Value = 167 * 16000 = 26,72,000;
The age of the building is less than 10 Years.
Plot Area = 1000 sq. mt.
Built-up Area = 800 sq. mt.
Usage = Pakka
The calculation of capital value will be as illustrated below.
Capital value for land = 1000 * 16000 = 1,60,00,000;
Capital value for construction = 800 * 12000 = 96,00,000;
Capital Value of Property = 1,60,00,000 + 96,00,000 = 25,600,000;
The age of the building is less than 21 Years.
Plot Area = 1000 sq. mt.
Built-up Area = 800 sq. mt.
Usage = Pakka
The calculation of capital value will be as illustrated below.
Capital value for land = 1000 * 16000 = 1,60,00,000;
Capital value for construction = 800 * 12000 = 96,00,000;
Depreciated capital value of construction = 96,00,000 - 96,00,000*11/100 = 85,44,000;
Capital Value of Property = 1,60,00,000 + 85,44,400 = 24,544,000;
Plot Area = 1000 sq. mt.
Built-up Area = 800 sq. mt.
Usage = Shop/ Restaurant/ Office
The calculation of capital value will be as illustrated below.
Capital value for land = 1000 * 16000 = 1,60,00,000;
Capital value for construction = 800 * 64000 = 5,12,00,000;
Capital Value of Property = 1,60,00,000 + 5,12,00,000 = 52,80,03,200;
Super built-up area = 139.355 sq. Mt.
Capital value = 139.355 * 30000 = 41,80,650;
Boundaries (IGRS Boundary Hierarchy)
District
SRO
Location Area
Village/ Mauza
Property Level
Property Type
Property Sub-type
Usage - AP classifies open plots also into residential and non-residential categories.
Floor Level
Floor Type
Sub-usage - Applicable only to commercial properties.
Construction Type - It is termed as construction type as well.
Construction Year - It is calculated from the date of construction.
There are 2 masters from IGRS values which covers Property Type, Usage, Sub-usage, and Construction Type. It also consists of the distance of the property from the road which is currently not available in the DIGIT. Hence the option to establish the mapping between IGRS and DIGIT masters is to be provided.
Area Major Class
Area Class
Boundaries (IGRS Boundary Hierarchy)
District
SRO
Village
Habitation/Locality
Property Level
Property Type
Property Sub-type
Usage - AP classifies open plots also into residential and non-residential categories.
Floor Level
Floor No.
Structure Type - It is termed a construction type as well.
Plinth Area - In some other places it is the built-up area/ super built-up area considered for calculation.
Stage of construction - ULBs assess the completed properties only. Under-construction properties are considered for property tax assessment.
UKD: SROs follow different hierarchies - decided based on tehsil boundary. cannot be categorised as purely urban or rural, can be mixed
AP: SROs have their own jurisdiction which is independent of the ULB. Typically SRO has Urban and Rural areas under its jurisdiction. Some ULBs have more than one SRO. In AP, NIC is the solution provider for IGRS. NIC has shared the Capital Rates data with CDMA. ULBs are asked to share the SRO Codes which fall under their jurisdiction. So, relevant data is pushed to the respective masters of the ULB. Provision was enabled to disable those Areas which doesn't fall under the ULB.
UKD: yes, these details are required.
AP: To calculate Capital Value, Deed Type and Sub-type is not required. Provision is enabled to capture Deep Type at the time of applying for New Assessment and Title Transfer.
UKD: in all cases, the circle rate is calculated based on this
AP: This is not a criterion in AP - might be specific to UKD.
UKD: since earlier, they have floor-based calculation, recommended to keep floor details even though it is not being used in CV calculation. also for subsequently constructed floors, the cost of construction will be different
AP: Yes – floor details need to be captured as:
depreciation is given based on the year of construction. There might be cases where all floors are not constructed at the same time.
usage [Residence/ Non-Residence] might be different for each floor.
UKD: land area does not impact CV
AP: Capital Value is calculated in 2 different ways for buildings:
For Apartments, Floorwise Composite Rate is defined for the specific Door No. is considered. In this case, Land Value is not considered.
For Non-Apartment, Structure Value based on the type of construction is considered for the calculation of Structure Capital Value [SCV]. The piece of Land that is used to construct the Structure is used to calculate Land Capital Value [LCV]. SCV + LCV is the total Capital Value of the Property.
UKD: yes land and building CV are calculated separately and then added.
AP: Yes – Land Value and Structure Value are calculated separately and summed up for Non-Apartments.
UKD: this is based on tehsil revenue records/maps. not used for the calculation of CV but important in MIS
AP: Not familiar with this terminology – might be specific to UKD.
UKD: this is considered in calculating depreciation
AP: Construction Date is required to calculate Depreciation.
UKD: not decided yet but needs to be kept configurable. early payment + one configurable (based on ULB) are recommended heads.
AP: There is no rebate given at the time of calculation of Capital Value.
UKD: based on the year of construction. recommended keeping the year of construction rather than this
AP: Age is dependent on the Date of Construction of the floor which is required for the calculation of Depreciation.
UKD: this will be decided by the Revenue Dept / SRO. ULBs will not have a say also, this needs to be maintained as part of the master data setup.
AP: This might be specific to UKD.
Not Applicable
Occupancy defines whether a property is occupied by the owner itself or rented out to a tenant.
Ownership Type
Ownership Type
It is upto 2 levels of categorization of ownership of a property.
Owner’s Category
Owner’s Category
It is a category of owner based on which owner would be eligible for certain exemption on property tax. E.g. Freedom Fighter, Army Personal etc.
Construction Type
Construction Type
It is to define the consumption category of a building. A building would be a Pakka, Kachha or Semi Pakka etc.
Not Applicable
Distance From Road
Distance of the building from the main road plays the role to calculate the capital value. It is applicable to vacant land properties only.
SRO
Name of sub registrar office within the given district. For smaller cities there is only one SRO.
Not Applicable
Segment/ Block
Localities are further segmented into multiple blocks to define the circle rates.
Tax Rates
Penal Interest
Penal Interest
Penalties
Penalties
Rebates
Rebates
No
Street name on which property is situated.
Door No.
Textbox
Yes
It is mandatory for Buildings and Flats
SRO
Dropdown
Yes
SRO will be populated based on the district of ULB.
Block/ Segment
Dropdown
Yes
It is a non-editable field. It is populated on SRO selected and cross hierarchy mapping if it exists.
This approach avoids the need to maintain rates and calculation logic in DIGIT. Hence any change in rate and capital value calculation will require a change in DIGIT.
10000
Individual
Non-residential
Shop/ Restaurant/ Office
64000
Individual
Non-residential
Others
58000
Flat
30000
Plot
16000
NA
NA
0 से 50 मीटर तक
51 से 350 मीटर तक
350 मीटर से अधिक
0-50 मीटर
51 से 200 मीटर तक
200 मीटर से अधिक
0 से 200 मीटर तक
Flat in apartment
(Super builtup area In Sq. Mt.)
बहुमंजलीय आवासीय भवन में स्थित आवासीय फ्लैट
Residential
NA
NA
NA
Individual building
(Builtup area in Sq. Mt.)
वाण्ज्यििक भवन/ गैर वाण्ज्यििक भवन
Residential
NA
प्रथम श्रेणी (लिन्टरपोष)/ (पक्का )
NA
द्वितीय श्रेणी (टीनपोश)/ (सेमी पक्का/ कच्चा)
NA
Non-residential
दुकान/रेस्टेरेन्ट/कार्यालय
NA
NA
अन्य वाण्ज्यििक प्रतिष्ठान
NA
NA
Area - In some other places it is the built-up area/ super built-up area considered for calculation.
Flat in apartment
Residential
Roof with palm/grass etc. with brick wall
Non-residential
Roof with palm/grass etc. without brick wall
Individual building
Residential
ACC/M. T/ Pan Tile/ Shabad Stone/Zn Sheet
Non-residential
ACC/TIN/Zn Sheet etc. with walls above 10 ft.
Poultry Form
Apartment without common walls at least 3 sides
Ward
Block
Door No.
Age of building - It is calculated from the date of construction.
10
02
बागेश्वर
BAGESWAR
63
11
03
चम्पावत
CHAMPAWAT
65
13
04
देहरादून
DEHRADUN
60
1
05
पौडी गढ़वाल
PAURI GARHWAL
61
5
06
चमोली
CHAMOLI
57
8
07
हरिद्वार
HARIDWAR
68
2
08
नैनीताल
NAINITAL
66
4
09
टिहरी गढ़वाल
TEHRI GARHWAL
59
6
10
पिथौरागढ़
PITHORAGARH
62
12
11
रुद्रप्रयाग
RUDRAPRAYAG
58
9
12
उधम सिंह नगर
UDHAM SINGH NAGAR
67
3
13
उत्तरकाशी
UTTARKASHI
56
7
भिकियासैण
BHIKIYASEN
01
03
रानीखेत
RANIKHET
02
01
बागेश्वर
BAGESWAR
02
02
कपकोट
KAPKOT
03
00
कैम्प कार्यालय टनकपुर ,चम्पावत
CHWAT
03
01
चम्पावत
CHAMPAWAT
04
00
डिस्ट्रिक्ट रजिस्ट्रार, देहारादून
DISTRICT REGISTRAR, DEHRADUN
04
01
देहरादून,प्रथम
DEHRADUN-I
04
02
देहरादून,द्वितीय
DEHRADUN-II
04
03
देहरादून,तृतीय
DEHRADUN-III
04
04
देहरादून,चतु्र्थ
DEHRADUN-IV
04
05
ऋषिकेश
RISHIKESH
04
06
विकासनगर ,प्रथम
VIKASNAGAR-I
04
07
विकासनगर द्वितीय
VIKASNAGAR-II
04
08
चकराता
CHAKRATA
04
09
मसूरी कैम्प कार्यालय
MUSSOORIE
04
10
त्यणी
TYUNI
04
11
कालसी
KALSI
04
12
देहरादून तृतीय 1995-1999
DEHRADUN-III 1995-1999
04
51
देहरादून
Dehradun
04
52
विकासनगर
Vikasnagar
05
00
कैम्प कार्यालय यमकेश्वर, कोटद्वार
KOTDWAR
05
01
कोटद्वार
KOTDWAR
05
02
लेन्सडौन
LANSDOWNE
05
03
पौड़ी
PAURI
05
04
श्रीनगर
SRINAGAR
06
01
चमोली
CHAMOLI
06
02
जोशीमठ
JOSHIMATH
06
03
कर्णप्रयाग
KARNPRAYAG
06
04
थराली
THARALI
07
01
हरिद्वार,प्रथम
HARIDWAR-I
07
02
हरिद्वार,द्वितीय
HARIDWAR-II
07
03
लकसर
LAKSAR
07
04
रुड़की,प्रथम
ROORKEE-I
07
05
रुड़की,द्वितीय
ROORKEE-II
07
06
रुड़की,तृतीय
ROORKEE-III
07
51
हरिद्वार
Haridwar
07
52
रुड़की
Roorkee
08
00
कैम्प कार्यालय कालाढूंगी ,
हल्द्वानी,द्वितीय
08
01
कैम्प कार्यालय कालाढूंगी ,हल्द्वानी,प्रथम
HALDWANI-I
08
02
हल्द्वानी,द्वितीय
HALDWANI-II
08
03
नैनीताल
NAINITAL
08
04
रामनगर
RAMNAGAR
08
05
धारी
DHARI
08
51
हल्द्वानी
Haldwani
09
01
देवप्रयाग
DEVPRAYAG
09
02
घनसाली
GHANSALI
09
03
जाखणीधार
JAKHNIDHAR
09
04
टिहरी
TEHRI
10
01
डीडीहाट
DIDIHAT
10
02
गंगोलीहाट
GANGOLIHAT
10
03
पिथौरागढ़
PITHORAGARH
11
01
रुद्रप्रयाग
RUDRAPRAYAG
11
02
ऊखीमठ
UKHIMATH
12
01
बाजपुर
BAZPUR
12
02
जसपुर
JASPUR
12
03
काशीपुर
KASHIPUR
12
04
किच्छा
KICHHA
12
05
सितारगंज
SITARGANJ
12
06
रुद्रपुर
RUDRAPUR
13
01
बड़कोट
BARKOT
13
02
पुरोला
PUROLA
13
03
उत्तरकाशी
UTTARKASHI
रायपुर मार्ग पर काली मन्दिर से नालापानी चौक होते हुये सहस्त्रधारा मार्ग तक
4
1
5
3071
डोईवाला - बुल्लावाला मार्ग
4
1
5
3072
डोईवाला - खत्ता मार्ग
4
1
5
3073
डोईवाला - धर्मूचक मार्ग
4
1
5
3074
मियॉवाला नहर वाली सड़क से रायपुर राझांवाला तक
4
1
5
3075
नकरौन्दा-घिसर पडी रोड
4
1
5
3076
गूलरघाटी रायपुर रोड
4
1
5
3077
मुख्य हिरद्वार मार्ग मियॉवाला चौक से चकतुनाला होते हये हाथीखाना चौक तक
4
1
5
3078
मुख्य हरिद्वार मार्ग से माजरी माफी (रेलवे फाटक), हरिपुर/नवादा होते हुए इन्दरपुर तक
4
1
5
3079
जोगीवाला चौक से बद्रीपुर होते हुए इन्दरपुर तक, बद्रीपुर चौक से माजरी माफी तक
4
1
5
3080
विधान सभा के बाद स्थित रेलवे फाटक के बाद से एम0डी0डी0ए0 कालोनी केदारपुरम तक
4
1
5
3081
हरिद्वार रोड पर कुऑवाला से गूलरघाटी चौक तक
4
1
5
3082
फयरिंग रेंज के बाद से दौडवाला होते हुये दुधली डोईवाला मार्ग तक, केदारपुर सचिवालय कालोनी के बाद से दुधली डोईवाला मार्ग तक
4
1
5
3083
दून यूनिवर्सिटी से मोथरोवाला लिंक रोड
4
1
5
3084
सहारनपुर हरिद्वार बाईपास मार्द से दक्षिण दिशा की ओर जाने वाली मोथरोवाला मार्ग से दून यूनिवर्सिटी के सामने से केदारपुर / सचिवालय कालोनी होकर जाने वाला मार्ग जो अन्त में फाईरिंग रैज के पुल पर मिल जाता है ।
4
1
5
3085
सहारनपुर हरिद्वार बाईपास मार्ग पर पुलिस चैक पोस्ट के सामने, महिन्द्रा शोरूम के बाराबर से मोथरोवाला रोड बंगाली कोठी के बाद ,केदारपुर, प्राथमिक पाठशाला होते हुए दुधली-डोईवाला मार्ग के पुल तक,
4
1
5
3086
सहारनपुर हरिद्वार बाईपास मार्द से दक्षिण दिशा की ओर जाने वाली कारगी / कारगी चौक से बंजारावाला तक,
4
1
5
3087
मौथरोवाला दूधली डोईवाला मार्ग
4
1
5
3088
चकराता रोड आई0एम0ए0 के सामने से प्रेमनगर-गोरखपुर रोड ग्राम आरकेडियाग्रान्ट की सीमा तक तथा तेलपुरा चौक तक
4
1
5
3089
डाईवर्जन रोड से सिनौला-जोहडी-अनारवाला वाला मार्ग
4
1
5
3090
जाखन-जोहडी मार्ग
4
1
5
3091
रिखोली-मसूरी बाईपास रोड
4
1
5
3092
कुठाल गेट से मसूरी तक मुख्य मार्ग
4
1
5
3093
पुराना पोस्ट आफिस (जोगीवाला) से किद्दूवाला चौक तक
4
1
5
3094
पुलिया नं0 6 से किद्दूवाला चौक होते हुये महाराणा प्रताप चौक तक
4
1
5
3095
मसूरी बाईपास रोड-रिंग रोड (पुलिया नं0 6 के बाद से रायपुर रोड तक )
4
1
5
3096
मालसी पुलिया से दोनाली चौक तक
4
1
5
3097
रायपुर चौक (शिव मन्दिर) से मालदेवता मार्ग वाया वाण्डा वाली
4
1
5
3098
किरसाली चौक से काला गॉव तक
4
1
5
3099
सहस्त्रधारा रोड ( कुल्हान करनपुर के बाद से मालदेवता तक)
4
1
5
3100
मालदेवता सिल्ला क्यारा रोड
4
1
5
3101
रायपुर रोड पर चक्की नम्बर चार से दोनाली चौक तक
4
1
5
6285
रायपुर - थानो मार्ग (रायपुर चौक से थानो चौक तक)
4
1
5
3102
सहस्त्रधारा मार्ग पर स्थित किरसाली चौक से मसूरी बाई पास मार्ग पड़नेवाले समस्त राजस्व ग्राम एवं उक्त मार्ग के अन्त में स्थित साई मन्दिर के बराबर पर पहॅुचने वाले मार्ग तक
4
1
5
3103
गुनियाल गांव-भगवतपुर मार्ग पुरूकुल गॉव तक
4
1
5
3104
हरिद्वार रोड पर लच्छीवाला फलाईओवर के बाद से डोईवाला टाउन एरिया क्षेत्र के प्रारम्भ होने तक
4
1
5
3105
शिमला बाईपास राड पर मेहुवाला ग्राम के बाद से ग्राम बडोवाल की सीमा समाप्ति तक
4
1
5
3106
सहारनपुर रोड पर चन्द्रबनी चौक से वाईल्ड लाईफ संस्थान तक
4
1
5
3107
सहारनपुर रोड से ब्राहमणवाला रोड माजरा क्षेत्र
4
1
5
3108
सहारनपुर रोड से इन्द्रा गाधी मार्ग माजरा क्षेत्र
4
1
5
3109
सहस्त्रधारा रोड पर छतरी के बाद से सहस्त्रधारा तक
4
1
5
3110
रायपुर रोड से काली मन्दिर से रायपुर तक
4
1
5
3111
रायपुर रोड पर सहस्त्रधारा चौक से काली मंदिर तक
4
1
5
3112
सहस्त्रधारा मार्ग पर स्थित आई0टी0 पार्क वाले मार्ग पर पड़नेवाले समस्त राजस्व ग्राम एवं उक्त मार्ग के अन्त में स्थित उप्पल टावर से होते हुये कैनाल रोड से पूर्व तक
4
1
5
3113
सहस्त्रधारा रोड पर आई0 टी0 पार्क के आगे से छतरी तक
4
1
5
3114
मसूरी बाईपास रोड-रिंग रोड (जोगीवाला चौक से पोस्ट आफिस होते हुये पुलिया नं0 6 तक)
4
1
5
3115
लक्ष्मी रोड के चौराहे से बद्रीश कालोनी होते हुए पुलिया नं0 6 तक)
4
1
5
3116
मोथरोवाला रोड (धर्मपुर चौक के निकट से बाईपास रोड तक)
4
1
5
3117
माता मन्दिर रोड (धर्मपुर चौक से बाईपास रोड पर स्थित पुलिस चौक पोस्ट तक)
4
1
5
3118
हरिद्वार रोड पर कुऑवाला से लच्छीवाला फ्लाई ओवर तक
4
1
5
3119
कौलागढ रोड पर सैन्ट्रल स्कूल से आगे कौलागढ की सीमा तक
4
1
5
3120
चकराता रोड पर प्रेननगर बस स्टैन्ड से नदी तक
4
1
5
3121
बाईपास रोड (सहारनपुररोड से हरिद्वार रोड तक)
4
1
5
3122
शिमला बाईपास रोड पर सहारनपुर रोड के 350 मीटर बाद से मेहुवाला ग्राम की सीमा समाप्ति तक
4
1
5
3123
सहारनपुर रोड पर सुभाष नगर चौक से आगे वन क्षेत्र तक
4
1
5
3124
सहारनपुर रोड लाल पुल से महन्त इन्द्रेश अस्पताल- देहराखास होते हुये कारगी चौक तक
4
1
5
3125
सर्वे चौक से रायपुर रोड पर रिस्पना पुल, सहस्त्रधारा चौक होते हुये आई0टी0पार्क तक
4
1
5
3126
हरिद्वार रोड पर जोगीवाला से कुँवावाला तक
4
1
5
3127
सहारनपुर रोड पर टर्नर रोड से सुभाष नगर चौक तक
4
1
5
3128
एफ आर आई के सामने से बसन्त विहार चौक तक
4
1
5
3129
अनुराग नर्सरी रोड पर बल्लीवाला चौक से बसन्त विहार चौक- लवली मार्किट- पंडितवाडी चकराता रोड तक
4
1
5
3130
अनुराग नर्सरी से इन्द्रानगर- सीमाद्वार- जी0एम0एस0 रोड तक
4
1
5
3131
कांवली रोड/शिवाजी मार्ग पर सहारनपुर चौक से बल्लीवाला चौक तक
4
1
5
3132
मौरवियन इन्स्टीटयूट वाली ओल्ड मसूरी रोड पर राजपुर तिराहे से कुठालगेट तक
4
1
5
3133
शहंशाही आश्रम वाली ओल्ड मसूरी रोड पर राजपुर तिराहे से कुठालगेट तक
4
1
5
3134
जी0एम0एस0 रोड (बल्लीवाला चौक से सेवला कलां ट्रान्सपोर्ट नगर होते हुए मौहब्बेवाला, सहारनपुर रोड तक) तथा सकलानी गैस गोदाम क्रासिंग से सहारनपुर रोड पर सब्जी मण्डी तिराहे तक
4
1
5
3135
सहारनपुर रोड पर बिन्दाल पुल से टर्नर रोड तक
4
1
5
3136
गढी चौक से बल्लुपुर चौक वाली- कैनाल रोड
4
1
5
3137
चकराता रोड पर बल्लुपुर चौक से प्रेमनगर बस स्टैण्ड तक
4
1
5
3138
हरिद्वार रोड रिस्पना पुल से जोगीवाला तक
4
1
5
3139
जी0एम0एस0 रोड (बल्लुपुर चौक से बल्लीवाला चौक तक)
4
1
5
3140
कौलागढ़ रोड पर किशन नगर चौक से सैन्ट्रल स्कूल तक
4
1
5
3141
सहारनपुर रोड पर सहारनपुर चौक से बिन्दाल पुल तक
4
1
5
3142
डायवर्जन रोड पर मालसी डीयर पार्क से कुठाल गेट तक
4
1
5
3143
डायवर्जन रोड पर मसूरी बाईपास से मालसी डीयर पार्क तक
4
1
5
3144
राजपुर रोड के समानान्तर कैनाल रोड काठबंगला तक
4
1
5
3145
राजपुर रोड पर मसूरी बाईपास से राजपुर तक (साई मन्दिर होते हुए)
4
1
5
3146
सुभाष रोड
4
1
5
3147
ईस्ट कैनाल राड
4
1
5
3148
न्यू कैन्ट रोड (कैंट सीमा तक)
4
1
5
3149
हरिद्वार रोड प्रिन्स चौक से रिस्पना पुल तक
4
1
5
3150
चकराता रोड पर घंटाघर से बिन्दाल पुल-किशन नगर चौक होते हुये बल्लुपुर चौराहे तक
4
1
5
3151
गांधी रोड पर रेलवे स्टेशन से आढत बाजार होते हुये सहारनपुर चौक तक
4
1
5
3152
सहारनपुर रोड पर रेलवे स्टेशन से सहारनपुर चौक तक
4
1
5
3153
घंटाघर से लक्खीबाग चौकी तक के मध्य स्थित पल्टन बाजार/धामावाला/पीपल मण्डी/दर्शनी गेट
4
1
5
3154
गांधी रोड पर घंटाघर से दर्शन लाल चौक/ प्रिन्स चौक होते हुये रेलवे सटशन तक
4
1
5
3155
राजपुर रोड पर आर0टी0ओ0 कार्यालय से मसूरी बाईपास तक
4
1
5
3157
राजपुर रोड पर घण्टाघर से आर0टी0ओ0 कार्यालय तक
4
1
5
3218
अजबपुर कलां
4
1
5
3420
बिन्दाल रोड
4
1
5
3421
खदरी मौहल्ला
4
1
5
3422
छबील बाग
4
1
5
3423
जटिया मौहल्ला
4
1
5
3424
इन्द्रश नगर
4
1
5
3425
प्रेमनगर
4
1
5
3426
कांवली शेष क्षेत्र (कांवली क्षेत्र की उल्लिखित कालोनी / मौहल्लों को छोड़कर)
4
1
5
3427
चक सेवलाखर्द
4
1
5
3428
कारगी ग्राण्ट
4
1
5
3429
निरंजनपुर
4
1
5
3430
ब्राहमणवाला
4
1
5
3431
सत्यान मौहल्ला
4
1
5
3432
पुराना राजपुर
4
1
5
3433
राजपुर माफी
4
1
5
3434
प्रेमपुर माफी
4
1
5
3435
लोहारवाला
4
1
5
3436
गोपीवाला
4
1
5
3437
धरतावाला
4
1
5
3438
डुगालगांव
4
1
5
3439
थानीगांव
4
1
5
3440
गढी कैन्ट
4
1
5
3441
कौलागढ मय चक भूड
4
1
5
3442
चक शाहनगर
4
1
5
3443
शाहनगर
4
1
5
3444
शाहपुर सन्तौर
4
1
5
3445
इन्दरपुर
4
1
5
3446
केदारपुर
4
1
5
3447
चक डालनवाला
4
1
5
3448
धर्मपुर डांडा
4
1
5
3449
डिफेन्स कालोनी, शाहनगर
4
1
5
3450
एम0डी0डी0ए0 कालोनी अजबपुर
4
1
5
3451
एम0डी0डी0ए0 कालोनी केदारपुर
4
1
5
3452
अजबपुर चक-2 (चक अजबपुरकला)
4
1
5
3453
अजबपुर चक- 1 (चक अजबपुरकला)
4
1
5
3454
अजबपुर खुर्द
4
1
5
3455
ब्रहमावाला
4
1
5
3456
चिडोवाली
4
1
5
3457
धोरण खास
4
1
5
3458
कण्डोली (केन्द्रीयदून)
4
1
5
3459
हथड़ीगांव
4
1
5
3460
रांघडवाला
4
1
5
3461
बाजावाला
4
1
5
3462
माजरा
4
1
5
3464
धर्मपुर
4
1
5
3465
पंडितवाडी
4
1
5
3466
अजीत प्रसाद मार्ग
4
1
5
3467
आनन्द चौक
4
1
5
3468
रामेश्वर मौहल्ला
4
1
5
3469
अखाडा मौहल्ला
4
1
5
3470
मुस्लिम कालोनी
4
1
5
3471
खुडबुडा समस्त ब्लांक
4
1
5
3472
गुजराती मौहल्ला
4
1
5
3473
डांडीपुर मौहल्ला
4
1
5
3474
मन्नूगंज
4
1
5
3475
हकीकतराय नगर
4
1
5
3476
नेताजी मौहल्ला
4
1
5
3477
मालियाना मौहल्ला
4
1
5
3478
लक्खीबाग
4
1
5
3479
रामनगर
4
1
5
3480
सिंगल मण्डी
4
1
5
3481
रीठा मण्डी
4
1
5
3482
पथरीबाग
4
1
5
3483
भण्डारी बाग समस्त ब्लांक
4
1
5
3484
ट्रान्सपोर्ट नगर
4
1
5
3485
बाडीगार्ड
4
1
5
3486
टीचर्स कालोनी
4
1
5
3487
कुम्हारमण्डी
4
1
5
3488
गोविन्दगढ
4
1
5
3489
कौलागढ मय चक
4
1
5
3491
सैय्यद मौहल्ला
4
1
5
3492
हाथीबडकला
4
1
5
3493
विजय कालोनी
4
1
5
3494
चक सालावाला
4
1
5
3495
सालावाला
4
1
5
3496
पथरियापीर
4
1
5
3497
अहीर मण्डी
4
1
5
3498
परसोलीवाला मय चक नरसिह वाला
4
1
5
3499
डोभालवाला
4
1
5
3500
बकराल वाला
4
1
5
3501
डंगवाल मार्ग
4
1
5
3502
ओंकार रोड
4
1
5
3503
मित्रलोक कालोनी
4
1
5
3504
चुक्खुवाला
4
1
5
3505
चुक्खुवाला नई बस्ती
4
1
5
3506
इन्द्रा कालोनी चुक्खुवाला
4
1
5
3507
गढ़ी उद्दीवाला
4
1
5
3508
गढ़ी
4
1
5
3509
आराघर
4
1
5
3510
शास्त्रीनगर (समस्त लेन)
4
1
5
3511
नेहरू कालोनी (क्रमांक 4-D-15 में वर्णित क्षेत्र को छोड़कर)
4
1
5
3512
वीरगिरवाली
4
1
5
3513
घास मण्डी
4
1
5
3514
द्वारिका पुरी
4
1
5
3515
शक्ति एन्कलेव
4
1
5
3516
व्योमप्रस्थ एन्कलेव
4
1
5
3517
अलकनन्दा एन्कलेव
4
1
5
3518
मिलन विहार/ एन्कलेव
4
1
5
3519
काली मंदिर एन्कलेव
4
1
5
3520
पुष्पांजली एन्कलेव
4
1
5
3521
मेघा एन्कलेव
4
1
5
3522
नर्मदा एन्कलेव
4
1
5
3523
अंकित पुरम एन्कलेव
4
1
5
3524
संगम विहार
4
1
5
3525
नेहरूपुरम एन्कलेव
4
1
5
3526
विवेक विहार
4
1
5
3527
दुर्गा विहार
4
1
5
3528
कालिन्दी एन्कलेव
4
1
5
3529
उत्सव विहार
4
1
5
3530
वन विहार
4
1
5
3531
महारानी बाग
4
1
5
3532
हिल व्यू कालोनी
4
1
5
3533
दत्ता इन्कलेव
4
1
5
3534
इंजीनियर्स इन्कलेव (समस्त फेज कॅावली क्षेत्र)
4
1
5
3535
आशीर्वाद इन्कलेव
4
1
5
3536
मोहित नगर
4
1
5
3537
बसंत विहार
4
1
5
3538
इन्दिरा नगर कालोनी
4
1
5
3539
कलालोवाली गली
4
1
5
3659
लूनिया मौहल्ला
4
1
5
3661
नेहरू नगर
4
1
5
3662
गांधी ग्राम
4
1
5
3667
देहराखास
4
1
5
3668
लक्ष्मण चौक
4
1
5
3670
वेस्ट पटेल नगर
4
1
5
3671
ईस्ट पटेल नगर
4
1
5
3672
गुरू रोड
4
1
5
3673
सरस्वती सोनी मार्ग
4
1
5
3674
केशव रोड
4
1
5
3675
पार्क रोड
4
1
5
3676
विचारनन्द मार्ग
4
1
5
3677
पी0डी0 टंडन रोड
4
1
5
3678
नैशनल रोड
4
1
5
3679
मालवीय रोड
4
1
5
3680
महन्त रोड
4
1
5
3681
केशव विहार
4
1
5
3682
काली मंदिर एन्कलेव
4
1
5
3683
शाम्भबी लोक
4
1
5
3684
वसंत विहार एन्कलेव
4
1
5
3685
साई लोक
4
1
5
3686
अशोक विहार
4
1
5
3688
जनकपुरी एन्कलेव
4
1
5
3689
गढवाल कालोनी
4
1
5
3691
शिवालिकपुरम
4
1
5
3692
प्रियदर्शनी एन्कलेव
4
1
5
3694
ओल्ड सहस्त्रधारा रोड (अरविन्द मार्ग)
4
1
5
3695
मानसिंहवाला
4
1
5
3696
ओल्ड डालनवाला
4
1
5
3697
करनपुर बाजार
4
1
5
3698
आर्य नगर
4
1
5
3699
किशनपुर
4
1
5
3700
ढाकपट्टी
4
1
5
3701
जाखन
4
1
5
3702
राजपुर
4
1
5
3703
प्रतीतपुर संतौर
4
1
5
3704
आकाशदीप कालोनी
4
1
5
3705
विजयपार्क एक्सटेशन
4
1
5
3706
विजयपार्क
4
1
5
3707
यमुना कालोनी
4
1
5
3708
ईदगाह
4
1
5
3709
प्रकाश नगर
4
1
5
3710
राम विहार
4
1
5
3711
महेंद्र विहार
4
1
5
3712
आनन्द विहार
4
1
5
3713
नरेन्द्र विहार
4
1
5
3714
दीप लोक कालोनी
4
1
5
3715
चायबाग कौलागढ
4
1
5
3717
कौलागढ
4
1
5
3718
बल्लुपुर
4
1
5
3721
किशन नगर
4
1
5
3722
राजेन्द्र नगर
4
1
5
3723
एम0डी0डी0ए0 कालोनी चन्दर रोड
4
1
5
3725
डिफेन्स कालोनी चक शाहनगर
4
1
5
3729
उषा कालोनी
4
1
5
3731
अमन विहार
4
1
5
3732
गंगोत्री विहार
4
1
5
3733
सुमन विहार
4
1
5
3735
मन्दाकिनी विहार
4
1
5
3736
गोविन्द नगर
4
1
5
3737
मयूर विहार
4
1
5
3741
करनपुर खास (सहस्त्रधारा मार्ग पर स्थित )
4
1
5
3743
केवल विहार
4
1
5
3744
नालापानी रोड
4
1
5
3745
नदी रिस्पना
4
1
5
3747
अधोईवाला
4
1
5
3748
बिष्णु रोड
4
1
5
3749
सेवक आश्रम रोड
4
1
5
3750
डी0एल0 रोड
4
1
5
3751
बंगाली लाईब्रेरी रोड
4
1
5
3753
करनपुर मौहल्ला
4
1
5
3754
प्रिन्सिपल रोड
4
1
5
3755
नेगी रोड
4
1
5
3756
सीमेंट रोड
4
1
5
3757
डी0ए0वी0 कालेज रोड
4
1
5
3758
बंगाली मौहल्ला
4
1
5
3760
एम0डी0डी0ए0 कालोनी, सहस्त्रधारा रोड
4
1
5
3761
उप्पल टावर
4
1
5
3764
राजेश्वर नगर
4
1
5
3766
नैशविला रोड पर काम्बोज स्वीट शॅाप से छोटी बिन्दाल नदी तक
4
1
5
3767
राजपुर रोड, करनपुरखास, एंव खेडा मानसिहवाला का वह क्षेत्र जो कि राजपुर रोड से 350 माटर दूरी के बाद स्थित है (अर्थात क्रमांक 1-A-में वणिर्त क्षेत्र को छोड़कर)
4
1
5
3768
एम0डी0डी0ए0 कालोनी लोहियापुरम
4
1
5
3769
सन्त विनोबा भावे मार्ग (अम्बर पैलेस से बाद)
4
1
5
3770
सन्त विनोबा भावे मार्ग (अम्बर पैलेस से पूर्व)
4
1
5
3771
त्यागी रोड
4
1
5
3772
चन्दर नगर
4
1
5
3773
सिक्का ग्रीन
4
1
5
3774
रिवर वैली
4
1
5
3775
ओर्किड / ओर्चिड पार्क
4
1
5
3776
विहस्प्रिंग विलोज
4
1
5
3777
पैसिफिक गोल्फ इस्टेट
4
1
5
3778
पनाष वैली
4
1
5
4253
रैस्ट कैम्प
4
1
5
6286
शिव लोक कॉलोनी
4
1
5
6287
बद्रीश कॉलोनी
4
1
5
3780
धर्मपुर सब्जी मण्डी चौराहे से लक्ष्मी रोड के चौराहे तक सड़क से 100 माटर दूरी तक (नेहरू कालोनी क्षेत्र की ओर पड़ने वाला क्षेत्र)
4
1
5
3781
हरिद्वार रोड पर रिस्पना पुल तिराहे से विधान सभा होते हुये रेलवे फाटक तक
4
1
5
3782
पो0ओ0 रोड (सुभाष नगर क्षेत्र)
4
1
5
3783
टर्नर रोड (क्लेमेनटाउन क्षेत्र)
4
1
5
3784
कृष्णा विहार
4
1
5
3785
आनन्द विहार
4
1
5
3786
इंजीनियर्स इन्कलेव जाखन क्षेत्र
4
1
5
3787
दून विहार
4
1
5
3788
अंसल ग्रीन वैली
4
1
5
3789
भागीरथीपुरम - जाखन क्षेत्र
4
1
5
3790
दिलाराम बाजार
4
1
5
3791
ओल्ड सर्वे रोड
4
1
5
3792
विदेश संचार कालोनी
4
1
5
3793
आयकर कालोनी
4
1
5
3794
नेहरू कालोनी (सी0 ब्लांक)
4
1
5
3795
इन्द्रा मार्केट
4
1
5
3796
कचहरी रोड
4
1
5
3797
नरदेव शास्त्री मार्ग
4
1
5
3798
पंत रोड
4
1
5
3799
कॅान्वेन्ट रोड
4
1
5
3800
न्यू रोड
4
1
5
3801
पटेल रोड
4
1
5
3802
अंसारी रोड
4
1
5
3803
तिलक रोड
4
1
5
3805
इनद्रापुरम
4
1
5
3806
चन्द्रलोक कालोनी
4
1
5
3807
साकेत कालोनी
4
1
5
3808
इन्द्रबाबा मार्ग
4
1
5
3809
कश्मीरी कालोनी
4
1
5
3810
कोचर कालोनी
4
1
5
3811
जज कालोनी
4
1
5
3812
डिक रोड
4
1
5
3813
उग्र रोड
4
1
5
3814
नेमी रोड
4
1
5
3815
चन्दर रोड
4
1
5
3816
लक्ष्मी रोड
4
1
5
3817
कर्जन रोड
4
1
5
3818
नेहरू रोड
4
1
5
3819
सकुर्लर रोड
4
1
5
3820
तेग बहादुर रोड
4
1
5
3821
बलवीर रोड
4
1
5
3822
मोहिनी रोड
4
1
5
3823
प्रीतम रोड
4
1
5
3824
इन्दर रोड
4
1
5
3825
म्यूनिस्पिल रोड
4
1
5
3826
रेसकोर्स
4
1
5
3827
डालनवाला क्षेत्र में पड़नें वाले समस्त सड़के तथा मौजा धर्मपुर के अग्रवाल बेकर्स- सब्जी मण्डी से पुलियां नं0- 6 तक की सड़क के उत्तर पूर्व का डालनवाला में पड़ने वाला समस्त क्षेत्र
4
1
5
3828
कालीदास रोड
4
1
5
3829
न्यू कैन्ट रोड पर कैन्ट सीमा से आगे गढी डाकरा बाजार तक
4
1
5
3830
नैशविला रोड पर राजपुर रोड से काम्बोज स्वीट शॉप तक
4
1
5
3831
चकराता रोड पर चुक्खुवाला मार्ग, नारी शिल्प मन्दिर मार्ग, रामपुर मण्डी रोड (क्रमांक-8-एच-1 में वर्णित क्षेत्र को छोड़कर)
4
1
5
3832
लक्ष्मी पार्क जैन कासोनी
4
1
5
3833
व्हिस्पिरिंग विलोज
4
1
5
3834
शिवम विहार
4
1
5
3835
शिप्रा कॉलोनी
4
1
5
3836
फ्रेंड्स कॉलोनी
4
1
5
3837
प्लेजंट वैली
4
1
5
3838
एकता कॉलोनी (अकेटा एवेन्यू)
4
1
5
3839
एकता कॉलोनी (अकेटा एवेन्यू)
4
1
5
3840
रामलीला बाजार
4
1
5
3841
घोसी गली
4
1
5
3842
बाबूगंज
4
1
5
3843
झण्डा मौहल्ला/बाजार
4
1
5
3844
हनुमान चौक
4
1
5
3845
मोती बाजार
4
1
5
3846
सरनीमल बाजार
4
1
5
3847
डिस्पेन्सरी रोड
4
1
5
3848
अजमल खॉ रोड
4
1
5
3849
राजा रोड
4
1
5
3850
दर्शनी गेट/आढ़त बाजार (क्रमांक-8-एच -4/5 में वर्णित क्षेत्र को छोड़कर)
4
1
5
3851
पीपल मण्डी (क्रमांक-8-एच -4 में वर्णित क्षेत्र को छोड़कर)
4
1
5
3852
धामावाला (क्रमांक-8-एच -4 में वर्णित क्षेत्र को छोड़कर)
4
1
5
3853
क्रास रोड
4
1
5
3854
न्यू सर्वे रोड
4
1
5
3855
जबर क्षेत्र से आगे नगर पालिका परिषद मसूरी सीमा में दोनों ओर की सम्पत्तियों हेतु ।
4
1
5
3856
सिस्टर बाजार से आगे जबर खेत का क्षेत्र मंलिगार गेट से आगे मसूरी-टिहरी रोड पर जवर खेत का क्षेत्र (कम्युनिटी हास्पिटल, बुड स्टाक स्कूल, बुड स्टाक धोबीघाट, के साथ ही इस मार्ग से सम्पत्तियों के पहुच तक के लिए तथा मसूरी-चम्बा टिहरी बाई पास मार्ग की दोनों ओर की सम्पत्तियों हेतु)
4
1
5
3857
350 मीटर (मसूरी चकराता रोड) कैम्पटी रोड के पश्चात भिलाडू के सम्पूर्ण क्षेत्र नगर पालिका परिषद, मसूरी सीमा तक
4
1
5
3858
लण्ढोर अनुपम होटल से नीचे भण्डारी निवास, रावत हाऊस के पश्चात खच्चरखाना लक्ष्मणपुरी क्षेत्र
4
1
5
3859
गांधी द्वारा के किंकेग मोटर मार्ग से 350 मीटर दूरी के पश्चात तथा देहरादून की ओर तथा आई.टी.बी.पी. का क्षेत्र तथा कार्टमेकेन्जी रोड नगर देवता मन्दिर का क्षेत्र गांधी द्वारा तथा उक्त मोटर मार्ग के दोनों ओर की भूमि (थापर टेरस, जय निवास, हुसैन गंज , विल्ला फॉल आदि का सम्पूर्ण क्षेत्र)
4
1
5
3860
अनुपम होटल से मंलिगार क्षेत्र चौक तक का पूरा (कैन्ट क्षेत्र)
4
1
5
3861
चार्लीविली गेट के नीचे हैप्पी वैली, के साथ ही पोलोग्राउण्ड का सम्पूर्ण क्षेत्र तथा देवदार रोड होते हुए तिब्बतन होम फाउण्डेसन के साथ ही इस क्षेत्र में नगर पालिका परिषद, मसूरी सीमा तक
4
1
5
3862
हाथीपांव व आसपास के क्षेत्र जहां पर खनन कार्य किया जाता था, पार्क एस्टेट, क्लाउड एण्ड जार्ज एवरेस्ट का सम्पूर्ण क्षेत्र ग्राम दुधली तक नगर पालिका परिषद मसूरी सीमान्तर्गत)
4
1
5
3863
पिक्चर पैलेस से लण्ढौर बाजार का पूरा क्षेत्र अनुपम होटल तक (बूचडखाना, अनुपम चौक गुरूद्वारा रोड से भण्डारी निवास, रावत हाऊस तक)
4
1
5
3864
मसूरी इंटरनेशनल स्कूल सीमा समाप्ति पर उससे आगे कैम्पटी फाल रोड (मसूरी से चकराता) पर नगर पालिका सीमा मसूरी तक के दोनों ओर के भाग के लिए (श्रीनगर इस्टेट)
4
1
5
3865
मंलिगार होटल से ऊपर का क्षेत्र 4 दुकान होकर सिस्टर बाजार से दूरदर्शन केन्द्र तक का क्षेत्र चार दुकान से र्सीक वाली कोठी तक का क्षेत्र, र्सीक वाली कोठी से लाल टिब्बा के पिछे की ओर की सड़क का पूरा क्षेत्र
4
1
5
3866
कचहरी के उपर एवोलोन गनहिल रोड को जोड़ने वाला तिराहा के पाश्चात का पूरा क्षेत्र सेन्ट मेरी अस्पताल व साहू जैन इस्टेट व पोंदार हाउस के पश्चात का सम्पूर्ण ऊपरी भाग
4
1
5
3867
घंघटार लण्ढौर से साउथ रोड होकर सिविल अस्पताल, वाईन वर्ग ऐलन स्कूल एवं बाला हिसार क्षेत्र (घन्टाघर से बालाहिसार तक जिसे पुराना राजपुर रोड से भी जाना जाता है)
4
1
5
3869
जीरो पॉइंट से आगे हरनाम सिंह रोड पर वेवरली कान्वेन्ट स्कूल (काला स्कूल गेट) से पूर्व का सम्पूर्ण क्षेत्र
4
1
5
3870
चार्लीविला गेट से डिक रोड होकर कम्पनी बाग, लौगी गार्डन, होलो ओक का सम्पूर्ण क्षेत्र
4
1
5
3871
नगर पालिका परिषद, मसूरी में सम्मिलित ग्राम मिसरासपट्टी का क्षेत्र
4
1
5
3872
भट्टा गॉव नगर पालिका सीमा के अन्दर का भाग के लिए मार्ग के दोनों ओर के भाग (देहरादून- मसूरी मार्ग हेतु निर्धारित 350 मीटर दूरी को छोड़ कर)
4
1
5
3873
होटल सेवेन ओक्स से आगे कैमल्स बैक रोड पर बहुगुणा पार्क से पूर्व तक (मार्ग के दोनों ओर पहुच सम्पत्तियों तक के लिए
4
1
5
3874
कम्पनी बाग लौगी गार्डेन के पश्चात हाथी पांव चौक तक
4
1
5
3875
घोबीघाट मसूरी झील के पश्चात ग्राम भट्टा तक नगर पालिका परिषद मसूरी सीमा में (देहरादून- मसूरी मार्ग हेतु निर्धारित 350 मीटर दूरी को छोड़ कर)
4
1
5
3876
बड़े मोड के अंतिम छोर के पाश्चात से किंकेग मोटर मार्ग पर दोनों ओर 350 मीटर की परिधि में किंकेग से नीचे घनानन्द रा.इ.का. के पश्चात देहरादून की ओर धोबीघाट का क्षेत्र नगर पालिका परिषद, मसूरी सीमा अन्तर्गत कीलिफ़ हाल इस्टेट का सम्पूर्ण क्षेत्र)
4
1
5
3877
राधा भवन इस्टेट, मुख्य भाग से आगे की ओर गुरूनानक स्कूल से सड़क से ऊपरी भाग न्यू सर्कुलर रोड से मानव भारती संगीला एस्टेट क्षेत्र कम्पनी बाग उपरी क्षेत्र वेवरली कान्वेंट स्कूल (काला स्कूल) गेट तक
4
1
5
3878
लाइब्रेरी चौक से होटल क्लासिक तथा लाइब्रेरी बस स्टैन्ड से नीचे की ओर 350 मीटर दूरी के पश्चात मुख्य मेनर हाउस भवन तथा सर्कुलर रोड एवं सप्रिंग रोड मोतीलाल नहरू रोड से लेकर सम्पूर्ण चमर खण्ड का क्षेत्र, मैकनेन पम्प क्षेत्र, ऐस्टल इस्टेट का सम्पूर्ण क्षेत्र, आई0टी0बी0पी0 गेट से पहले तक
4
1
5
3879
चकराता रोड पर सा0नि0वि0 निरीक्षण भवन मसूरी के क्षेत्र से आगे चकराता टोल में मसूरी इंटरनेशल स्कूल तक पोलो ग्राउन्ड क्षेत्र तक 100 मीटर रोड क्षेत्र की ओर(श्रीनगर इस्टेट)
4
1
5
3880
झडीपानी क्षेत्र (ओकग्रोव स्कूल का क्षेत्र, झडीपानी टोल के साथ ही राजपुर पुराना टोल नगर पालिका परिषद, मसूरी सीमान्तर्गत)
4
1
5
3881
बार्लोगंज क्षेत्र (जेपी बैड से बार्लोगंज मार्ग की सम्पूर्ण सम्पत्तियों हेतु, बालाहिसार मार्ग पर बालाहिसार के पश्चात सम्पूर्ण मैरीविल एस्टेट, भट्टा गॉव नगर पालिका सीमा तक, देहरादून-मसूरी मार्ग हेतु निर्धारित 350 मीटर दूरी को छोड़कर सम्पूर्ण बार्लोगंज-झडीपानी मार्ग पर स्थित भूमि भवन जो नगर पालिका परिषद मसूरी की सीमा के अन्तर्गत हो)
4
1
5
3882
लाइब्रेरी चौक से आगे मोतीलाल नहरू मार्ग पर दोनो ओर पहुच मार्ग (काला स्कूल) वेवरली कान्वेंट स्कूल तक का क्षेत्र ।
4
1
5
3883
मसूरी मार्डन स्कूल तिराहे से राधा भवन मसूरी मुख्य भवन से होते हुए मान काटेज, बडौदा हाऊस चण्डालगढी क्षेत्र एवं विन्सेट हिल का सम्पूर्ण ऊपरी क्षेत्र
4
1
5
6288
पिक्चरपैलेस के ऊपर नगर पालिका परिषद कार्यालय मसूरी, हिमालय क्लब नान पारा हो कर आर एन भार्गव इंटर कॉलेज मार्ग होते हुये वाइन वर्ग एलेन स्कूल प्राइमरी सेक्शन तक तथा घंटा घर से ओकबुश रोड होते हुये
4
1
5
3884
इन्द्राभवन से आगे चार्लीविली गेट तक (साथ ही इस मार्ग से सम्पत्तियों तक की पहुच हेतु)
4
1
5
3885
लाईब्रेरी चौक के बाद आगे इन्द्रा भवन तक (होटल ओएसेज मार्ग, गाडीखाना, सेवाय होटल स्टाफ क्वाटर्स का भाग, इन्दिरा भवन आदि के साथ ही इस मार्ग से सम्पत्तियों तक की पहुच हेतु)
4
1
5
3886
माल रोड पर रोजलीन होटल से होते हुए कैमल बैक रोड पर बहुगुणा पार्क तक का भाग (प्राईमरी पाठशाला लाईब्रेरी भिलाडू मार्ग पर मित्तल हाउस व धर निवास आदि तक का अन्तिम भाग )
4
1
5
3887
लाइब्रेरी चौक से संपूर्ण माल रोड कुलड़ी बाज़ार, जफर हाल , स्टुडियो लौज़, तिलक मार्ग , बारह कैंची पर डॉक्टर ठुकराल के आगे वाले किंक्रग की ओर वाले बंद तक सड़क के दोनों ओर 50 मीटर तक कैमल बैंक रोड पर होटल नन्द विला एवं होटल सोलिटेयर प्लाज़ा तक (दुग्गल विला का गुनसोला निवास दुग्गल विला कॉटेज, रोज़लीन होटल से कालाकाकर हाउस एवम चर्च रोड पर पोदार हाउस आदि तक का भाग, कचहरी रोड पर एवलॉन-गनहिल मार्ग को जोड़ने वाला तिराहा, हैकमन्स होटल मे शगुन पैलेस, घोडा लाइन, हम्पटन कोर्ट, क्रेग कालिज आदि के साथ ही एस्टेला कालिज, लॉलर बैक, तिब्बतन मार्केट मार्ग पर इन्दर निवास पदमनी आदि के साथ ही वासू सिनेमा बिल्डिंग आदि)
4
1
5
3991
डोईवाला टाउन एरिया का शेष क्षेत्र0
4
1
5
3992
डोईवाला चौक से शुगर मिल प्रेम नगर बाज़ार चादमारी चौक तक
4
1
5
3993
डोईवाला चौक से रेल्वे स्टेशन रोड पर रेल्वे स्टेशन तक
4
1
5
3994
डोईवाला चौक से देहारादून रोड पर टाउन एरिया सीमा समाप्ती तक
4
1
5
3995
डोईवाला चौक से ऋषिकेश रोड पर सौंग नदी तक
4
1
5
3996
मारखम ग्रन्ट- ।
4
1
5
3997
मिस्सरवाला खुर्द
4
1
5
3999
हंसूवाला
4
1
5
4000
डोईवाला
4
1
5
4001
घिसरपड़ी
4
1
5
4002
मिस्सरवाला कलां
4
1
5
4003
लच्छीवाला
4
1
5
4004
डैशवाला
4
1
5
4005
गुजरमी
4
1
5
4006
जगातखाना, जगातखाना करनपुर
4
1
5
4007
डोमगांव
4
1
5
4008
भंडारीवाला मयचक
4
1
5
4009
मंगलूवाला
4
1
5
6289
भण्डारी वाला
4
1
5
4010
विजयपुर गोपीवाला
4
1
5
4011
लाडपुर
4
1
5
4012
गुजराडा मानसिंह
4
1
5
4013
आरकेडिया ग्रांट
4
1
5
4014
नवादा
4
1
5
4015
नथुवावाला
4
1
5
4016
चंद्रबनी ग्रांट
4
1
5
4017
चकतुनवाला
4
1
5
4018
चकरायपुर
4
1
5
4019
दानियों का डांडा
4
1
5
4020
सेवलाखुर्द
4
1
5
4021
सुन्दरवाला
4
1
5
4022
सौन्धोवाली ,सौन्धोवाली धौरन
4
1
5
4023
रायपुर
4
1
5
4024
हर्रावाला
4
1
5
4025
हरभजवाला
4
1
5
4026
हरबंश वाला
4
1
5
4027
हरिपुर
4
1
5
4028
सिनौला
4
1
5
4029
पित्थूवाला
4
1
5
4030
मियांवाला
4
1
5
4031
किरसाली पछवादून
4
1
5
4032
मेहुवाला माफी
4
1
5
4033
माजरी माफी
4
1
5
4034
मोहकमपुर कलां
4
1
5
4035
मोहकमपुर खुर्द
4
1
5
4036
मोहब्बेवाला
4
1
5
4037
मक्कावाला
4
1
5
4038
कुवांवाला
4
1
5
4039
कुठाल गांव
4
1
5
4040
आसारोडी
4
1
5
4041
चन्द्रबनी
4
1
5
4042
चन्द्रबनी खालसा
4
1
5
4043
विजयपुर हाथीबड़कला
4
1
5
4044
मिटठी भेडी
4
1
5
4045
मरेठा
4
1
5
4046
कुल्हान करनपुर
4
1
5
4047
कुल्हान मानसिंह
4
1
5
4048
सोन्धोवाली मानसिंह
4
1
5
4049
नागल हटनाला
4
1
5
4050
हटनाल गांव
4
1
5
4051
आमवाला करनपुर
4
1
5
4052
कालागांव
4
1
5
4053
चांलग
4
1
5
4054
आमवाला उपरला
4
1
5
4055
आमवाला मझला
4
1
5
4056
किरसाली परवादून
4
1
5
4057
तरलानांगल
4
1
5
4058
ननूरखेडा
4
1
5
4059
बालावाला
4
1
5
4060
बगराल गांव
4
1
5
6290
नकरौंदा
4
1
5
6291
जोहड़ी
4
1
5
6292
मोथरोंवाला
4
1
5
4061
भंडारगाँव
4
1
5
4062
खुरावा
4
1
5
4063
खाला गांव
4
1
5
4064
आमवाला तरला
4
1
5
4065
नत्थनपुर
4
1
5
4066
डांडा नूरीवाला
4
1
5
4067
डांडा लखौण्ड
4
1
5
4068
डांडा खुदानेवाला
4
1
5
4069
डांडा धोरण
4
1
5
4070
सेवलाकलां
4
1
5
4071
भारुवालाग्रान्ट
4
1
5
4072
मासली
ARVM
Annual Rental Value Method
UAVM
Unit Area Value Method
CVM
Capital Value Method
IGRS
Inspector General of Registration and Stamps
CV
Capital Value
Property Type
Property Type
It is to define the structure of property as a property would be a vacant land, or a building.
Property Usage
Property Usage
It is upto 3 levels of categorization of usage of a property.
Floors
Floors
It is to define the floors e.g. Ground Floor, First Floor etc.
ULB
ULB
It is to define the ULB with all its attributes like District, Address, Grade etc.
Ward
Not Applicable
All the ULBs in the state have only one boundary hierarchy i.e. Admin Boundary which is used for both Revenue and Administration purposes. Ward is the smallest boundary in this hierarchy and placed at second level just below the ULB boundary itself.
Locality
Not Applicable
Locality or Mohalla is the smallest boudry unit within the ULB which defines the state of the bounded area. So a locality would be specified as posh, modest, slum etc. and the rares are defined accordingly. Rental and Unit Area rates are defined based on the locality.
Rental Rates
Not Applicable
Rental rates are generally defined based on the locality, usage, and the construction type of the property.
Unit Rates
Not Applicable
Rental rates are generally defined based on the locality, usage, and the construction type of the property.
Not Applicable
Circle Rates
Circle rates are generally defined based on the Segment or Block, Usage, Property Type, Construction Type, and Distance of property from the road.
Pincode
Textbox
No
Pincode of the locality property belongs to. Though it is non-mandatory.
Locality
Dropdown
Yes
Locality to which property belongs to. It is internally mapped to ward and ULB boundary.
Street Name
Individual
Residential
Pakka
12000
Individual
Residential
Kachcha
Forming Land
कृषि भूमि
Vacant Land
(Land area In Sq. Mt.)
Forming Land
Vacant Land
Residential
RCC
Non-residential
Mud Roof
DISTRICT MASTER
01
अल्मोडा
ALMORA
Sub Registrar Office Master
01
01
अल्मोडा
ALMORA
01
Segment Master
4
1
5
Occupancy
Not Applicable
Tax Rates
Textbox
अकृषि भूमि
64
02
3070


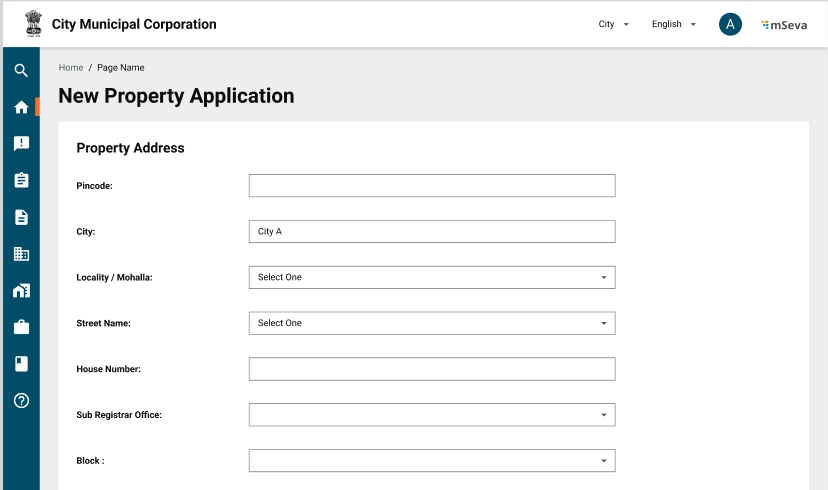