An illustrative guide to using the Inventory Management module
In health campaigns, it is crucial to keep track of the resources delivered to prevent stock mis-handlings and maximise coverage. This helps to track the resource till the last mile delivery, that is, it captures the stock till it reaches the distributor, and the distributor can record the quantity of stock received along with other stock transactions.
Users can do the following:
Track stock till the last mile.
Capture stock details till the end user to keep track of the transactions that take place.
Record the stock transactions during a campaign.
Ensure the safety of stock.
Keep track of the stock count and verify from both ends (received versus issued) to prevent the misuse of stocks.
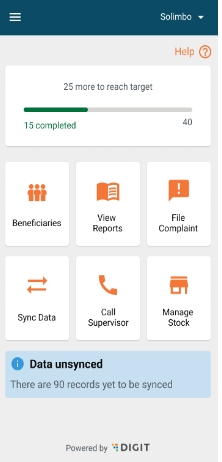
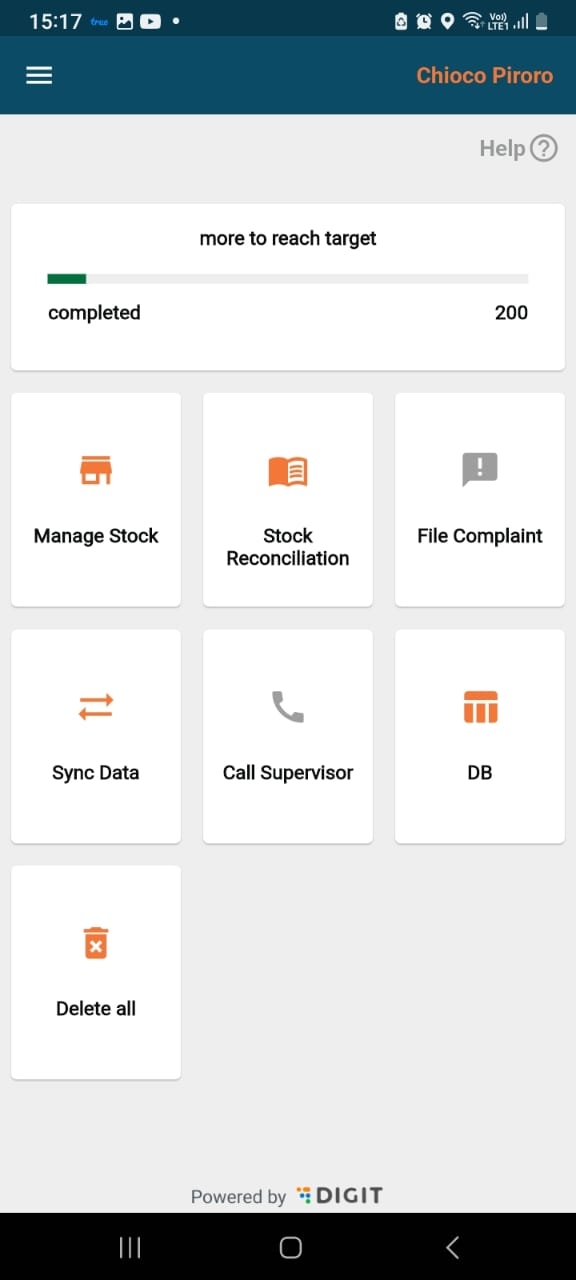
After logging into the application, the user lands on this screen which displays daily performance (number of households registered). The progress bar must reset daily at 00:00 hours, and start from 0 registrations. The action buttons related to the beneficiary are present which include:
Beneficiaries
View Reports
Sync Data
Call Supervisor
File Complaint
Manage Stock
On the bottom, there is a card that shows how many records are unsynced for the user’s convenience to sync data. If all the records are synced, then the card must say “All records are synced”.
The help button is on every screen of the application, and by clicking on it, a user can get a walkthrough of the elements on that screen.
On the top right, the administrative area assigned to the user is displayed which will be based on the level of hierarchy.
The hamburger button on the top left corner covers some other actions mentioned further.
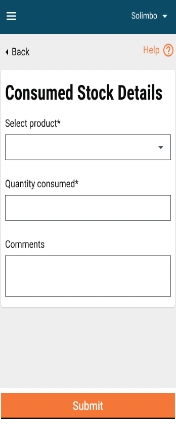
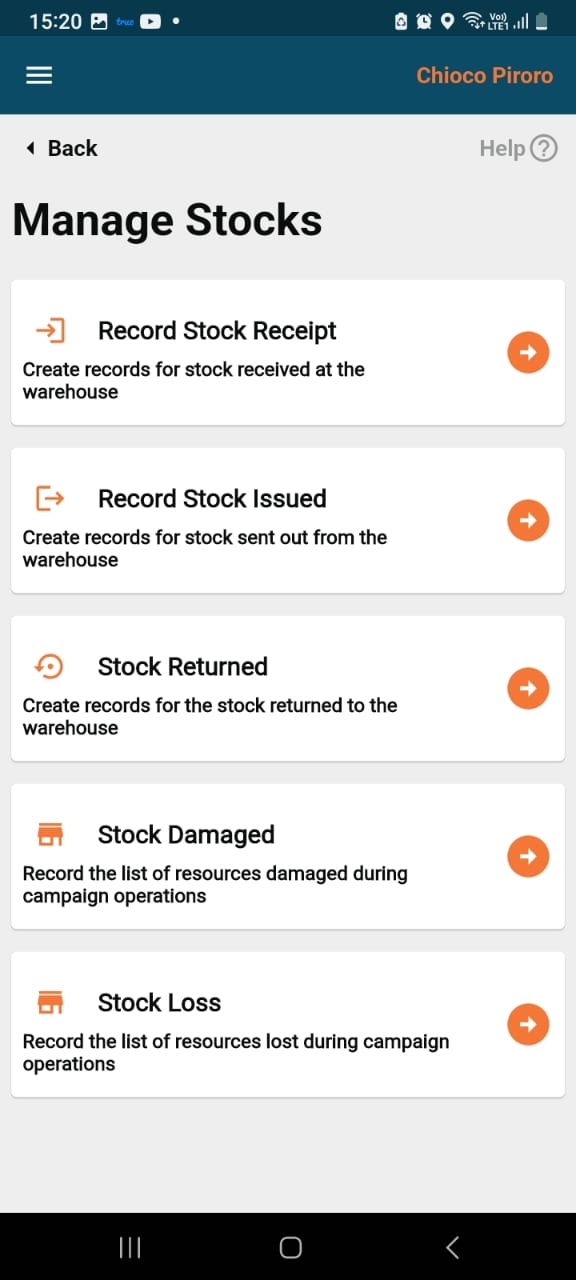
This includes all the stock transactions that can be captured by the distributor.
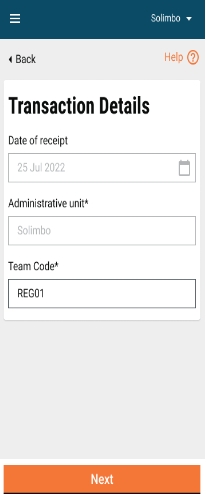
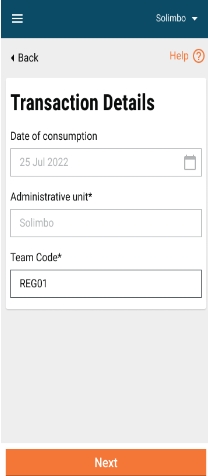
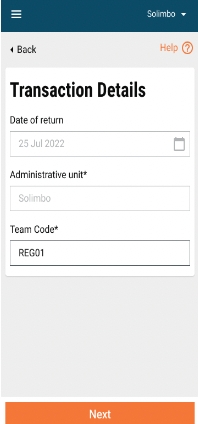
The transaction details are captured on this screen. The date and administrative unit fields are auto-captured by the system and are non-editable. The team code/identifier is captured from the user profile and it must be editable.
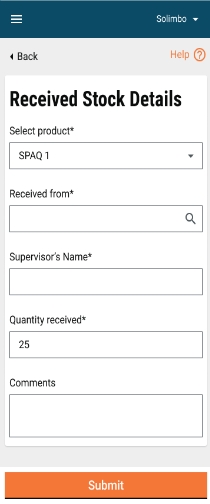
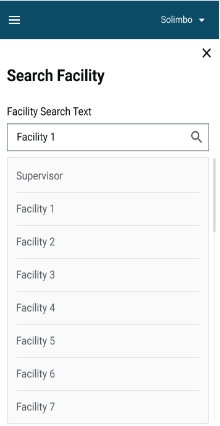
The stock-related details are captured on this screen. “Select product” is a dropdown field that includes the resource that has been received. “Received from” is a search-based dropdown field, clicking on which navigates the user to the search facility screen that includes the facilities along with ‘Supervisor’ as the value. If the user selects ‘Supervisor’ then he/she must enter the supervisor’s name. The user must enter the quantity received, and if any additional comments are needed, they can be added.
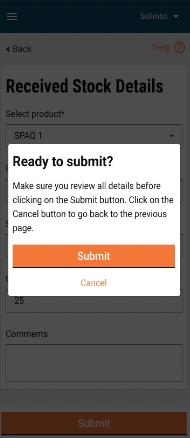
Once the user clicks on ‘Submit’, the confirmation pop-up appears. If the user clicks on the ‘Submit’ button, the acknowledgement screen appears, and ‘Cancel’ takes the user back to the previous screen.
This screen includes all the fields except for the facility field.
This screen includes all the fields except for the facility field.
Click on the links below to learn more:
This enables a user to verify whether the physical count and calculated stock values are the same or not.
After successful login, a user lands on the home screen, which consists Stock Reconciliation". When the user clicks on the stock reconciliation button on the home screen, he/she is navigated to this screen where they need to verify whether the physical count and calculated stock values are the same or not.
In the select product field, the user needs to select a product from the dropdown. There are warehouse name and administrative area fields as well, all of which are mandatory. The following details are there:
Date of Reconciliation
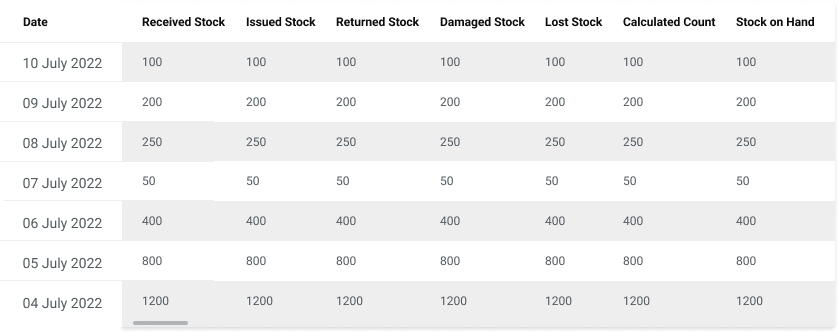
Received Stock
Issued Stock
Returned Stock
Damaged Stock
Stock Lost
Stock on Hand- The stock on hand is calculated as incoming stock minus outgoing stock. There is a hint icon for how the stock on hand is calculated. The received and returned stocks will be considered incoming stocks. The issued, damaged, and lost stocks will be considered outgoing stocks.
The date of reconciliation is system-generated and non-editable. Other values are calculated based on the data recorded in stock receipts, stock issued, and the stock returned screens. In the manual stock count, the user needs to enter the value for manually counted inventory. If the stock on hand does not match the physical count, then the latter must take precedence, provided the user has submitted the form with a proper reason. In the comments field, the user can add remarks and comments.
When a user clicks on the view reports button on the home screen, he/she is navigated to this page where he/she has the provision to view the following reports:
Stock Received
Stock Issued
Stock Returned
Stock Reconciliation
Users can click on the arrow button placed next to every transaction to open the respective report. The back button will navigate them back to the home screen.
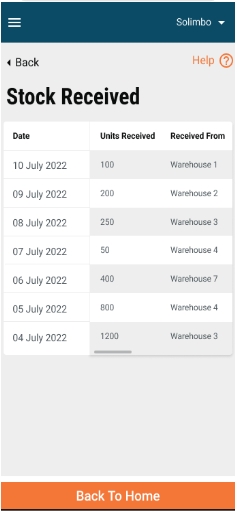
When the user clicks on the “Stock Received” button, the report for stock received appears which provides a tabular representation of the data. The table is scrollable, both vertically and horizontally, to cater to multiple values and columns. The date column is kept frozen and other columns are scrollable. The first column is for the date of the receipt, followed by units received in the second column, and received from (warehouse name) in the third column. The “Back To Home” button is placed at the bottom of the screen which navigates the user back to the home screen.
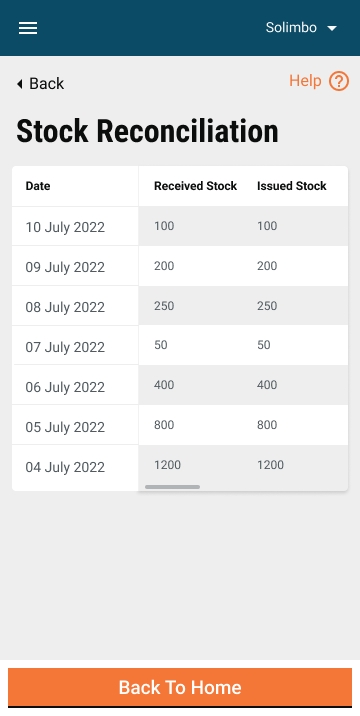
For the stock reconciliation report, the table consists of the date in the first column and other columns. The “Back To Home” button will navigate users to the home screen.
This enables a user to manage stocks, besides facilitating stock reconciliation.
On this page, the following actions can be performed:
After a successful login as a warehouse manager, a user lands on the home screen which consists of "Manage Stock", and "Stock Reconciliation".
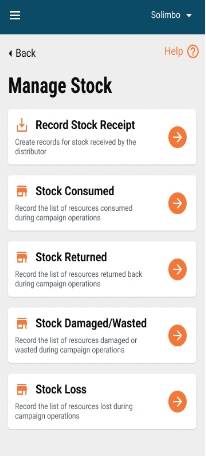
This screen consists of the following types of transactions that take place for the the inventory:
Stock Receipt
Stock Issued
Stock Returned
Stock Damaged
Stock Loss
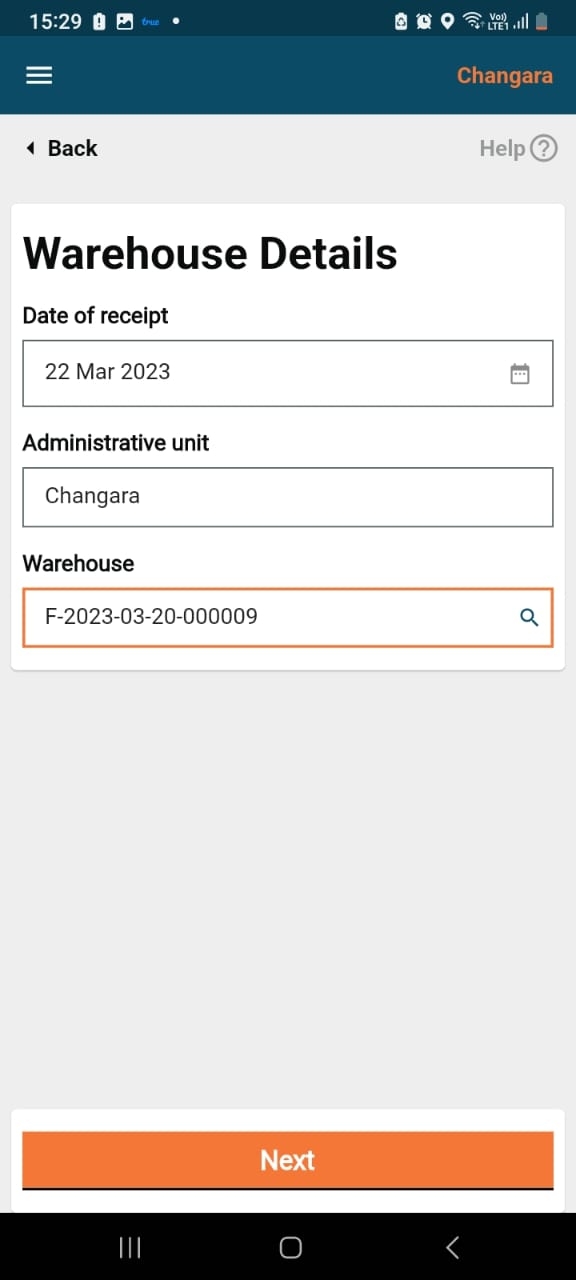
When a user clicks on record stock receipt, the warehouse details screen will appear.
The latitude/longitude captures the geo-location of the warehouse which can be fetched with the help of the location icon within the field.
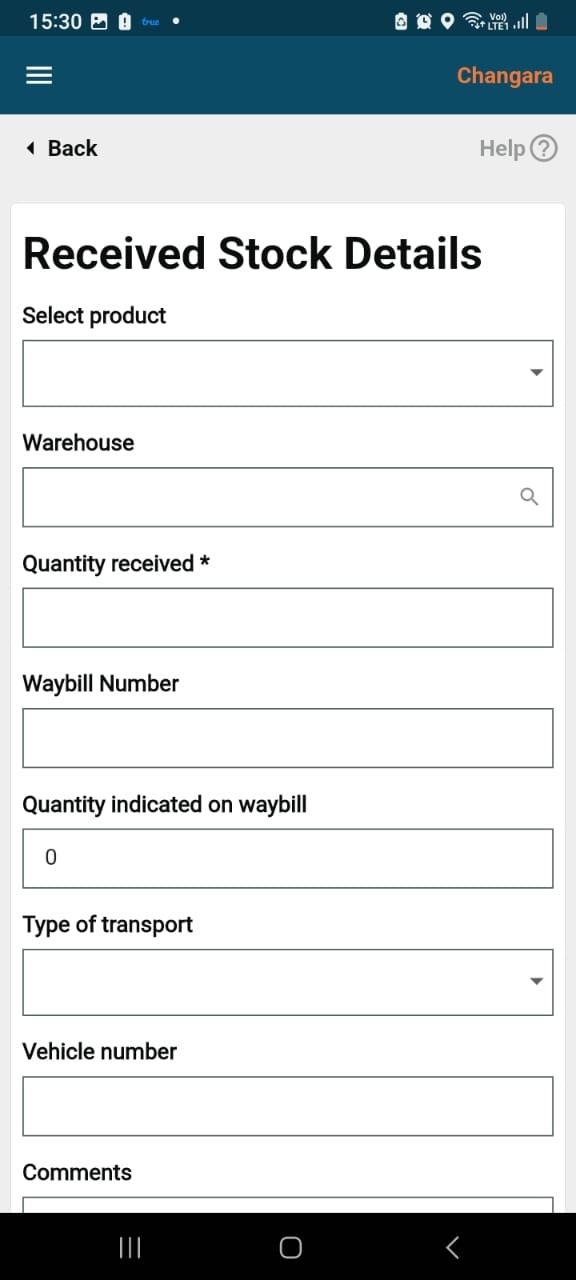
Clicking on the next button will navigate the user to the "Received Stock" details screen.
The "Receipt Stock Details" form has some mandatory fields: product, received from warehouse, and quantity received.
The optional fields include waybill number, quantity indicated on waybill, transport type, vehicle number, and comments.
Clicking on the submit button will take the user to the success page.
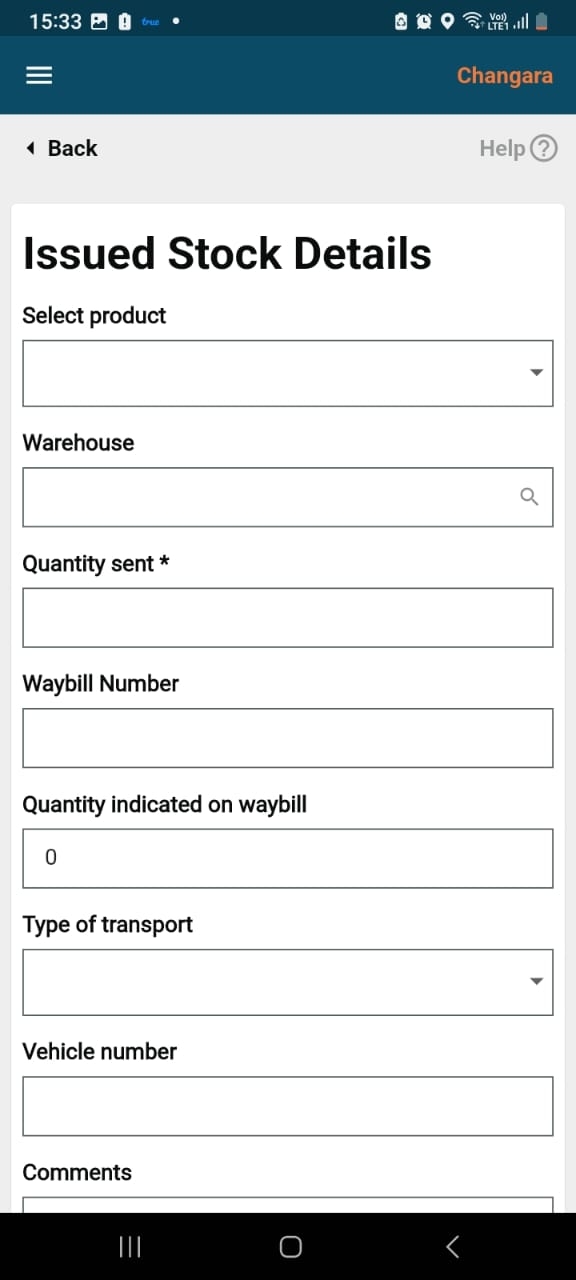
This screen captures the mandatory fields: Product, Issued to warehouse, and the quantity.
The optional fields include waybill number, quantity indicated on waybill, transport type, vehicle number and comments.
Clicking on the submit button will go to the success page.
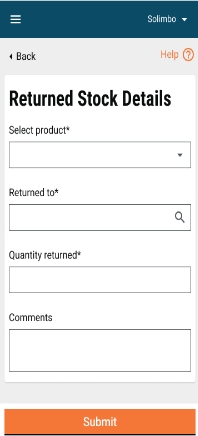
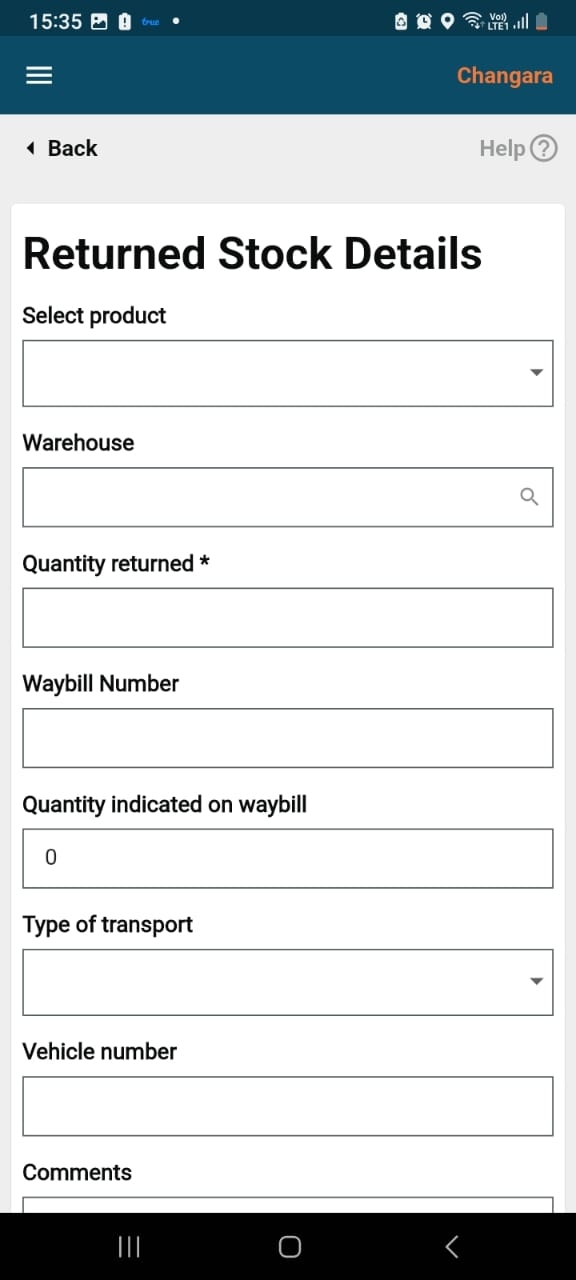
This screen captures the mandatory fields: Product, returned to warehouse, and quantity returned.
The optional fields are waybill number, quantity indicated on waybill, transport type, vehicle number, and comments.
Clicking on the submit button will take the user to the success page.
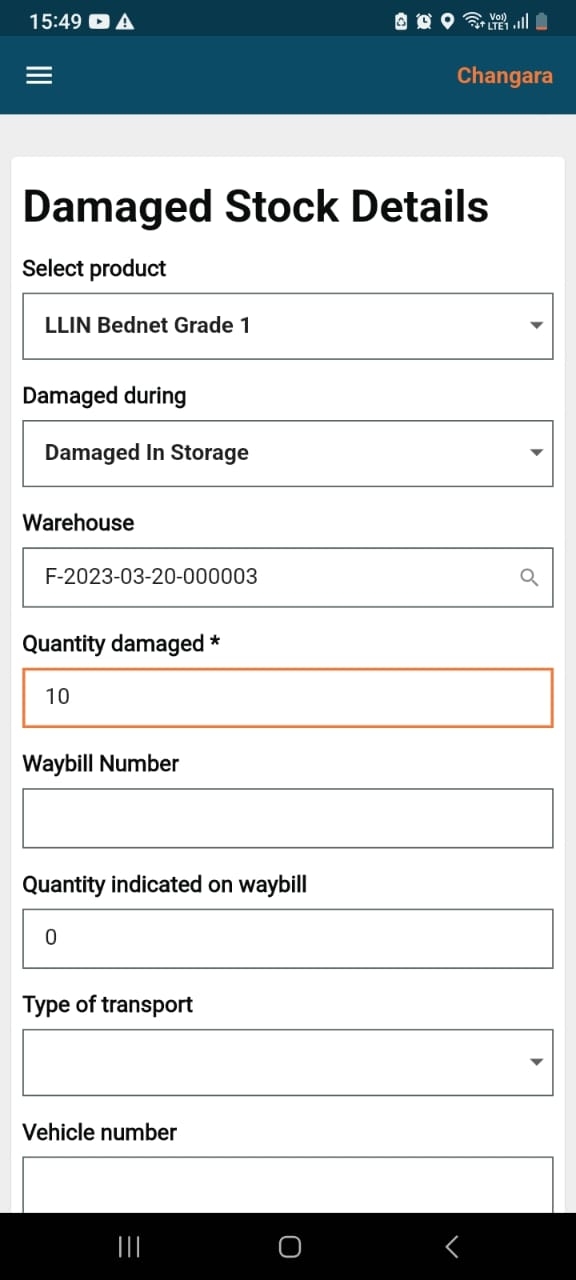
This screen captures the mandatory fields: Product, damaged during, received from, and quantity damaged.
The optional fields include waybill number, quantity indicated on waybill, transport type, vehicle number, and comments.
Clicking on the submit button will take he user to the success page.
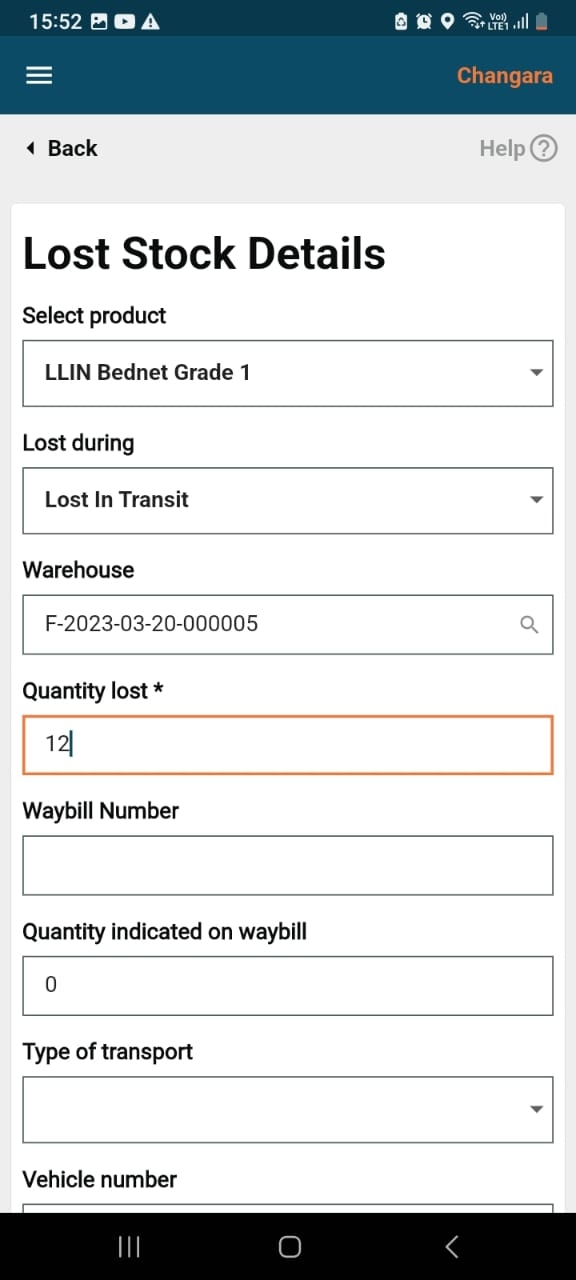
This screen captures the mandatory fields: Product, lost during, received from, and quantity lost.
The optional fields are wWaybill Number, quantity indicated on waybill, transport type, vehicle number, and comments.
Clicking on the submit button will take the user to the success page.
Click to learn more about stock reconciliation.
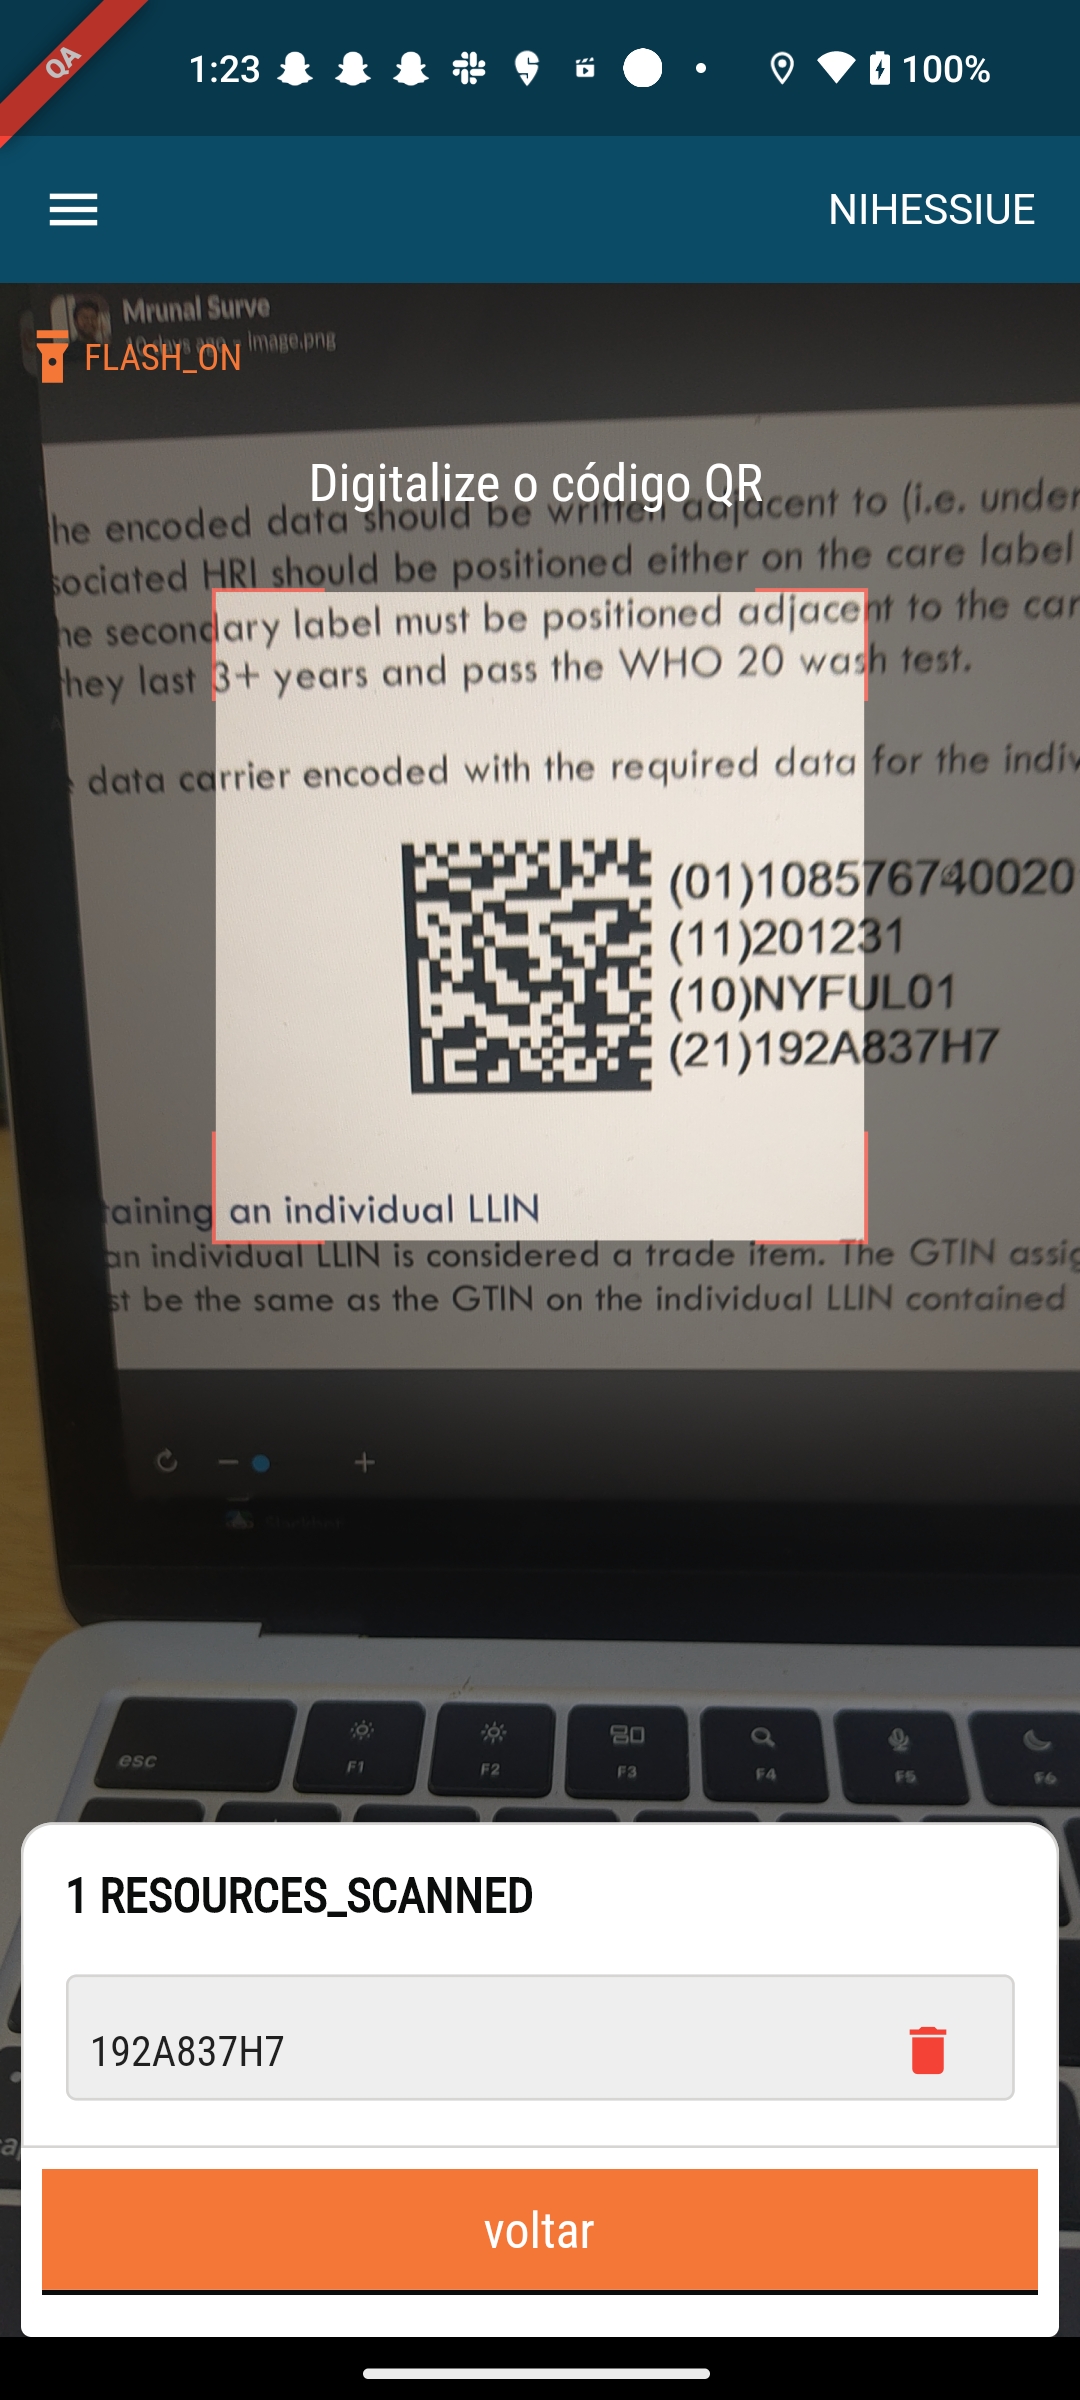
Scan the resource code to track the resources delivered:
Package utilised to parse the barcode : https://pub.dev/packages/gs1_barcode_parser.
Package utilised to QR code scanner: https://pub.dev/packages/qr_code_scanner
GS1 - standards : https://www.gs1.org/docs/barcodes/GS1_DataMatrix_Guideline.pdf
Package utilised for barcode scanning-
https://pub.dev/packages/google_mlkit_barcode_scanning
Given a field value formatted with the GS1 data matrix standard and a string key from the GS1 application identifiers. The function should look and return the value linked to the provided key.
A well-formatted value would look like:
]d201084700069915412110081996195256 10DXB2005 17220228

