
2. Infra-as-code (Terraform)
To deploy the solution to the cloud there are several ways that we can choose. In this case, we will use terraform Infra-as-code.
Overview
Terraform is an open-source infrastructure as code (IaC) software tool that allows DevOps engineers to programmatically provision the physical resources an application requires to run.
Infrastructure as code is an IT practice that manages an application's underlying IT infrastructure through programming. This approach to resource allocation allows developers to logically manage, monitor and provision resources -- as opposed to requiring that an operations team manually configure each required resource.
Terraform users define and enforce infrastructure configurations by using a JSON-like configuration language called HCL (HashiCorp Configuration Language). HCL's simple syntax makes it easy for DevOps teams to provision and re-provision infrastructure across multiple clouds and on-premises data centres.
Cloud Resources Required
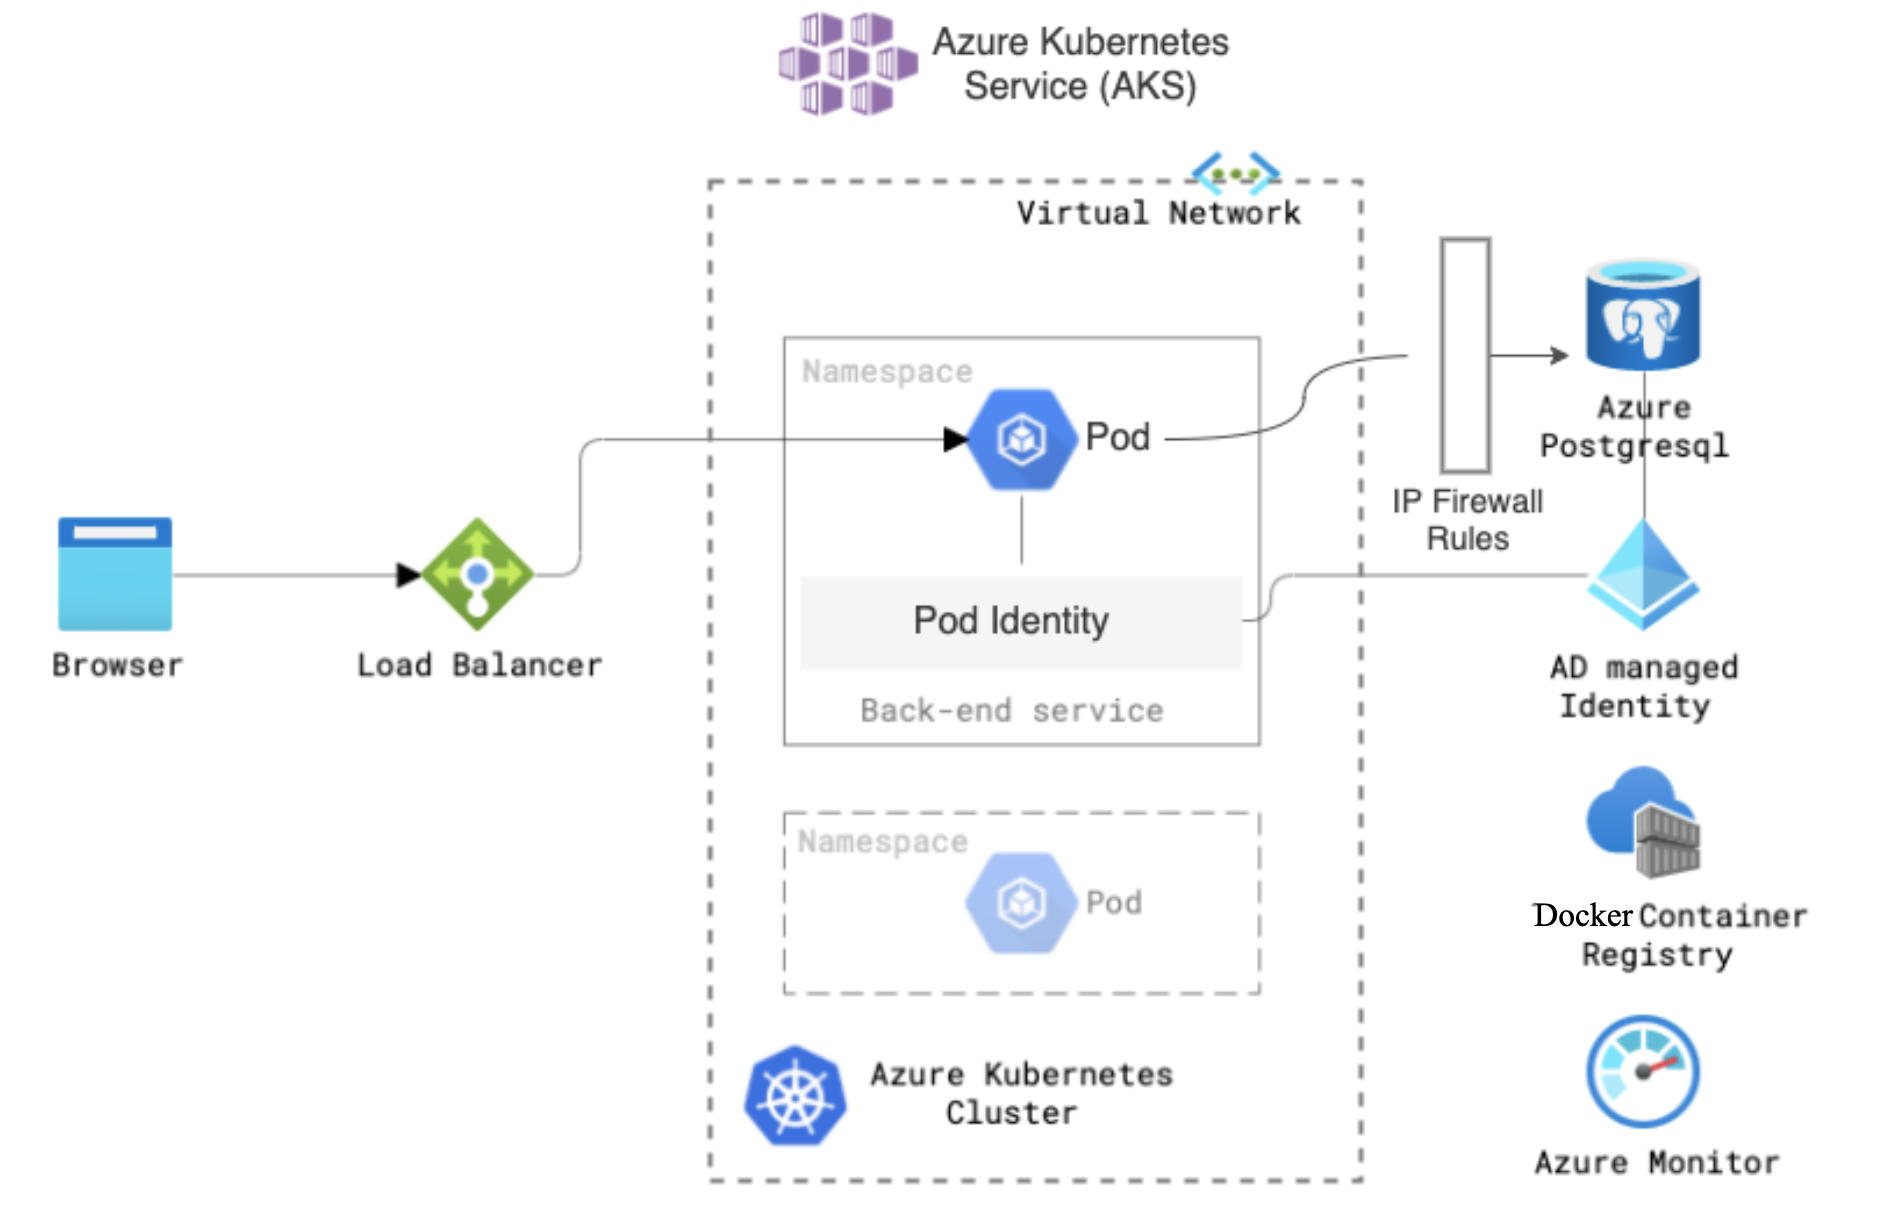
Before we provision the cloud resources, we need to understand and be sure about what resources need to be provisioned by Terraform to deploy DIGIT. The following picture shows the various key components. (AKS, Node Pools, Postgres DB, Volumes, Load Balancer)
Understand Terraform Script
Ideally, one would write the terraform script from scratch using this doc.
Here we have already written the terraform script that one can reuse/leverage that provisions the production-grade DIGIT Infra and can be customized with the user-specific configuration.
Deployment Steps
Clone the following health-campaign-devops where we have all the sample terraform scripts available for you to leverage.
2. Change the remote-state/terraform.tfvars according to your requirements.
3. Change the main.tf according to your requirements. Update terraform.backend config to match with remote-state once created.
3. Declare the variables in terraform.tfvars
Save the file and exit the editor.
Terraform Execution: Infrastructure Resources Provisioning
Once you have finished declaring the resources, you can deploy all resources.

terraform init: command is used to initialize a working directory containing Terraform configuration files.terraform plan: command creates an execution plan, which lets you preview the changes that Terraform plans to make to your infrastructure.terraform apply: command executes the actions proposed in a Terraform plan to create or update infrastructure.
After the complete creation, you can see resources in your Azure account.
Now we know what the Terraform script does, the resources graph that it provisions and what custom values should be given with respect to your environment. The next step is to begin to run the Terraform scripts to provision the infrastructure required to deploy DIGIT on Azure.
Use the CD command to move into the following directory, run the following commands 1-by-1 and watch the output closely.
Test Kubernetes Cluster
The Kubernetes tools can be used to verify the newly created cluster.
Once the Terraform Apply execution is complete, it generates the Kubernetes configuration file, or you can get it from the Terraform state.
Use the command below to get the kubeconfig. It will automatically store your kubeconfig in the ~/.kube folder.
Verify the health of the cluster.
The details of the worker nodes should reflect the status as Ready for All.
Note: Refer to the HCM deployment documentation to deploy HCM services.
Was this helpful?